
Today, in order to transform your home or apartment, you do not need to break the walls, knead the solutions and put the brick. Complex and dirty work successfully replaces plasterboard! Currently, it is most convenient in installation, and therefore the most sought-after finishing material.
With it, you can easily make a multi-level ceiling, to build a partition, arrange with door opening columns or pilasters and much more. But in our article we will focus on how to make the arc from drywall do it yourself.
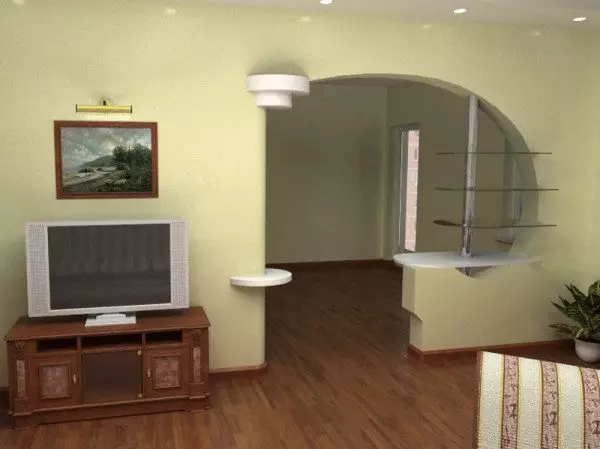
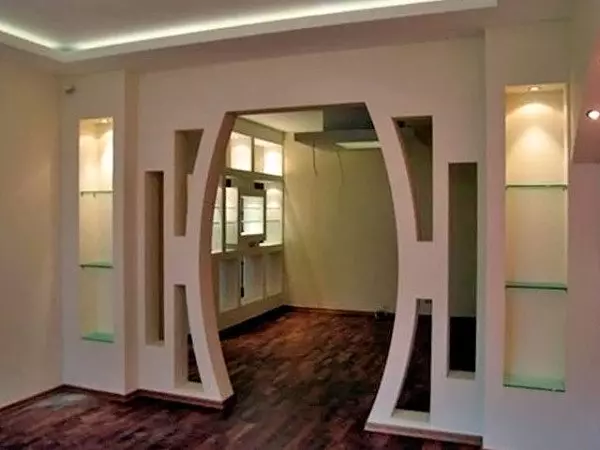
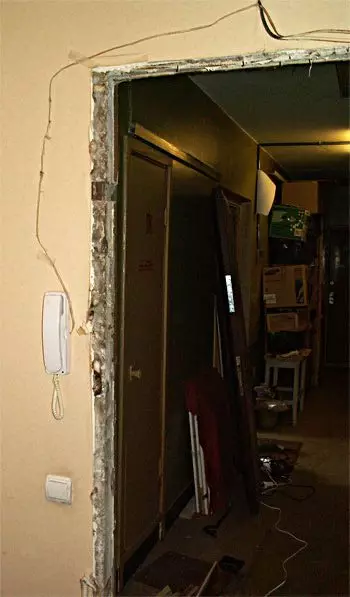
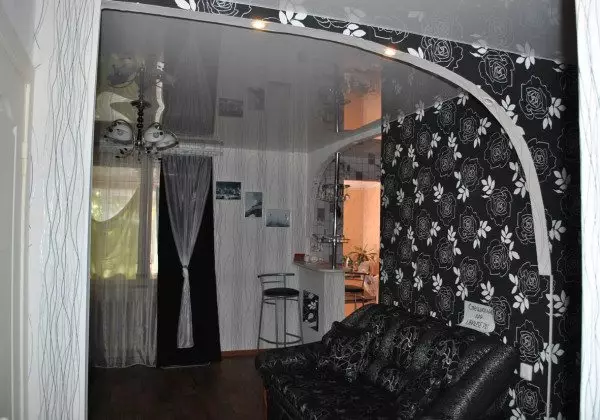
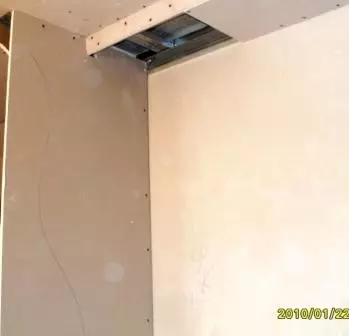
Plasterboard wall with arch, supplemented with vertical railing design
All stages we will consider the most detailed as possible, with all possible details and nuances. We hope the instruction presented in the article will help you understand the construction of the arches and repeat everything in practice.
Choose the design of Arki.
- Dome symmetric arch - Classic option.
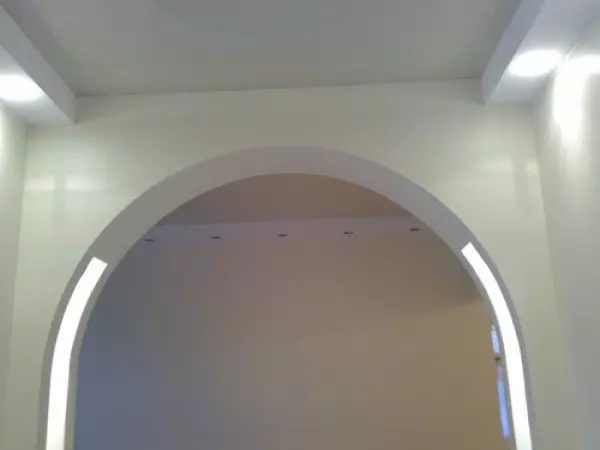
Arch dome
- Assymmetric - arch with a displaced center. Perhaps one of the easiest and most economical structures suitable for almost any interior.
Assymmetric arch
- Gothic arch where the highest point is obtained due to the planes converging at a low angle.
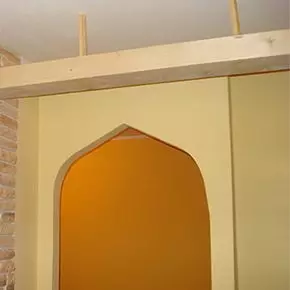
Gothic arch
- Openwork arch. The main difference of such a design is the presence of a hole-type holes that run through the doorway line.
Openwork arched construction
- Designer or multi-level arch. In order to realize such an intention, it is necessary to have a little imagination and skills to work with drywall. By the way, about how to make a complex arch, we will talk a little later.
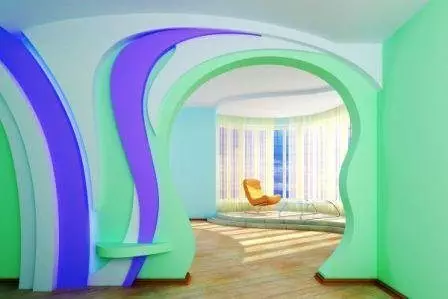
Multi-level plasterboard arch
Stop your choice is on the design of the Arch, which will harmoniously fit into the rest of the interior of the room.
Note! If the height of the doorway is 2 meters or less, then make the arc from drywall in the corridor will be an irrational solution, since it "will eat" and without that small space. In this case, you can simply round up the upper corners in the doorway.
Learn also how to arrange a plasterboard partition yourself.
All about mounting
Kosya Arc.
Luxurious french arch
Optionally, you can build an oblique arch, the French arch or any other, but in our article we will consider how the arch of the dome symmetric plasterboard is made. So, proceed.
Required material and tools
- Leafs of drywall (when building the archer, it is recommended to use special GLCs, a thickness of 6.5 mm - they are best suited for creating curvilinear designs);
- rack metal profiles;
- Plastic dowel;
- self-tapping screws (3.5 mm per 25 mm and 4.2 mm by 13 mm);
- Scissors for metal;
- Knife for cutting plasterboard or jigsaw;
- Passatia;
- Drill, screwdriver and perforator;
- needle roller;
- Construction level, roulette, pencil;
- Serpian ribbon;
- Spatula and plaster-based powder;
- Schucker for grinding the spacion layer;
- Perforated corner for registration of edges arches;
- primer;
- Paint or wallpaper.
Cooking opening under the arch
Before making a wall with a plasterboard arch, you need to thoroughly prepare the opening in which it will be mounted. To do this, you will have to dismantle the door box, with the aim of increasing the opening, as the arch will visually reduce its height. Next, we clean the surface from peeling materials, dirt and dust.
Article on the topic: Crafts from straw for cottages
Learn also about the principles of metal frame mounting for drywall.
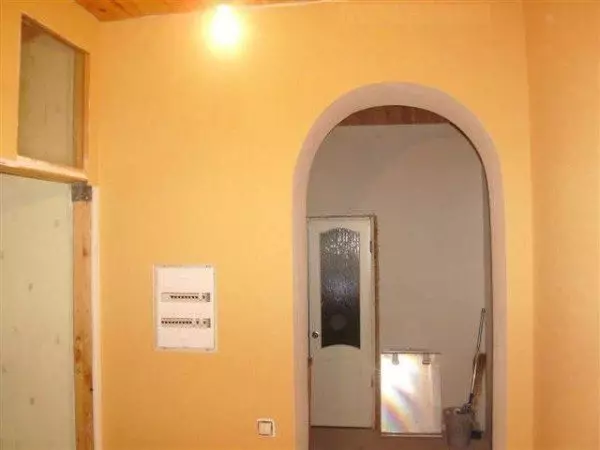
Visual example of a dismantled door frame
Side drywall arches
As a rule, the classical arcuate arch consists of three elements of drywall: 2 identical lateral parts and 1 curved part. To make side details, make your own hands the following: With the help of a roulette, you measure the width of the opening and calculate the radius of the future arch.
Then tie on the caproic thread, the length of which is equal to this very radius, two loops. Insert sequel into one loop, and to another - a pencil. Now sticking the sequel in a plasterboard sheet and, evenly pulling the thread, with a pencil arc.
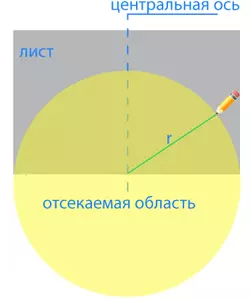
Scheme of the side details of the arch
After that, the first side part of the arch cut the first side of the arch on the labzik or a conventional building knife. We apply the cut part to the new sheet of plasterboard, outlawing with a pencil, cut out and get the second side of our arch. So, we partly answered the question of how to make plasterboard arches.
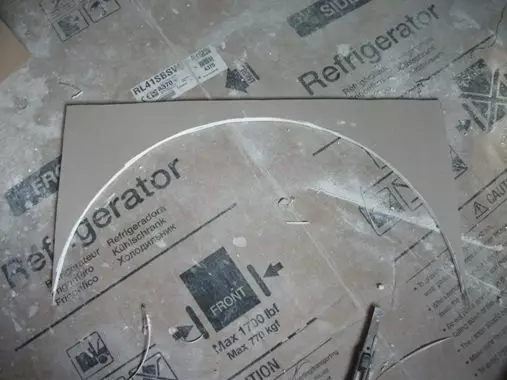
Side arched part
Installing the frame from the profile and the mounting of the side elements
How to make a plasterboard arch? It is important to take care of a reliable framework. Let's consider this stage in detail:
- First, the opening, with the help of a dowel, is attached to the guide of metal-turn. After that, the same guides are fixed on the wall, from two sides - from the top angle to the place where the rounding of the arch will end.
Important! The length of the side guides should be the same, otherwise the arch will turn out the curve.
- Then, from ordinary metal profile, we make an arcuate profile. For this you need to make cuts in it with scissors for metal and bend, as in the photo. So that the framework is as accurate as possible, as a template we use the side parts made earlier. The profile is attached as follows: to the vertical guide - dowels, and to the plasterboard - self-tales. Such arcuate details will need 2 pieces.
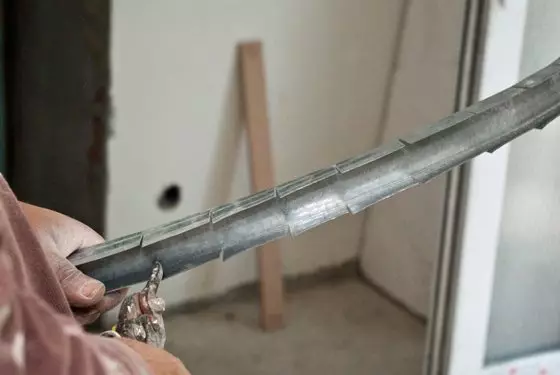
Making cuts

It turned out an arcuate profile
- In order to make the frame more reliable, in the space between the two arcs it is necessary to attach additional sections of the profile.
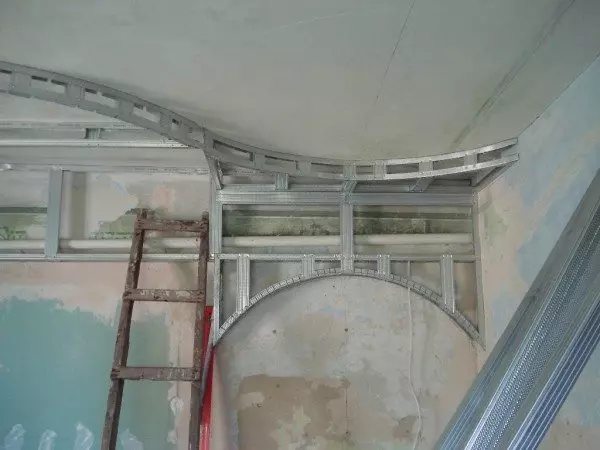
Ready carcass
- The next step is to fix the lateral arcuate parts of the arch on the frame using self-samples. Now go to the curved item.
Here the side parts are already fixed
Bending and installing a curved element
In order to carefully arrange the lower end of the arch, it is necessary to cut off the smooth lane of the drywall of the corresponding length and width. When measuring the length, it is better to use a flexible measuring meter. Also do not forget to add 10 cm strips to the length.
Make a plasterboard end element in the form of an arc will help us with ordinary water. Wet the lower surface of the strip, then pinched it with a needle roller and leave for a while. After that, it is possible to carefully place the curved element in the form of the arch, fasten to the sticky tape and wait until it gets up a bit.
Attention! It is not necessary to water the plasterboard too much, otherwise it will soften and crawl.
A slightly wet strip can already be mounted in self-drawing to the frame, along both sides. Start doing this is necessary from the middle of the arch. Now we are waiting for a complete drywall drywall (about 12 hours).
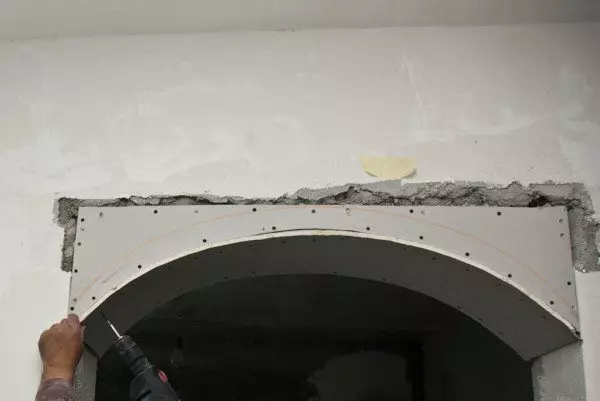
Fixing the curved element
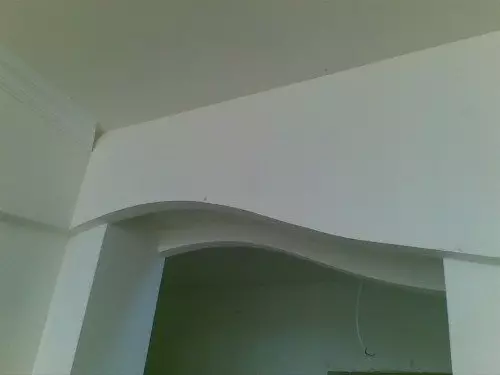
Answering the question of how to make the arc from the drywall, it is necessary to add that in addition to giving the arc bending with a wet method, it can be done and by cutting the layer of material. But this method is only suitable for creating small bends.
And he is as follows:
- On one of the sides of the plasterboard, a layer of paper and gypsum is gently cut through (almost all of the depth).
- The future element of the arch is premium on the processes made by slotting with easy pressing. It is important here that the gypsum mixture remains to stay on the intact layer of paper.
- The slots are sealed with putty (if necessary, before it is sickled by flight-sickle).
- The curved item is attached by self-drawing to the frame. Consider the self-tapping screws should not be screwed at the very edge of the plasterboard part, in order to avoid its destruction. In addition, the hats of self-tapping screws must be dried slightly into plasterboard.
- The places that were subjected to shtchevyania are cleaned with a skin before receiving an ideally smooth surface.
- Now the arch is ready for decorative cladding (to painting or watering wallpaper).
Article on the topic: Knitting in the style of patchwork knitting needles: Schemes, Patchwork Knitting Video, Technique and Master Class, Jackets and Cardigans, Socks and a jacket, Stylish pullover, sweaters and mittens, photos
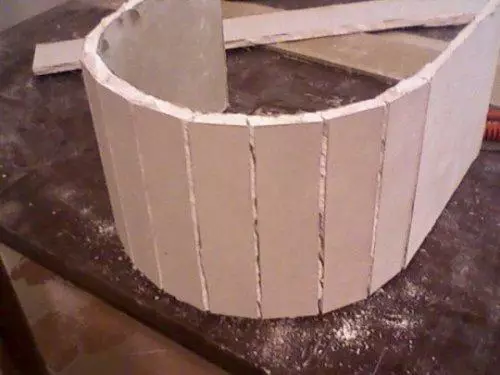
Giving bending with cuts
How to make an arch on the wall of plasterboard? As you can see, very simple!
The process is quite painstaking, but not complicated and, moreover, very interesting. If you are concerned about how to make a big arch, you will immediately answer you - all the same technology, only dimensions change.
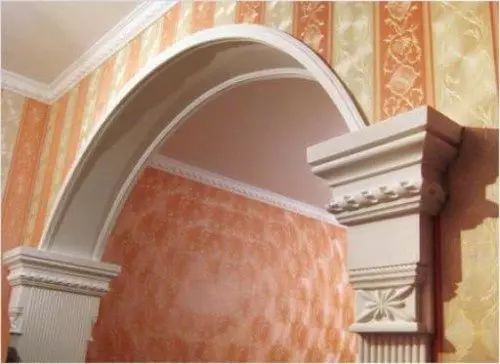
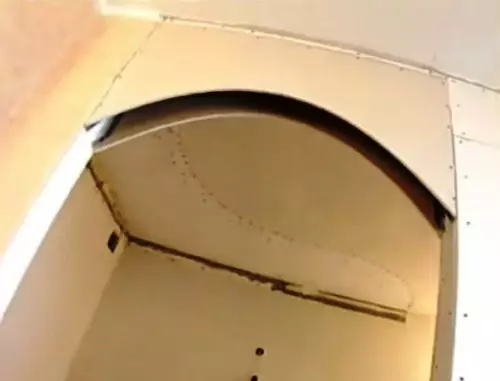
Finish treatment
Finishing arch
After complete drying of the constructed construction, the time of its finish treatment occurs.
We, again, step bypass consider this process:
- First of all, in all elements of the plasterboard arches we pass shallow emery paper. Thus, we remove all irregularities and eventually get wonderful rounded protrusions.
- Then we close the mounting seams with a special putty for the seams, not forgetting to smoke the joints with a sickle ribbon.
- Before starting to put shit, it is necessary to fix the angular perforated profiles made of galvanized metal or plastic (they are needed in order for the arches to keep their shape). Such profiles are attached to putty and, after it is also closed with a layer of putty.
- We wait for a complete drying of the putty, after which we clean all the irregularities with the help of all the same sandpaper.
- Now we apply a layer of primer, we wait until it dry.
- Speed the arch with a special finish line and lastly grind it.
- Everything! Arch is ready for scenery.
Choose a decorative coating
With how the arches are made from plasterboard, we figured out. However, mounted the arch - just half down.
And how beautiful to improve the resulting design? After all, it is necessary to take into account not only originality and compliance with the whole interior, but also practicality.
The arch will be periodically subjected to contacts with passing people or transfers through it, which is fraught with the appearance of damage.
Therefore, let's think together, which decorative coating is suitable for her most.
- Fucking wallpaper. Pretty frequent selection of those who reflect on how to make a door arc from drywall. Traditional facing option. But thanks to the limitless assortment of wallpaper, a wide variety of colors, textures and drawings, such decoration may turn out to be very interesting and exclusive. As for practicality, it all depends on the material from which the wallpaper selected by you are manufactured. The highest quality and durable are vinyl wallpaper on a flieslinic basis. Wallpaper with a bulk drawing will be readily watched.
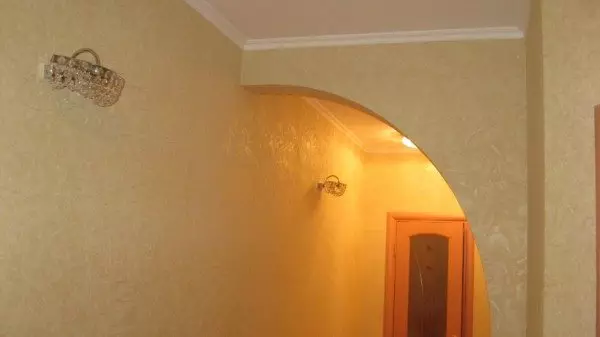
Obloa Arch
- Painting with water-level paint. Perhaps the best option, from a practical point of view. The painted arch can be washed as much as you like, and it will be quite stable to damage.
Painted Arch
Note! It will take a little paint on the arch, so we recommend not to skip the expensive, high-quality paint. The price will pay off doubly - it will make your design even more reliable.
Alternatively, after applying paint, you can decorate the arch of a beautiful painting throughout the arc - it is important to have a fantasy and some artistic skills.
- The covering of everything open with decorative tissues is very extraordinary and noble. The material can be used the most diverse: flax, atlas, jute, brocade, jacquard, viscose, and so on. All fabrics have their own special textures, drawing and color. But it must be said that this option is not suitable for each apartment, it all depends on the size and style of the interior.
Article on the topic: Wall mural Paris: Romantic Interior

Decorative cloth
- Stone finish. The most reliable and, at the same time, an insanely beautiful way. However, he is the most expensive, because the facing material will cost much more expensive compared to the same paint or wallpaper. Yes, and to work here seriously. But if we make the arc from drywall do it yourself, then we are not scary! Moreover, the service life of the stone finish is almost unlimited.
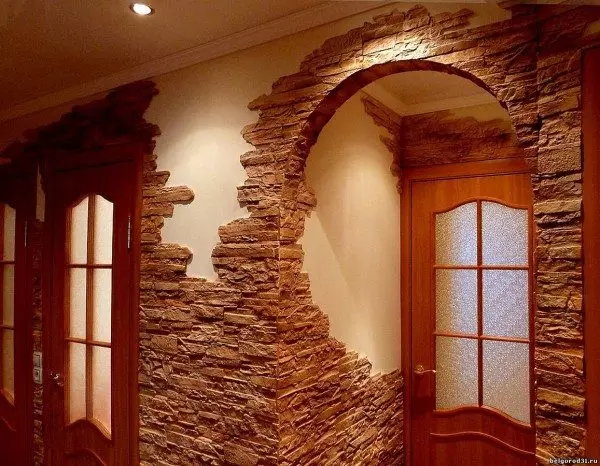
Fascinating Artificial Stone
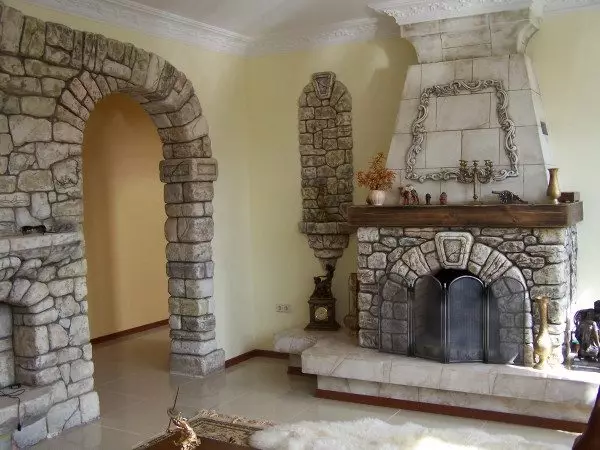
Finishing Arch Stone
Installation of complex arches
On the example of a simple dome symmetrical design, we looked at how to make the arches from drywall do it yourself. But sometimes the desire comes to create something truly special and unique!
However, often we just lack knowledge. After reading the instructions below, you will learn how to make an arc from drywall of any form.
- Before making the arc from drywall, you need to decide where the design will be located and what the sizes will be. It is important that it does not interfere with the functionality of the apartment, pleased the eyes and gave a good mood.
- It was determined with the location, you can proceed directly to the installation. Let's look at the wall decorative design, which is only partially arch.
- With the help of a level or a plumb, you beat off the line on the wall, according to which the future wall arc will be located.
- Then, on this line, we montuate the metal of the metal. And one more to the ceiling.
- Now, by two profiles located Mr., we screw the appropriate sheet of drywall.
- Next, armed with a pencil and draw the figure to us.
Draw a figure
- Through the lines drawn by us we go through the jigsaw or construction knife.
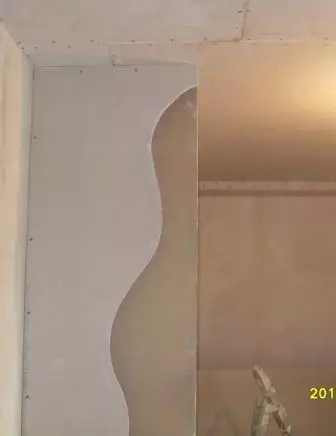
Cut on line
- Then in a similar way, we mount the second sheet of drywall at the desired distance from the first sheet (it all depends on how thick the design you want to receive).
- On the perimeter just the circumcised lines must be screwed by metal profile. We prepare it in this way: every 5 cm we make cuts on it so that a flexible "snake" ("serpents" will be required 2 pieces). We are attached to the cropped perimeter of plasterboard sheets. Self-shanks do not stand, otherwise the design will be unreliable.
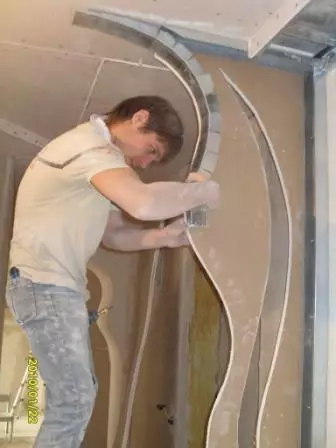
Fix "Snake" from metal
- It remains only to strip our "snakes" strip of drywall. Cut the strip of the desired length and width. Then we can slightly wet one of their sides with water (how to make the arc from the plasterboard with a wet method, we were explained above).
- The final stage of installation is the fixation of the strip to the ends of our design. What happened in the end, you can see in the photo.
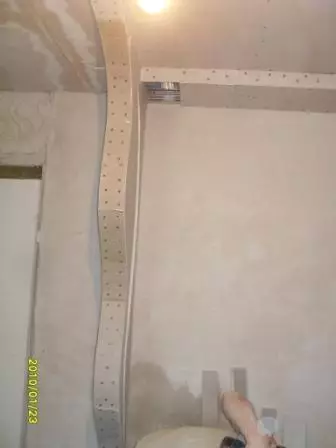
That's what we did
If you are not fully understood by the technology of the construction of such designs, we recommend to view the thematic video.
Epilogue
So we figured out how to make the arc from the plasterboard himself. This designer reception is an effective and unfortunate way to revive any interior, to make some freshness and identity into it.
Therefore, do not be afraid to experiment in creating a variety of forms. And in the next article we will talk about how to make the arc from the plasterboard over the bed.
Read also how to mount the shelves to plasterboard.