
Many parents want to give their baby only the best. Some give a huge number of gifts, while others are trying to spend most often with their children. In this case, the manufacture of the aircraft will help to develop a small motorcycle of the hands to develop the baby, develop such qualities such as perfection, patience. Make a plane with your own hands from the girlfriend, you can from plasticine, from cardboard or matchbox or candy. Such a product is perfect for a gift or they will decorate your home, giving some comfort. In this article, we will look at the most popular options for the manufacture of the aircraft with their own hands.
Simple option
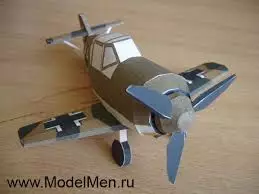
The process of manufacturing an airplane with its own plasticine hands can be traced on the example of a master class with step-by-step photos. In each option you need to consider the entire design of the aircraft.
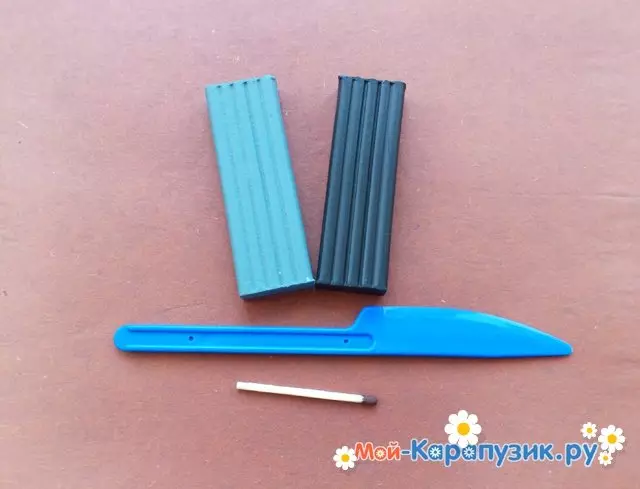
To work, you need plasticine, matches and stack.
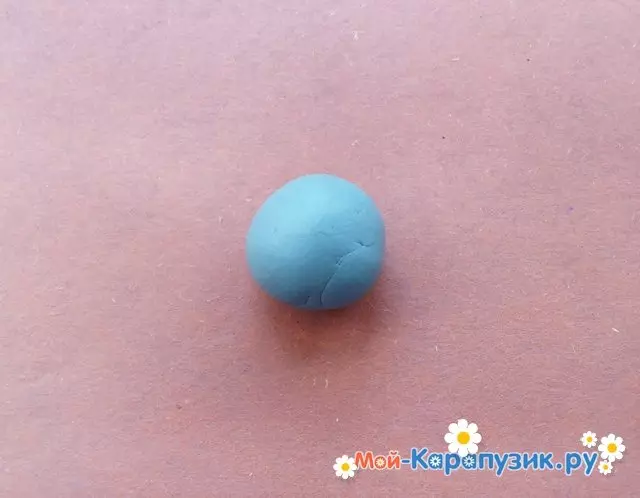
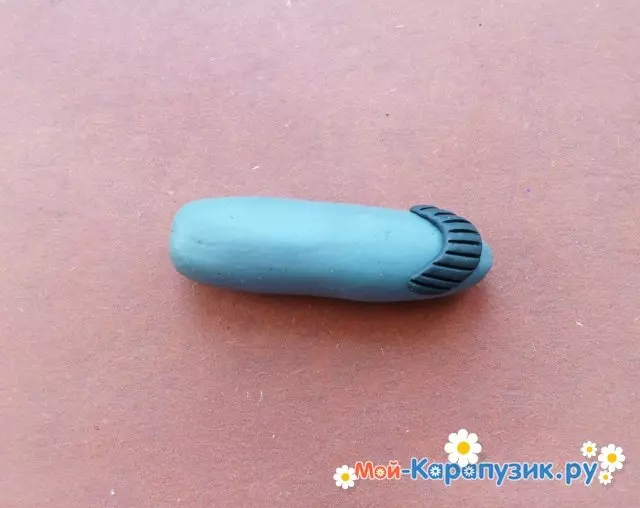
Plasticine colors can be the most unusual, bright, mothers, and you can choose realistic and natural shades (gray, blue, white). One of the most popular aircraft options are made in black and gray and white and blue combinations. Take the plasticine required color, soften it in your hands and blind the ball.
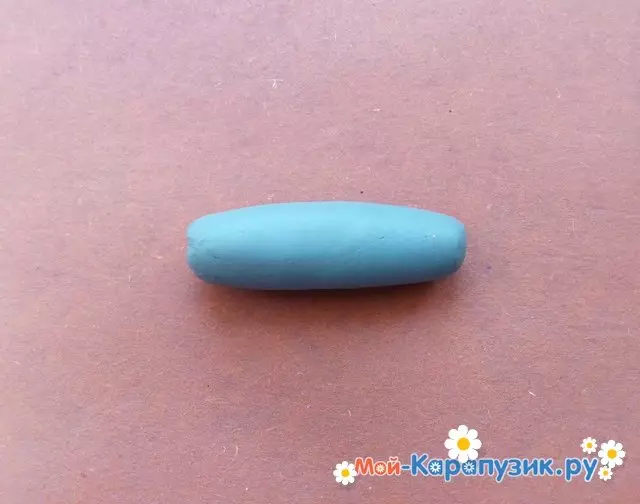
Then pull the ball into the sausage. It can be done between the handles or roll the sausage with the movements back and forth on the board.
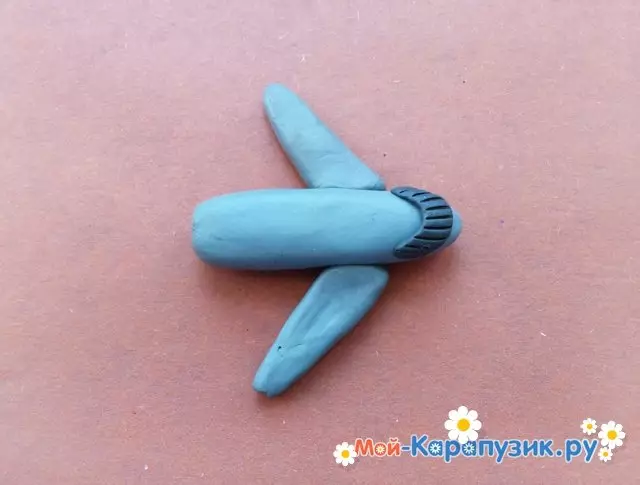
Pen pressed a slightly sausage. Then sharpen the front part of the sausages, and after the rounding it in the form of a real aircraft. Thanks to this trick, you have turned out beautiful spout of the aircraft. Take the plasticine of black color, cut out a large window in the cockpit of the pilot. The form of such windows resembles crescent.
After that we wangle from plasticine wings. If you want to make a beautiful plane, then the wings should not be thick, but should not be very thin so that they do not fall. Wings must keep their shape.
Article on the topic: Suit "Red Queen"
Then take black plasticine, pinch up small pieces from it and attach to the top as windows of portholes on each side of the aircraft. Make a pair of barrels and prepare matches, because you will need to make a turbine.

Attach to the bottom of the housing and the wings of the turbine.
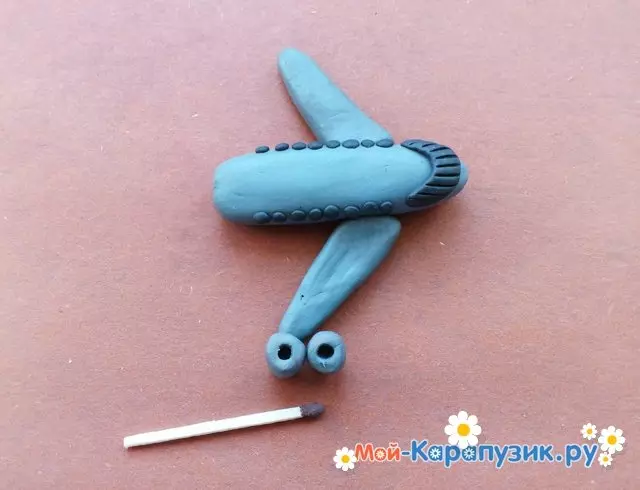
After that, we make the tail. To do this, fix the triangular elements from behind toys.

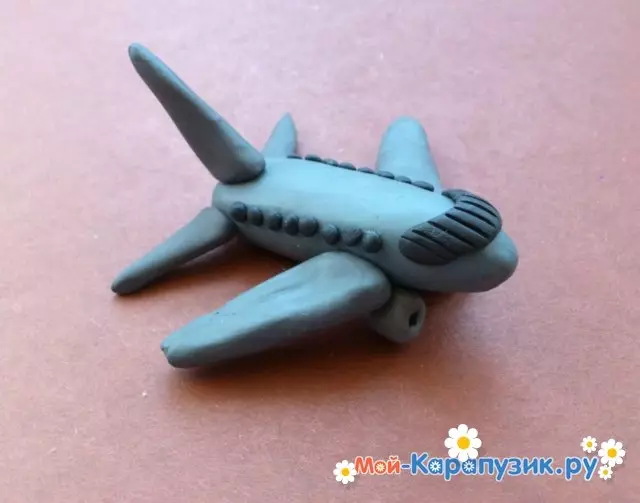
Here is such a plane from plasticine from us.
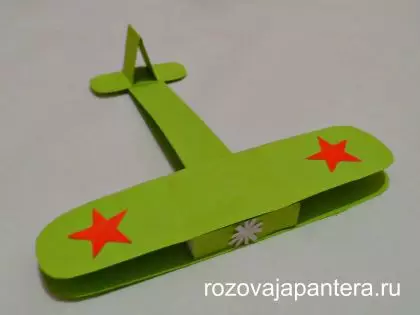
Cardon airplane
With the help of the next step-by-step instructions, you can make a plane from cardboard and from matchboxes with your own hands, literally in 15 minutes. This option is very simple and even a child can cope with it. At the same time, you need a little help of someone from adults to cut strips, but if the baby can do it himself, then the adult help will not need.
The first step you need to attach the paper matchbox. Cut out the strip of paper, the width is three cm. After that we fold the strip in half and glue along the edges to the match box.
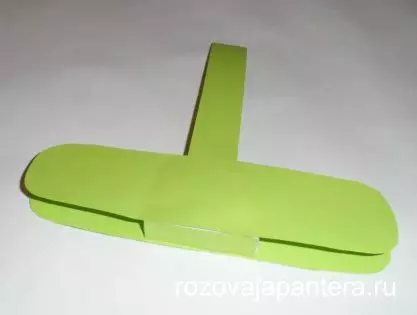
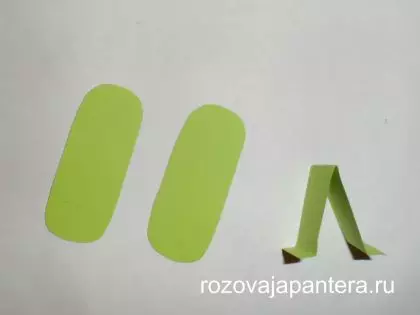
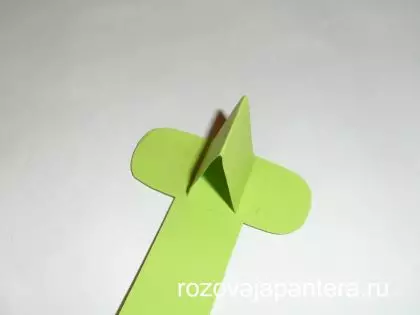
After that, drew two blanks on cardboard - rectangles. After that, we spin the edge and cut out. The width of these rectangles should be a couple of mm more than the width of the matchbox. Cut out one small strip and bend it to the English letter "B". As well as two more billets for the tail.
Then glue all the details. Here is such a beautiful tail from us.
Wings of the aircraft can be decorate with asterisks or other decorative elements. From small strips, we make a propeller, which attach the button or glue on the aircraft to the body. Here is a beautiful aircraft, the manufacturing process is clear and for children, we succeeded.

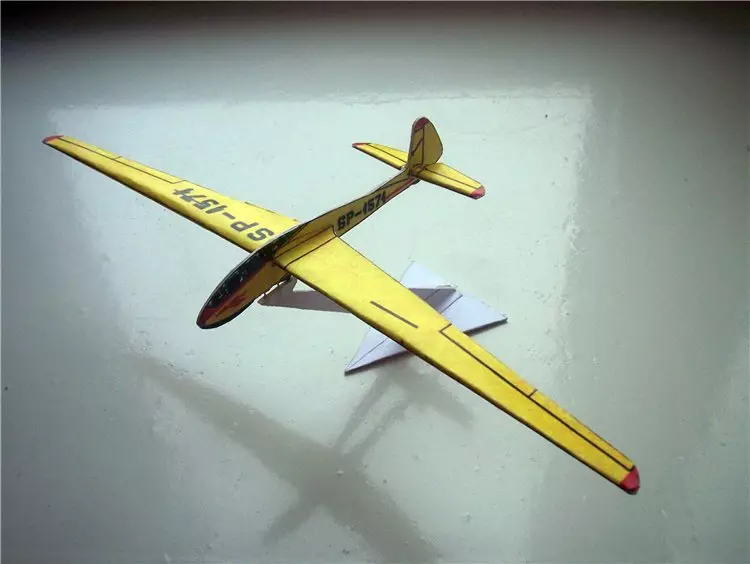
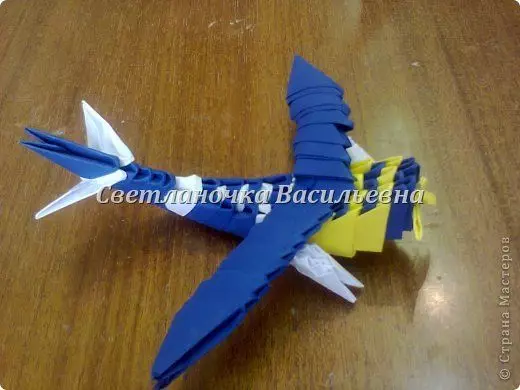
From paper and sweets
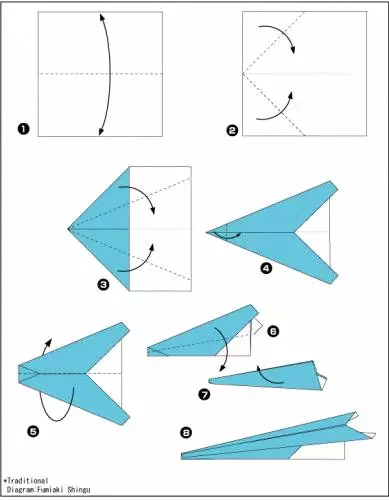
In the next photo you can see a scheme, thanks to which you can make a paper plane in Origami technique.
Article on the topic: Crafts from paper for children 3 years and 8-9 years old with photos and videos
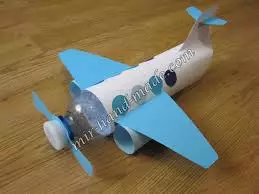
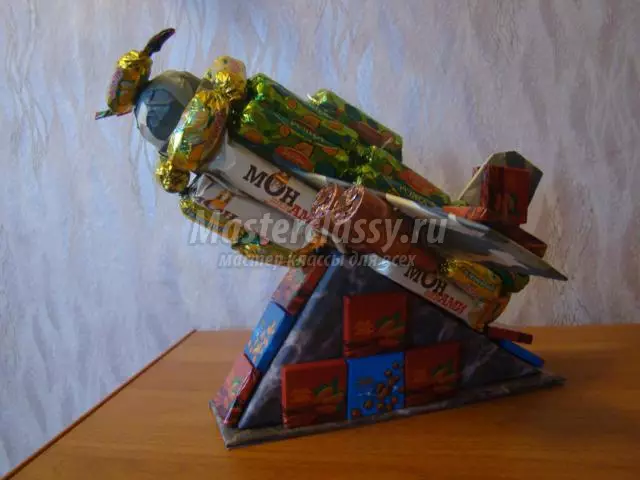
The process of making toys on the pedestal can be traced on the example of step-by-step photos with a brief description. Such a gift, we are confident, like a child and an adult, and make it very simple.
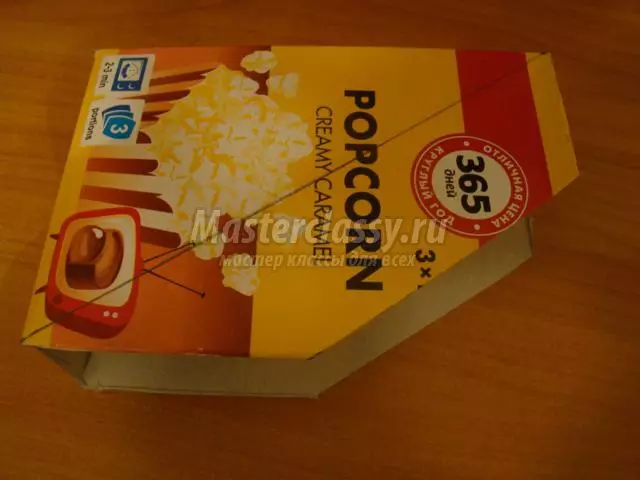
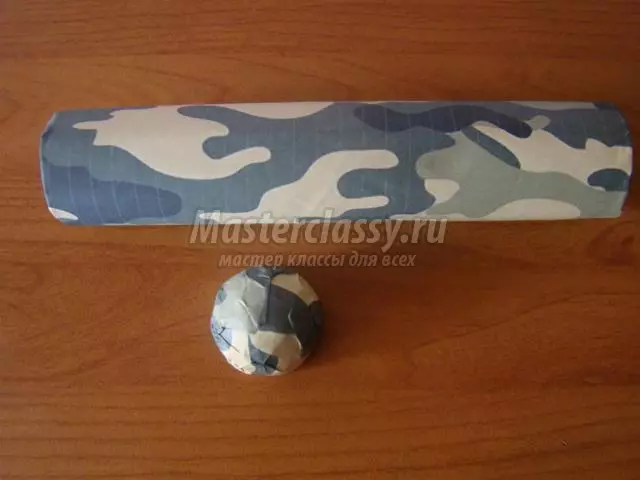
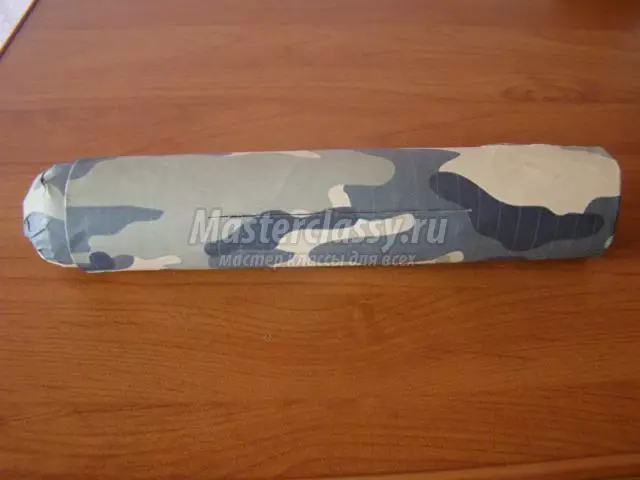
To make a plane from sweets, you need to prepare such materials like candy, box, cardboard, paper, glue, tape, pencil simple, cylinder from a paper towel and a bottle cover. And from the tools, prepare an adhesive gun, a stationery knife, a ruler.

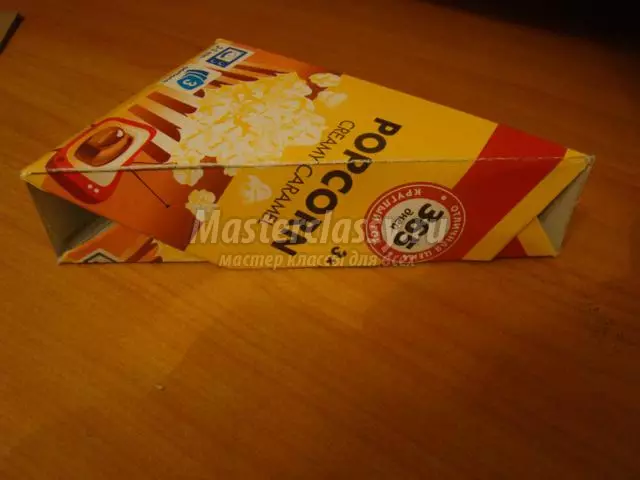
Take the cardboard box and cut the upper and side part.
After that, bend the box and glue the pedestal for the aircraft.
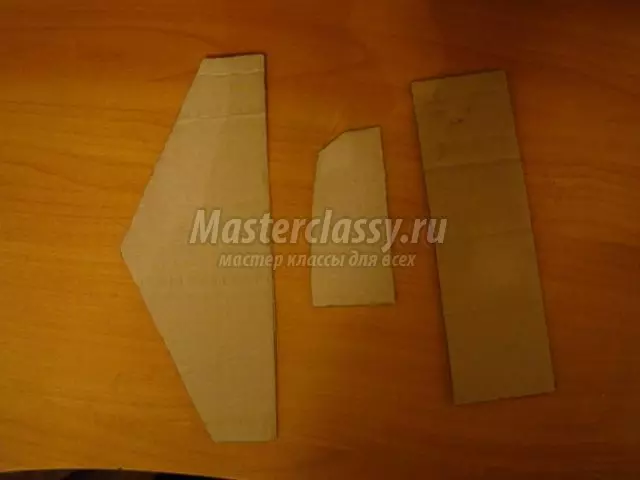
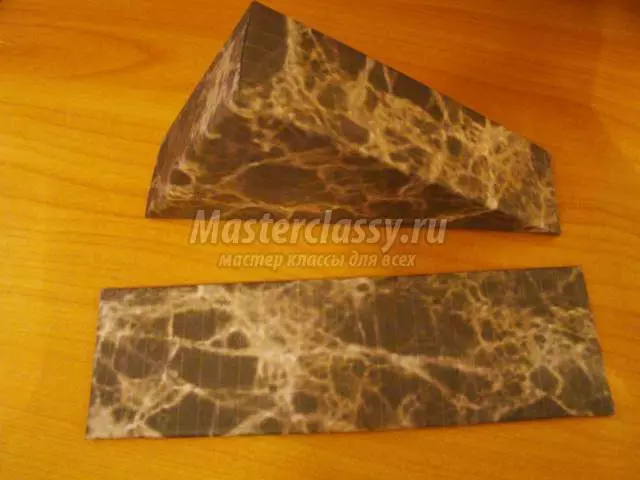
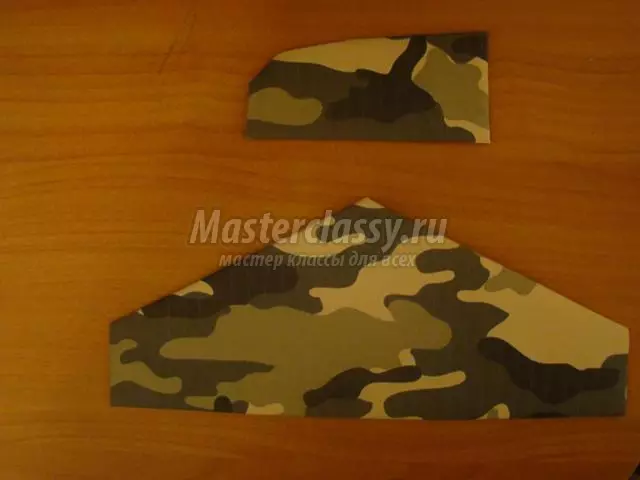
Then take the cardboard and draw the blanks on it, the tail and the lower part of the pedestal. Scissors cut each detail.
Take the paper and begin to attach the blanks.
Glue a pedestal blank among themselves.
Plug every detail paper.
Blacks and the lini, where the wings and tail will be placed, and then make cuts.
Attach the tail and wings.
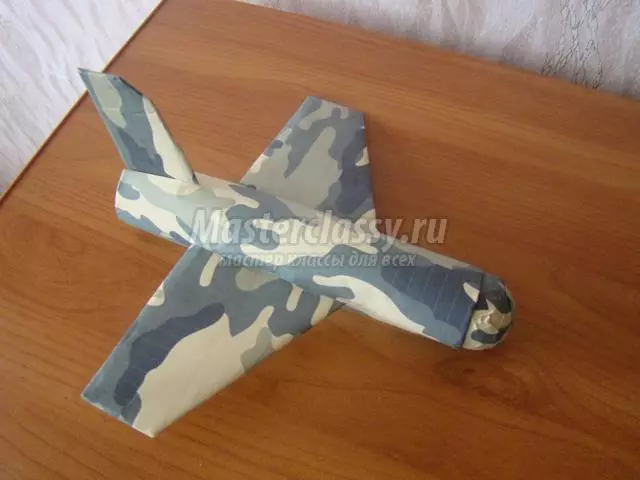
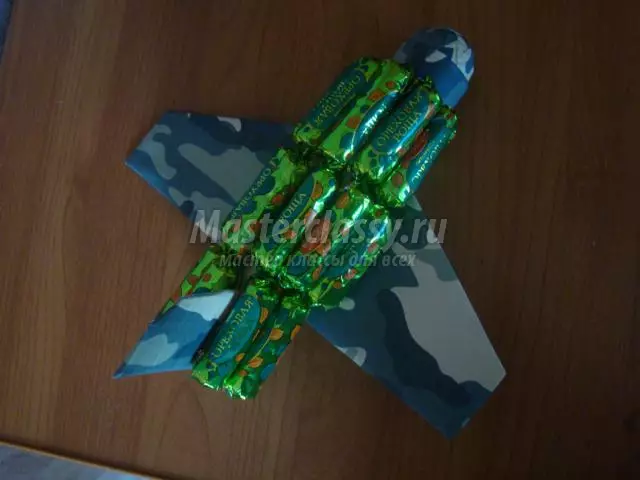
Each blank plane is gluable by candy.
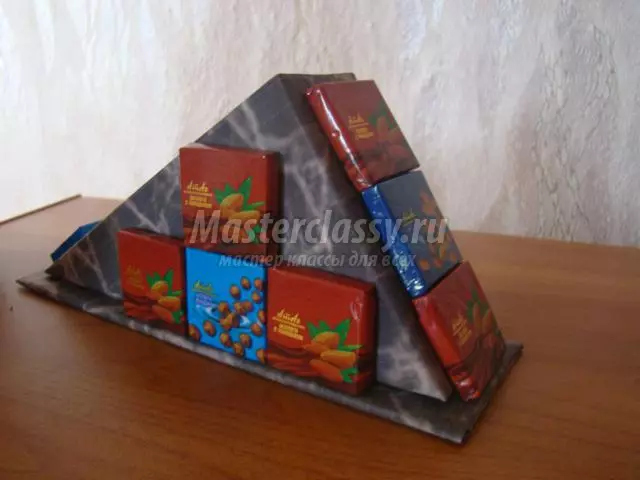
Chocolates glue pedestal.
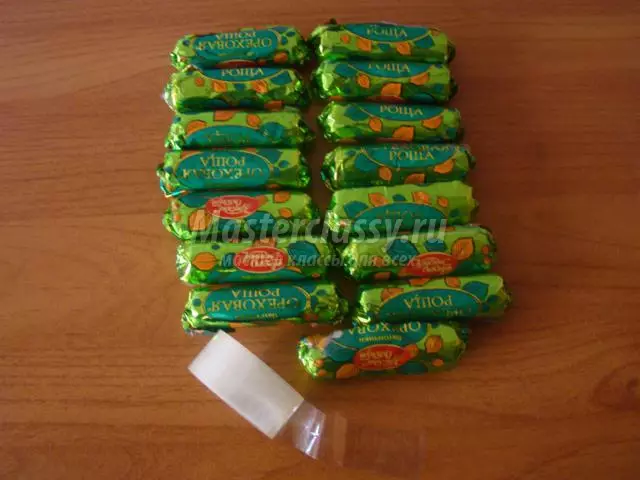
Scotch tape tie candies.
On the top of the aircraft we stick candy.
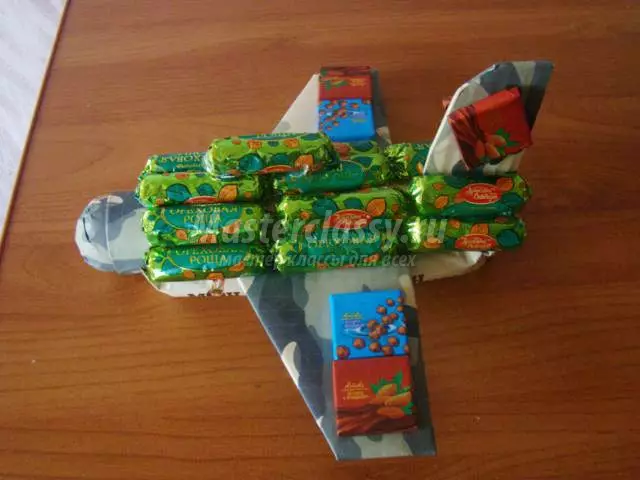
And chocolates glue on the tail and wings.
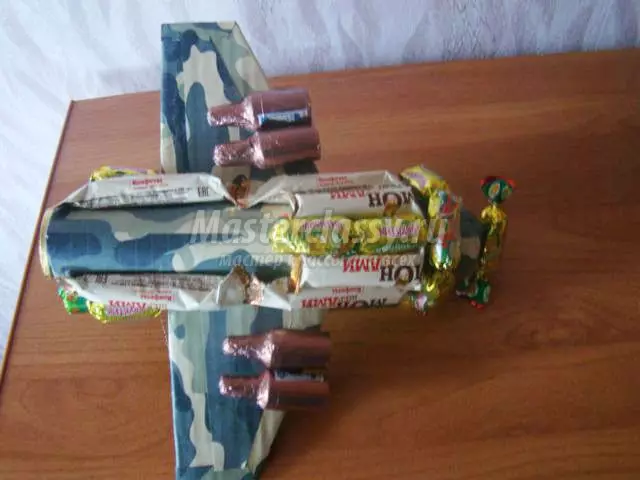
Glue candy on the bottom of the aircraft.
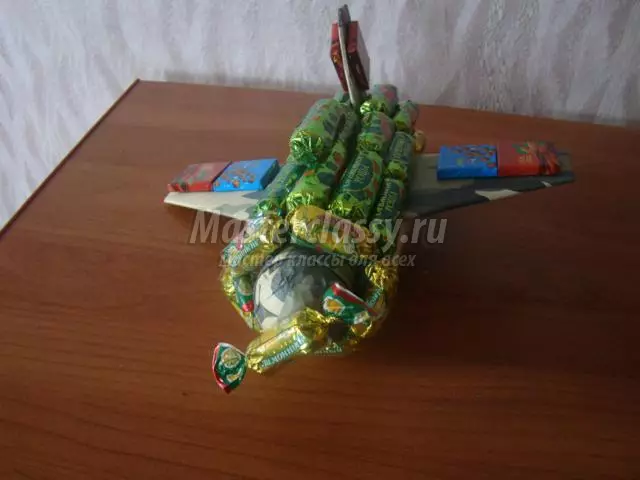
We make a propeller from sweets and glue it to the plane. Between themselves fasten the air apparatus and pedestal.
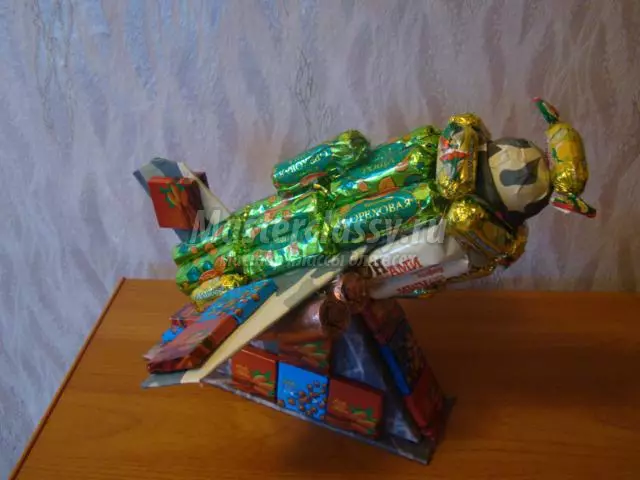
Sweet gift for friends ready.
Video on the topic
We offer to see a selection of video on how to make the plane with your own hands.