
What efforts you would not attach, achieve perfectly smooth and smooth surfaces after applying putty, you will not succeed. In any case, traces from the spatula, uneven transitions, bugs or pits and other errors will be visible on the walls.

How to bulk the walls after putty?
To avoid such a situation, the walls of the walls are carried out, we will tell about in the article in more detail.
What can be ice wall?
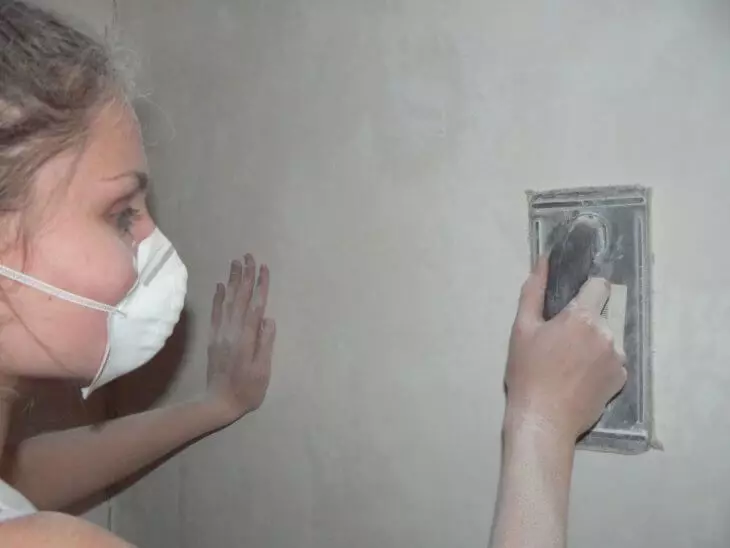
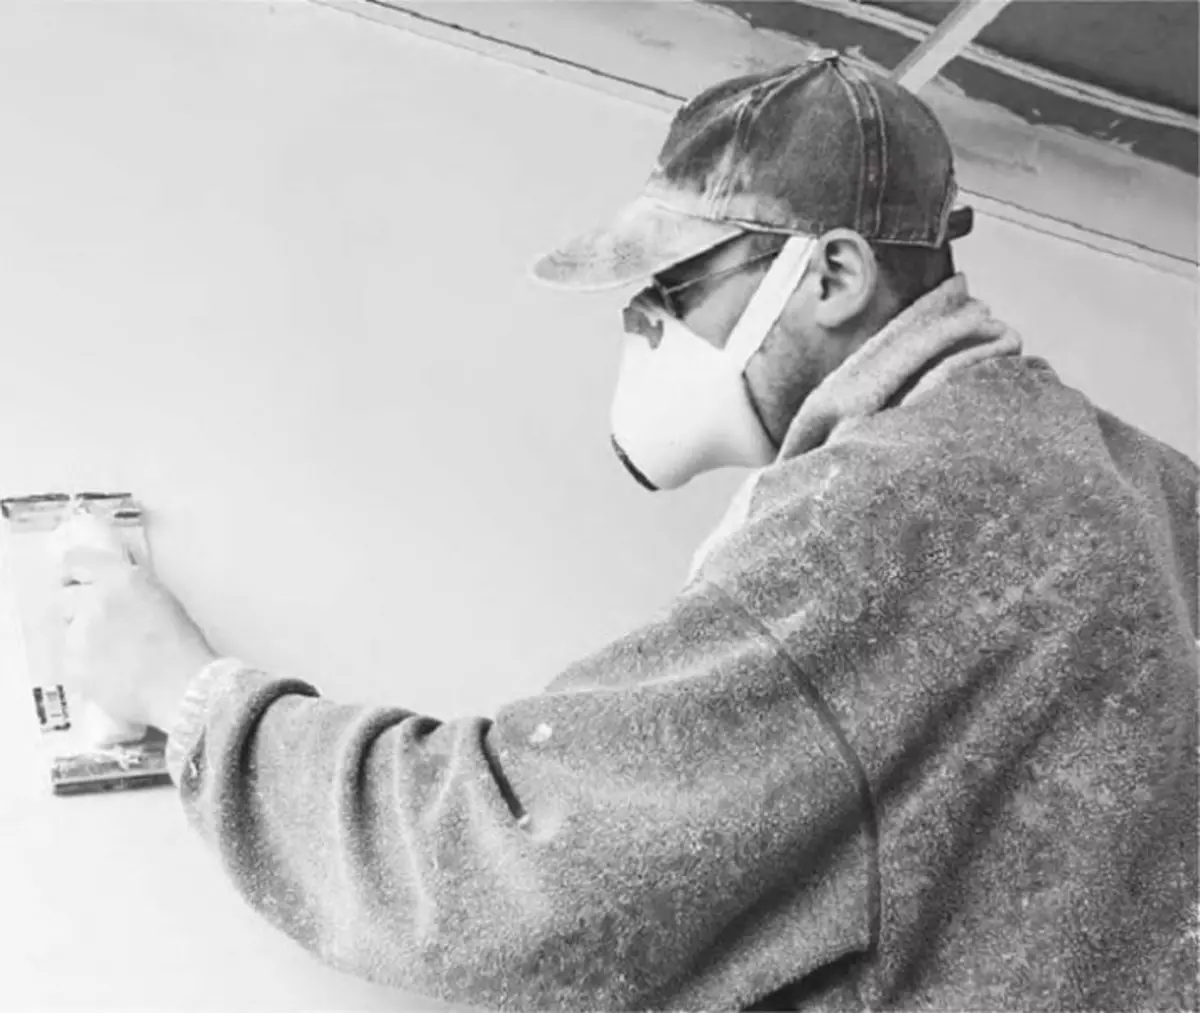
It is important to use a mask during sowing walls to protect the respiratory organs
First of all, you will need to acquire the necessary devices.
For the Okrug, you will be useful for:
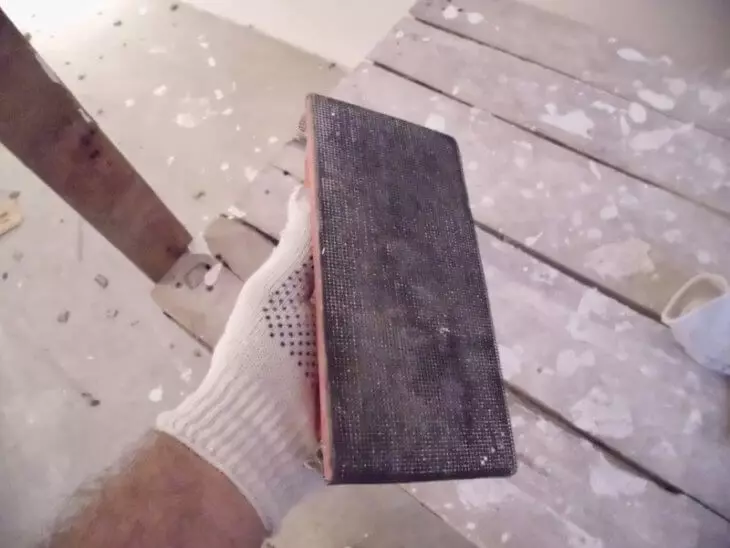
- Various types of abrasive mesh or varying abnormal odds;
- grinding bar;
- Grinding sponge;
- stairs;
- additional lighting;
- a spatula with a small workpass;
- individual protection means.
Experienced finishers Recommend to clean the walls:
- After applying putty;
- before applying paint;
- Before pasting wallpaper.
But, there are other cases when it does not work out without Okurition.
Grinding surfaces is not very complex, but a very long process, as a result of which a lot of dust is formed.
An impact machine is used or a special abrasive grid. What to choose to you - depends on your preferences and wishes.
The advantage of the abrasive grid consists in its perforated structure, so that all the dust will easily pass through the holes and the canvas will not quickly clog. The replacement of the grid is carried out after its wear, which immediately becomes noticeable by external signs. As a result of wear, the grid may rush and does not fulfill the task properly.
Most often, such a grid is sold by pieces, the size of which can be chosen in the size of the bar. To work, you will only need to install the cloth on the bar and start the wall transformation.
Whirlwind walls at home
Please note that the bars can be very different from each other in size, so buying the grid, accurately measure the dimensions of the bar.
The abrasive grid has one drawback - high cost, relative to the sandwich. But minus sandpaper - fast wear, because of which the canvas require constant replacement.
Article on the topic: Garden benches Photo
Ans for sale in absolutely different variations:
- ready-made web;
- a small roller;
- Smeared to a large roll.
If you want to buy a cloth in a roll, immediately decide how you will cut it, so that there are no too many waste. Of course, you can easily facilitate the task, and buy ready-made pieces, but their cost is much more than at a non-smoked canvase.
Another distinctive feature of the sandwich lies in the grain, which says license plate. This is what causes many difficulties and questions from beginners who cannot properly choose a suitable grain.
Note the higher the ribbon number, the larger the grain, and, accordingly, on the contrary. The sandpaper with large grain is presented in the category from 20p to 220r, and with small - from 240r to 2500.
The features of the emitted are shown in the table below.
| The base of the web | Paper, Cotton Fabric, Fiber, Polyester, Latex Paper, Combined |
| Binding components | Resin, glue, adhesive with resin, varnish, carbamide resin |
| For ferrous surface treatment, grain | From 500 to 1000 mkm |
| For rough woodwork | From 250 to 500mkm |
| To smooth the surface and primary grinding | From 100 to 250 μm |
| Grinding before painting | 20-40 microns |
| Wet grinding | 14-20 microns |
| Delete gloss | 3-14 microns |
Chew walls after putty are needed in two receptions:
- The first squeak is carried out with a ribbon with a coarse-grained texture;
- Second - fine-grained paper.
Most often for repair work in apartments, a skin is used from P80 to P280, and for a particularly fine work - from 320 to 360r.
When the wall is sandpage with a starting putty, its subsequent polishing is required by a rough skin, the range of which varies from 80 to 180 rubles.
But, pay attention that this is a very coarse-grained material, and if you plan to persist in the future, it is impossible to use such a sandpaper.
What technology is carried out to be done?
Independent Okurization of the walls after putty
Article on the topic: What better to make the ceiling in the living room
Before starting to sowned walls, it is necessary to check the finish for readiness (see if it dried properly). To work, it was comfortable, and the result was positive, get enough lighting. Rays should not distort and discard the shadow, the treated section of the wall should be covered from all sides.
Do not forget about the individual defense that will save your eyes and respiratory organs from dust, it will believe, there will be a lot.
If large protrusions are noticeable on the walls, remove them with a small spatula, but make sure it is clean. Then install a large-grained paper on the bar and start grinding the walls from above, heading on the right side. Such actions will help not be knocked out and process the surface with small areas, without missing a single centimeter of the wall.
If you have never been engaged in the walls of the walls, and are afraid not to make a mistake with the skin grainy, test the selected abrasive on a small sector of the wall in a secluded place. If scratches were formed during testing on the wall, your choice is erroneous, so immediately replace the skin on the smallest grain.
Once again, I want to mention that the coarse stacker is suitable for the preparation of walls before pasting with wallpaper, but the subsequent painting of the walls does not allow the presence of even the smallest flaws, which after applying paints will become more pronounced.
Try to do not apply too much effort when pressing on the bar and do not blame a very long surface in one place. After spending some circular actions, check the result and go to the next fragment of the wall.
If during the Okurization after the primary polishing you will find substantial pits on the surface, skip these sections, and later process them with a putty mass.
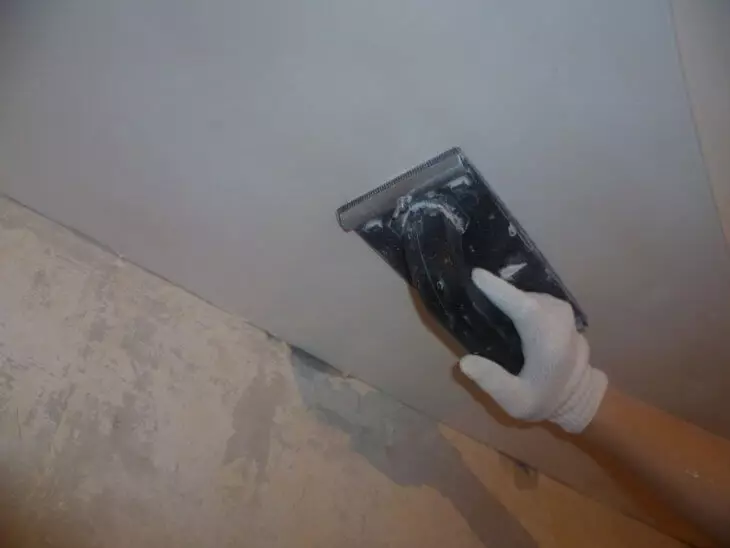
When the main surface of the walls is puffed, you can go to more hard-to-reach parts - in the corners. For processing angles, do not use the grinding bar, which will only spoil the putty layer. For such a painstaking and delicate work, the sponges for grinding, which have an angle. If you did not have such a device, use the same fine-grained sandpaper by folding it in half.
Article on the topic: Kitchen repair features in Khrushchev
How to hide the ceiling?
Whirl the ceiling with your own hands
In the repair of the room, the ceiling requires no less attention than the surface of the walls, because all defects on it will be very attracting attention not only by the owner, but also from the guests of the house.
Performing ceiling grinding is no different from the sump of the walls. The only nuance is that work on the ceiling is much more complicated. That is why, before it starts to Oshkawing this site, get a grinding machine.
If such a miracle machine is used, it is put on it with a mesh under No. 60 to No. 80 for rough stripping, or a grid at number 100 for finishing work.
To easily get to the required surface area, use a staircase or scaffolding, but if you have a car with a special barbell, it is possible to wash the ceiling directly from the floor.
Grinding the surface produce circular motions until the surface does the perfectly smooth texture. Initially, Okurization eliminates the surface from large damage, after which the residues of garbage, dust are removed and the surface is examined to the presence of small defects.
When the work came to an end, you can cover the walls with finishing putty. After the mass is finally dry, the finish opening of a fine-grained skin is carried out. The technique of performing work is identical, as described above, the only nuance - movements should not be inspired, but neat.
When all the surfaces are sash, it is necessary to remove the remnants of dust, after which the walls are negotiated. It is the applying of the soil to increase the level of adhesion of the base with subsequent finishing materials.
Solving, what materials to take a surface, and for what technology, it is necessary not only to take into account the advice of more experienced finishers, but still test your strength on a small segment of the wall. At least today you can view many video lessons on the network, but they will not replace work experience with grinding or other abrasive materials that need to feel their own hands.