Metal brazier is definitely good. But, in addition to functionality, I also want beauty, especially on the plot: at the cottage or near the house. Attractive view without reducing functionality give a barbecue from a brick. There are completely simple models that are folded, even without skill, you can, two or two, there are more complex - whole complexes. We do not recommend such such without experience, but a simple bake barbecue or just a brick brazier - try. Light the masonry, the main techniques, and then you can also take more serious projects.
Barbecue Mangal - What is the difference
There is no accurate separation between mangals and barbecue. The main difference is that on the grill is prepared on skewers, and Berbeky do on the grid. But both of these methods can be applied even on a fire, so - for us, in any case, that the brazier is that the barbecue is one construction.
Simple brand or barbecue from bricks in the country or on the site can be built and without experience
You can still classify the presence of a roof. The brazier is always an open device, without the presence of a chimney. Barbecue, especially from brick, chimneys often make, although simple open models are also there.
Simple brick mangal
This design is very simple, easily changes to any needs and desires. It consists of brick walls in which the protrusions are arranged (the brick is on the edge). The heat-resistant sheets (metal, etc.), grilles, skewers are stacked on these protrusions. Convenient, especially if there is some kind of roof over your head in case of precipitation, it is built separately and at will.
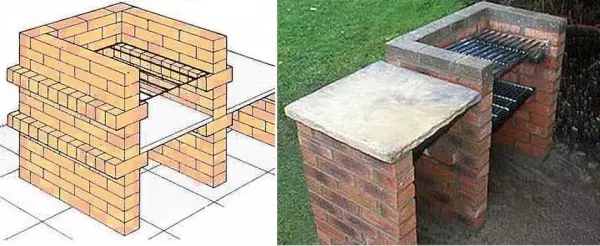
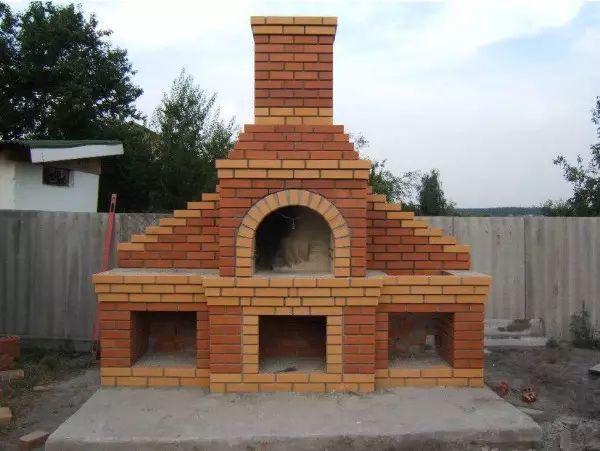
Project and photo of the finished manga / brick barbecue
Under any brick structure requires a foundation, or at least a prepared basis. Not even this small brick brand. Since bricks go a little - the wall in the Pollipich, then the rammed site is suitable for this design, which is lined with any solid coating.
Preparation of the foundation
Remove the fertile layer, if necessary, deepen the pita. The depth must be about 20-25 cm. The size of the foundation or platform is 50 cm more than the oven dimensions in all directions. The bottom is aligned, the crushed stone of the middle fraction is poured. The thickness of the rubble layer is 15 cm. His choir trambet. Preferably - vibratory, if there is no, metal or wooden traam.Article on the topic: Tailoring of the Roman Curtains with their own hands: Step-by-step instructions
Further steps depend on the selected foundation. If it is one of the coatings - a pavement, paving slabs and similar materials, then a layer of fine-grained sand is poured, in which the coating is stacked by the level.
If a slab foundation is selected as the base, it is reinforced by a rod 10 mm in diameter. It is stacked along and across the foundation in a step of 20 cm, in the area of intersection it is associated. If you do not know how to knit special wire, you can pull the plastic clamps. It is allowed for this model reinforcement of a finished grid of thick wire. Exhibited on the edges of the formwork and all poured concrete M250 brand. Works can be started in a week, if the average daily temperature was not lower than + 20 ° C, and after two, if it was + 17 ° C.
Order (masonry drawings) and laying recommendations
For this brick manga, a full-length ceramic brick M200 is used. You can take a stove, but it is more expensive, the chamotte laying is not worth it: there are no temperatures and he loves moisture too much to feel himself in open mangale.
The masonry leads to the clay-sandy mixture, which is added a little cement for greater strength. For beginners, it is better to take a ready-made mixture for furnaces, just not heat-resistant, without a chamot. Align according to the instructions, the seam thickness is 3-5 mm, to withstand strictly. Constantly control the verticality of the walls and the horizontal of masonry. This is important for normal operation of the furnace.
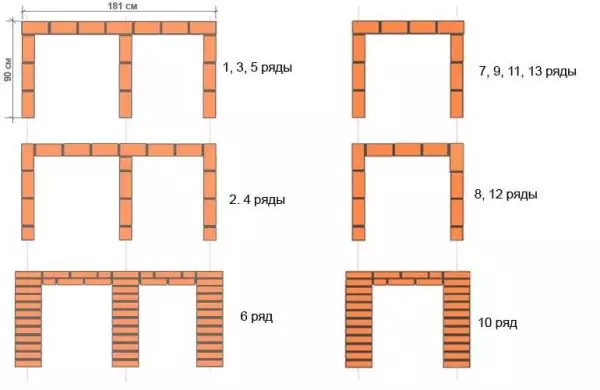
Brick mangal coach (masonry drawings)
As you can see, everything is really very simple. Each odd row begins with a whole brick, odd - from half. In the 6th and 10th row of bricks put on spoons - sideways, and unfold across the main masonry. If you make a barbecue - under the grill - in the same rows, the rear wall is placed out of the brick, also put on spoons, and to preserve the thickness of masonry they put in two rows, as well as the rest - with dressing - displacement of seams. If you're going to use and ka brass - for skewers - on the back wall put the brick, too on spoons, making the protrusion and in this zone. Ahead as a support for skewers use a profile metal tube of small sections, carved in size. In it, under the skewer you can do notch.
Article on the topic: Installation of the shell with a pedestal
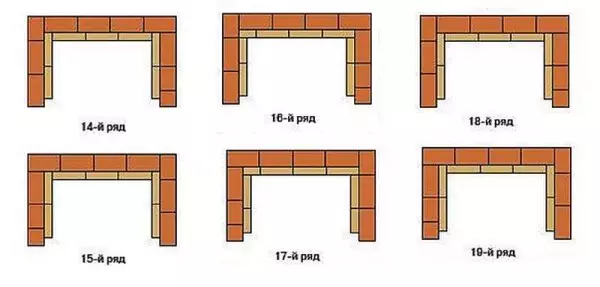
Starting from the 7th row, the masonry lead only on half - right or left - as it is convenient for you, but this layout is given to the roasting chamber on the left - it is wider, and the table is located on the left. If you are more convenient because of the contrary, make a mirror reflection of this order.
Brick - hygroscopic material to reduce the amount of moisture that it will "pull" from the ground and extend the life of its operation, waterproofing is needed under the first row. You can put in two layers a rolled material (type of rubberoid or hydroizol), walk around the perimeter with hydrophobic impregnation. It does not hinder the waterproofing layer and between the first and second next.
Here's what one of the variations of a brick mangaal looks like a table (if it is unnecessary to you, just ignore this part)
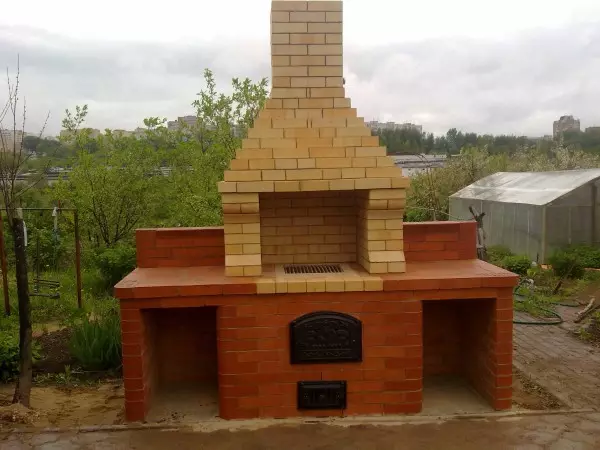
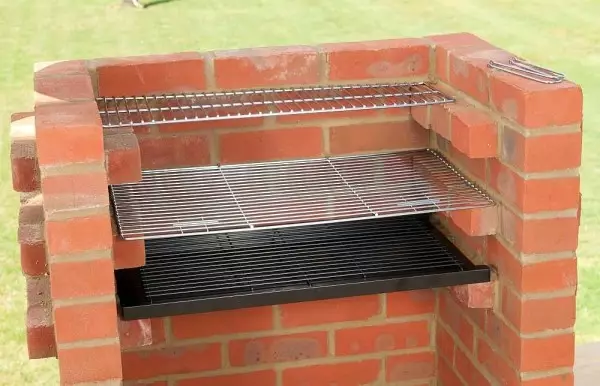
After the brick brand is complicated, it is left to dry during warm weather for 1-2 days, with a cooler - by 3-5. Then you can spend a trial launch. Approximate "Equipment" is shown in the photo of the finished manga. In this version, three rows of protrusions were made: the upper - for products, the middle - for coal, the lower - to collect the struggle coal and ash.
In order to be folded, the brand more or less a long time, it is desirable to cover with a composition that reduces hygroscopicity. For this case, the KO-85 varnish is best. And it would be nice to provide some kind of lid: close in case of rain and for the winter.
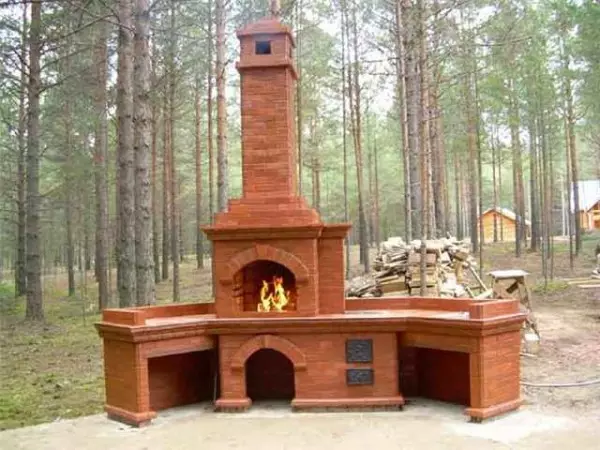
Brick barbecue with pipe: order
This version of the barbecue is a bit more complicated, but also not the most difficult. The most important thing is the heat chamber here has a direct arch, and it is much easier to do it. The brick frying chamber is raised to a height of 90 cm, a total height - until the start of the pipe - 217.5 cm.

Brick Barbecue Masonry Scheme
It all starts with the preparation of the foundation. For this barbecue furnace, only a monolithic reinforced base is suitable (15 cm reinforcement step) on a compacted rubble base. On the dried foundation spread in two layers of waterproofing, then the laying start. If the barbecue is done in the gazebo, the first row of masonry should begin at the floor level. If the foundation turned out below, lay out an additional row (or two) bricks, and then begin the laying according to the scheme.
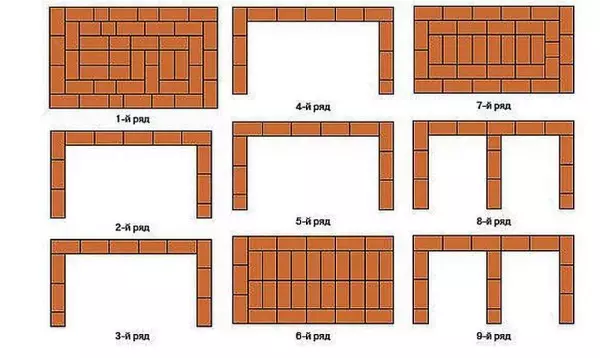
Brick Barbecue Drawings
The first 9 rows of special explanations do not require. We put exactly according to the scheme, observing the order using halves and cutting brick, if it is indicated on the plan. Be sure to check the verticality of the resulting walls, as well as control the thickness of the solution - 8-10 mm and the horizontal styling of each brick.
Article on the topic: How to repair a castle of plastic door
To control the seam thickness, you can use the rod of the reinforcement of the corresponding diameter. It is put on the edge, the surface of the row is filled with a solution, the bar is superseded above the rods. After laying and tracing bricks, a smooth seam is obtained - the bar does not give brick to fall lower than necessary. The rods are then removed and shifted above.
So that there was an opportunity to lay the 6th row (solid), after laying the 5th, lay a metal strip with a thickness of 4-5 mm, 40 mm width. Length - a little less than the span of the furnace - 1450 mm. The bands are needed 3 - one with the edge, two in the middle of each row of bricks or as indicated below (11th row).
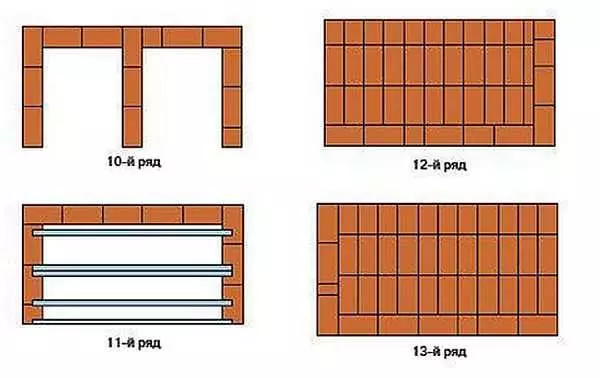
Formation of two shopping chambers
The laying scheme of the following rows of barbecue is clear. Only in the 12th row, pay attention - you need saw along bricks. It is also worth saying that the 12th and 13th rows are obtained greater than the lower - forming a decorative "belt".
The formation of the furnace chamber begins
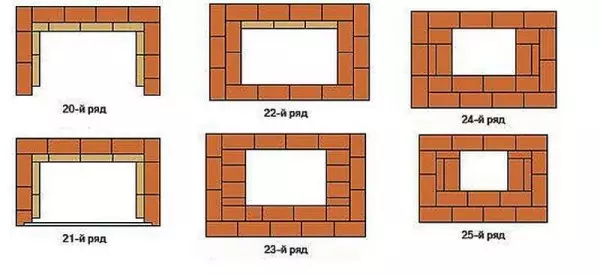
Light color in these rows indicates chamotte brick (Sha-8). They put it on the same composition of clay and sand (an additive of a small share of cement is possible). Shampoo-based mixtures are better not to use: they need very high temperatures for sintering, which are unattainable in street barbecue. As a result, this solution may later simply get out.
Formation of the chip chamber
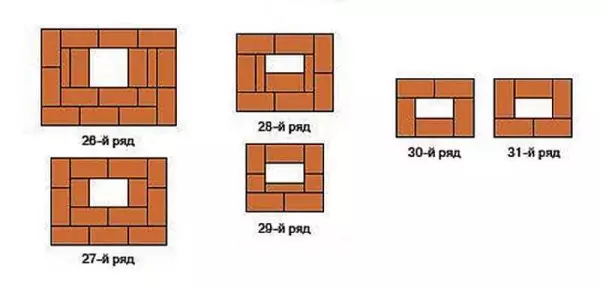
On this part of the coach, too, everything is clear: we begin to form the arch of the furnace. It overlaps on the 22nd row, in which the gradual narrowing begins.
Tube
The formation of the arch continues, which in the 30 row goes into the smoke tube. Next, alternate the 30th and 31st rows before reaching the required height.
Video
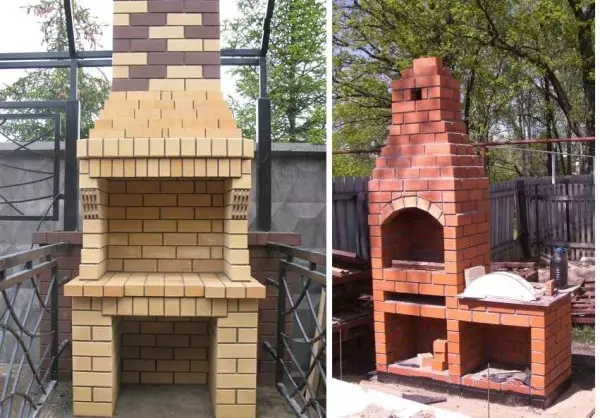
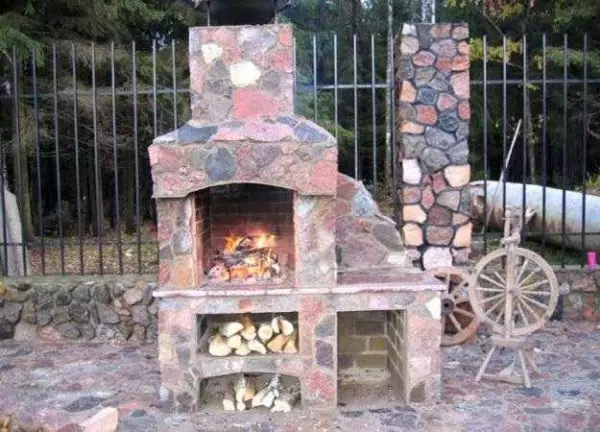
Stock Foto Barbecue from brick
First, several options are simpler. You can make these barbecues from the brick yourself.
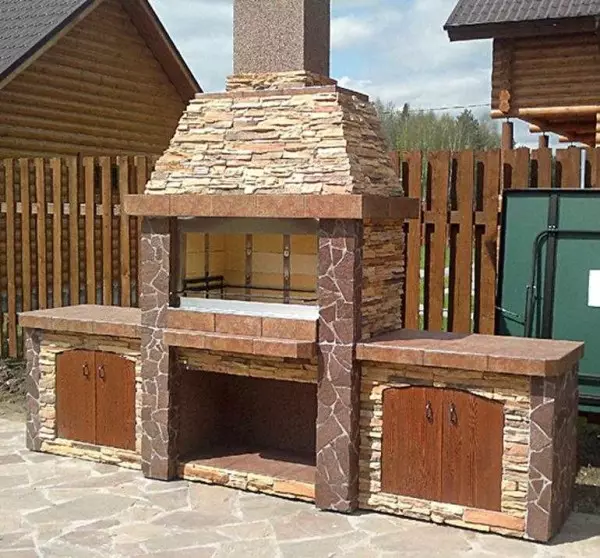
This furnace-brand can be built with your own hands
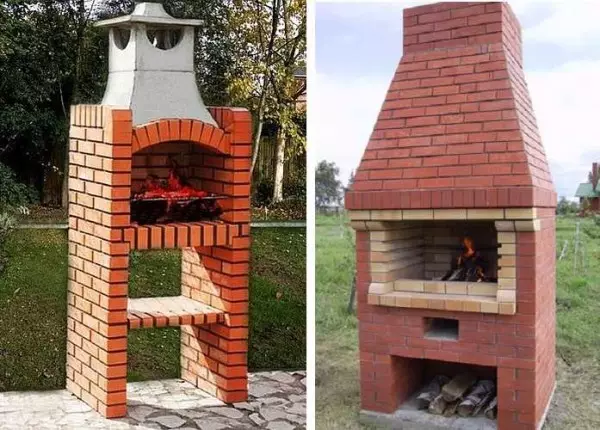
Simple brick barbecue options
A little harder, but really do it yourself
Variations on the same topic - the original finish
Several barbecues that can be built, having any experience, but better - to trust a specialist (if you find, of course)