
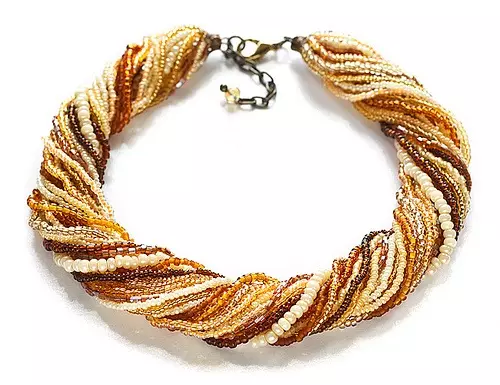
Decorations - the cherished dream of any girl and women. Beautiful earrings, expensive necklace, any ordinary image is capable of doing amazing and unforgettable. The graceful necklace of beads and beads made by their own hands will be beautifully lying on the female neck. The needlewoman itself can adjust the twisted of the harness and pick up the appropriate color for the future product. We offer a detailed master class on the necklace of beads with your own hands. Weaving schemes Necklace from beads and beads will help you master the technique faster.
List of essential materials to create crafts:
- beads and beads of suitable shades;
- fishing line;
- needle;
- pins;
- cones;
- lighter.
Immediately to practice
First you need to pour out all the beads into any capacity. Now it's time to proceed to the manufacture of beading threads with their own hands. Weaving scheme Necklace from beads and beads will not deliver excess worries. With the help of a needle make beaded low about 40 cm long. Adjust the length of the product at its own discretion.
Attention! Best before creating decoration measure your neck and decide on the desired result.
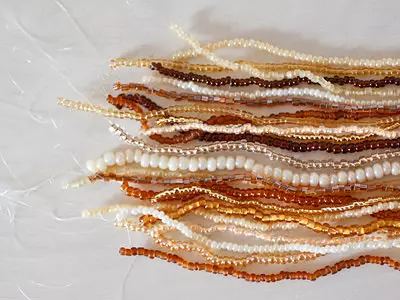
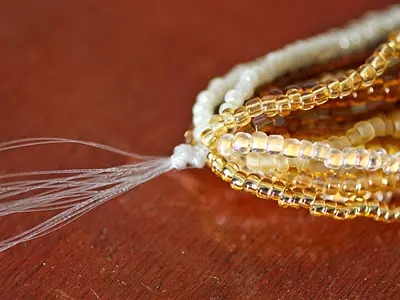
The initial and last beads are fixed by timing the fishing line a couple more times, without nodules. Beads and beads must slide on the fishing line, but not to subscribe from it. It will be necessary for us to assemble the final product. The tips make a long length so that the beads are not lost.
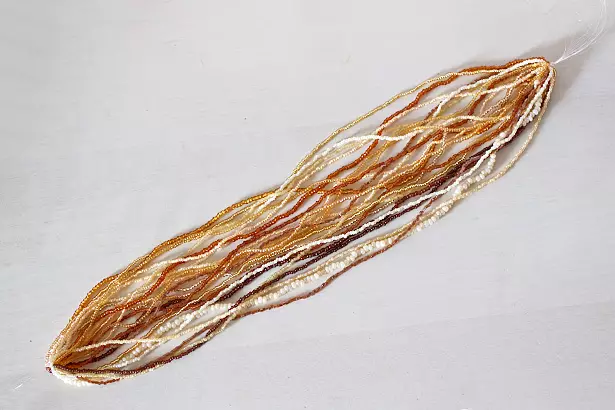
According to such a simple scheme, you can make twenty of the same bead threads. Beads, which consist of 28 rows, on thin - from 16-20, look good on the large neck.
Take advantage of the beads and beads of different shades and the magnitude so that the necklace seemed more interesting and original. You can also use the cut and various textures. Beaded low needs to be done with a reserve, since when assembling it may be needed to add a couple of items.
When all the details are prepared, you can start collecting multi-row beads. You need to collect the tips with each other, while twisting the fishing line as in the photo. Thanks to this action, you can see how the finished necklace will look like. If everything is fine, collect ends.
Article on the topic: how to tie a crochet chicken
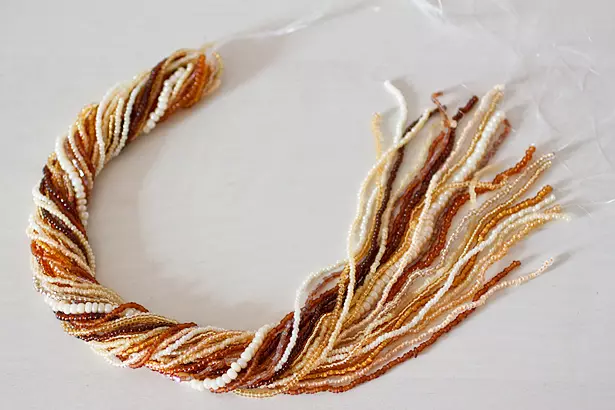
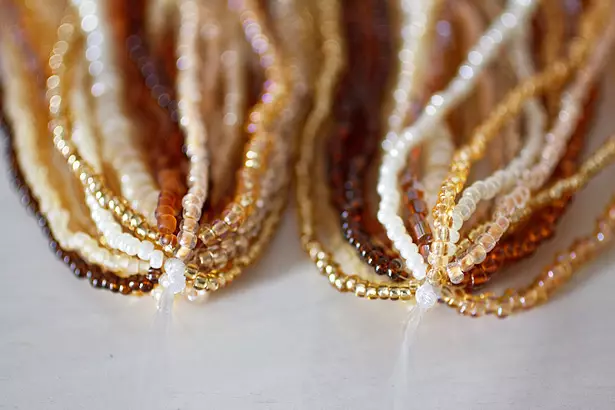
The tail, which turned out, tie into the nodule. Beaded low are located at different levels.
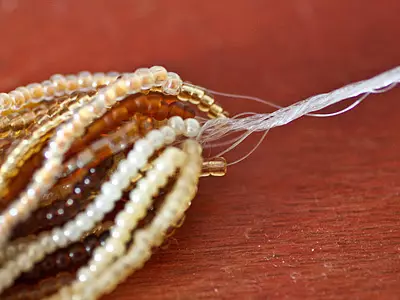
The next step is to pull up the fishing line so that the beads are close to the formed node. Holding the entire tail, you need to take the fishing line one after another and tighten. Thus, beads and beads on the fishing line "will rise." It is necessary to closely monitor this process. Having finished the first round, inspect the work and tighten the non-shifted threads, if any.

Next, it is worth starting to the second nodule. It must be made close to the first to be well fixed. If the node seemed not strong enough, one can make one more.
Then you need to straighten the beads. Try so that there is no twisting. After the node was raised, the threads should be smoothly hang on the bottom. With the second tip, do the same actions.
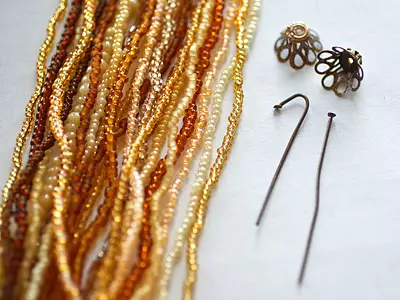
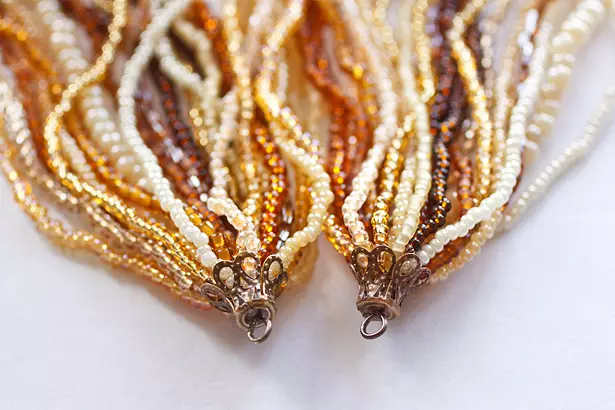
Now it is necessary to pay attention to the process of hiding the tails. To do this, you will need to take cones and pins and roll them with crochet.
Divide into two equal parts of the low and push the obtained hook there. This item is needed in order to share the threads with the node on half.
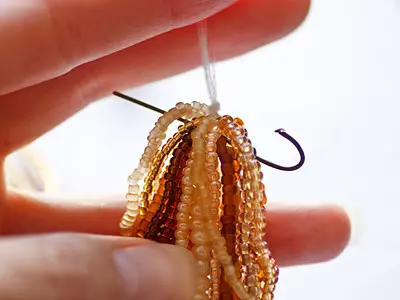
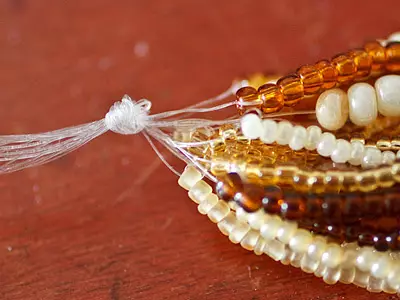
Then click the hook and trim the tailing lines. Leave only about one centimeter.
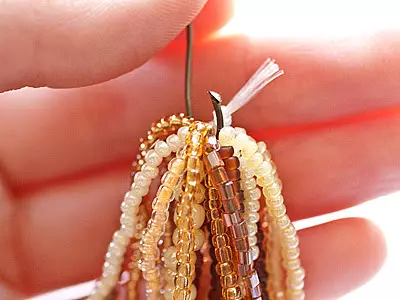
Next should be used a lighter. Her work will come in handy in order to carefully bore the fishing line to the location of the nodes. After that we bring the hook. It remains to ride a cone, get a pin and make a loop. How to do it correctly, shown in the photo:
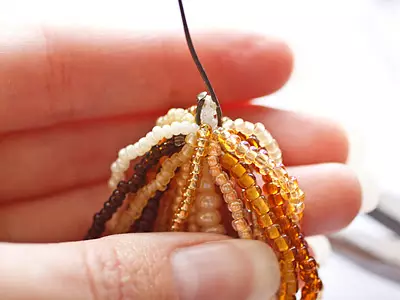
At the other end to do similar actions. Now it remains only to install the lock and twist the multi-row beads so that they look more beautifully. Pay attention to the stronger to twist harness, the shorter it will be your necklace.
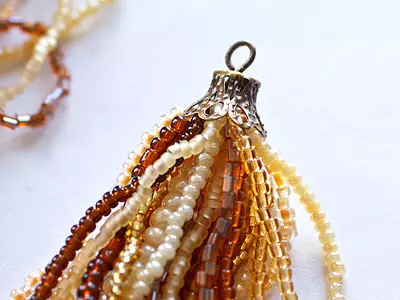
Step-by-step MK completed. Thanks to such simple schemes, you can easily make a beautiful and refined decoration with your own hands.
Article on the topic: Cap-cap knitting needles for newborns with diagrams and photos