
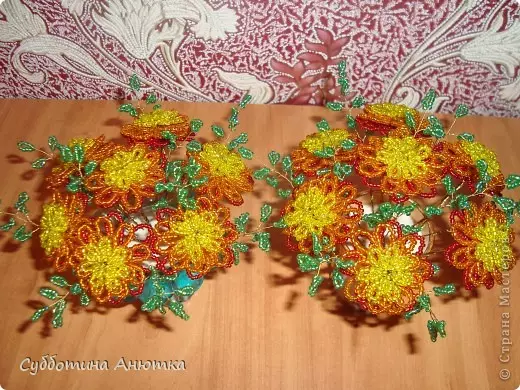
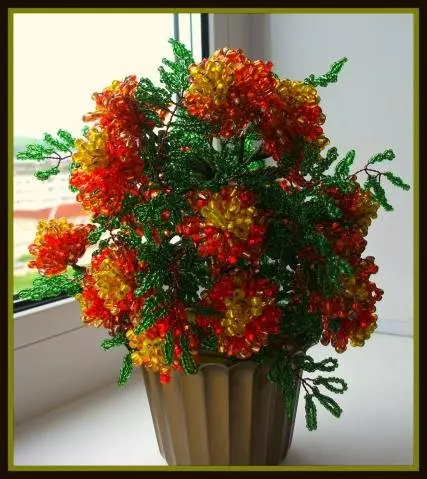
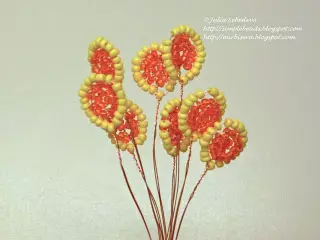
A small porridge with flowers from beads can perfectly decorate and refresh the interior not only an apartment, a country house, but also a cafe, restaurant and just office premises. Flowers in vases can be a completely different species, for example, velvets from beads, a weaving scheme of such a work will be described in detail in this article.
Weaving technique
We are not really hard to weave the beads as it may seem at first glance. But still the occupation does not require patience and desire. But the result is simply striking pieces, for example, beads, bracelets, brooches, necklaces, plants and animals, which can serve not only the decoration of the house, but also become an excellent gift for friends and loved ones.

In its technology, weaving beads is quite varied.
Many masters use a huge number of options for this type of needlework. The most famous is customary:
- Mosaic:

- Rhombick.
- G8 method:

- Ring weaving. It implies the principle of connecting the bisperin in the product in the "ring". Each new ring is the basis for the next. Subsequent rings are reminded in the form of flowers, so this method is used mainly to create flower arrangements, which will be discussed today.
- The easiest of all other ways of weaving is weaving at right angles. Its essence lies in the fact that as the beads increase in a row, the craft can be given any shape. This technique is mainly used for weaving paintings, medallions, the various items will deteriorate.
- Weaving (weaving on the machine).
Interesting flowers
Such bright flowers like velvets today can be found almost on every flowerbed. They can be called the basic decoration of the garden for their brightness and unpretentiousness to weather conditions. But in order to have a pot home with these flowers, it is not necessary to go to the country area at all and tear live plants. You can make a similarity to them yourself.
Article on the topic: Knitting scheme with warm sarafan needles for a girl
The master class is designed for craftsmen with at least some kind of weaving experience from beads, but if attaching stubbornness and preceptability, even newcomer can succeed in beading.
For work it will be necessary:
- Beads of orange, yellow and green colors;
- Thin wire;
- Rights of green for bonding leaves and flowers.

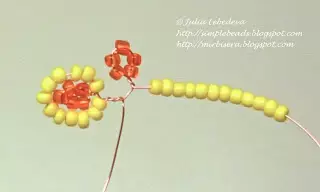
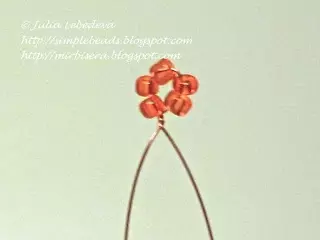
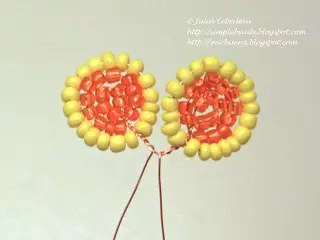
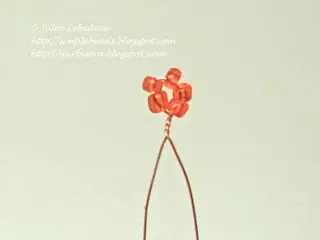
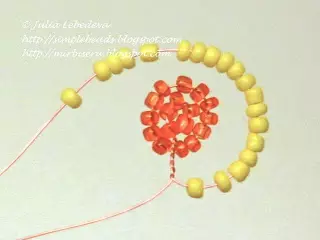
Of the 4 rows of petals usually consists of a bud. In the first row there are the smallest petals. Scroll on a wire with a length of 35 cm 5 yellow beads.

Slide them on the wire in the middle, fold the beads in the loop and twist the wire under them in 2-3 turns.
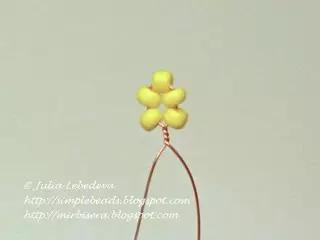
On both sides of the wire next to the initial loop, make two of the same petals.
Place them as dense as possible to the initial loop.

Smeat a spiral of the wires of the wire.
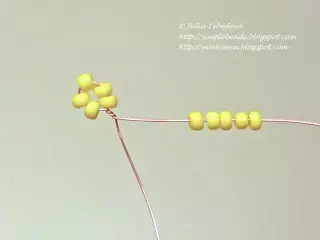
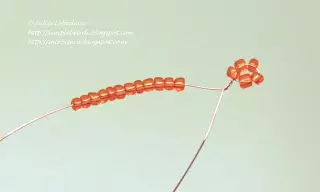
The next stage of manufacturing petals: You will need a wire long 60 cm. Like the first step, make the petal of orange. The only difference is that it is necessary to place the loop at a distance of 15 cm from the end of the base.

Then gossip the loop on the terminating piece of the wire. Type 12 yellow beads.
Twist them arcuate over the initial loop.
Tension the wire to make this row to the first loop, twist the wire under them 2-3 turns.

Five more such similar blanks are on the same end of the wire.
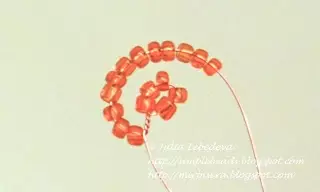
Return 5-7 mm from the first petal, twist the loop from the obtained parts.

Type yellow beads in the amount of 12 pieces.
Like the same, fold them over the first loop of the second row, twisting the wire subsequently from the bottom.

As before, prepare petals, continuing to fill the wire. Since the beads can be of different sizes, it may be necessary to add some of them.
Gradually, as petals add, you will notice that they will begin to lay down on each other.
Article on the topic: Ribbon in Koshi Kosashi with flowers: Master class with photos and video
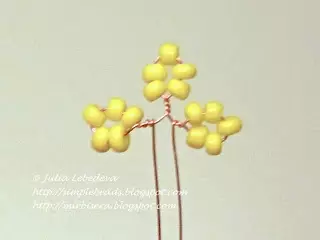
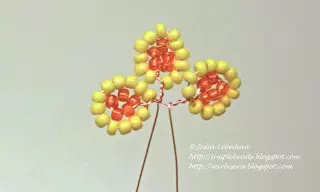
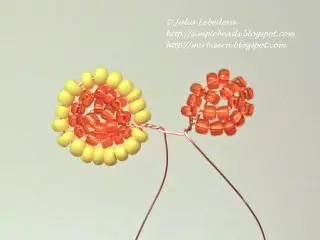
To fulfill the next row on the same wire, do only 6 petals.
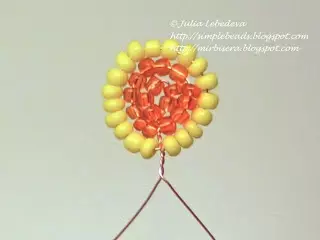
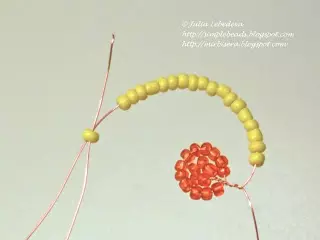
Next, connect the resulting rows. To do this, insert the first row of the petals into the central part of the second.
Now together all the tips of the wire, exactly distributed around the circumference of the petal of the second row.

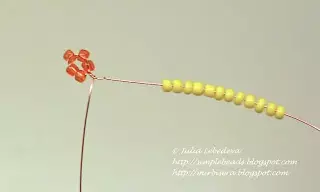
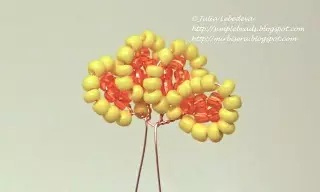
Next will follow RY№3. Glowing 6 wire petals, the length of which is 80 cm. Weaving technology is similar to the previous one, but the petal of the number 3 will not consist of two, but from three loops. The loop consisting of 5 orange beads, place 15 cm from the tip of the base. Subsequent weaving will take place at its long end.
The next loop should consist of 12 beads.

Of the 19 yellow beads should be the third loop.
Subsequent details leafing in the same way. The first loop of each subsequent petal is at a distance of 7-9 mm from the previous one.

And so on, everything is happening by the former weaving scheme:
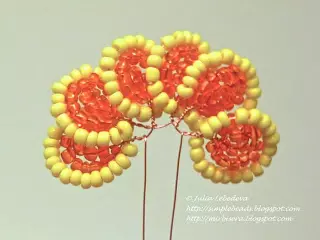
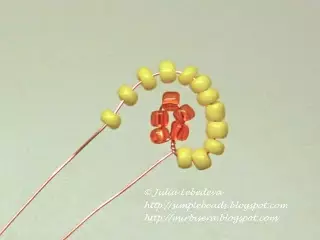
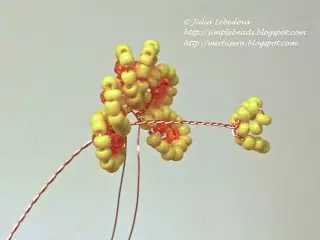
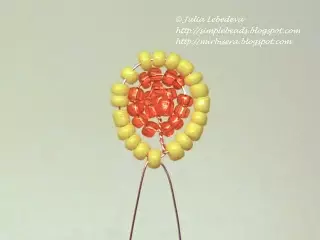
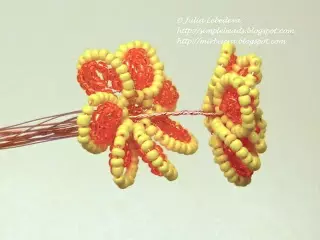
Having finished weave the third row, attach it to the bud.
Further, as before, connect and tighten around your axis all the ends of the wire, distributing evenly the petals around the circle

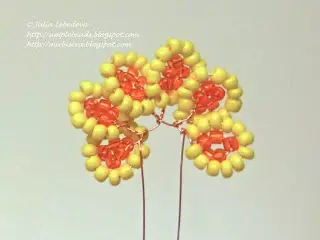
Parts of the flower in the fourth row are also similar, but we rush separately from each other, based on this, each petal needs an individual wire 40 cm. The first loop is 5 orange beads, position it in the middle of the wire.
The second loop will be located at the short end of the wire. Type 12 beads.
Further as usual - arc over the first loop and twisting of the wire under them.

Type 19 yellow beads for the third loop. Make it on the longer end of the wire.
The next stage is an arc of yellow beads over a beads of orange.
The second tip of the wire skip through the last beerin.
Tighten the wire like this: yellow bispers should form a third loop over two previous loops. Now twist the remains of the wires with each other.
Article on the topic: Mosaic from photos with your own hands: Creating a portrait with a photo
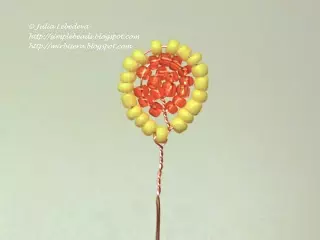
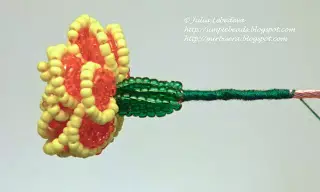
For the fourth row of bud, you just need to weave 8 separate petals.
Align the resulting petals and align the tips. Create them with each other and wind the wire. You do not need to twist from the petals ends.

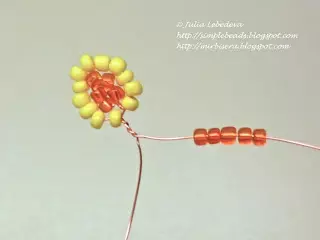
Combine the first three rows of petals and insert them into the central part of the fourth to the end.
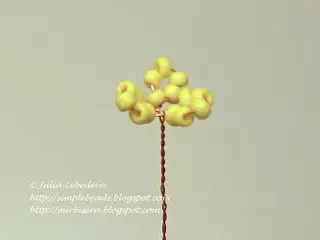
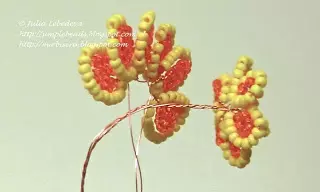
Put the finished bud on the top of the top. Running all wires to the sides, on each twisted pair and separately running ends put on 8 green beads.
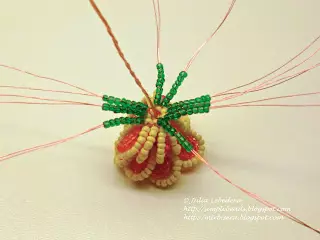
Now collect all the ends of the wire together, slide the green beads close to the bud and twist the wire.

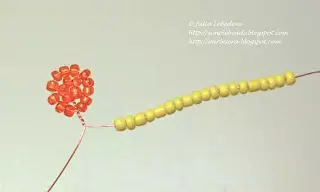
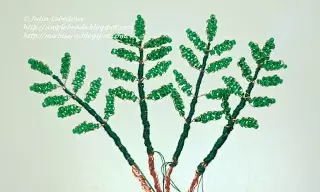
Now you can start creating velvetse leaves. To do this, on wire 20 cm. Putting 9 green beads using the technique of parallel weaving.
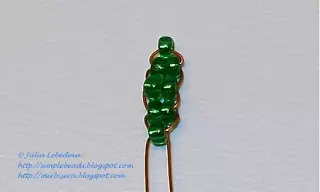
Make separately 9 such leaves.
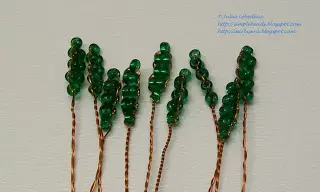
Next twist them with each other at the base.
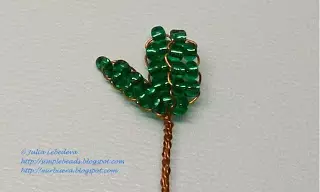
Now scroll them in such a way that one central sheet is directed upward, and the rest went under it at right angles in different directions.

Next, screw each individual sheet to the cutter, going down the lower.
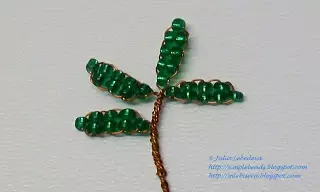
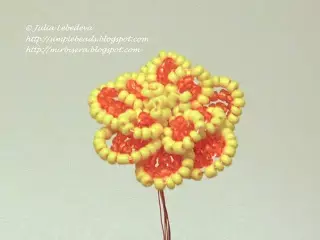
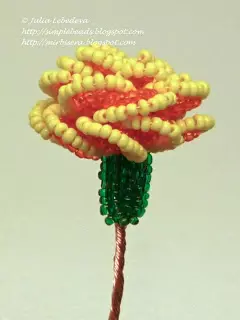
Thus, you will get a ready-made piece. The amount of details these make your discretion.

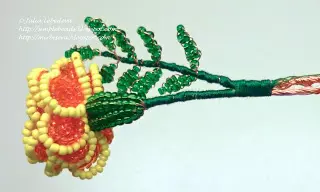
To the completion of the assembly of all parts in one plot, you can begin after the preparation of all leaves. The threads of the green color wrap the tip of each leaf, the gaps between them and the wire, approximately 2 cm after the leaves.
The same threads wrap the flower stem long 3 cm.
Winding the leaf threads, continue to attach them to the stalk.

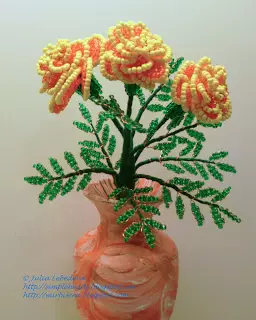
Similar to the procedure, you can make several such colors and put them in your favorite vase.
Video on the topic
Similar schemes for weaving velvets and leaves, as well as some other colors are presented below on the video.