
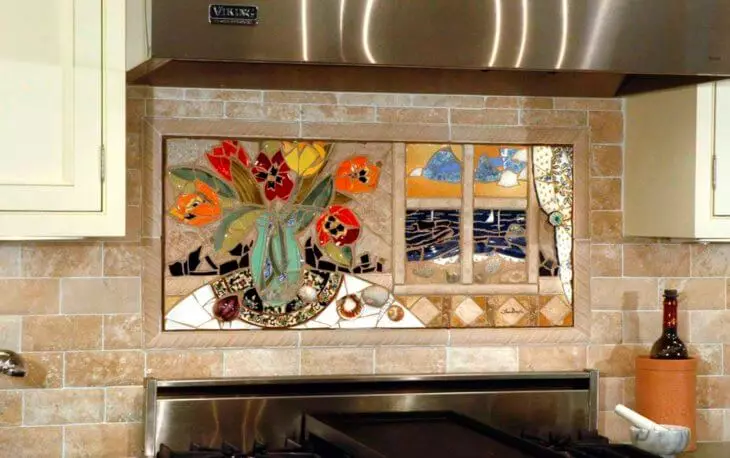
Each of us at least once, but I tried to do something with your own hands, whether it was an exercise to school for a child, repairing the room in the room, laying the tile or decoration of the aquarium with fish. Deciding to decorate the walls in the kitchen with their own hands, I began to consider many options and stopped on the wall panel. A panel in the kitchens is used very often and can be made to the atmosphere home comfort and heat. Only at first glance, the creation of such a scenery may seem like a difficult event, because in fact, it is possible to portray the panel in the kitchens from girlfriend. Today I will give a few examples of the manufacture of panels for the kitchen with your own hands.
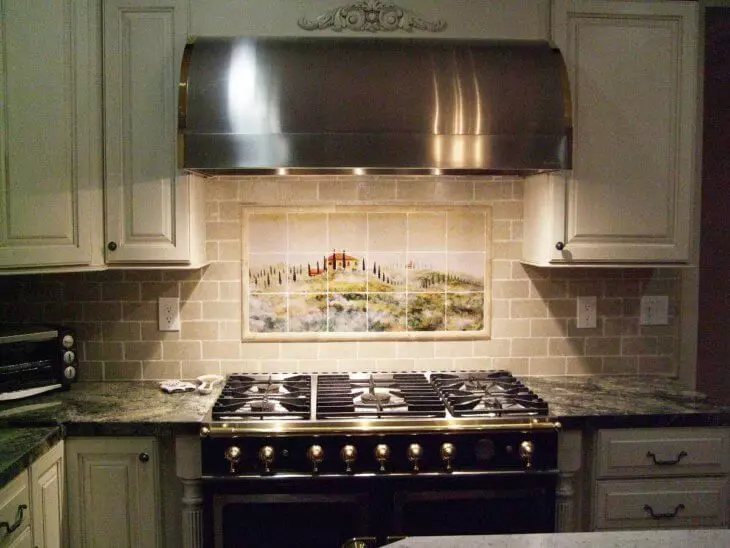
Panel on the kitchen
What may be the composition
Panel into the kitchen with their own hands
Under the word panels, in view of the composition, which is made using paints or volumetric elements. Using such panels in the kitchens, you can not only decorate the room, but also hide some of the flaws obtained during the repair. For small rooms, large compositions can not be used, but also in large rooms it is not one small, but better several panels.
Panel in kitchens can be made of:
- Pictures or photos - also actively used in bedrooms and children's rooms
- Volumetric panels from salt dough and croup
- With dry flowers
- When using tissues, clay or special felting wool
This is just a small list of materials that can be used for wall-mounted compositions. But since I had a task to make a panel for the kitchen, I tried as much as possible to use the firing elements.
The most sought-after paintings
We make a panel into the kitchen yourself
Article on the topic: Construction of a gazebo in the country
Panel from photos is in great demand, since these compositions carry family values and transmit the mood of their owners. Thematic panels are very easy to do with their own hands, but best of all it will look in the bedroom, hall or children's room.
I decided to make a picture that clearly passed the stylistics of the room. And the first option I tried this fruit prints and vegetables. The option is quite simple and can be done even in a pair with a child. For the product we will need:
- The basis is a canvas, or a cardboard sheet. I had a beautiful wooden one at hand, for which I found an old unnecessary frame
- Paint - it can be acrylic, oil mixtures or gouache
- Vegetables and fruits in the context - the only obligation of such elements is a solid state.
The technology of manufacturing panels in the kitchen is very simple and does not require special skills. First of all, you need to prepare paint and the foundation - pour into the container and dilute to the necessary state, as well as degrease the base of the crafts and paint it into the right color. After that, it is necessary to take vegetables or fruits, cut them and scatter into a container with paints. After that, the basis is applied.
Important! Now there is a huge number of video and master classes that will help you decide on the style and view of your panel into the kitchen.
We use old kitchen utensils

Homemade panel for kitchen
On this production of compositions with my own hands I just started. Reviewed a bunch of sites and various options, I decided to try to apply old and already unnecessary kitchen appliances and elements. And my wife reminded me of what has an old family recipe for a cake that wants to keep and for his grandchildren. A little thought I decided to combine wine plugs, a family recipe and old kitchen forks and spoons. I acted according to such a scheme:
- Prepared the foundation on which the recipe will be fixed, took old traffic jams from wine and champagne, scissors, stationery buttons and adhesive gun
- For a start, I decided to make a frame that consists of traffic jams. I was cut along and began to glue, both horizontally and vertically on the contour of the base. The width of the frame for the panel you can choose to your taste. I had two rows
- When the frame was ready using the stationery buttons, I secured the recipe in the middle of the base. Next with the help of a glue gun fixed a dessert fork and a teaspoon
- For strength, I covered everything with varnish and left to dry
Article on the topic: Learn how I myself laid Tulle
For your panel into the kitchen, you can use different cutlery and combine them with another kitchen utensils. The main thing is to include fantasy and properly place it all on the canvas.
Interesting idea for notes in the kitchen
Panel for notes
For those who have a space in the kitchen allows you to use a few panels, I would advise you to use a very interesting way of fastening for recipes and family notes. Of course it will be suitable for those who in the family it is customary to leave messages for loved ones.
Their materials, you will need only beautiful forks and glue. The technology is very simple and you will need only the presence of free space on the wall to which there will be permanent access. The aesthetic position of the forks should be vertical, they should be placed or strictly parallel, or in chaotic order. It will be enough to fix on the wall of 3-4 forks, after which the recipes or notes addressed to members of their family are on the tissum instrument.
Important! Embroidered with beads or cross paintings, can also be closed on the walls of the kitchen room. However, they should be pre-placed in the frame and under the glass, since negative factors and cooking over time can have a detrimental effect on your work of art.
It will be very impressive to look at the panels from buttons of different colors, you can fix them to the base, both in chaotic order and laying out certain patterns. With the help of buttons of various shapes and colors, you can lay out a tree or flowers, the name of the name, or some kind of drawing. Before starting to glue off the buttons using a glue gun, you should draw the contours of the picture using a pencil, which will be depicted on the panel.