
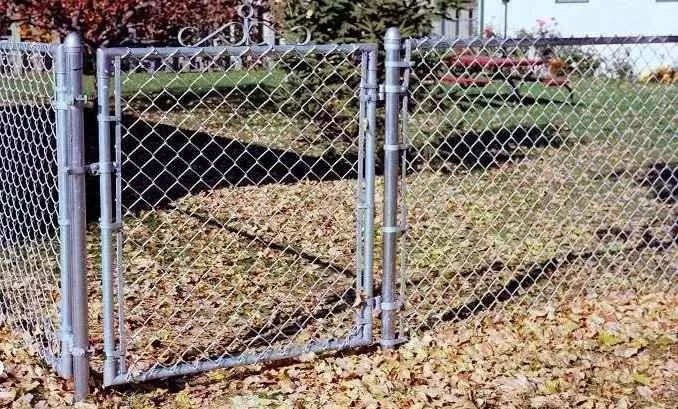
A distinctive feature of a metal wicket from the chain net in
comparison with wickets made from other materials is simplicity
manufacturing, low weight and transparency. Thanks to this, they are popular for
Dachas and country sites. There is also a place for its location.
From existing three ways to install wickets, to use
Only two are available, namely:
- Installation of separate wicket;
- Installing the wicket next to the goal.
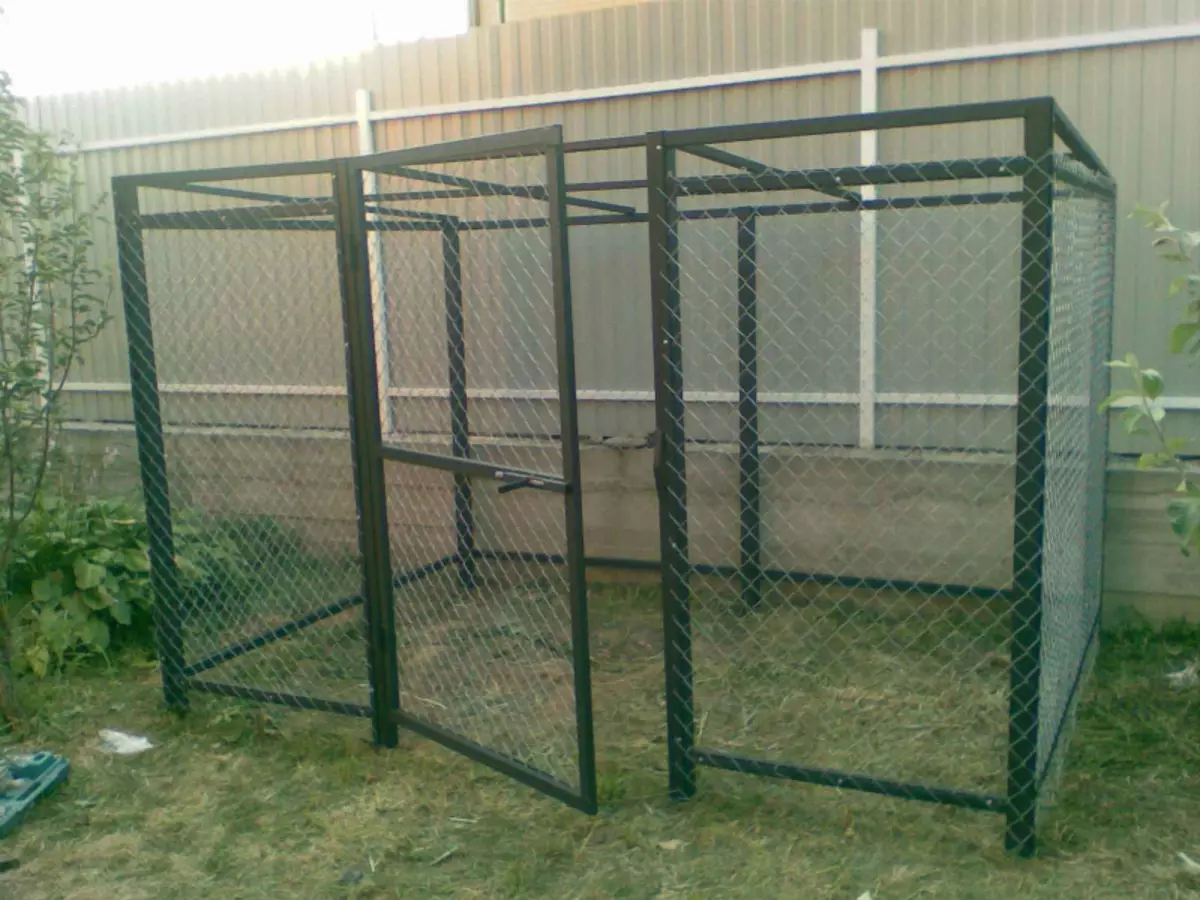
The third option - the swollen wicket for the fence from the chain grid, installed directly in the door of the gate, is not an idea, because The complexity of manufacture and high costs will reduce all the savings from the use of the Rabita. Also concerns and retract / sliding structures.

Wicket from grid Rabits for gates
Rabits Rabit Mesh Rabita
How to make a gate from the chain grid do it yourself
For the correct device, you must consider several
Nuances:
- Choose a good chain grid. It is advisable to give preference
The one that is made of galvanized wire with a thickness of at least 3 mm.
The size of the cells depends on the gate destination. If it is installed in the input
The area of the site is enough to use 50x50 if on an aviary for shallow livery
You need to take a cell in bed.
Note. The quality of the mesh is determined by the weight of the roll, in
The average weight of the chain mesh rollers is 36-38 kg (cell 50x50, thickness
Wire 3 mm).
- Prepare metal. To work it is better to take a new metal or
Good processing used. A profile tube is used (40x40 or 40x20 mm with
Wall thickness of at least 3 mm) or corner. Metal polished and processed
anti-corrosion composition;
- Perform the correct weld. Masters advise to weld
Billets of the wicket frame first at the point method, and then solid welded
seams. At the same time, the seam location is thoroughly polished and also processed by primer.
Depending on the desire, the frame of the wicket is painted.
Article on the topic: How to make liquid wallpaper with your own hands: 3 main methods
The reference pillars are installed as for the gate from the chain with a gate and without.
We recommend to familiarize yourself with the description on the device of the fence from the chain grid, where it is detailed from which to make pillars, how and what depth to insert / score.
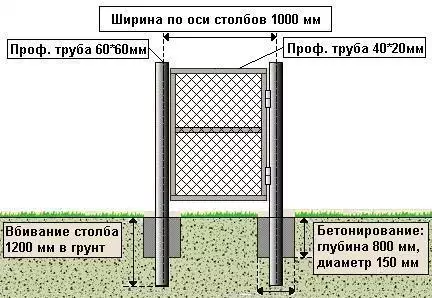
The scheme of the column device under the gate of the chain
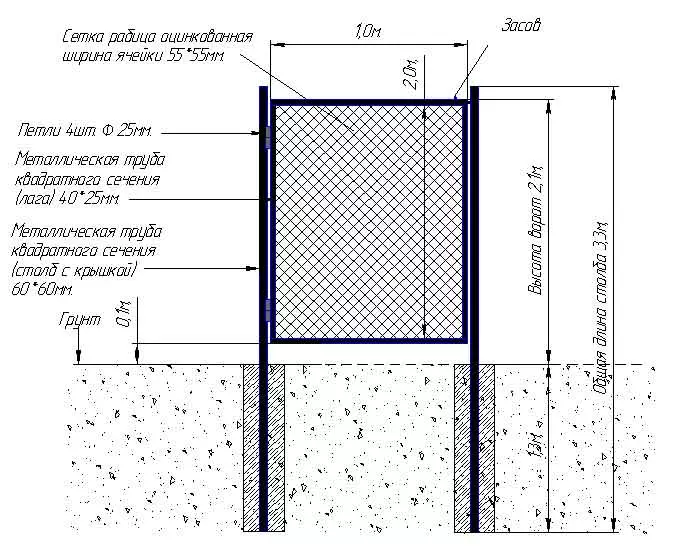
Drawing of wickets from chalk grid
Technology (stages of manufacturing wicket step by step):
- From metal cut off the workpiece. They will be all four: two
Long, vertical (wicket height), two short, horizontal (width).
Masters advise to install an additional jumper on the frame, which
will perform the functions of the reinforcing element. Its length is calculated by
Pythagora theorem.
Washed in the process of manufacturing blanks better to do under
An angle of 45o so that water does not fall into the frame. In addition, welded
The seam will have a big length and, accordingly, strength. For newbies,
optimally will cut off under the 90th, and boils weld so that
Exclude water from entering. Those. The horizontal part of the frame must rest
vertical. As a last resort, the location of the cut can be brewed metal
overlay;
- The billets are processed, cleaned from sizes;
- Design elements are welded, the seam is processed
primer;
- Rabita grid is stretched on the frame. Usually for the stretch
Steel wire is used (6 mm) or fittings. Supporting wire
It is pulled between the grid cells and is welded on the frame of the wicket. If a
The frame is made of a corner, then often the mesh pulling method on
hooks that are welded around the perimeter of the frame;
- On the finished wicket section you need to screw the loops. In view of
the fact that the gate will be used often, it is recommended to take durable
Garage loops. Sheds (loops) are separated - one part is welded to
Kalitka, the second to the support racks.
Council. To avoid pumping the loops, it is recommended to cover the loop first to the profile by a meticome, but only then welcome.
- Installed handle and lock (for mounted lock
There are eyeles, and for mortise - pad).
Article on the topic: Facade plaster to protect your home from rain and frost and decorative design
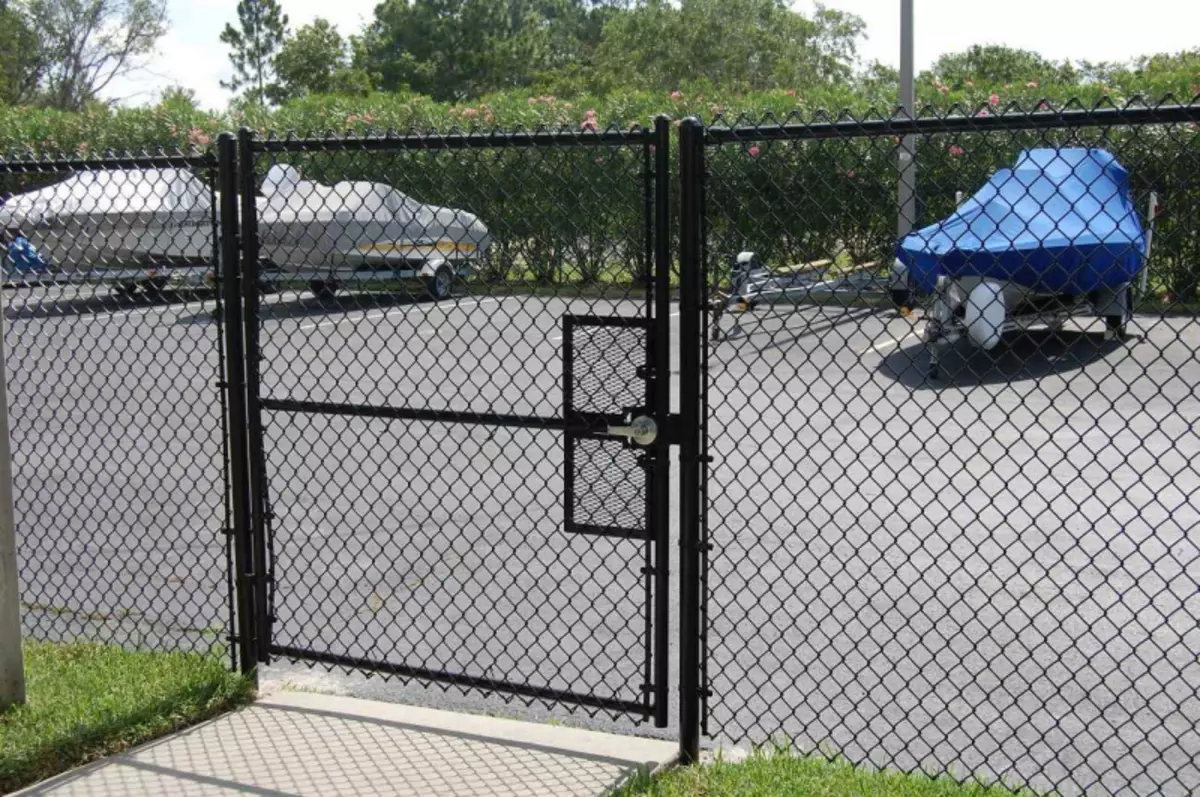
Wicket from the grid Rabits for the courtyard of a private house
Rabita wicket for giving
As you can see, the wicket from the chain grid is one of the most simple variants of the device of an element of a simple input group for the cottage or courtyard of a private house, which can be made by one person during the day with your own hands.