
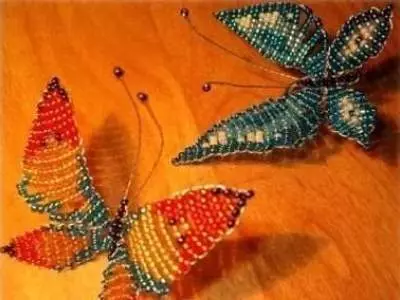
For a long time, the butterfly is present in many accessories: head decorations, pendants, earrings, on bags and more. After all, butterflies are one of the easiest and most beautiful insects that embody the purity and tenderness, beauty. Moths are very attractive, which makes masters do it yourself. So how to make a butterfly from beads? Many beginners it may seem a challenge, but if you use the instructions and resort to the help of needlewomen, which many of their work describe in blogs and on other sites, even for beginners it will not be a problem.
Even those who have never been engaged in beading and see the product for the first time, in any case will want to try to make such a decorative thing.
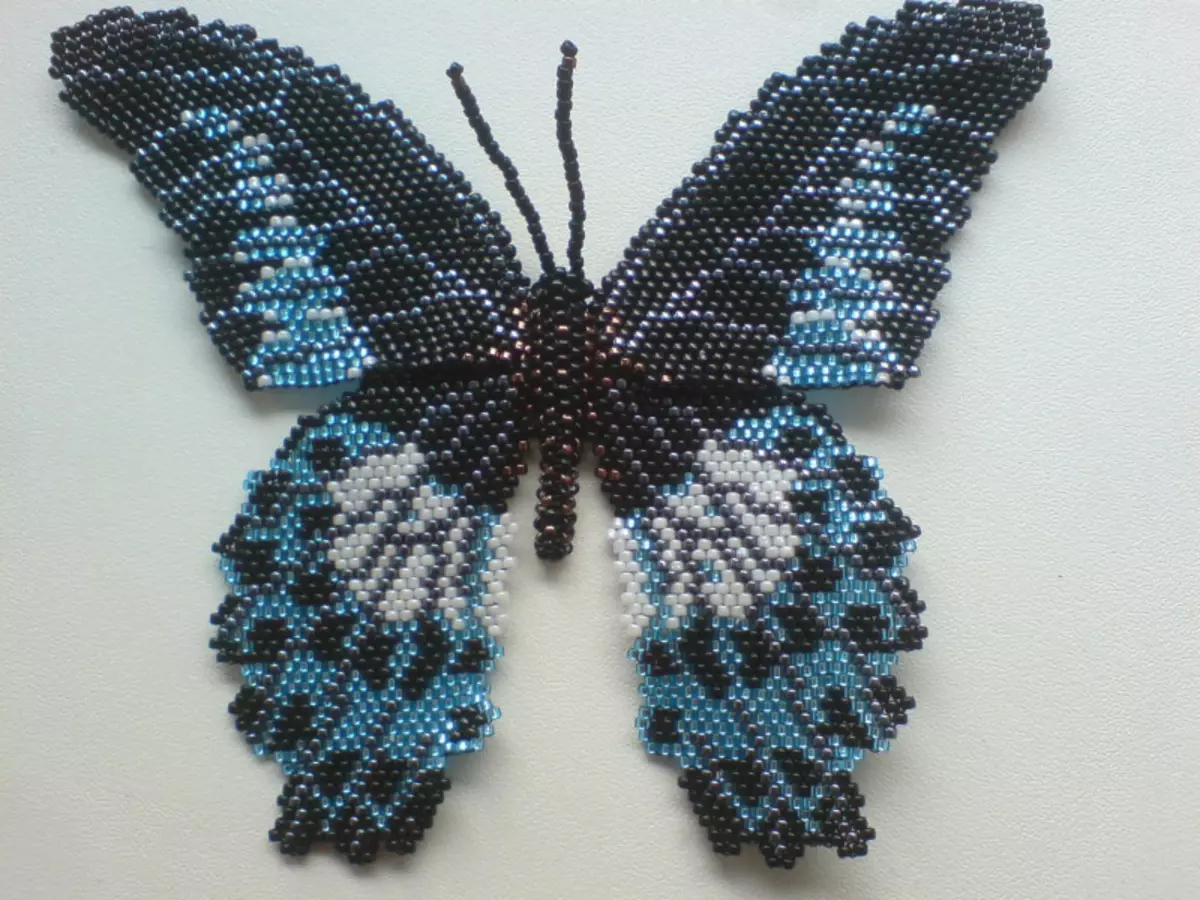
Multicolored moth
Many like butterflies that have a large number of colors, motley. And that is why this master class will help weigh the insect with beads.
In order to rush such a butterfly, you need to prepare the following tools:
- Beads at number 11 of different colors;
- Leske or wire;
- Scissors or nippers.
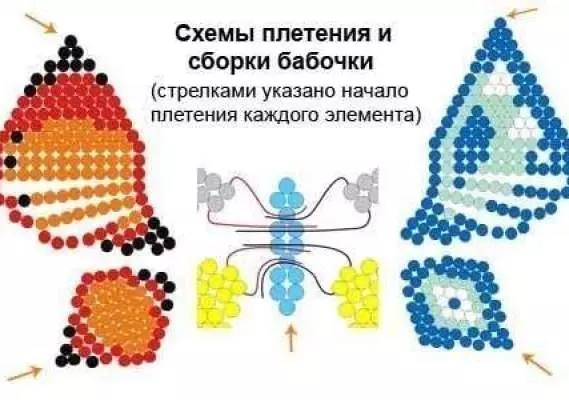
The scheme of how to evan the product with beads is provided below.

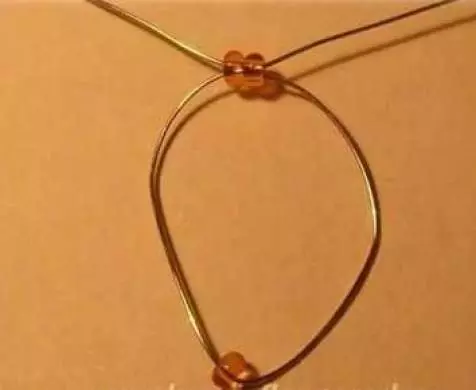
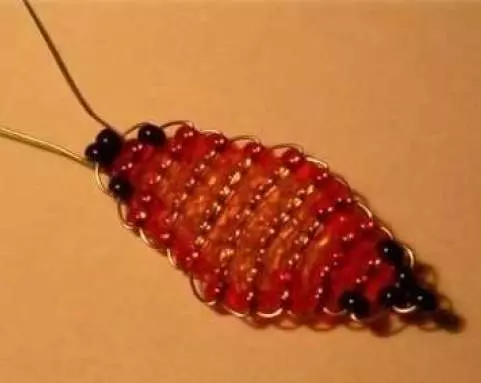
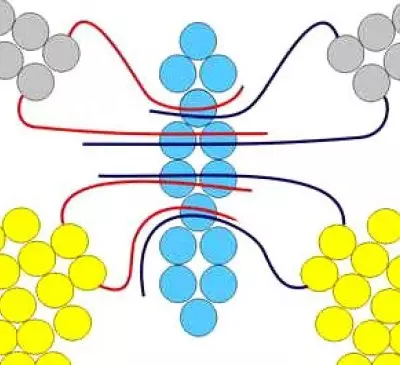
Wings need to be placed each separately. You need to start from the bottom wing. You need to take 60 centimeters of a wire or fishing line. We look at the scheme and, taking into account it we ride on the line, a wire bead and stretch it into the central part - this is the primary row of our butterfly. After you need to ride two more beads on the tip of the wire, the fishing line. Next, stretch through these beads the next end of the wire and delay - it will be the second row. Next, look at the scheme and weave. The second wing is made in the same way as the first.
When two lower wings are made, it is worth embarking on knitting those that from above. To weigh the upper wings, you need to cut off the wire or line in 80 centimeters long. Weave taking into account the scheme provided.
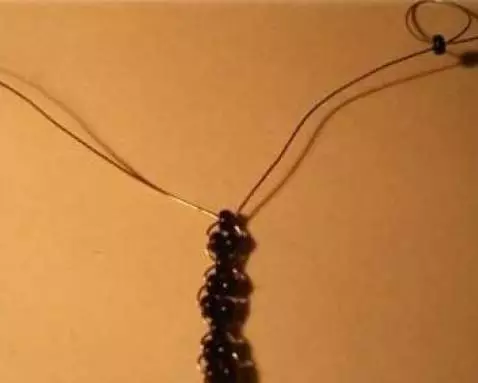
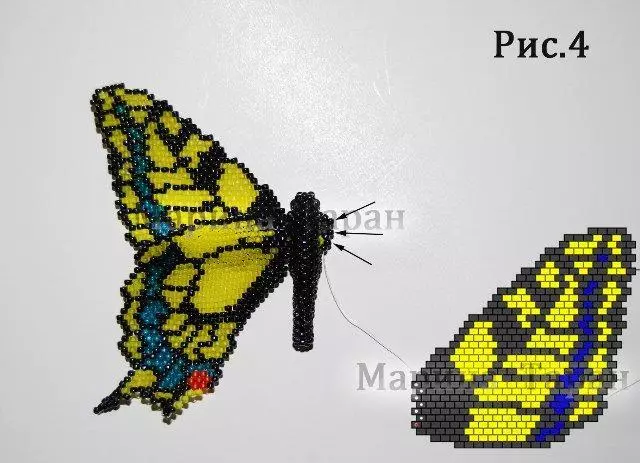
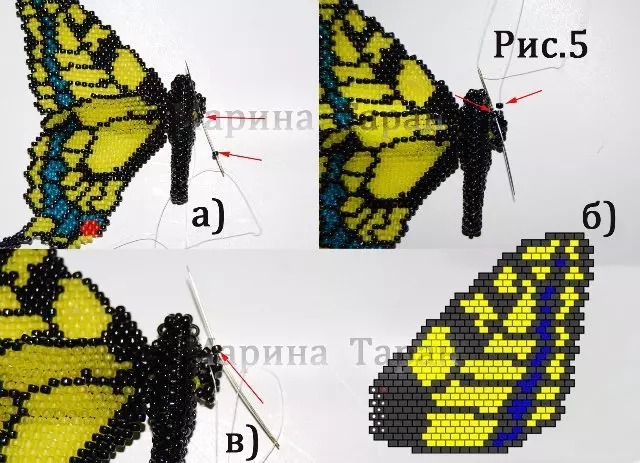
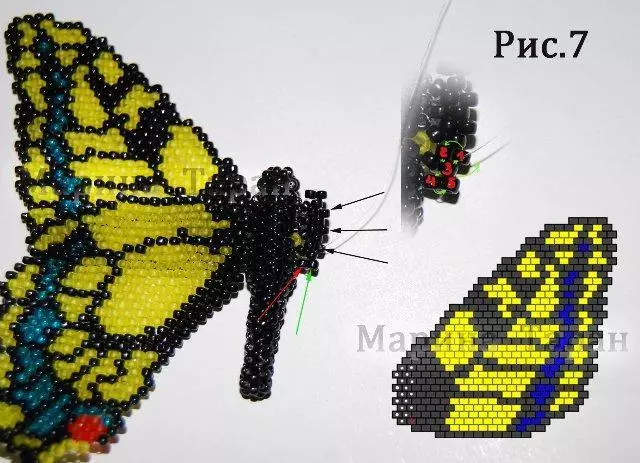
Now we proceed to weaving the body of our beauty. We look at the scheme and weaves as follows: 1,2,2,1,2,2,1,1,1, the remaining sections of the wire or fishing rods do not touch. On the tips of the wire we put on one base, so that the distance of 3 centimeters from the bead was formed, which was the last banner for the torso. Now we have a wire tip via a bead - it will be a butterfly mustache. All described in detail below using the photo.
It is very important to draw attention to that it is necessary to use larger beads to create a torso. This is due to the fact that through some beads will have to check the wire or the fishing line several times.
We start collecting all parts. We need to pass through two beads of the body to skip the wire or the fishing line, which are the upper tips of the lower wings, and already through the biserinka 4 row - the wings of the wings that are below. Through the 7 row beads, we carry out the top ends of the wings that are from above. After 2 beads 6 row - lower wire tips. All tips must be consolidated.
Article on the topic: Giraffe crochet with a scheme and description: Master class with video
When assembling our product, it is very important to follow the scheme and ensure that the wings are symmetrical to each other.
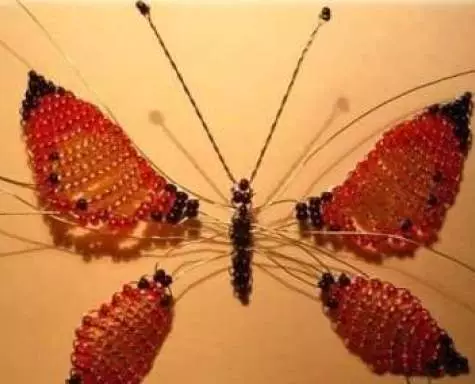
You can use any colors, because the shades are very characteristic of nature. And why don't we play them. Wings can be made more pointed or decorate somehow - it all depends on the imagination of the needlewoman.
Mosaic weaving
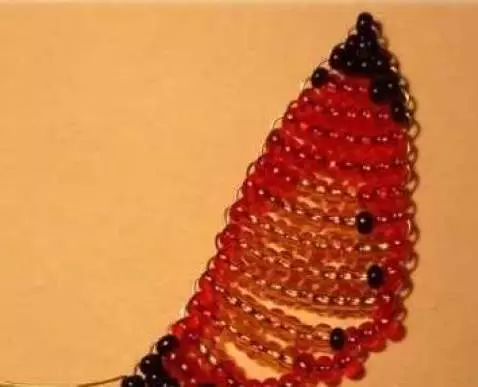
Many like butterflies made of beads, but especially products in which mosaic weaving were used. But not everyone can easily make such beauty. Therefore, in this master class will be provided with a step-by-step instruction in which it is described how this technique can be performed. But one more interesting supplement is non-smooth wings, and the edges are more skating, like real butterflies.
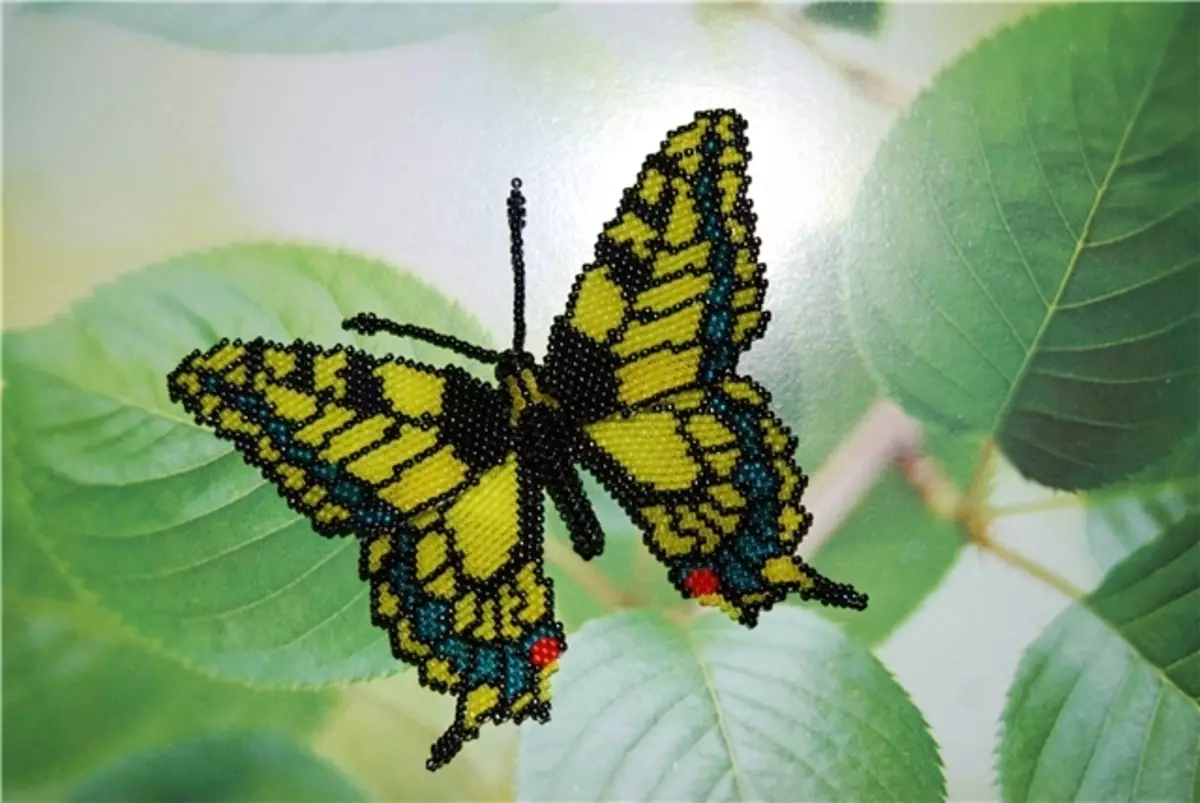
In order to make such a butterfly, it is necessary to take the beads of the filled colors: yellow, black, blue, red, we will weaken with the help of a fishing line, and need a needle.
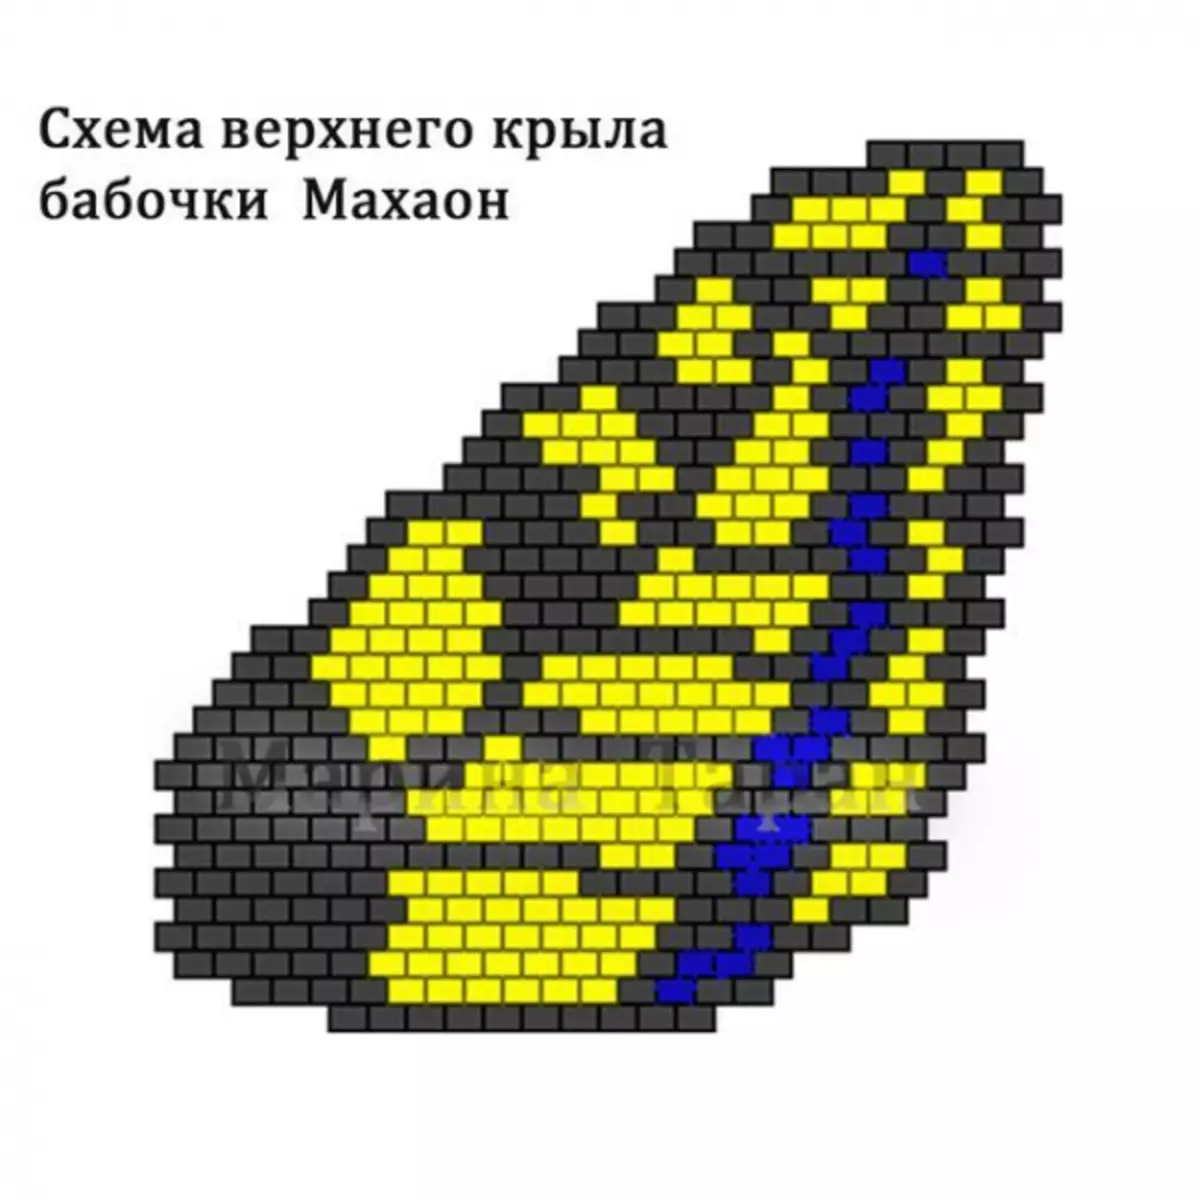
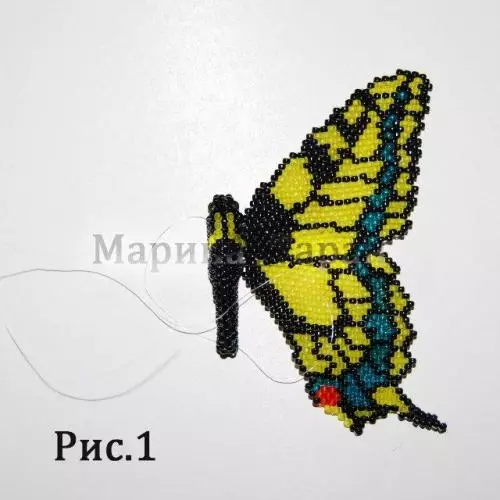
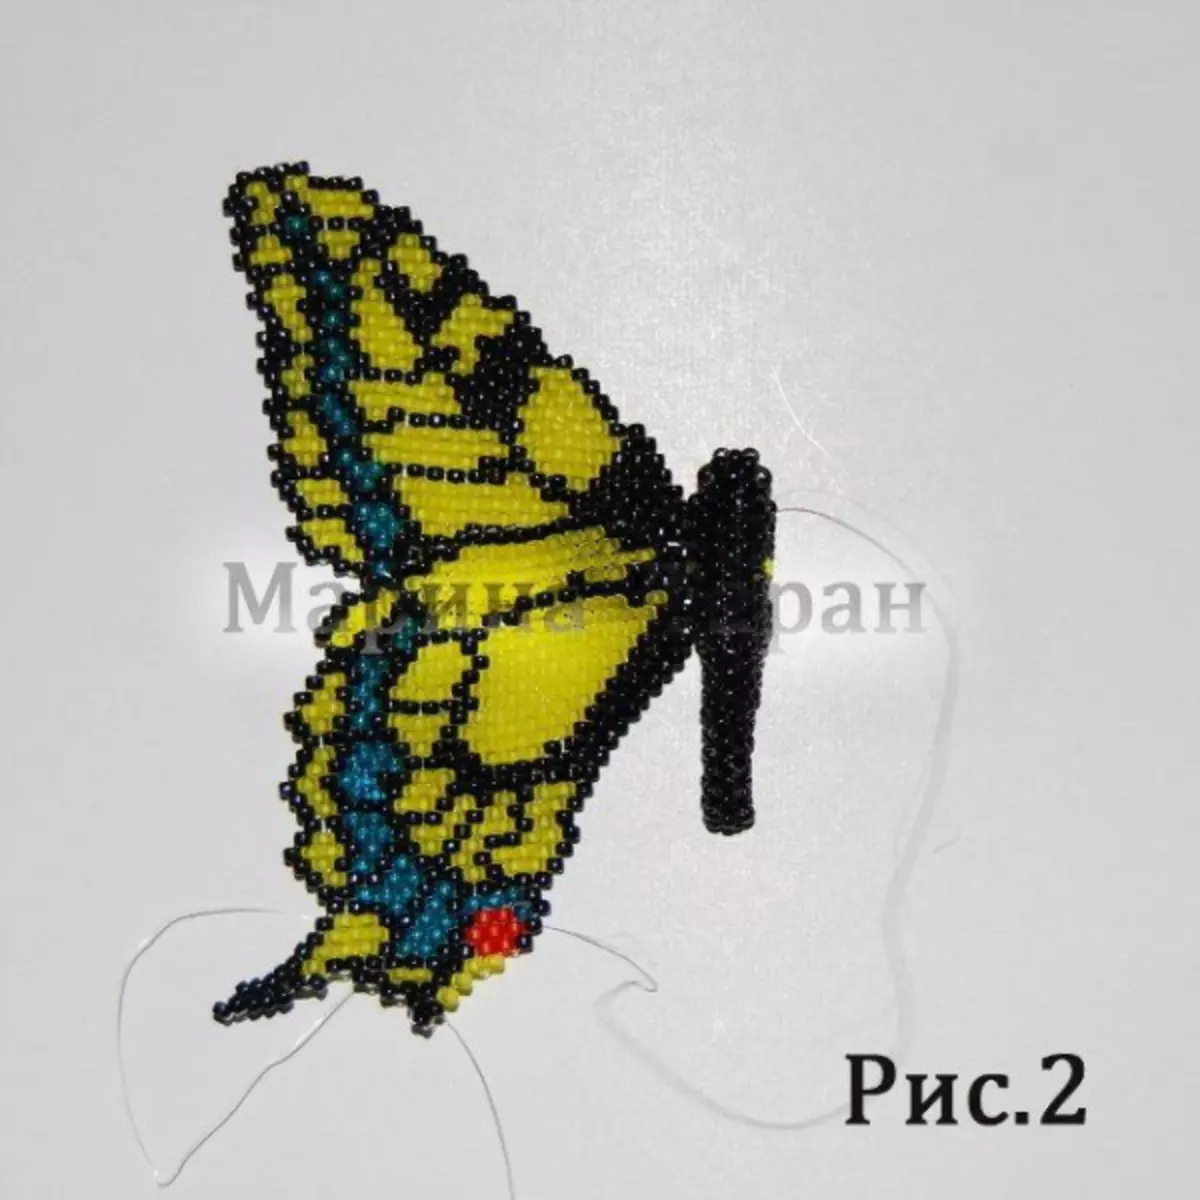
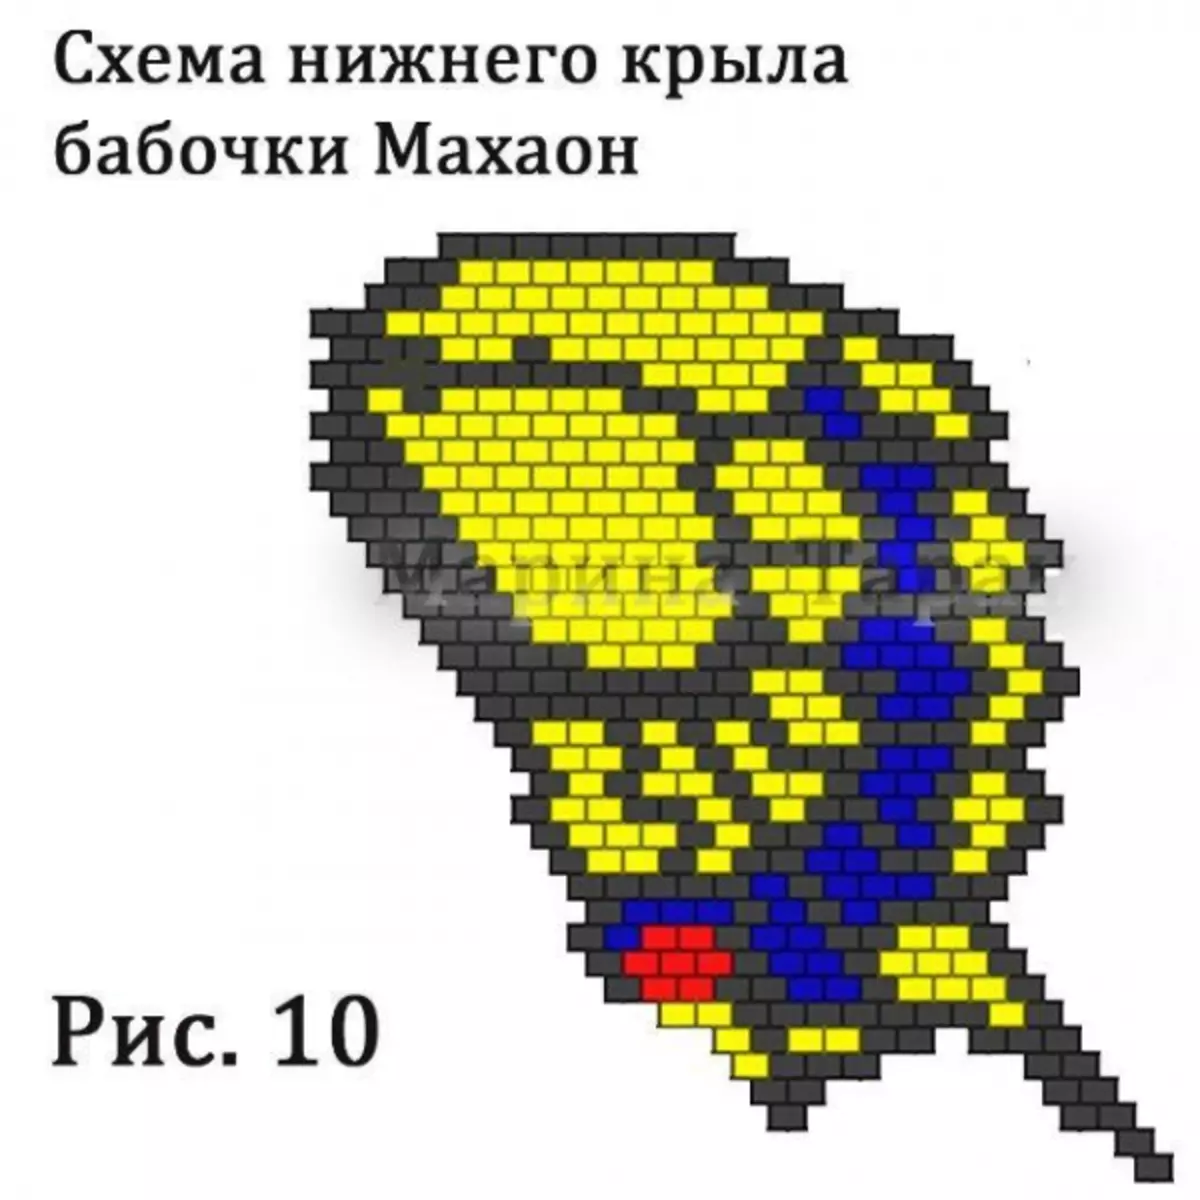
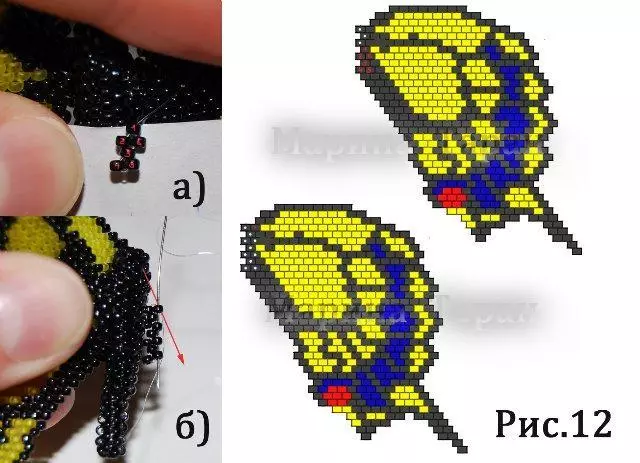
In Figure 1, the half of our butterfly is provided - the top, where you can clearly consider the pattern on the wing and the torso, but the bottom wing can be seen on the second drawing.
The root is right to do with the scheme when the drawing on the torso is in the upper part, but the left is when the figure will be below.
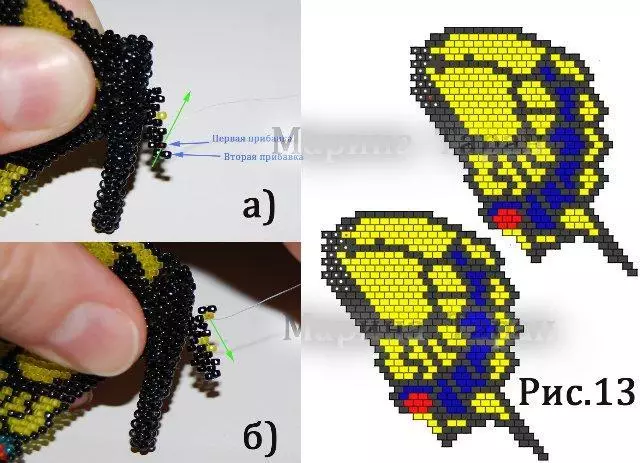
We make the first row, in which 4 beads on the fishing line, we attach to the calf (the body can be made like the first version of the butterfly weaving). Now we flash the needle in the first upper bead of the Taurus and collect the second row. Everything is shown in the figure at number 4. Now we do the third row - we gain beads and skip the needle through the last beads of the second weaving line - drawing number 5. Next, you need to take 4 row beads and now stretch the fishing line through the next first row bead. We look at Figures 5 and 6. Then the fishing line is introduced in 4 a bead 3 row - Figure 5 V.
Article on the topic: Little las Amigurumi
Now we take 2 beads, on the scheme are located above the bead, with which it was already out, where the first is a 4-row bead, also the second - the second row bead, we look at the pictures 6a and again stretch the line in the same bead again, as in Figure 6.
Now make 4 row: look at the drawing at number 7. Green arrow indicates a simple set. Now go to 5 row. We take four beads, and then two more is an ordinary increase at the end of a row. Now we take the fiber of the eight - we look at Figure 8 A, the bead and which should leave the line, is indicated by red and so on the following drawings. In 6 row - 4 beads, but the fifth is recruited as shown in 5 drawings, and after 2, a simple set to look at the image 8 b.

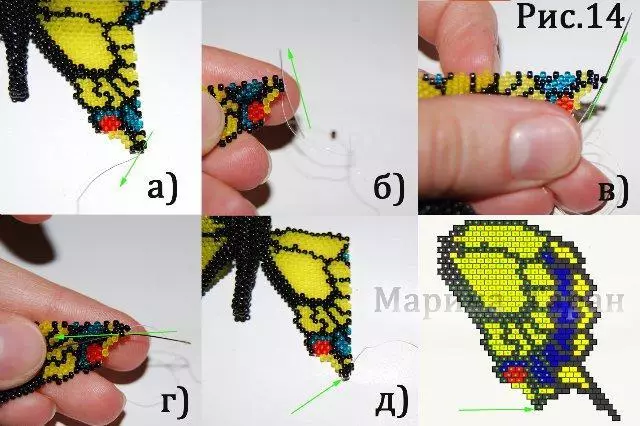
We proceed to 7 row: we take 4 beads, and the 5th must be scored as indicated in Figure 5, and bring the line into the green bead. And on this bead, we make a conventional absorption. And now bring the line eight in the blue color bead and again the rise is ordinary. And we leave again eight in a bead marked with red. Again, a regular increase - we look at the drawings of 8 V. And the eighth row is done, based on an image of 8 g, and the ninth - 8 d, the tenth - Figure 8 e. Further, we look at everything as fit according to the schemes, and the additions are made solely above or under, not otherwise.
Now we make the bottom ward. To do this, we derive the fishing line over the first bead of the first row.
Weave the wing under the top. To the butterfly body, the bottom ward will be attached by two beads. The fishing line is displayed as indicated in the picture. You need to drive the second row bead and output the first row through the secondary bead. We recruit 5 beads, watch 12 drawings, then stretch the fishing line to the third bead, take the sixth and deposit in the first - 12a. Further weaves, we take the fishing line in the eight of the most recent row beads.
Article on the topic: Fences with inscriptions - Weaving schemes and how to weave
We make another row, taking into account the scheme - three beads, and in the end of the row you need to make the usual increase and eight remove the fishing line and the last beads. In the diagram, this process is indicated in red, the increase in Figure 13a. And so they see the next row and again the increase - 13b. And so on, taking into account the scheme.
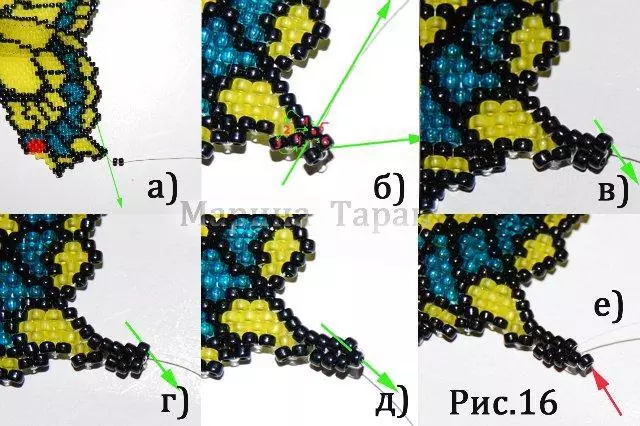
Already when the first part will be woven, we begin to weave the second, look at Figure 16. You need to withdraw a logging and dial 2 beads - pictures 16 a. After you need to withdraw the line back to the same bead and further output from the beads from 1-6, we look at the picture 16b. Again you need to take 2 beads and output as indicated in Figure 16B. And again 2 beads, as in Figure 16. Next, follow Figure 14 and remove the fishing line, as shown in the image 16D. You still need one bead and back the fishing line in the same bead, Figure 16.
That's ready butterfly, it remains to make a mustache, which can be like beads, so with a wire.
Video on the topic
This article provides video lessons with which you can learn to weave butterflies from beads.