
Processing of sawn timber, pockets, manufacturing of technological holes and recesses, wood carving - all this can be a device as a mill. Moreover, it can not only professional equipment, but also relatively inexpensive manual copies. But the work by a manual milling tree requires knowledge of some techniques and rules. About all this - in the article.
What is a mill and what is it needed for what
The mill is a device for processing a tree or metal. They process flat and shaped surfaces, also forms technological recesses - grooves, comb, removing under the installation of loops, etc. By the installation method, there are stationary machines (there are different types for performing different operations), and there are manual milling mills. Manual electrifresters are a universal tool that allows any operations. To change the operation, only you only need to change the nozzle - mill and / or its location on the details.
Machines are used mainly at mass production. The milling cutter is installed motionless, and the workpiece is moving - according to a certain trajectory. When working with a manual milling, the situation is the opposite - fix the workpiece, move the milling mill. When processing large volumes of the same details, it is more convenient to fix the hand mill on the horizontal surface by making something similar to the milling machine.
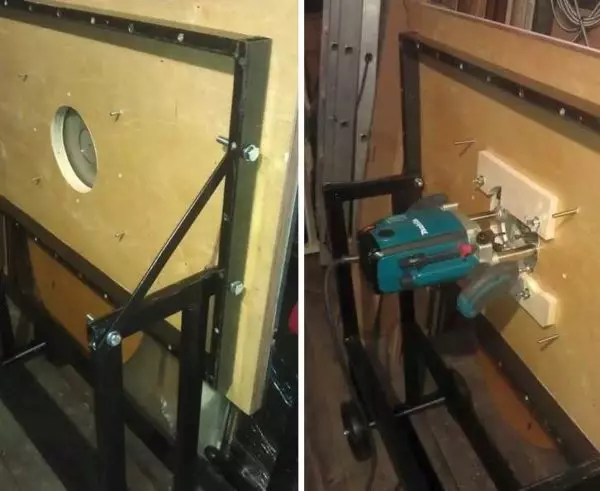
Homemade milling machine - horizontal plane with a hole in the midst, to which the hand mill is mounted below
There are many different types of milling machines, but for a home master or for semi-professional use more universal fit. They are installed different cutters and special devices, which allows you to perform any operations. Just for their execution requires more time and skill than on a specialized machine.
What can be done with the help of a hand mill:
- grooves and grooves of any shape (curly, rectangular, complex forms);
- Through holes and blind;
- process edges and ends (can be made straight, curly);
- Cut compound details;
- Apply inscriptions, patterns, drawings on the surface;
- Copy details.
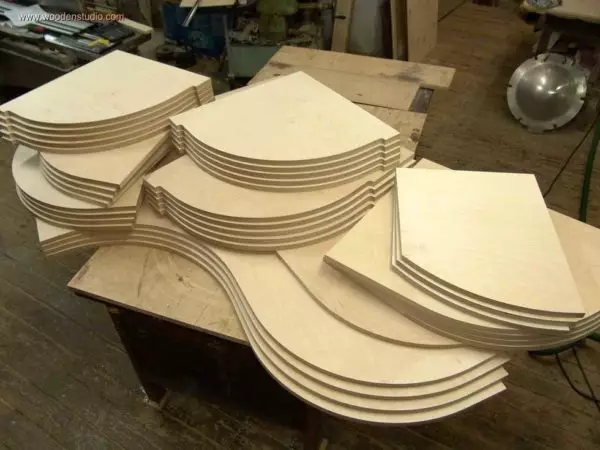
Copy parts - one of the features of the electric power
Such operations are used in carpentry, in the production and assembly of furniture. Even to cut the lock or loops on the door - it can also handmade milling mill. And it will make it much faster and elegant than similar operations, but performed using a hand tool.
Preparation for work and care
To deal with the principles of working with a manual milling, it is desirable to have at least a general idea of its structure and the purpose of the part.Building and appointment of main nodes
It consists of a manual electrophower from the housing in which the motor is hidden. From the body there is a holder where the collet is inserted. Canggi is small adapters that allow the use of cutters with shanks of different diameters. The milling cutter is inserted into the collet and delayed with the clamping bolt (on some models is fixed with the button).
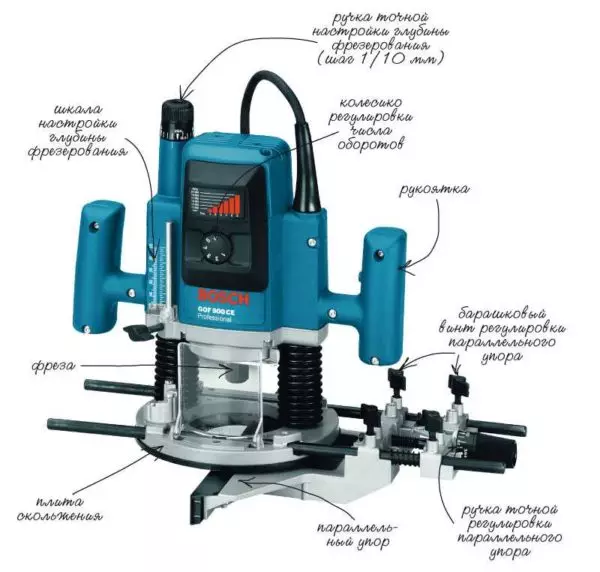
Main nodes of manual milling and their purpose
Another important detail of the manual milling is a platform that connects to the housing using two rods. The platform is usually made of metal. On the bottom side of the platform there is a sliding stove. It is made of a smooth material that ensures the smoothness of the tool when it is moved across the part.
Setting the parameters of the freesomeer occurs with:
- Pens and shakes setting depth of milling. Setting step - 1/10 mm.
- Adjusting the number of revolutions. Changes the speed of rotation of the cutter. To begin with, it is worth trying to work on small or medium turnover - it's easier at first to lead the instrument.
It is also necessary on the case there is an on / off button, there may be another blocking button. Here, briefly all the nodes. In addition, there is still quite convenient parallel emphasis. It may be simple or with the possibility of adjustment - you can slide the cutting portion to the right or left.
Care
From the factory, the equipment goes in lubricant, so in principle, no additional operations are required. But it is necessary to support equipment in cleanliness - it is necessary to consider dust more often, change with lubrication if necessary. Lubrication is needed for moving parts - guides. Liquid aerosol lubricants can be used (preferable), but conventional Litol-type consistency types can be used. But, when using thick lubricants, you will have to periodically delete them, as chips stick and dust, it becomes difficult to work. With the use of light aerosol compositions, there is practically no nagging.In order for the sole easily slid, you can lubricate it with silicone lubrication. This is especially useful when working with templates. Then the tool literally slides, goes smoothly and without jerks.
Rotational speed
Work manual wood milling, composite, plywood, etc. Begins with the placement of basic parameters. First set the speed of rotation. It is selected depending on the selected cutter and stiffness of the material and the characteristics of the millingrer, so that accurate recommendations must be signed in the instruction manual.
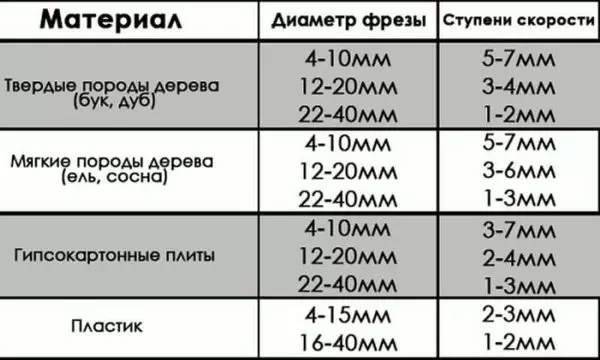
Approximate processing speed when using different cutters
Filling cutter
Next is installed milling cutter. On most corporate cutters, there are tags for which you can navigate. If they are not, then the minimum must be clamped at least 3/4 of the shank length (cylindrical part). Insert the cutter into the required depth (if necessary, after installing the collet - the adapter cartridge for different diameters of the cutter), fasten the shaft, tighten the wheel key until it stops (but do not drag).
Work manual wood milling and other materials begins with milling cutters
If the model is simple, two keys are needed. They do not provide a shaft blocking mechanism, the second key will need to hold it. In the middle class devices there is a lock button. Pulling it, tighten the carkin key. In expensive models besides blocking, there is a ratchet in which you can navigate.
Setting the depth of milling
Each model of a manual freresser has a certain departure - this is the maximum depth to which this unit is able to process the material. The depth of milling is not always required to be maximum, then its adjustment is required. Even if it is necessary to mill to a greater depth, so as not to load too much and the unit, you can smash it on several levels. For this there is a revolving emphasis. This is a small disk under the barbell with a certain number of stops of different heights - legs. The number of legs - from three to seven, and more - does not mean better. It is much more convenient if there is the possibility of adjusting the height of each leg. This shows the ability of the equipment. To secure the revolving stop in the desired position there is a retainer, which is usually made in the form of a checkbox.
The rewarding depth of milling on a manual milling happens in several stages:
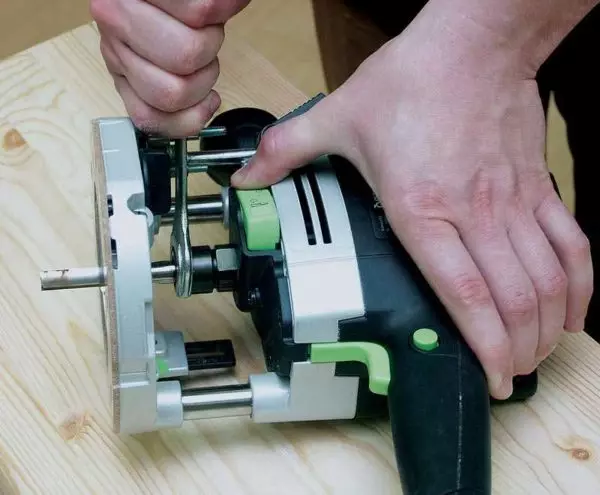
- The tool put on a flat surface, free the clamps, press the cutter to overflowing into the surface.
- Release the revolving focus, reloading its lock.
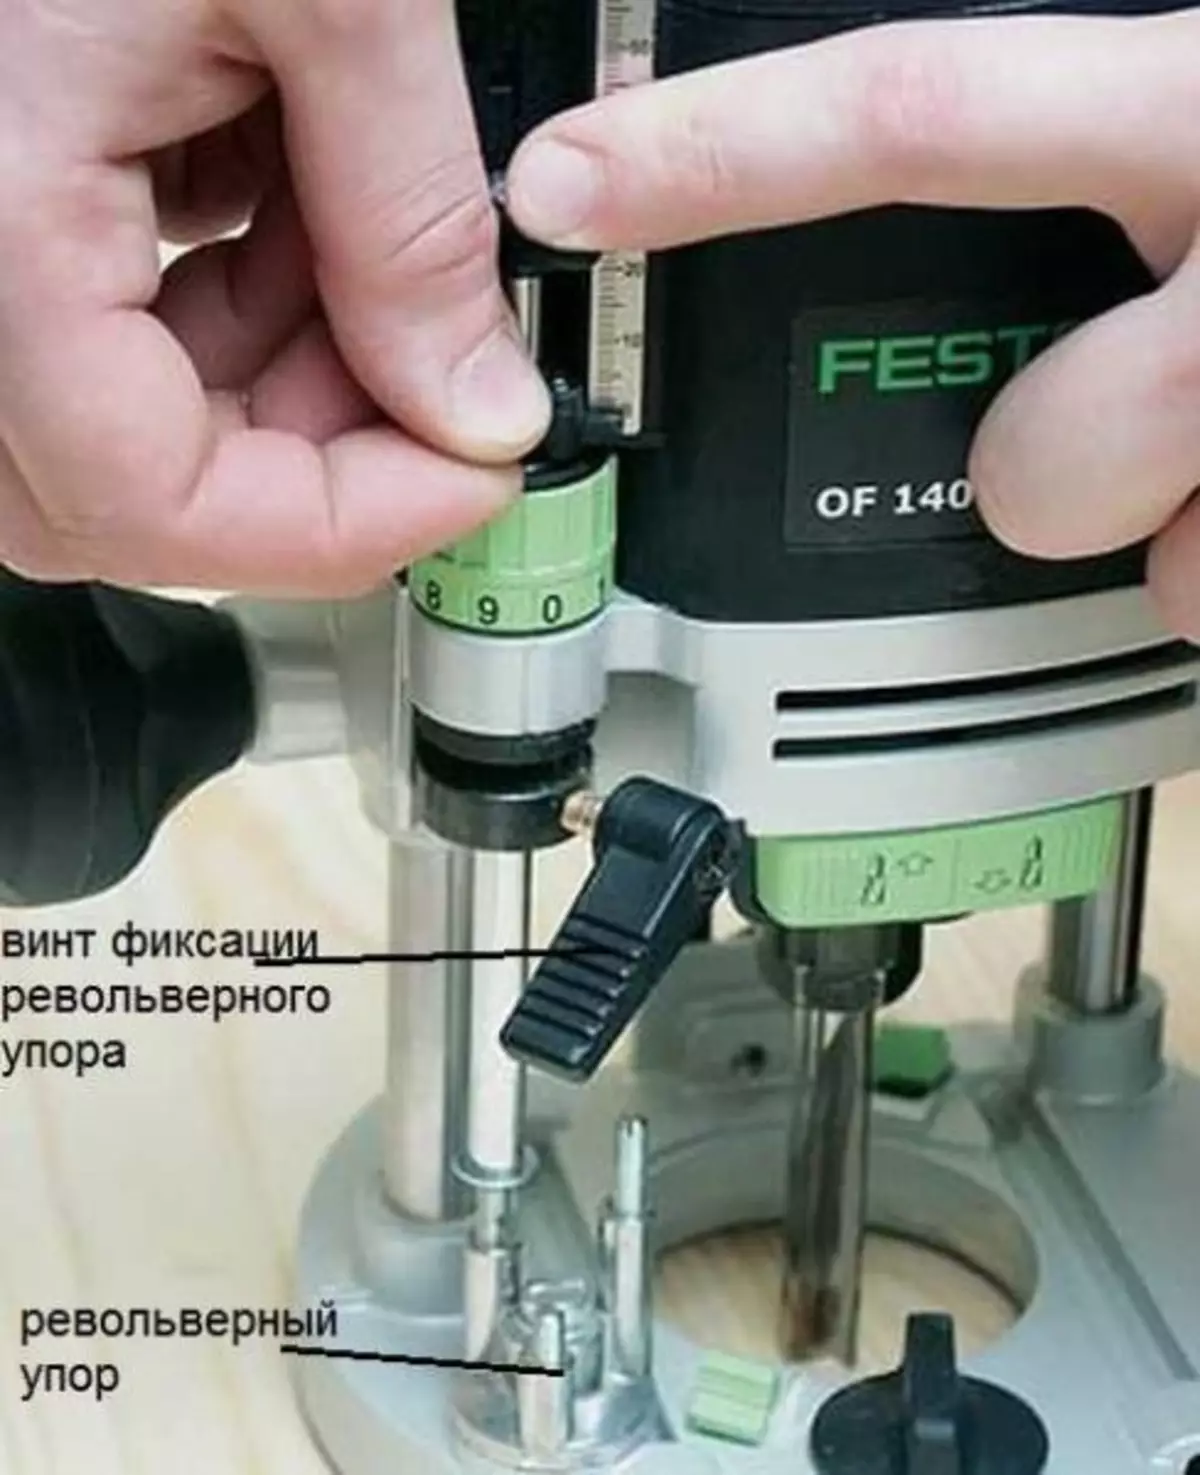
Choose the leg of the revolving stop
- Depending on which milling depth is needed, the leg of the revolving stop is chosen. The disc with the legs rotate to the desired position.
- The screw is not fixed, but hold the bar with a finger, move the movable pointer so that it coincides with zero (in the photo above).
- The bar is raised to the milling depth, after which the record of the revolving stop is lowered (in the photo below).
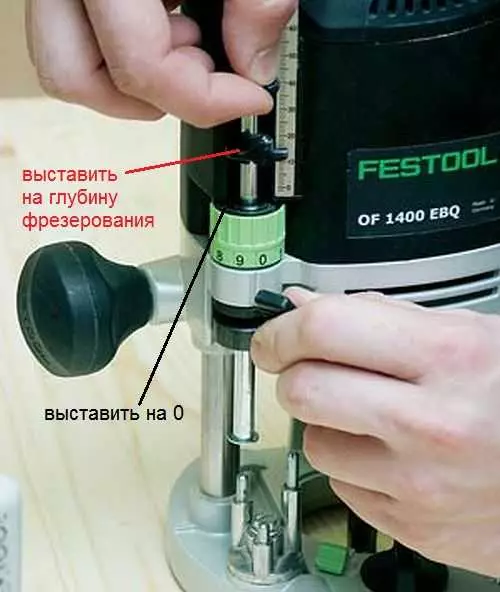
Exhibit depth on scale
Now, when installing on the workpiece and jamming on the top, the cutter will enter the detail to the exhibited distance.
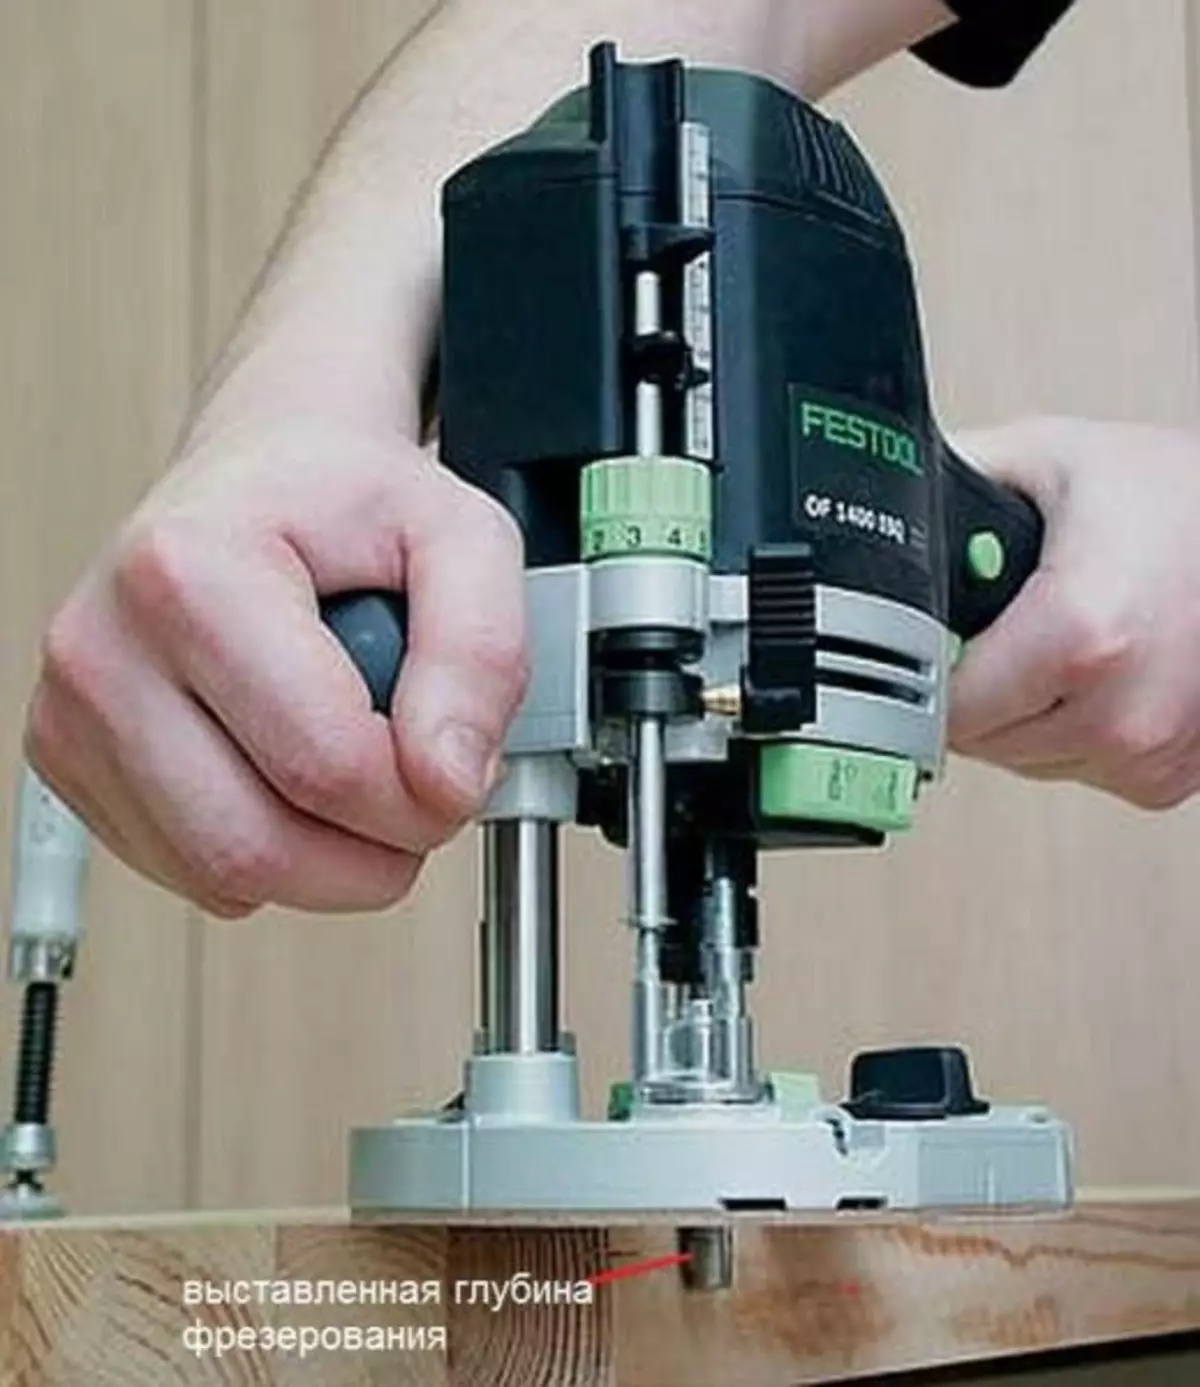
Now it will be a blank for the desired depth
On good freshers there is a wheel of accurate adjustment of the depth of milling. It allows you not to knock down the settings (you do not need to repeat the entire operation) Correct the depth, albeit in small limits (in the photo above it is a green wheel).
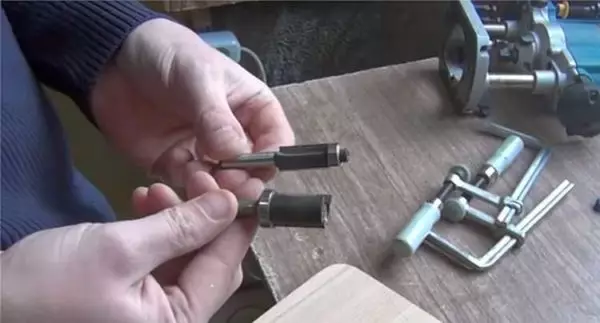
Cutters for manual milling
Cutters are a cutting tool that processes and forms the surface. They consist of a cylindrical part, which is clamped by the colors in the hardener of the unit, and the cutting part. The cylindrical part may be different diameter. Choose such a collet under which there is in your device. The shape and location of the knife of the cutting part defines the type that the wood receives after processing. In some mills (for edges) there is a persisting roller. It sets the distance from the cutting surface to the material being processed.
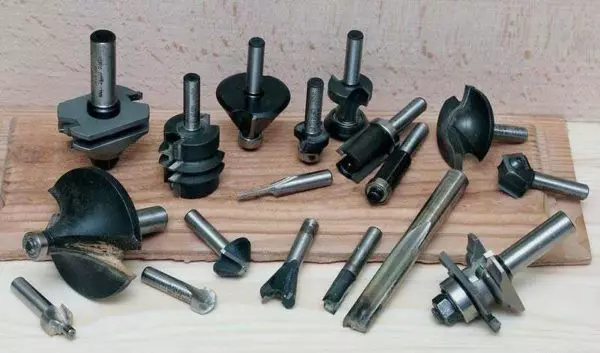
The work of the tree with a manual milling tree involves the presence of a certain amount of cutters. This is a small part of what exists
Make cutters from different metals and alloys. For handling soft wood - pine, spruce, etc. - Use ordinary nozzles (HSS), for hard rocks - oak, beech and others - from hard alloys (HM).
Each milling cutter has a certain resource and the maximum speed on which normal operation is provided with minimal beating. Excess recommended speed is not worth it - this can cause a mill breakdown. It also makes no sense to sharpen the mill, if it fastened. Do it on special equipment (worth about $ 1000), where you can set the desired sharpening angle. Manually nothing will succeed. So that focused easier (and cheaper) replace, as they are relatively few.
Popular species
There are some types of pumps for the millingrer, which are used most often.
- Edge. Serve to handle lateral surfaces of blanks. With their help, you can make smooth or curly edges, you can form notches and spikes for docking parts. It is this type of cutter that happens with the bearing at the end - it rests on the part, asking the distance from the edge of the workpiece to the cutter.
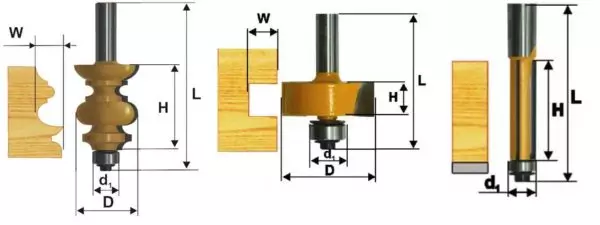
Some types of edges
- Groove. Serve to form grooves and recesses of various shapes. They are:
- Spirals (a) are mainly used to form technical grooves, for example, a joint / groove compound;
- Gallery (b, e) - to decorate the surface with the help of grooves of different shapes, can be rounded, v-shaped or figured;
- Swallow tail (B, d) - to form a groove in the form of a trapezium, this groove is used for an open and hidden connection of parts;
- Shaped (D) - with their help decorate the surface with grooves of complex forms.
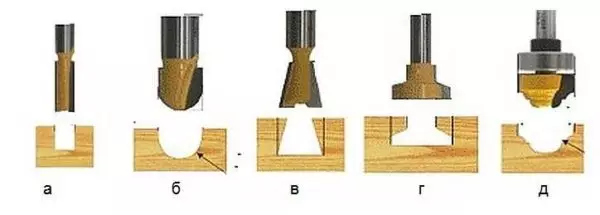
Slip cutters - for the formation of recesses anywhere
There are malls simple, formed from a single piece of metal, there are typical. Sets have a shank - the basis, some set of different cutting planes, a set of washers of different thickness. From these parts you can independently form the required relief.
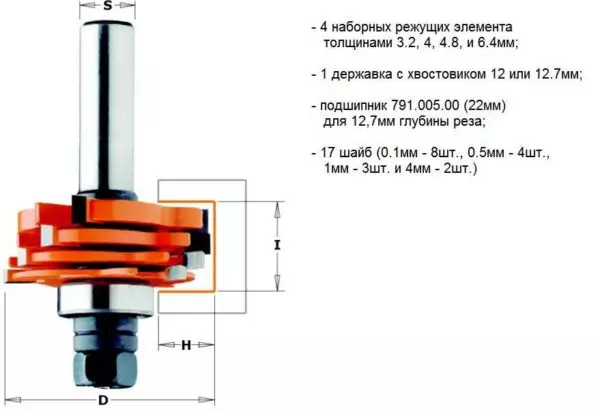
A set cutter - a set of several cutting surfaces and washers, from which you can make a mill of the required form
These are the most popular types of cutters, but in fact there are a lot of them. In addition to different diameters of shanks, there are various diameters of cutting surfaces, their height, the arrangement of knives relative to each other, etc. In general, for milling with their own hands, it is usually required about the five most chassis cutters. They are usually present constantly, and the rest are purchased for specific types of work.
Principles of working with manual milling
The eletcroter is a rather dangerous thing - rotating at high speed sharp cutting parts can cause serious injuries, and the chips flying from under the instrument too. And at least on most models there is a protective flap, reflecting the main stream of chips, the safety glasses will not interfere. So the work with a manual milling wood requires attention and concentration.
One of the models - with a connected vacuum cleaner to remove chip
General requirements
The work with a manual milling tree will be easier and more enjoyable, the product will turn out normal, if you perform some conditions:
- The mill must be acute. It is difficult to estimate this parameter "to the eye", therefore it is necessary to navigate on working moments: if the motor is greatly heated and / or the treated surface is not smooth (they say "dirty"), then the cutter stupid. It must be replaced.
- The processed billet should be firmly and securely fixed. You will not get anything good on the jumping and twitching workpiece.
Billets should be firmly fixed. Best use clamps
- Small depth of removal in one pass. The more wood you shoot in one pass, the greater the load on the cutter. This leads to a decrease in the speed of rotation, which increases more increases the load. Next - in a circle. Because if you need a high depth of processing, it is better to break it into several passes.
- When replacing cutters, you need to de-energize the unit. And not the switch, but remove the cord from the outlet. This will eliminate the possibility of involuntary inclusion.
Not such complex requirements, but their implementation is a guarantee of good work and safety. Well, the main requirement - the milling mill must be carried out smoothly, without jerks, jerks. If a strong beating is felt - change the frequency of rotation. Most often it must be reduced, but in general it is necessary to focus on the manufacturer's recommendation (there is on the package).
Edge Processing - Working with Template
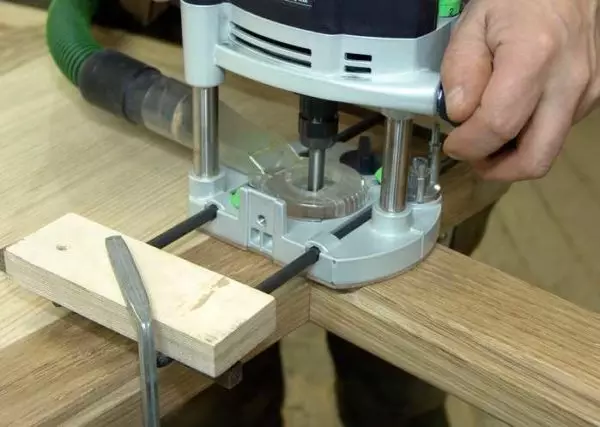
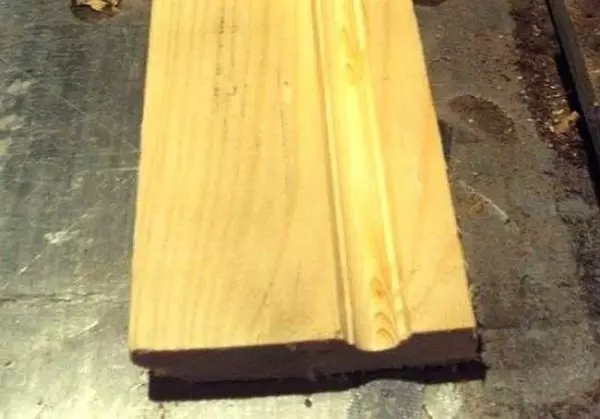
Processing the edge of the ordinary board is easier and faster on the flight, but if it is not, the manual milling mill will also cope, that's just takes it more time. There are two ways: without a template and with a template. If this is the first experience with a milling mill - it is better to use a template. When processing the edges of the boards, straight edge cutters are needed, and most likely two - with the bearing at the beginning and at the end of the cutting part (in the photo).
For the edge processing - make a smooth surface
As a template, you can use the already processed board or, for example, the construction rule. The length of the template must be slightly larger than the length of the workpiece - on 5-6 radius cutters on each side. This will give the opportunity to avoid the "Viska" cutters into the material at the beginning and at the end. One important point: the horizontal plane (perpendicular to the treated) must be smooth. In any case, its curvature should not be greater than the gap between the bearing and the cutting part, otherwise the cutter will touch the pattern, and this is very bad - it becomes non-ideal and inflicted irregularities will appear on other copies.
If the width of the part no longer cutting edges
The cutting part of the milling mills there are different lengths, but the more cutting part, the more difficult it is to work - more efforts have to be applied to hold the aggregate. Therefore, it is easier to start with a middle cutter. The processing order of the edge with a mill (with a template) is:
- The template is installed so that it sets the required smooth surface - retreating the desired distance from the edge.
- The workpiece with the template is securely attached to the table or any other horizontal surface.
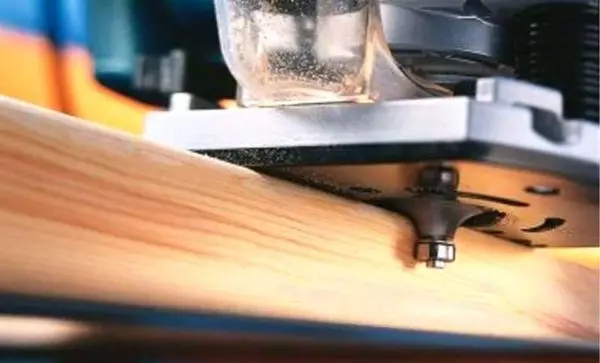
- Install the mill with a roller in the middle part. It is exhibited so that the roller rolling on the pattern, and the cutting part is the detail. For this, the milling is installed on the fixed blank with the template, they put the mill disconnected from the network, adjust the position of the nozzle, clamp it.
- Install the mill into the working position - they lower the case, clamp.
- Include a manual milling machine, lead them according to the template. The speed of movement is determined by the depth of processing. You all feel yourself.
- And how to drive a mill? Pull or push? It depends on which side you are standing. If the workpiece on the left - pushing, if on the right - pull. You can also navigate on the departure of chips - it must fly forward.
On this, actually everything. After the passage finished, evaluate the result, remove the clamps.
This, by the way, is still a way to take a quarter along the edge of the workpiece or in some part of it. To remove a quarter, exhibit the cutting part so that the processing is a given depth.
Filled a quarter on the furniture facade
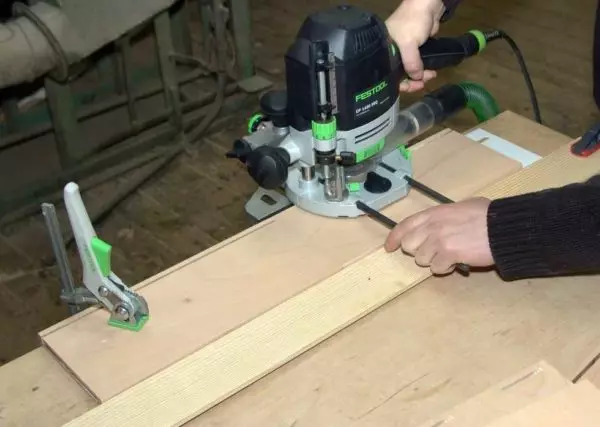
Changes the cutter on the curly (gallop) and shifting the template or using the stopping stop, you can apply a longitudinal drawing on the workpiece (in the photo below).
The principle of working with a manual milling
In general, this milling technique is quite comfortable. For the first steps in the woodworking - this is the best way to "fill the hand", then you can even raise the edges even without guides.

Smooth edge without guide requires experience
Width more cutting length
What if the thickness of the workpiece is not longer than the cutting part of the cutter? In this case, the work of a manual milling tree continues:
- Remove the template, pass the same cutter again. Only in this case the template will be the processed part of the workpiece - the bearing will roll on the only part of the part. Mill rearrange so that you can process as much as possible. Strongly to move to you will not let the departure of the holder, but some part will still turn out.
- After that, we take another nozzle - with the bearing at the end, the workpiece turn over so that the processed part is below. Fasten on the table with clamps. The nozzle with the lower roller is installed so that the bearing is rolling over the treated part. Thus, you completely copy the already processed part.
Bearing roll over the treated part, the cutting part levels the rest
Now the edge is completely processed on the one hand. If necessary - repeat with the second party. In general, in order to master the work with a manual milling tree, a few "draft" blanks will be required. Choose from those that it is not sorry to throw away - at the first pores of the shoals will be much, then gradually learn.
Getting a figured and curvilinear edge
If you need not even, but a rounded or any other shape of the edge, you have to look at the state of the existing edge. If the billet is more or less smooth, take the necessary edge milling, install it and process the surface, as described above. If the surface is too curve, it is first adjusted to a normal state, and then milling.
Rounded edge
It is necessary, since the roller of the bearing is rolled over the surface and if there are flaws, they will be copied. Therefore, act consistently - first drop, then - give the curvature.
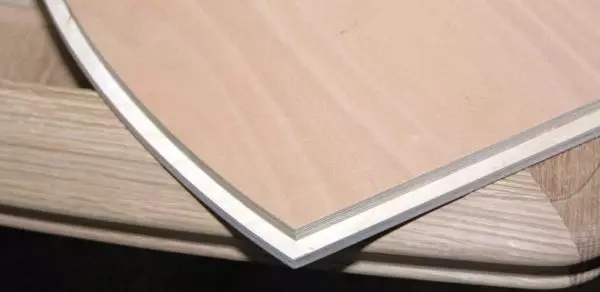
If the nudna is generally a curvilinear surface - the pattern is cut out. The drawing is applied on the phaneer with a thickness of 8-12 mm, first it can be filled with an electrolybiz, because the edge to bring to the perfect state by the milling line.
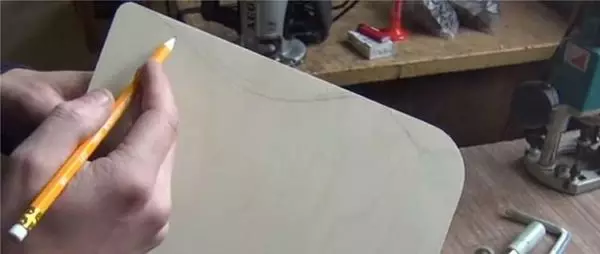
On the plywood draw the desired drawing
In this case, too, we will have to work with a mill, but so far without a template. When the surface is perfect, the template is fixed to the workpiece and further described above the work with a manual milling tree. Only one point: if you need to shoot in some places you will need a large amount of material, it is better to do the jigsaw, for example. Otherwise, the milling cutter fastens.
Video lessons for working with manual milling
When installing doors, it is necessary to cut the loops, how to do with the help of a mill - in the next video (there is also about how to make a groove, for example, under the installation of a good).
How to make a homemade milling machine from laminate samples (can be plywood) and how to make a thickening connection for boxes (tables, for example) - in the next video
The work by a manual wood milling line is well shown in the following video, but it is in English. Even if you do not know English, do not regret the time, look. Many operations will become clearer.
Article on the topic: How to install track lamps