
Wisteria, or Visteria, is a liana of incredible beauty. Of it form whole gardens-tunnels. The most popular of them is the "Visteria Tunnel", which is located in Kavatati Fuji, Japan. However, with all its beauty, she is poisonous, so its bark and seeds should not be available for animals and children. Again, and this seemingly a negative property bears favor, because phytoncides, secreted by glycine, are a powerful antibiotic, which suppresses a tuberculous wand. Probably, therefore, Visteria is a symbol of protection, healing, youth. Given the symbolism of the plant and its dangerous properties, the best option for the house will be wisteria, made with their own hands. Just in the article will be given beading of wisteria, the master class includes several variants of colors and technician.
In lilac tones
Materials and tools:
- Beads of white, light green, dark green, light pink and purple colors;
- wire with a diameter of 0.3 mm, 1 mm (branches) and 3 mm (trunk);
- Bowl for base;
- gypsum;
- White and blue gel candle;
- Decor at will.
Next follows a description of each stage with a step-by-step photo.
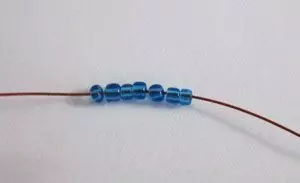
We start weaving with the covers themselves. On the middle of the segment of a thin wire with a length of about 90 cm we ride five beads of purple and form a central looper for three turns.
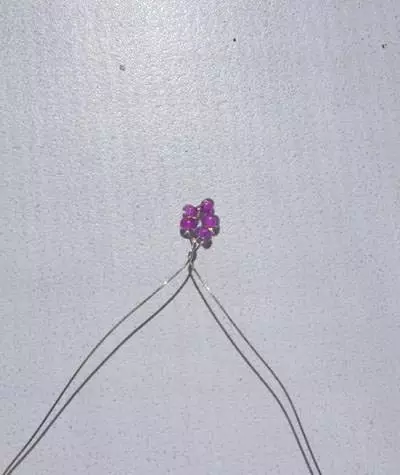
We still leave one end of the wire, take the second. We ride 6 purple bisper and twist the loop. The following two hinges will consist of 8 and 9 bispers of the same color, respectively.
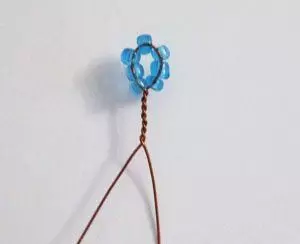
The fifth shell is 3 purple beads, 4 pink, 3 purple. Sixth - 1 purple, 10 pink, 1 purple. Seventh - from 14 pink bispers. Eighth- 5 pink, 5 white and 5 pink again. Nine - consists of 16 white beads.
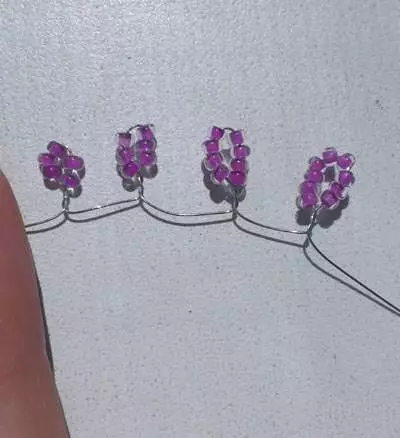
At the end that remained free, we form the same shells.
Article on the topic: Gingerbread men crochet. Amigurumi

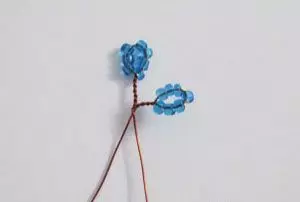
Now twist two halves, ranging from the central loop.
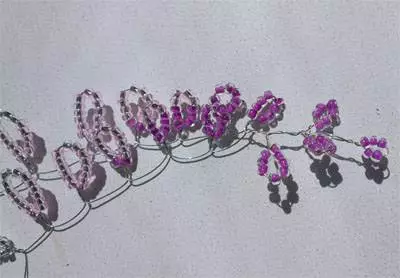
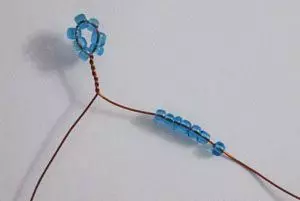
There are 60 pieces such billets.

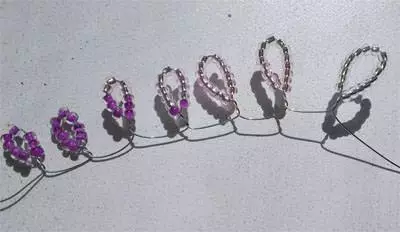
We proceed to weaving leaves.
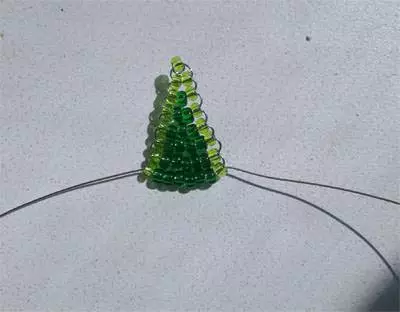
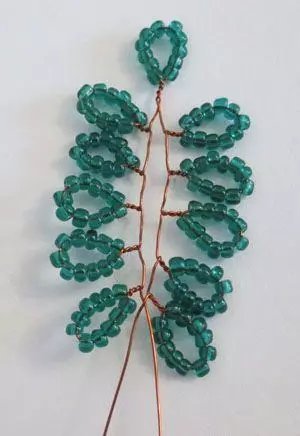
We harm the beads of green shades and cut wire 25 cm. We recruit 3 beads of light green color and do one end through two extremes. This technique is called parallel, with it a row is bound and the free end pass through all the types of bispers.
We have already risen the first and second row. The third row is 1 bisperin of a light shade, 1 dark, 1 light. The fourth row - 1 light, 2 dark, 1 light. The fifth row is 1 light, 3 dark, 1 light. The sixth row is 1 light, 4 dark, 1 light. The seventh row - consists of 1 bright beads, 5 dark and 1 light. The eighth row is 1 light, 6 dark, 1 light.
From the ninth to the fifteenth row weave in reverse order.
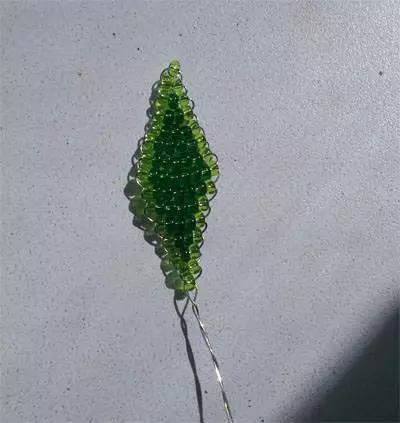
The number of leaves are determined independently.
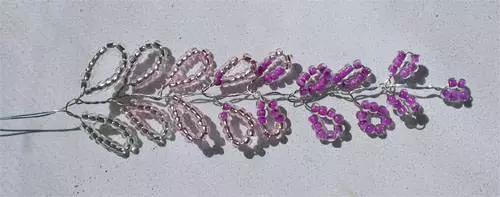
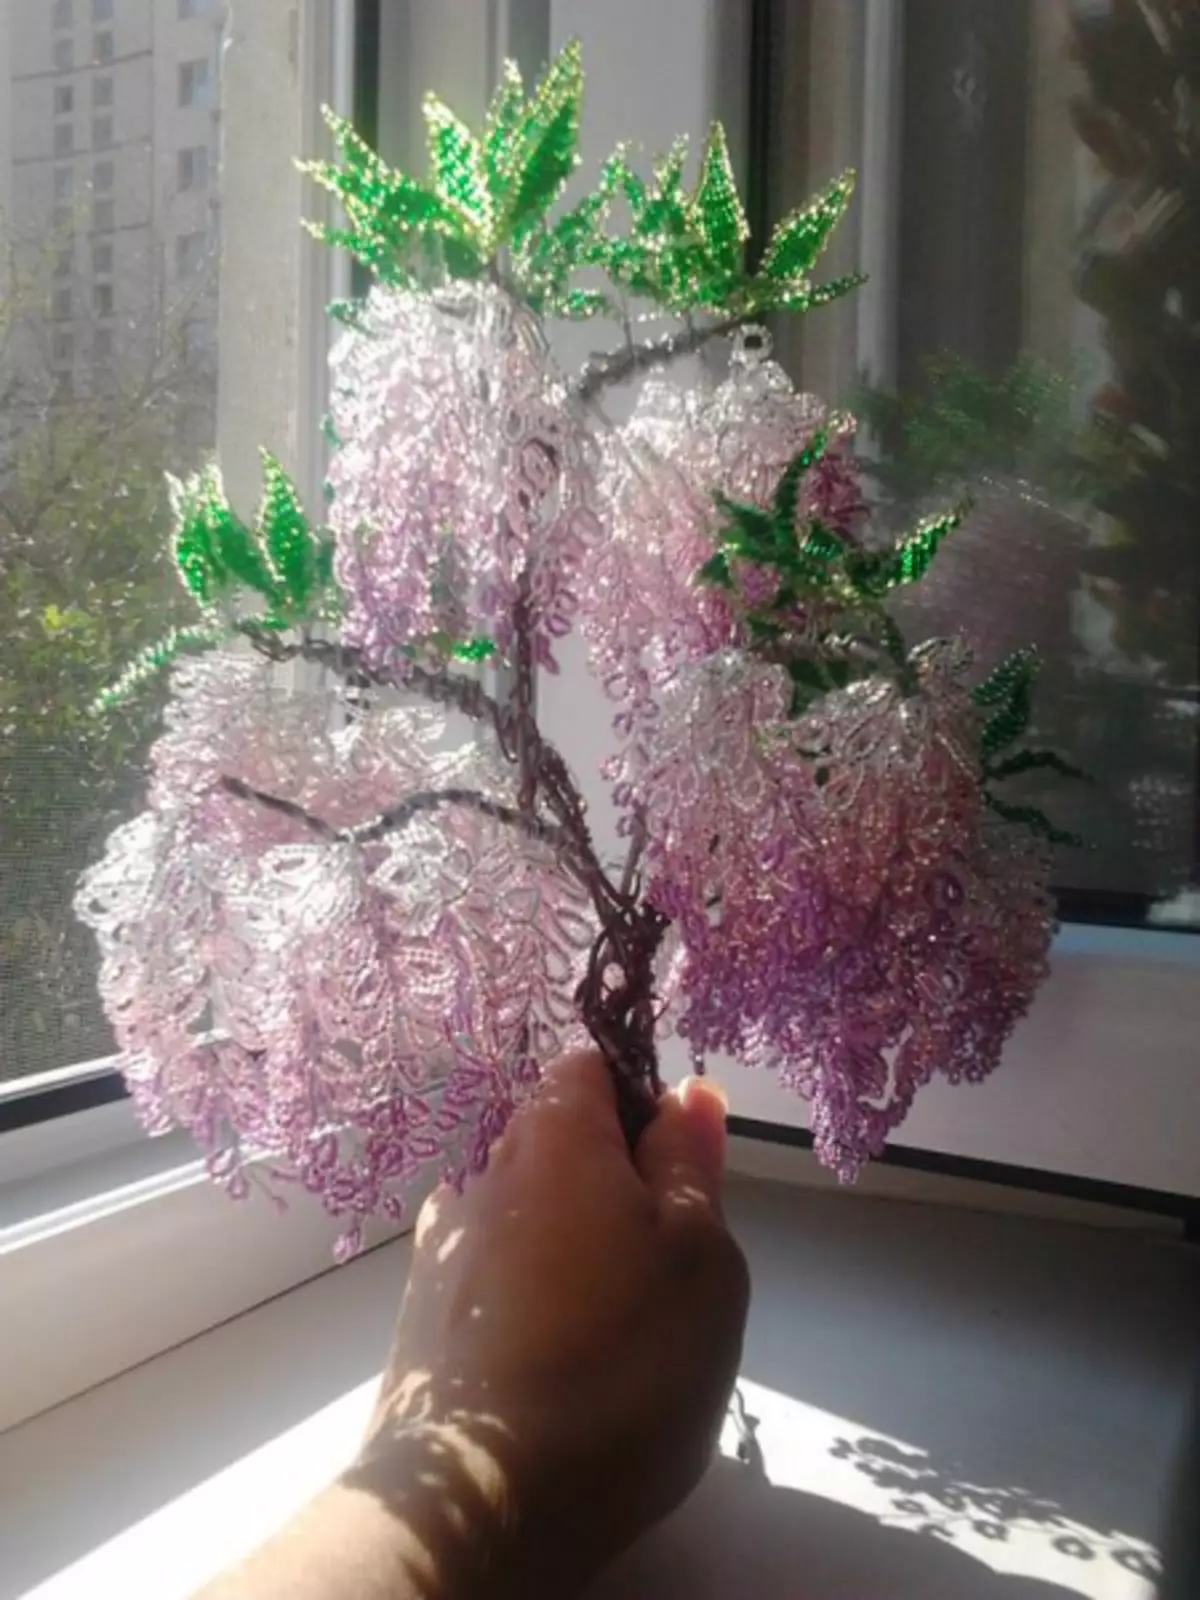
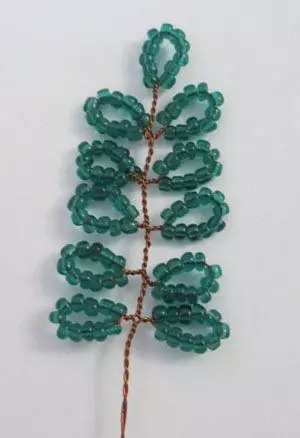
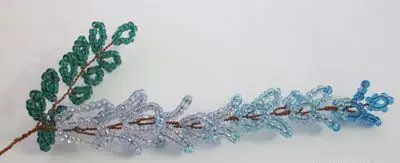
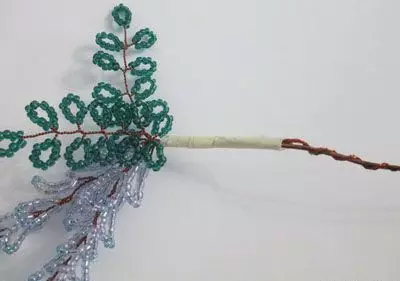
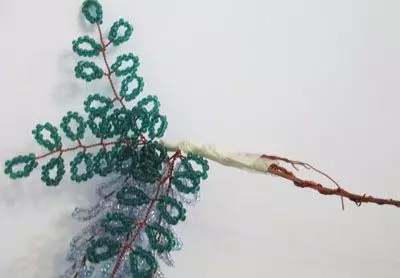
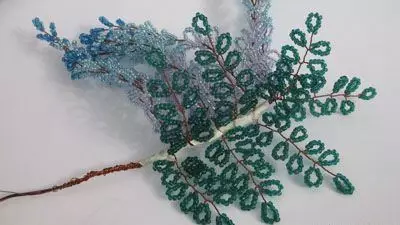
We collect branches. In thick wire we wake up 10-12 clusters and several leaves, thus form thick branches. Now we connect them into the common trunk.
We can leave it as it is, and we can close all the wire brown threads Moulin.
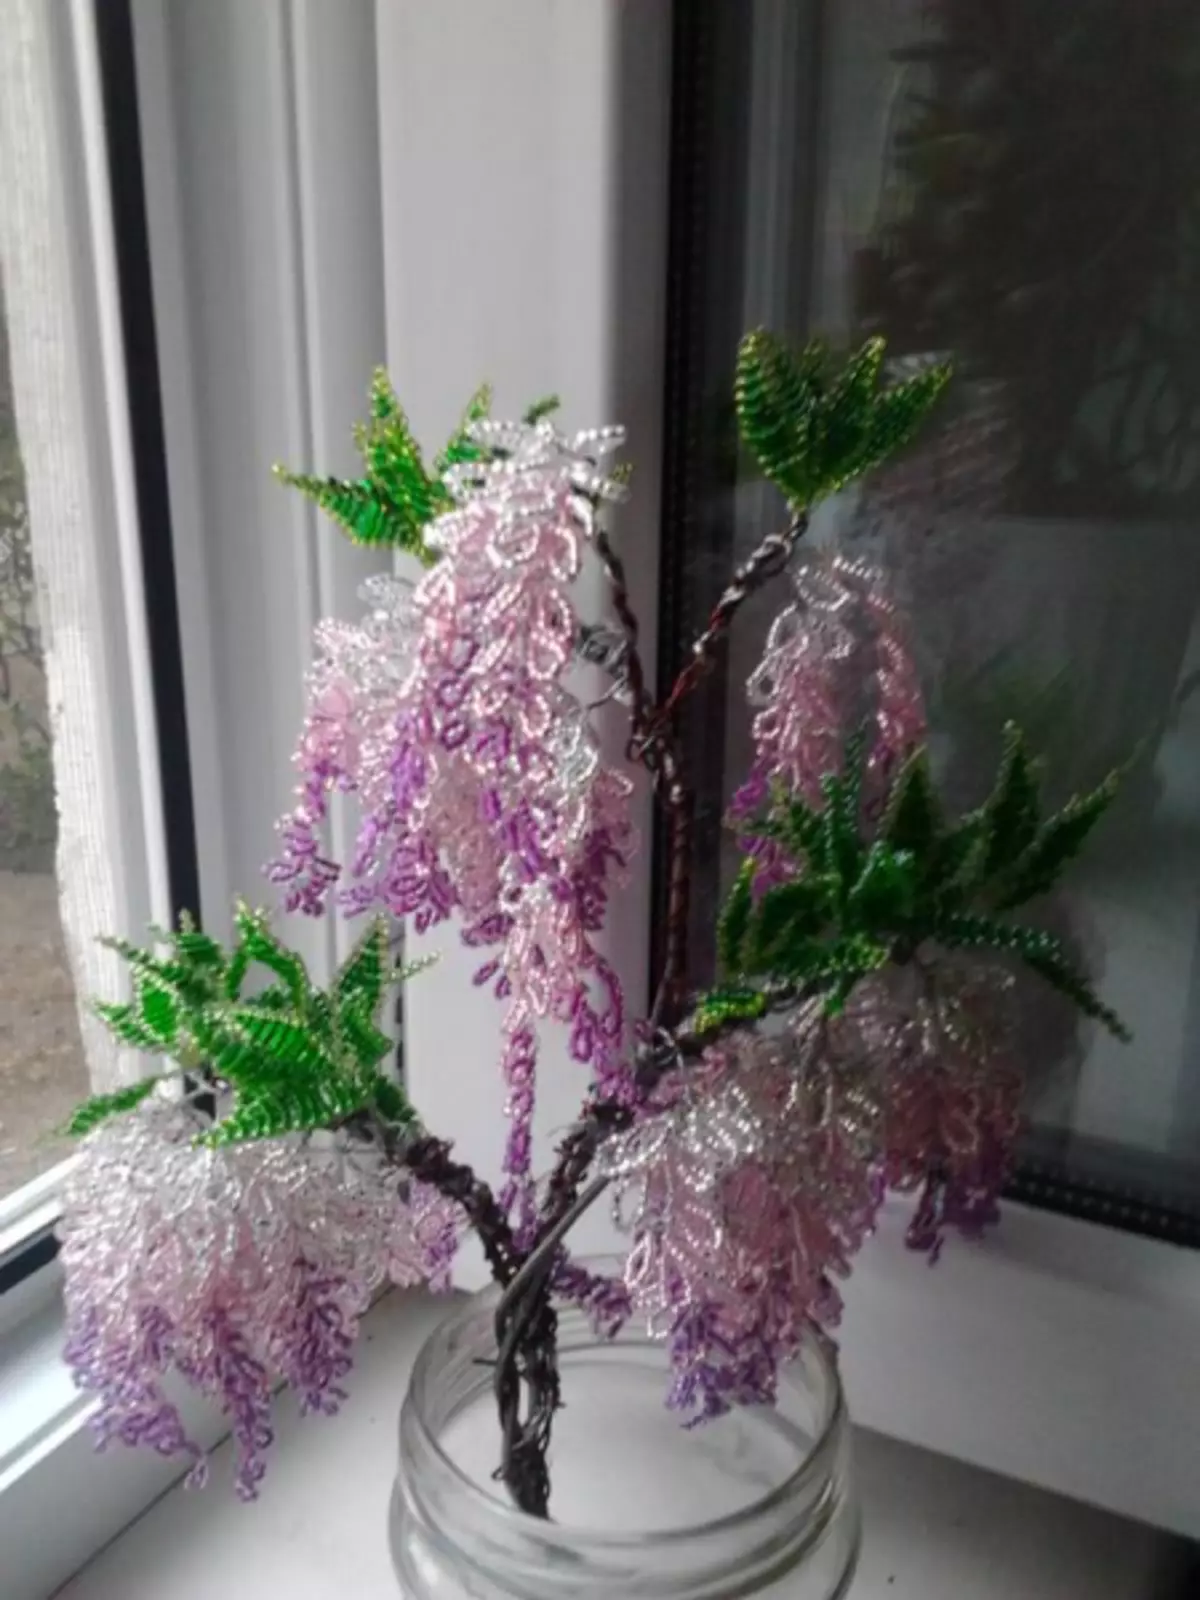
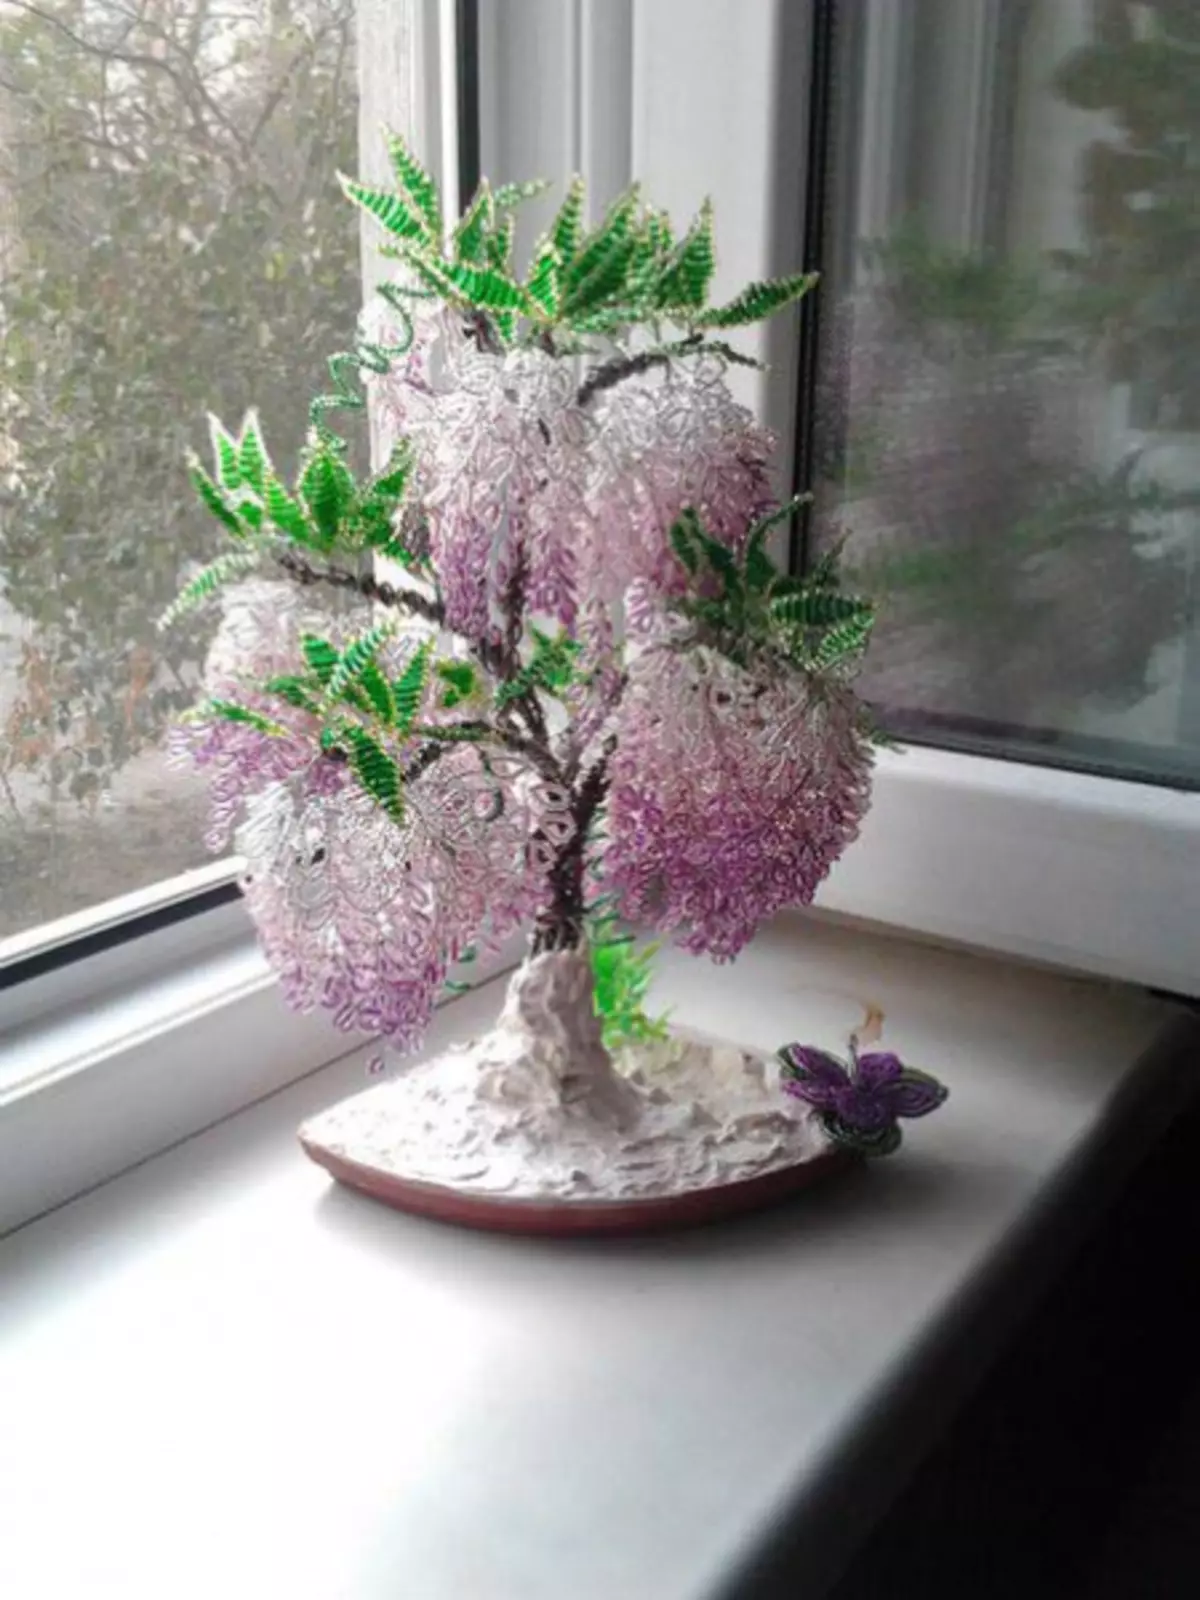
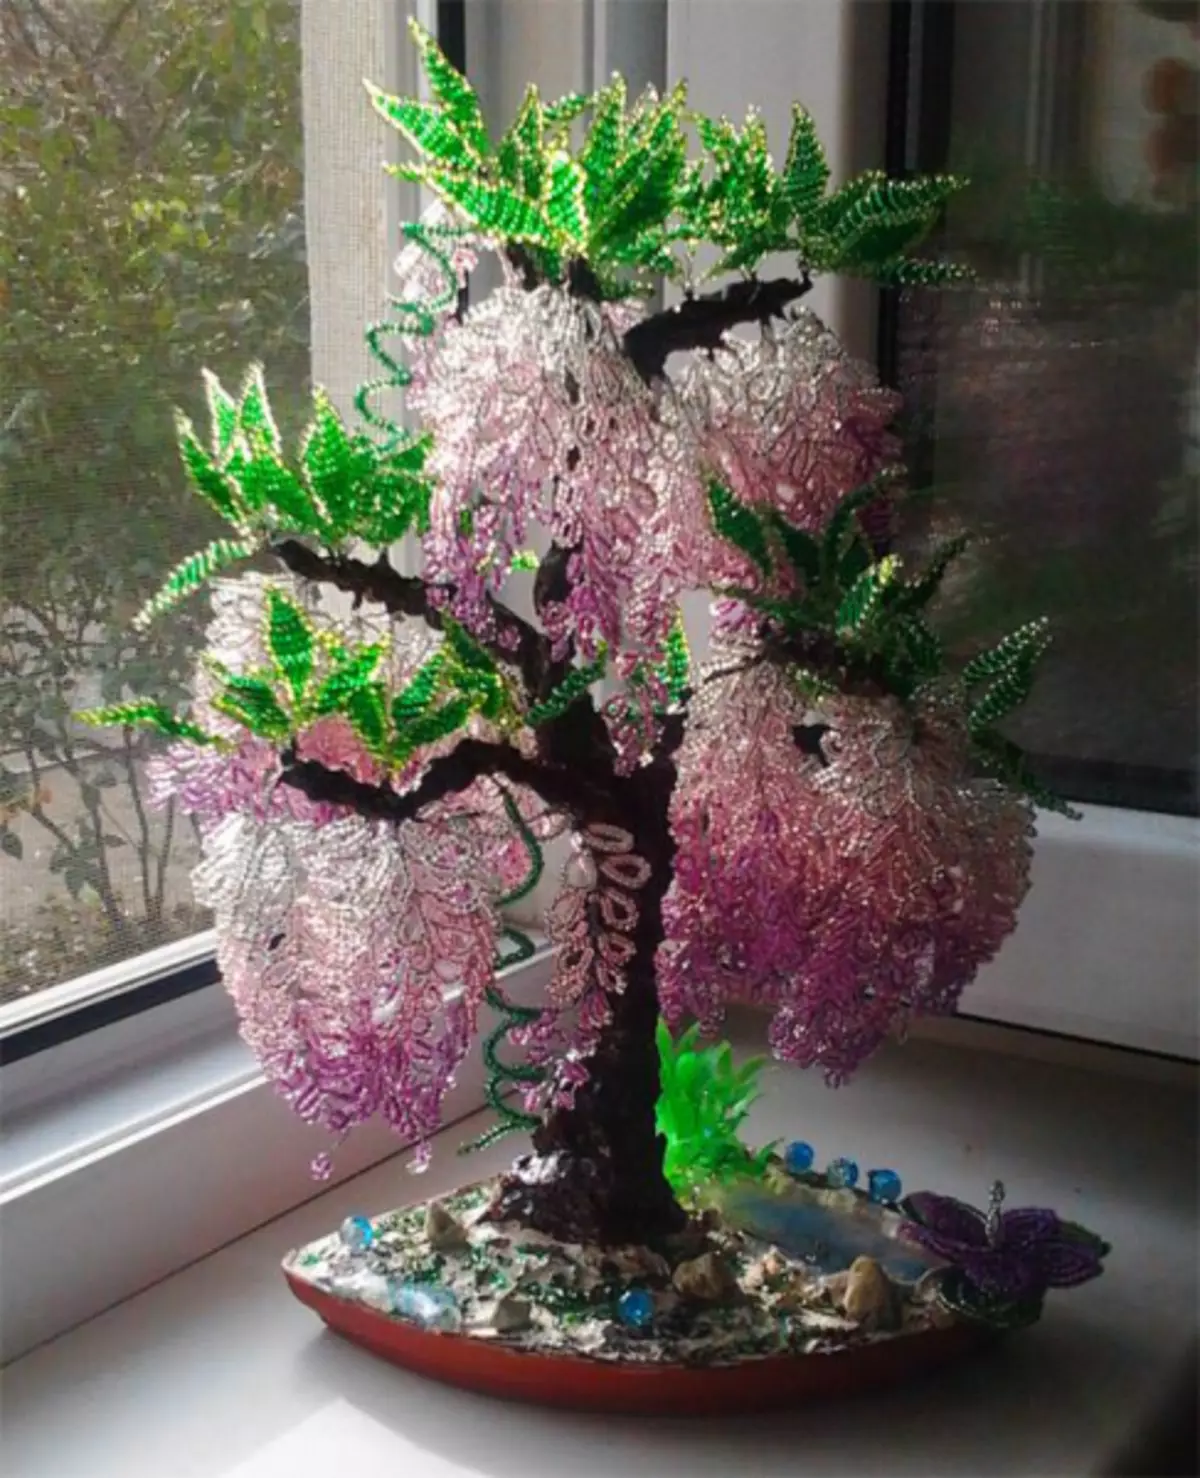
Fix the village in a bowl with a gypsum. And after drying it, decorate to your taste.
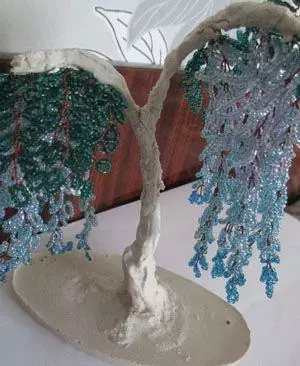
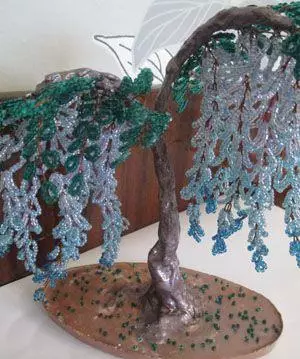
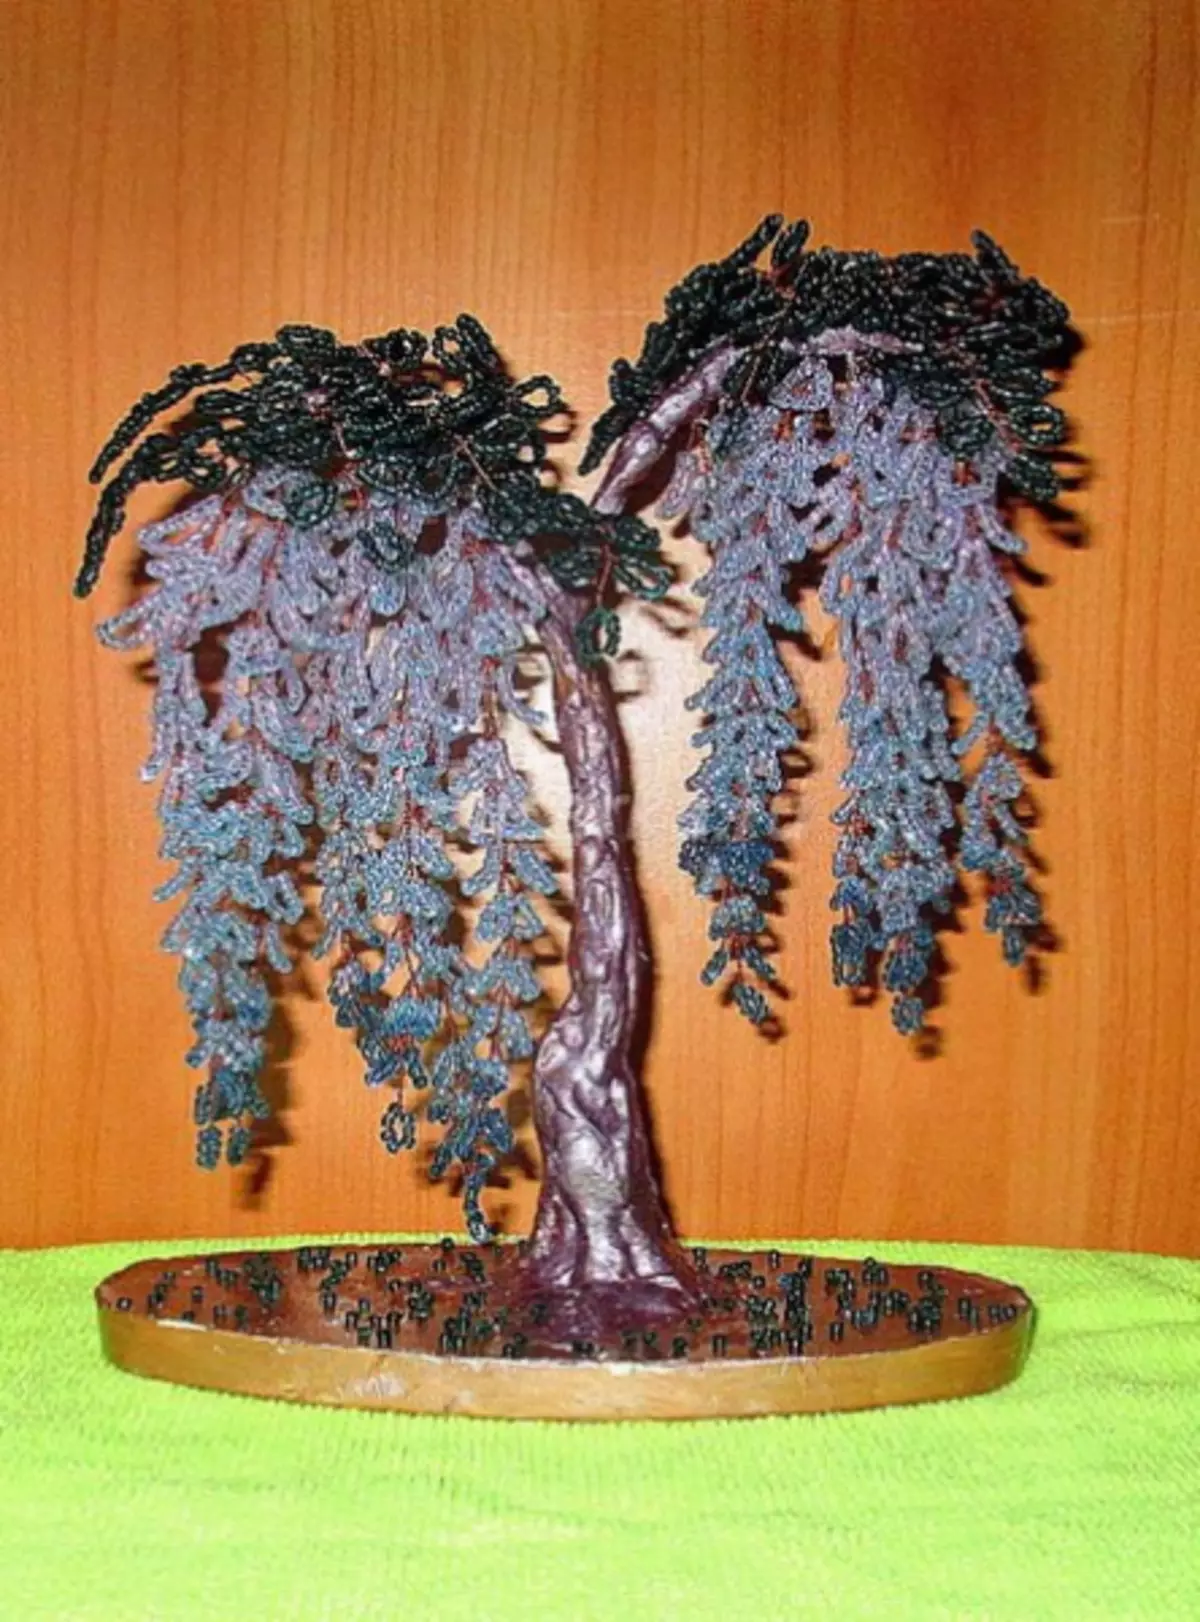
In blue shades
We will need:
- beads of three shades of blue, size number 10;
- green beads;
- Wire, the diameter of which is 0.3 mm and 3 mm for the trunk;
- molar tape;
- glue;
- Gypsum (can be replaced by alabaster);
- Paints, better acrylic.
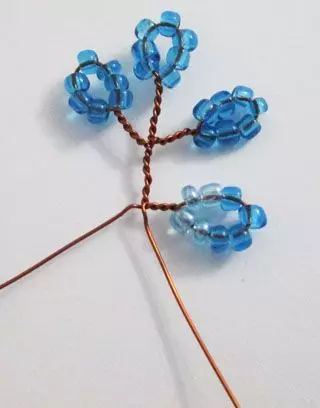
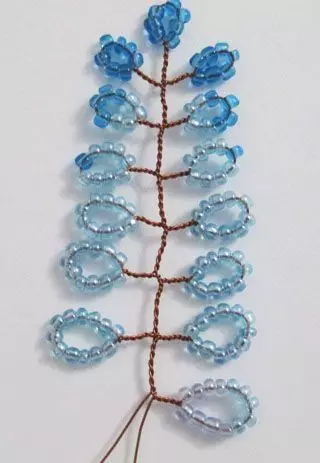
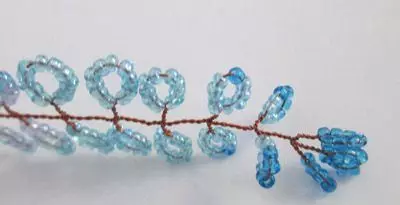
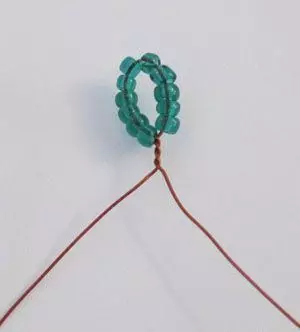
We proceed to work with the formation of brushes. For them, we will need a pale blue, blue, blue beads and wire 120 cm long. The central loop consists of 7 bisperin blue shade. Twisting it in such a way that 6 mm double wires are formed under the loop.
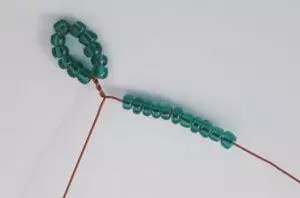
We will work on both ends of the wire immediately. On each form a droplet of seven blue beads.
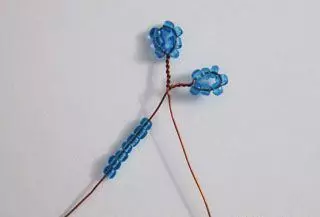
Third loops - 2 blue beads, 4 blue and 2 blue.
Fourth steam - 4 blue beads, 1 blue, 4 blue.
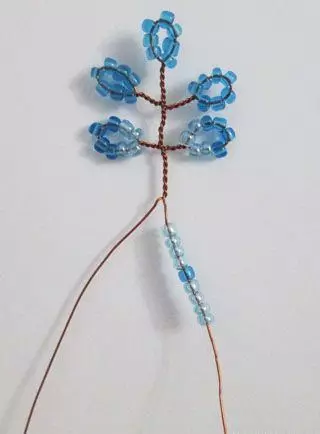
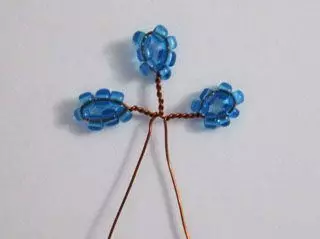
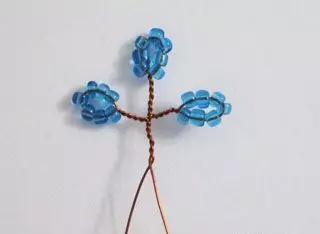
Fifth steam - 10 blue beads. Sixth steam - out of 11 of the same color. Seventh Couple - 12 Blue Bisper. Eighth - 4 pale blue, 5 blue, 4 pale blue. Ninth -5 pale blue, 4 blue, 5 pale blue. Tenth - 6 pale blue, 3 blue, 6 pale blue. Elentist - 7 pale blue, 2 blue, 7 pale blue. The twelfth and thirteenth pair consist of pale blue beads of 18 and 19 pieces, respectively.
Article on the topic: Conducting set of loops with knitting twin thread with video
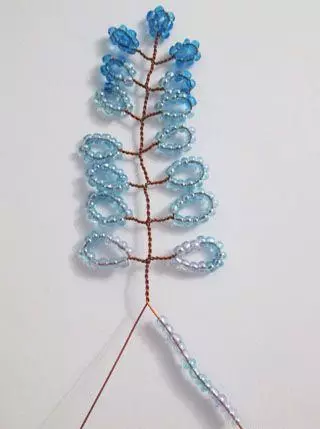
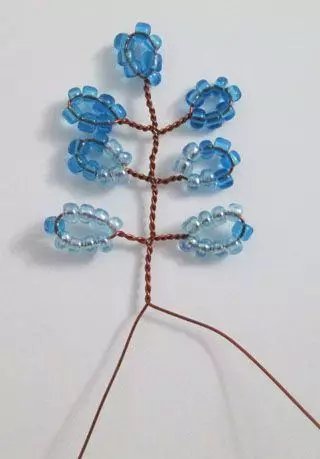
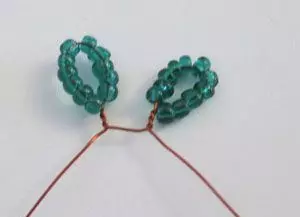
Now we convert a woven element slightly. The loops of the first pair turn to each other and flex a slightly vertex.
The second pair is folded so that the hinges are between the hinges of the previous row.
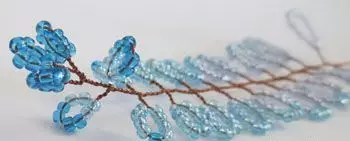
The third pair duplicates the addition of the first pair. And so, alternating, we fold all the couples in a checker order.
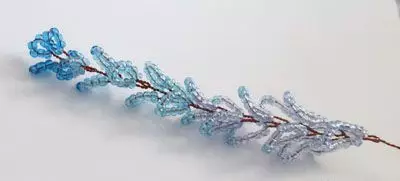
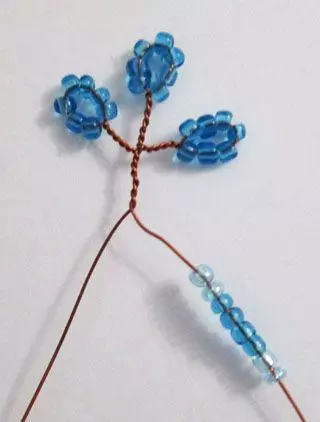
Such twigs need to be made 14 pieces.
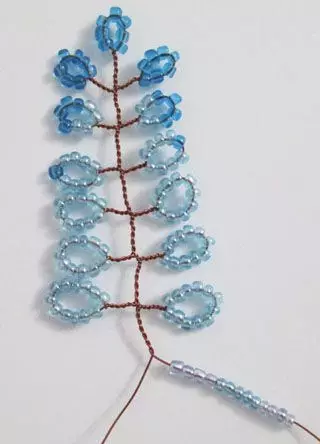
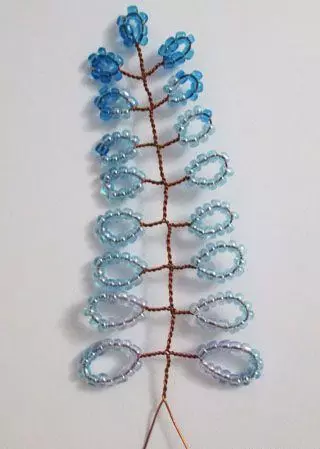
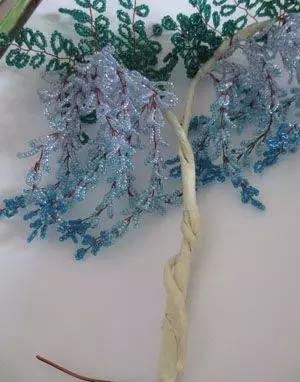
The foliage is also formed by a loop method. For one billet, we will need a cut of a 50 cm long. The first droplet consists of 11 green beads and twisted at a distance of 10 cm from the end. Work continue on the long working tip of the wire. Total loopsticks for eleven beery need to make 11 pieces. After all of them are ready, we fold so that one droplet is a vertex, and all the others on the sides. It is necessary to collect 14 green twigs.

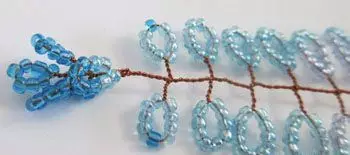
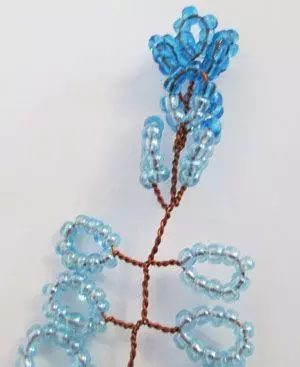
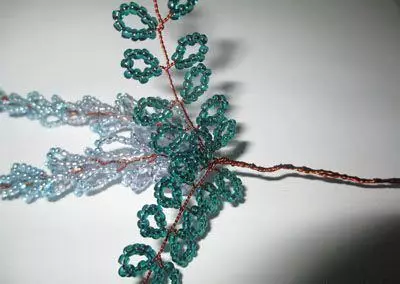
Now proceed to the assembly. We connect each brush and branch of foliage. We get 14 sprigs.
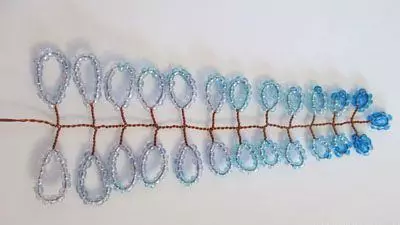
As a result, one large branch will consist of seven such billets. Cover wire with scotch or flora (threads of Muline). There are two such branches and form a common trunk of them.
Then we install all the tree into some kind of sidier, poured it with plaster, they are also covering the trunk and waiting for complete drying. Color the bark of wisteria and the basis of that color that you like.
Such a tree made by your own hands can mask any beginner.
The article describes a pair of options for the execution of wisteria beads. A few more will be shown in the video. Choose those to taste or those who are going to present such a gift.