
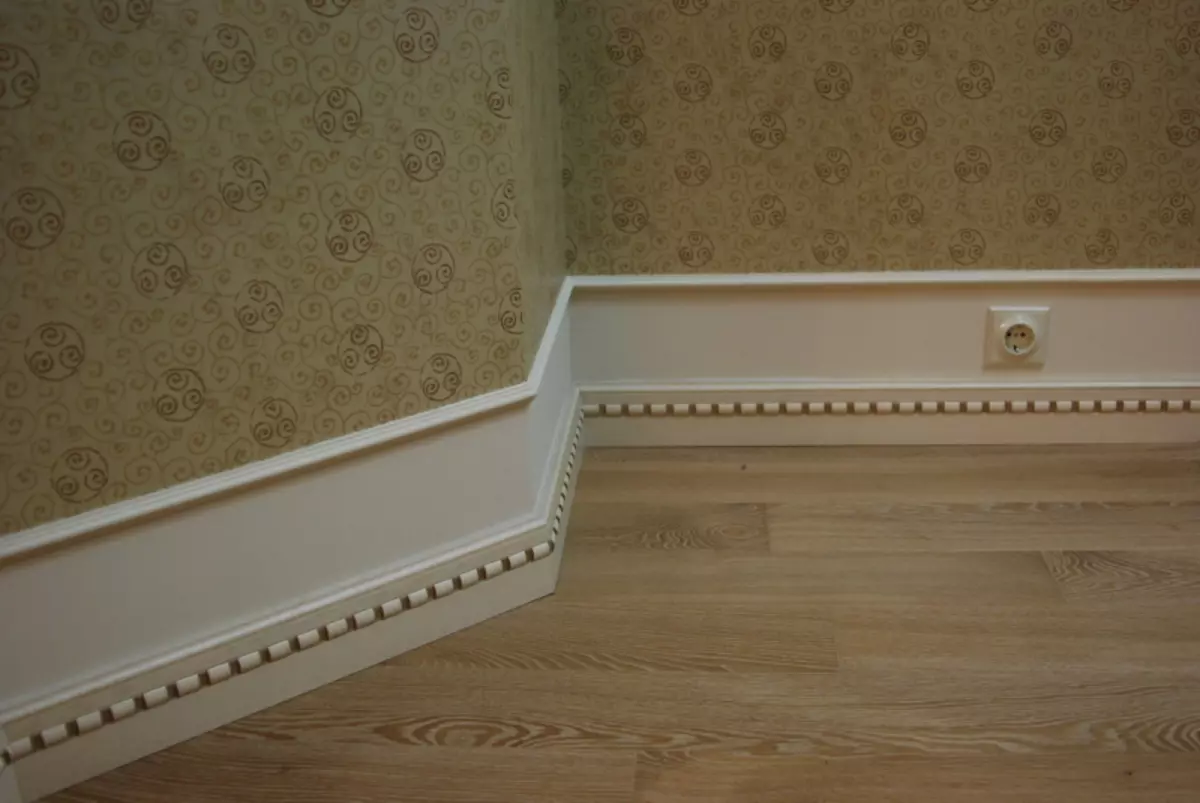
No finishing coverage will look allotously and finished without such an important detail as the plinth. Therefore, if you decide to refresh the exterior of the room, then, when choosing materials, the plinth falls into the list of mandatory purchases. The optimal option will be the plinth of plastic - simply, inexpensively and stylish. But before thinking about how to kill a plastic plinth, you need to choose it correctly. In this article, I will tell you about the types of material and how to quickly install it.
Choose a plinth
There are several basic moments for which you should pay attention to, going for the purchase of plastic plinth. First of all, it is, of course, the positive characteristics of this product:
- Plastic elements have absolute resistance to moisture. This means that such strips are universal, and are suitable for installation both in residential rooms and indoors with a complex microclimate - kitchen and bathroom.
- Baguettes of this species are pretty plastic and make it possible to mount on any wall. And flexible models are indispensable for the curved sections of the wall in premises with non-standard layout. For example, if the room is equipped with a rounded erker, then finishing the flexible plinth will become the most profitable solution.
- One of the biggest advantages of plastic can be called its wide range of shades. You will have the opportunity to choose a color that will ideally complement the walls of the walls or it will be indistinguishable from the tone of the flooring. In addition, PVC imitates natural materials well, so you can easily save on wooden planks.
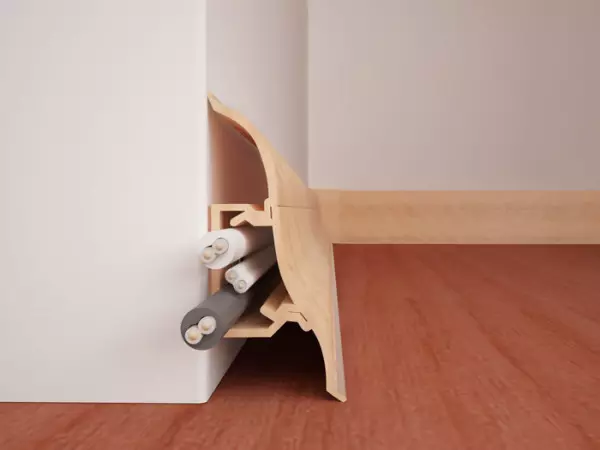
- Among the plastic plinth models can be found species designed specifically for carpet. In addition, there are very conveniently hiding various cables for such planets. Hollow from inside plastic plinth allows you to hide up to 6 wires.
- Lovers of independent repair work will please the simplicity of installation of this type of decorative elements, thanks to which it can be killed, stick or fix it without resorting to professional assistance.
- Well, in conclusion, it is impossible not to remember the affordable price of plastic. With budgetary or modest cosmetic repair, such an element of the finish can become an excellent alternative to the plinth from any other material.
Article on the topic: Toumba in the bathroom with a tabletop: Choose correctly
Of course, in addition to obvious advantages, plastic has its own set of deficiencies, among which it is noted by low strength. Products from this material are quite simple to damage: any mechanical blow can lead to the formation of chips or cracks. I want to note that the plastic baguette is not reused. Also he does not tolerate cold. The latter factor can hardly be called a significant disadvantage, because room plinths are not used for external finish.
According to its varieties, these products are divided into the aforementioned models for carpet and universal. The latter are suitable for any type of coverage: parquet, laminate, tile, linoleum.
For the manufacture uses different types of plastic:
- PVC foamed (for hard not hollow);
- Hard PVC (for hollow);
- Semi-rigid PVC (for flexible).
Choose the type of product best on the basis of the place where you will begged, as well as the functions that are necessary for you. Having understood in all the characteristics and varieties of plastic baguettes, you need to carefully examine the steps of the installation.
Step-by-step installation instructions
There are three popular methods of high-quality installation of the plinth. Each of them has its own order of work and requires different tools.On glue
Mounting on the adhesive composition can be called the easiest way out. But you should consider the fact that if the wall is not absolutely even, then such a fastening will be not effective.
The same applies to heavy plinths - with time the clutch will weaken, and the plank can come off. In general, the installation process is as follows:
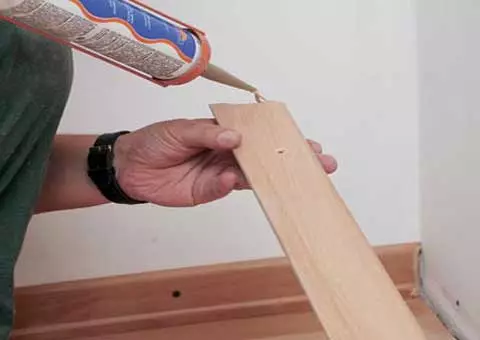
- At first, special glue or putty is purchased. Liquid nails will rise.
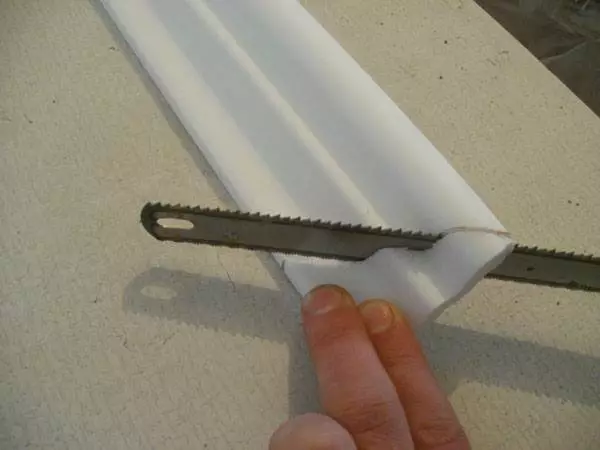
- Before fixing the baguette you need to cut and try on the wall. Pay attention to the adjustment of the corners.
- Then you should install plinths, attach all the angles, coupling and plugs. It is necessary to do this at first dry, and only making sure that the elements are ideally suited around the perimeter, lubricate them with glue and fix it finally.
- Excess the adhesive composition is immediately removed, since it is very difficult to get rid of the trash or traces of liquid nails.
Article on the topic: Installing the door in the drywall partition with your own hands
Ready straps need to give time to dry, and only then repair work can be continued. Remember that it will not be possible to remove without losses attached to the glue, the appearance of such a profile will not go anywhere.
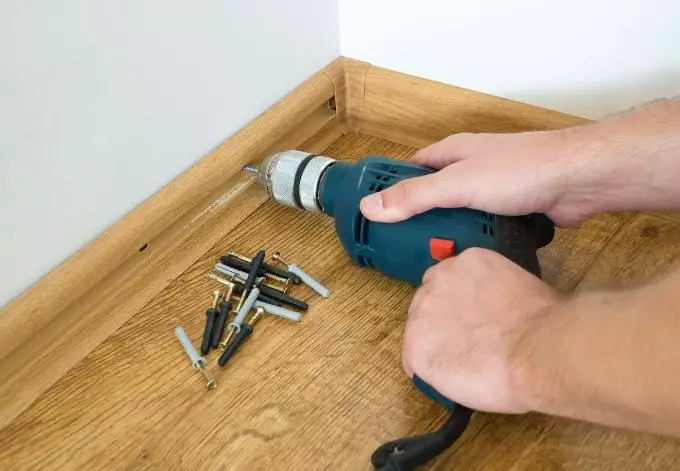
On self-tapping
Specialized attachments are good because their use allows you to hide any traces of installation. In this case, the condition of the wall is not so important - not even the most even surfaces do not affect the efficiency of this method of installation.
- First of all, you need to drill a 2-3 millimeter diameter hole in the profile. The distance between the attachments should be 30-40 centimeters.
- In order to completely disguise the upper part of the screws, in the holes you need to make a conical deepening. Here will come in with a zenkovka or a big drill.
- As a rule, the installation starts from the corners of the room. To do this, press the planks to the wall and make small marks in the places of holes.
- Then the openings are also made in the closing portion of the plinth and the dowel themselves are inserted. The plinth is applied to the wall and screws twist. It is necessary to do it extremely gently so as not to damage fragile plastic elements.
- All these operations need to be repeated around the perimeter of the room, and the self-tapping screws close with special plastic plugs. For greater efficiency, the masking plugs can be lubricated with glue. Their color is desirable to pick up under the shade of baguettes.
The final step will be the treatment of angles with the help of sealant.
On clipses
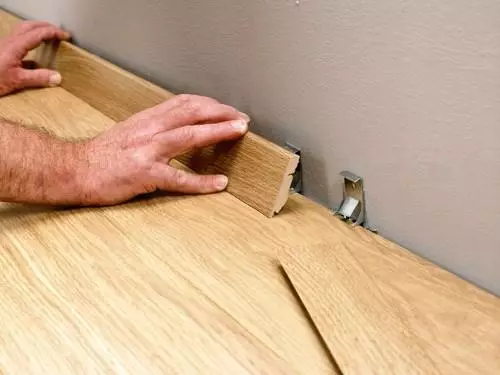
This method is suitable for rigid plinths that do not contain inside cable channels. When buying fasteners, you need to correctly calculate the number of clips - they are set to approximately at the same distance that the screws are 30-50 centimeters.
- The described technique also requires pre-markup around the perimeter. For this, clips are pressed against the wall and in places of drilling with a pencil are made small marks. The joints are best hiding the furniture - it should be considered when planning planks.
- Then, at the scheduled points are made holes. For a concrete wall, it is better to stock up the perforator, if the partition is made of standard drywall, then you can use the screwdriver.
- Next, clips are installed in the drilled places, for which the self-sufficiency and dowel will need.
- After the final fitting, the plinths can be mounted on clips. In places of joints it is better to use two fasteners for greater reliability.
- At the end, traditionally, clutches and plugs are attached.
Article on the topic: Decoration of the playground do it yourself
If you follow these simple rules, it is true to calculate the possibilities of the room, as well as the number of materials, the choice and installation of plastic plinths will not cause any problems.
Video "Installation Instructions for Plastic Plinth"
This video will tell how with your own hands to fix the plastic plinth, how to properly hold the cable in the cavity, as well as how to put the corners.