
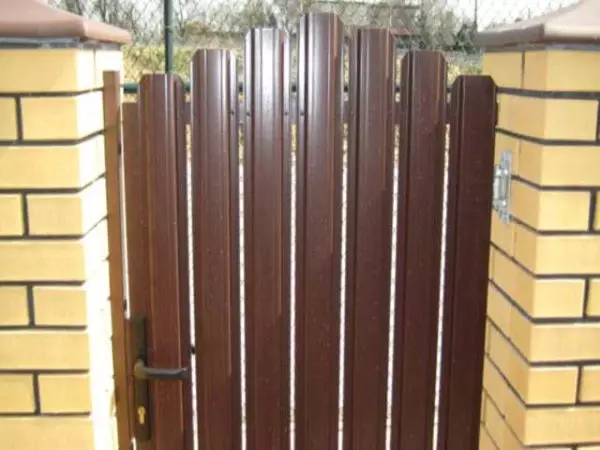
In any fence there should be an entrance. For the entry of cars make the gate, for the passage of people - wickets. They are made on a frame of wood or metal, the filling is picking up the same as in the fence or something original. If the entrance between two brick walls, the filling can be selected to your taste. Moreover, it is not difficult to make a gate, in any case, some uncomplicated options.
Device
The gate consists of reference pillars and the door leaf on the frame, which is attached to the pillars with hinges. Poles can be brick (stone), wooden or metal. In bricks, a small pieces of thick metal or a thick metal rod, which subsequently weld the frame subsequently welded to bricks.
Unusual wickets with wooden frame and original filling
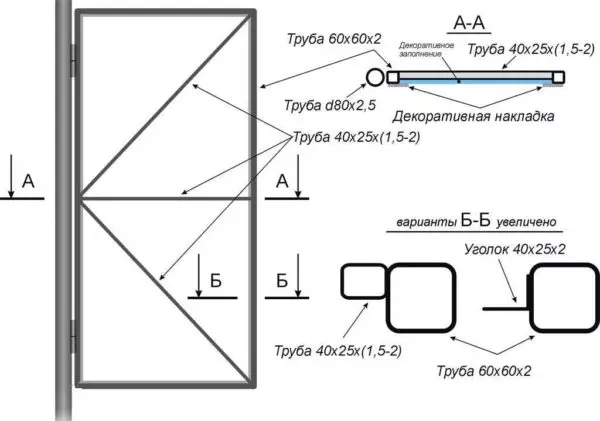
Metal poles are made of a round or profiled pipe with thick walls. Round pipes are used less often: it's more difficult to apply to them, put on something. The profiled pipe with the same section (diagonal compared with the diameter) and the wall thickness withstands large wind loads, to flat faces it is easier to weld or fix with the help of screws, bolts. Therefore, it is more commonly used when the device wickets. Another option is to the frame from the profile pipe to weld the metal corner. In this case, the filling will be as it were in the frame.
The device wickets with a wooden and metal frame equally
Wooden pillars usually use if the fence is wooden. Most often, the pillars are a pine timber treated with protective impregnations. They prevent (or slow) the destruction of wood. But there are such cases when the pillars put metal, and the wicket and fence are wooden. This is because wood in the ground quickly rotates, even after protecting processing.
A little about the design of the reference frame. It can simply be two columns into the ground - the option is suitable if the ground is not inclined to begged (sands, sandy, fertile, but not clay soils).
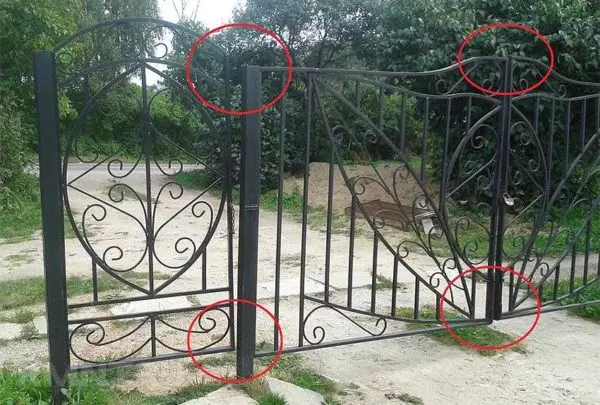
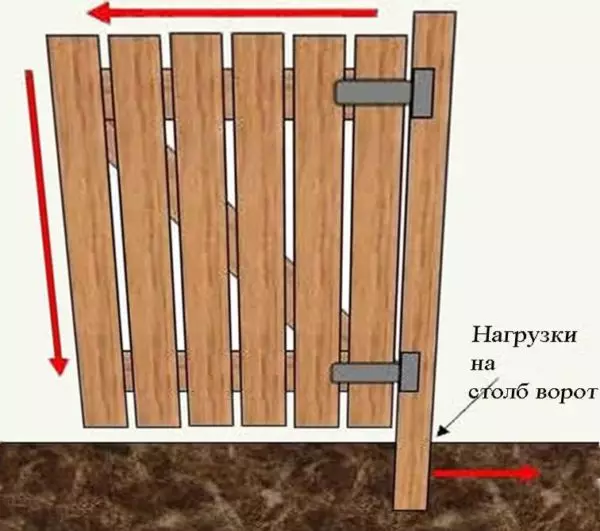
Poles led. If there are jumpers at the top and bottom (in this case, you can make the arch at the top), the likelihood of such trouble will be much reduced
For bunching soils (clay, loam), it is desirable that the poles are connected at the top and bottom. In this case, the probability of skewing wicket after winter is very small. If you do not want to make the threshings in the opening, the bottom jumper can be lowered below the ground level (on the bayonet and a half). It will be necessary to carefully cover the anti-corrosion composition, to predict, and paint into several layers. And still to avoid skew, you should bury the pillars below the freezing level at least 15-20 cm.
The frame of the wicket is made of metal pipe or wooden bars. Wood is used for wooden fences, metal - in all other cases.
With a frame of a profile pipe with a straightener, metal ...
The most, perhaps, the universal version of the wicket is a frame of a profile pipe or a metal corner. On a metal base, you can attach any filling material: wood, sheet metal, professional flooring, metal stakenat, flat slate, polycarbonate, chain grid, metal rods, forged or bent items ... make a combination of several materials. There are a lot of options, if you want to make a gate, usually imply the square pipe, and the design is selected in one style with a fence.
Frame from the profile pipe. Filling - Cold Forging and Wood
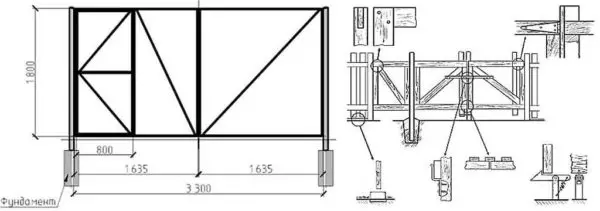
Dimensions and materials
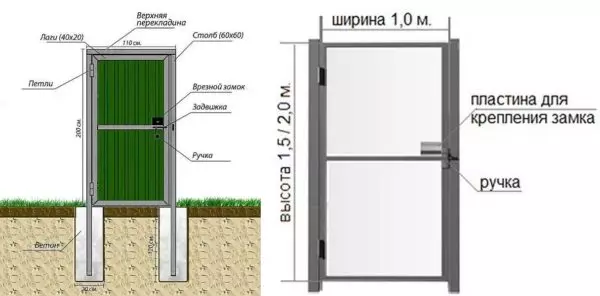
For wicket with solid filling (wood, sheet metal, professional owl, etc.), for pillars take a profiled pipe with a cross section of 60 * 60 * 3 mm. You can take thicker walls, thinner - it is better not necessary. For the frame, a rectangular pipe 40 * 20 * 2.5 mm is usually used. The strength of this pipe is enough for medium wind loads. With small wind loads, you can take a wall of 2 mm, but it will be more complicated to cook. All that thinner is 2.5-3 mm you need to weld in a special mode and this is not easy. If the wind is stronger, you can either increase the wall thickness, or use the rental of larger sections: 40 * 30 or 40 * 40, even 40 * 60.
Article on the topic: Install the slopes for the entrance door
The height of the wicket with the upper crossbar is usually about two meters, without a crossbar - from 1.2 m. Low is usually made in the inner fences, distinguishing the plot or in translucent low-outer fences. For deaf high fences from the professional sheet, wood, flat slate is more characteristic of the height at the level of fence. The width of the wicket is minimal 90 cm, optimal 100-110 cm.
It is still worth talking about what depth to bite pillars. Standard solution - 15-20 cm below the drainage depth . Based on this number and the height of the wicket make pillars.
Additional ships increase rigidity
With the help of a borah in the ground, they make a hole, on the bottom of which bucket of the graffer of the middle fraction falls asleep. Then the pillar is installed, it is set vertically, falling asleep with rubble (you can be broken with brick and other construction garbage), it is rambling, poured with concrete solution. When the solution drops at least 50% of the strength (after 7 days at a temperature of + 20 ° C), you can mount the frame to the columns. If you want to make a wicket correctly, this is exactly what you do.
An example of self-making: photo report with explanations
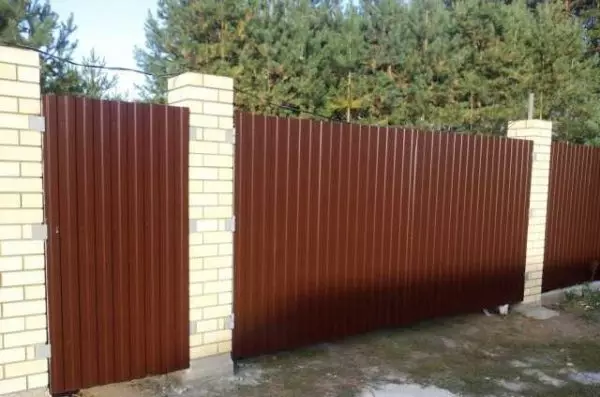
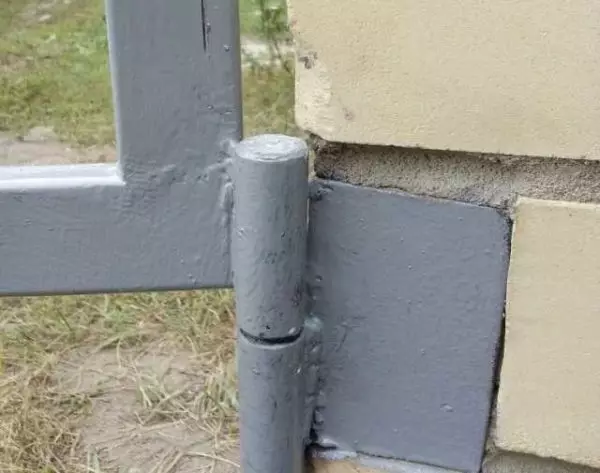
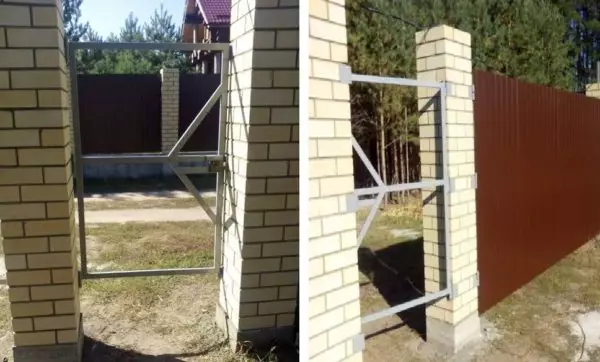
The fence is from the professional sheet with brick columns, respectively, and the wicket from the proflist. In the posts, the metallic plates welded with a pipe in the middle are closed in the post. It was decided to make a wicket with additional drives - so that the professionalist is tightly fixed, and also to increase the castle fastening area. Castle - old so far, replacement.
Final result
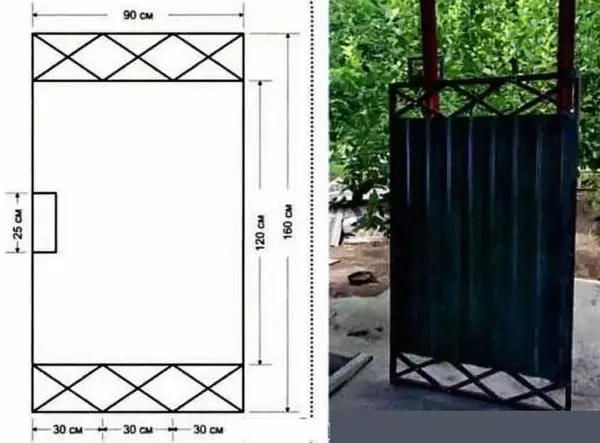
The frame of the wicket can be prepared using an inverter welding machine from the profile pipe 40 * 20 * 3 mm. We will put "at the place", welding to the mortgage. Sut off the workpiece:
- Two crossbars in length from one pillars to another (it turned out 108 cm),
- Two racks - 185 cm high.
Cook Rama
We do not welcome the crossbars, but only "grab" to the mortgage plates - to hold. Literally two welding points to the place of attachment. Before welding the second hand, check the horizontal of the crossbar. We put the construction level, correct the position, then we grab. So, it turns out that in the opening two horizontal jumpers.
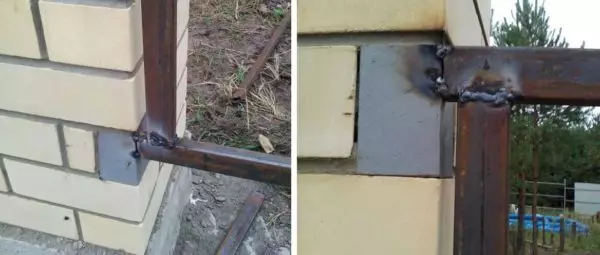
We grab the crossbars to the mortgage two points
To the established cross, weld the vertical racks. They must be vertical - in the place of connection with jumpers angle strictly 90 °. We check in the connection process, adjustable if necessary. Another: seam should be good, durable, dye from all sides, around the perimeter of the pipe.
And on the other hand
As a result, the frame was graceed to the columns. We once again check the angles, otherwise it can be squeezed, the wicket will stop closing / open.
We put a loop
Further, the most responsible moment - you need to weld the loop. They took standard metal loops for swing gates, which are fully in any construction store and in the market. They must be installed strictly vertically, and both on one axis. Otherwise, the wicket will not open.
We weld the loop.
Racker with a frame from a profile pipe - device and sizes
First weld the bottom loop, rechecking its vertically levels. We try to install the second on the same axis. First, we grab to the mortgage, check and only then, if all the coincided, carefully coordinate the seam. If everything is calculated correctly, the loop is adjacent to the carcass pipe, so the trouble will not be the work.
Article on the topic: Snowman made of threads do it yourself
Loop welded on the gate
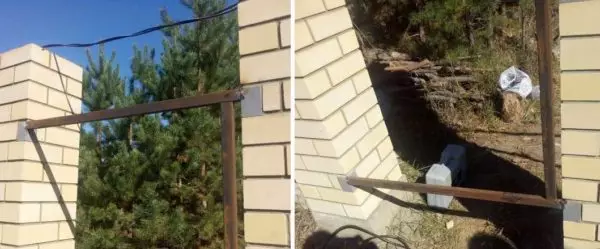
When the loops are set, we remove the "tag" that keep the gate. It magically opens / closes. Next, it's a small thing - to fight the bodies. Elementary work: cut off pieces of the pipe of the same length, we apply to the estimated place of installation, we note with chalk as it should be cut off. We take a grinder with a cutting walker on metal, cut off, check if we need, we are refined (with a grinder or file - depending on the magnitude of the "jamok"). When Ukrose "became", we weld it.
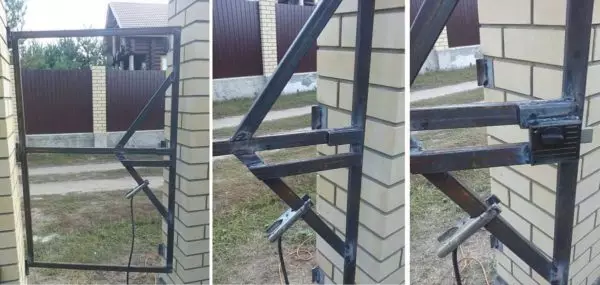
Privarian bias are easy
Similarly, we communicate a strengthening under the lock on the gate. To mount the old metal castle, it took to prevail a piece of the corner, otherwise it was not working to fasten it.
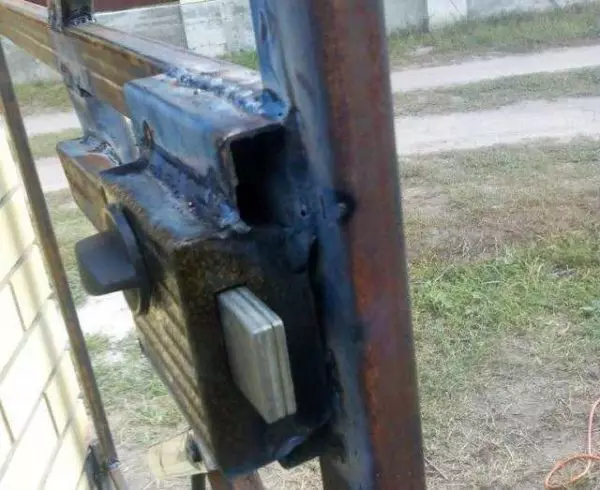
Make a gate - it's also to welcome the lock (when it paints, it will look better)
Latest welders - it is necessary to close the open cuts of the pipes that are directed upwards and sides. If they are not closed, rainwater and snow will fall in them, the pipes will begin to rust from the inside, which will speed up the death of the frame. Welding at this stage is not necessary, you can close with silicone or find plastic caps of a suitable size.
Finish work
It's all. The gate has almost done. Next - Standard Metal Works - Grinding, Primer, Painting Frame and Last Stage - Filling Filling. In this case, it does not differ from the installation of the proflist on the fence.
At the USM (Bulgarian), we put the sandpaper on metal, we clean all the places of welding, removing rust, etc. By the way, do it all more convenient when the wicket stands on the spot. If it is removed, it will not work so convenient, it will have to turn it over, walk around it with circles ...
Gate after primer
So that the frame of the wicket does not break for a long time, we will process it with rust converter, then the primer. Next, you can fix a professional. It must be cut off in size, try.

And this is the ultimate result: decided to make a gate, made ...
Definitely it will have to cut somewhere so that everything opens. Therefore, for a start, the sliced sheet is literally on four self-pressing sheet - in the corners, we apply marks - where it is to cut, remove, cut off, try again. When I achieved normal operation, you can fix "for centuries."
Wooden wicket for giving
Fences at Dachas rarely represent an impregnable barrier. This is usually not too high wooden fences. For such a fence, it makes sense to make a watery of wood. There is quite simple, without clauses. We will need only dry boards (provided that there are already pillars).
If there are no woodworking machines (reysmaus, milling), it is easier to buy a edged board of the desired parameters. The width / thickness of the boards is arbitrary, as well as distances between the planks. Most often, a pine board is 6-10 cm wide and a thickness of about 2 cm, the distance between the planks is 2-6 cm. You can and more, and less - depends on the desired degree of "transparency".
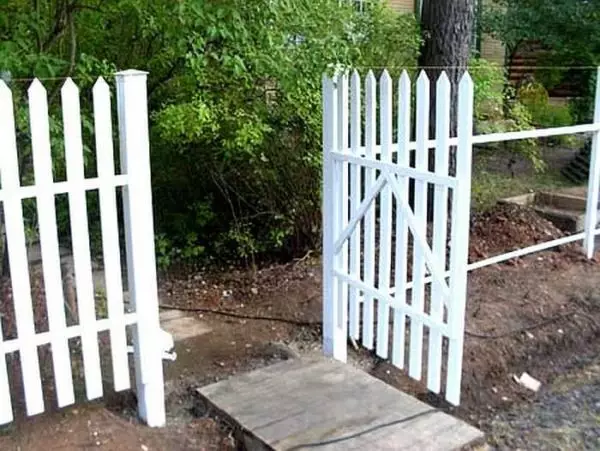
One of the most common options
Boards are desirable to have a dry. The chamber of the drying is unlikely to use, but a couple of years or at least half a year old (the humidity of about 25%) is already excellent. For wood longer than destroyed, it must be treated with protective impregnations. Now there are compounds that protect even wood, which lies on Earth (protective impregnations for a tree in direct contact with the ground). But some of them give the wood an extraneous shade (most often greenish, olive). If the gate is going to paint, it is not scary. If they gathered to use light varnish, pay attention to this moment.
Article on the topic: paintings for interior - types, appointments, rules
Simple garden gate
This is the easiest gate that an ordinary person can make is not a carpenter. If you know how to cut, keep the hammer in your hands, score nails, everything will work out. Nothing more difficult to do.
Take two strips or two bar (parameters depend on weight wicket). In length, they are equal to the width of the future wicket. These bars are laid across. The distance between them is a bit less than the height of the wicket. It makes sense to arrange them at the same distance as the testers on the adjacent fence (as in the photo above). Then the wicket will look part of the ensemble.
Device wooden wicket
Processed and dried boards-stakes are laid out with a predetermined distance on the cross. To withstand the distances it was easier, you can use trimming of the same length, paving them between the boards (you can and match boxes, if you are satisfied with its size). Take nails (two on the bar at the top and two below) and the boards to each crossbar.
After all the slats are nailed, we turn the cloth of the wicket, trying in trying to evoke, outline the lines at which you need to cut down. Haves are scolding superfluous, put in place, Krepim - two or three nails on both sides. Now freamed every board to the viola. This gives the gate additional rigidity.
How to make a simple writing of wood for giving
Loops choose metal, you can - barn. They are small sizes, just for dacha wickets. If desired, they are attached to the face of the wicket - they give a kind of highlight. With the same success, you can fix them with the back side.
How to make a wicket from the boards: the right design
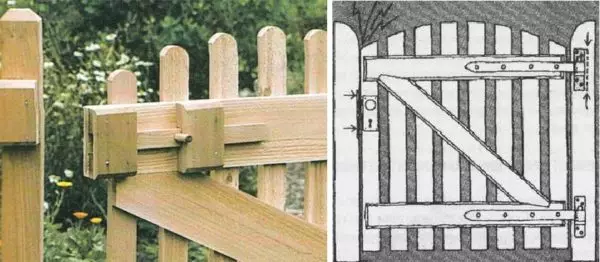
The above describes a simple gardening option, but there is a design more complicated. It will require minimal carpentry skills: it is going to connect a spike / groove. This wooden wicket consists of two rivers of strapping greater thickness, two crossbars (top and bottom) and pan. The thickness of the upper crossbars and the staketin (vertical slats) is the same, and the thickness of the strapping of the strapping is three times more (it is possible that thinner is thicker). For example, stakeholders, crossbars and shrews have a thickness of 20 mm, rail rails are 60 mm.

How to make a wooden wicket with a frame
In the rail rails, the groove is cut out, at the ends of the crossbar - spike. The compound is wetted with joinery glue, clamping into vice. Ship can also be installed - on the thorn and groove, but it turns out a complex shape, it is necessary to connect. Therefore, it is more often attached to nails - it's easier. After the frame is assembled, nourish staketins. They can be brought from the courtyard or from the street. Instead of nails, you can use bolted connections, in which case fasteners also serves as decoration. It makes sense to put stainless or bronze rivets.
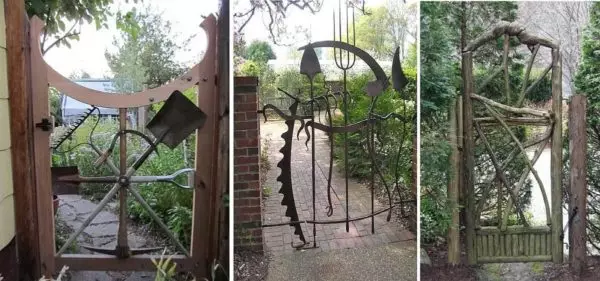
Photo of beautiful gate
Make a gate is not ordinary, and beautiful is not so difficult. And not always for this, expensive materials are required. What is always necessary is a fantasy. Then even a bike, a shovel, a knuckle or kirk - material for exclusive design.
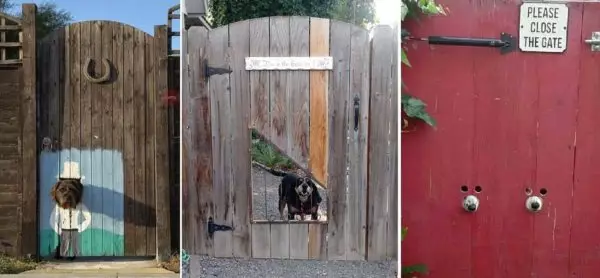
For pets))
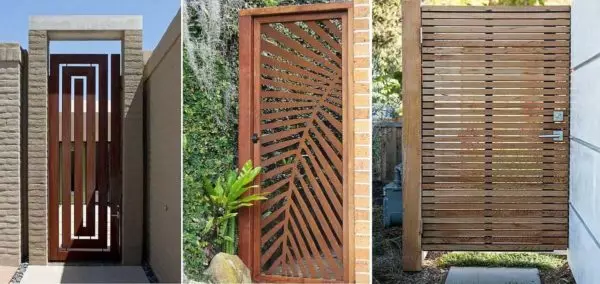
For houses in a modern style wicket need respective
From a variety of materials ... even from bitch
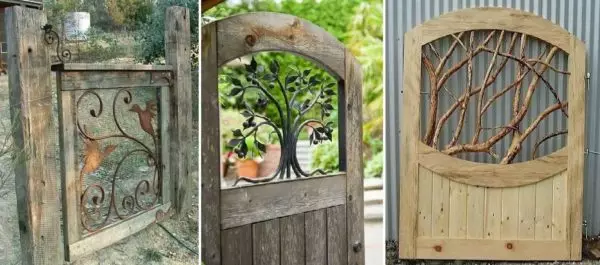
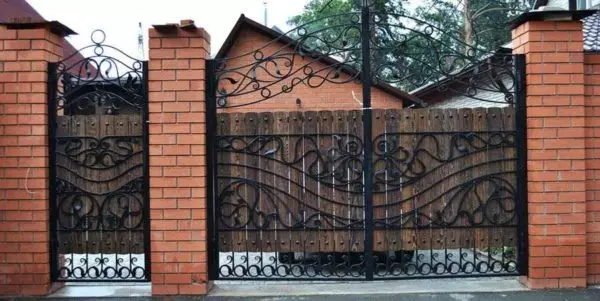
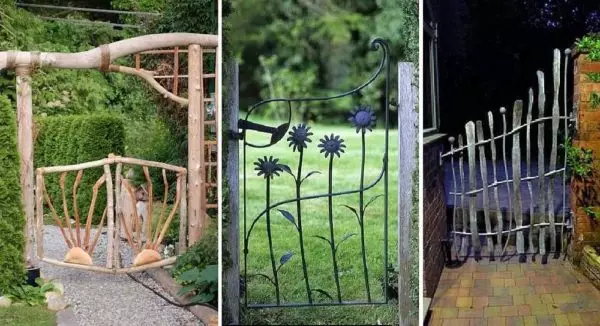
Wood and forged elements - a win-win combination
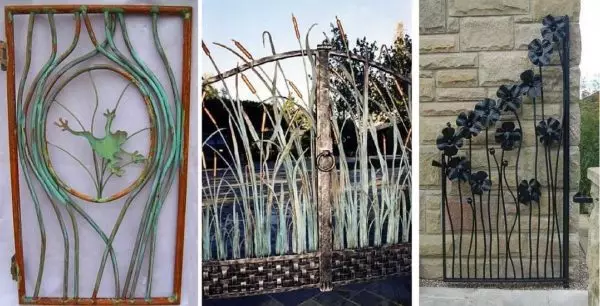
The main component - fantasy
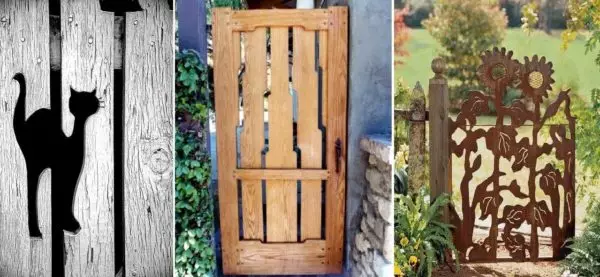
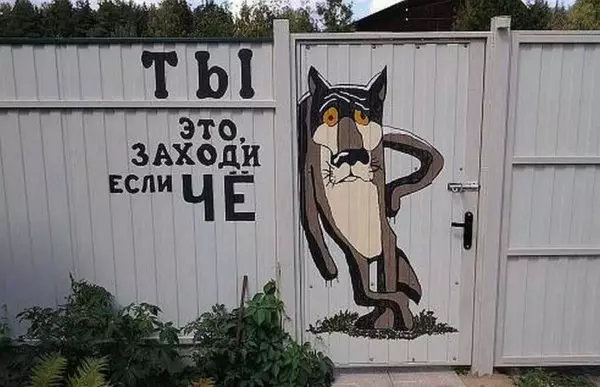
Stencil changes even the easiest fence
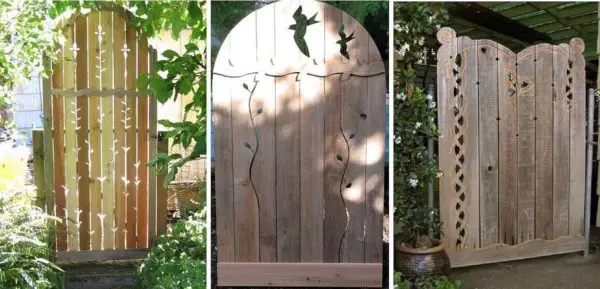
Make a couple of cuts in boards ... Original Wooden Wicket is ready!
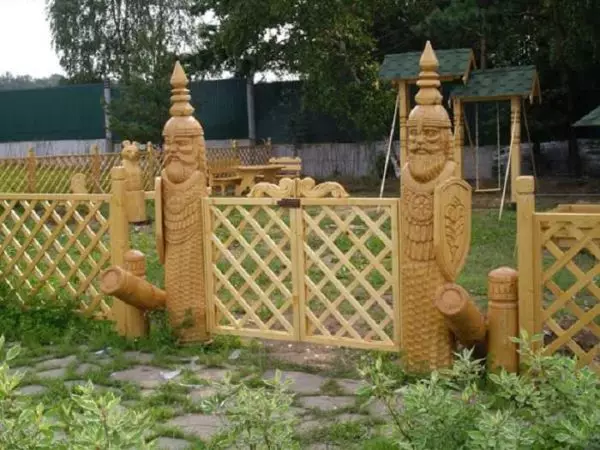
To visit to fairy tales
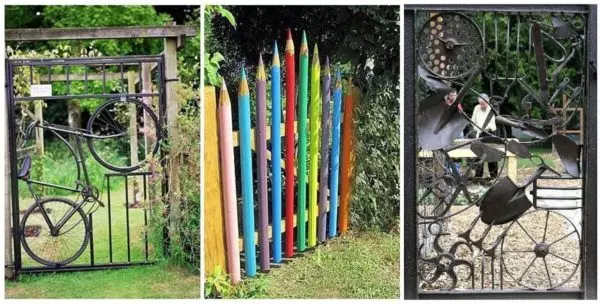
Bike, Wheels, Shovel - All Materials for Wickets
To the fence of the erupteer
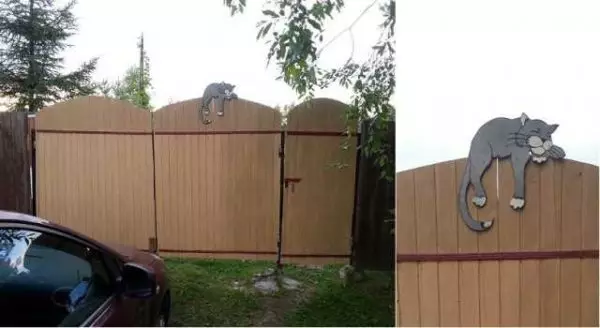
A small fragment - a cat from plywood ...
Original design ... from the courtyard
Even the wicket from the professional flooring may be original