
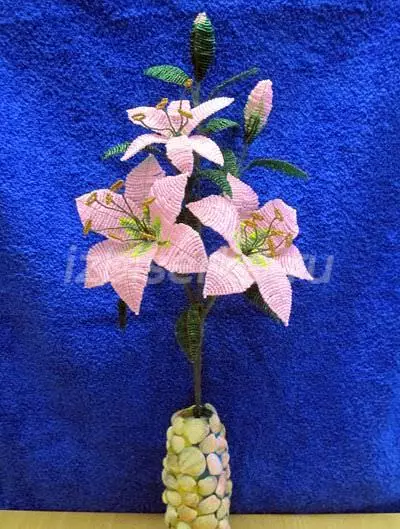
Each of us I want to decorate your apartment with something unusual made with your own hands, but without spoiling the interior. Lilies from beads are very simple, but at the same time a gorgeous solution to the problem. After all, no wonder most florists call this majestic Lily royal flower.
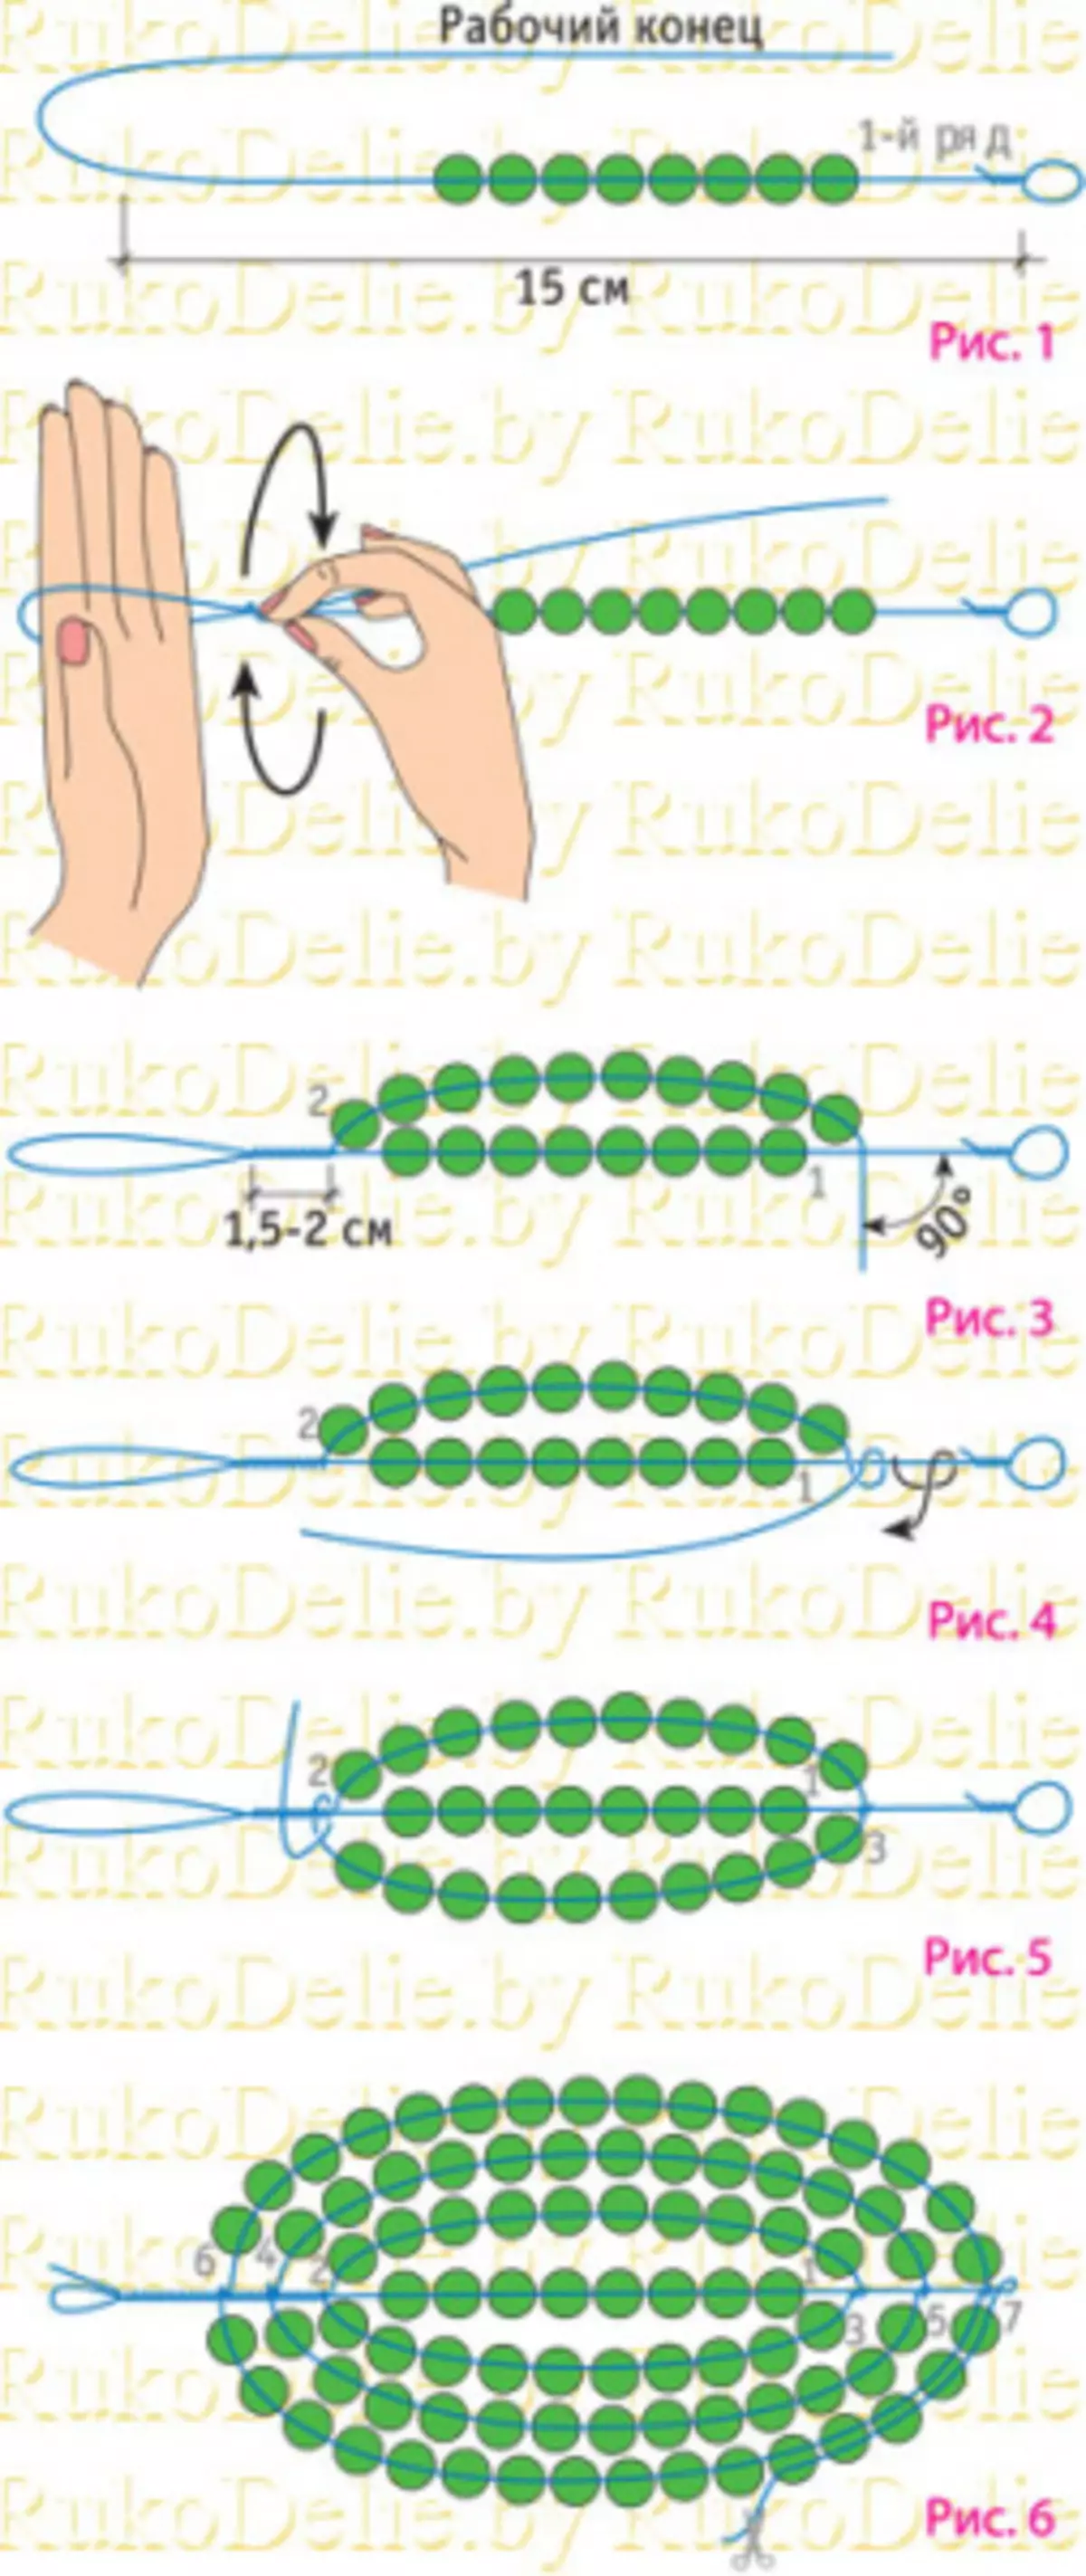
We start work
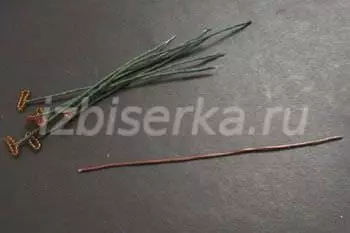
To do this, you will need beads (Czech) size number 10 of five shades: two colors of green, brown, gentle pink and yellow. It will also be necessary to take a floristic ribbon of brown color, three types of wire with a thickness of 0.3; 1 and 1.8 mm.
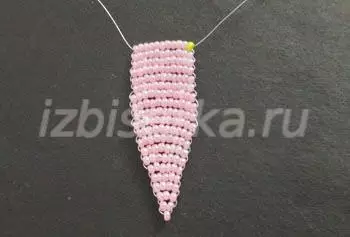
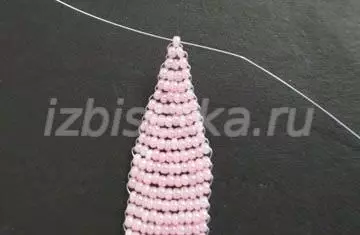
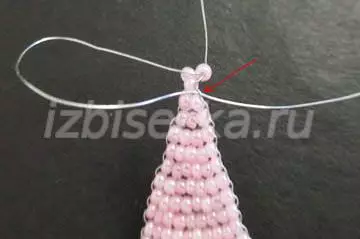
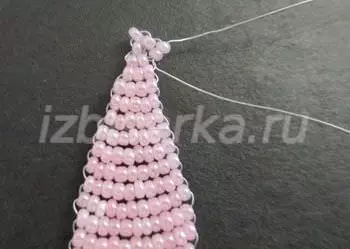
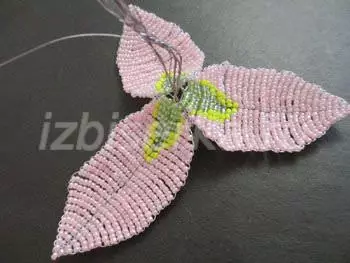
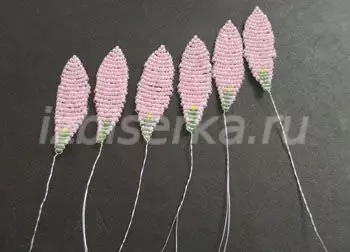
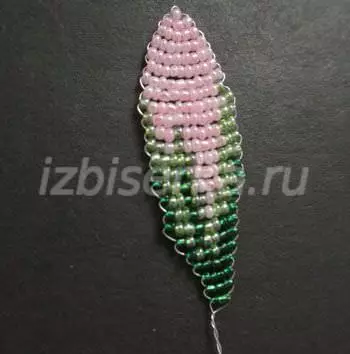
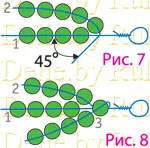
The manufacture of a flower begins with the formation of petals in which the first rows weave with the addition of one bisper. Take a piece of wire length meter and ten cm and in the middle put on three pink bispers. Then take, for example, the right end of the wire and grind through two beads. Thus, the first two rows should turn out: in the first one, and in the second - two beads.
For the third row we ride already on the left tip of the wire three beads and we draw through them the right side of the fishing line.
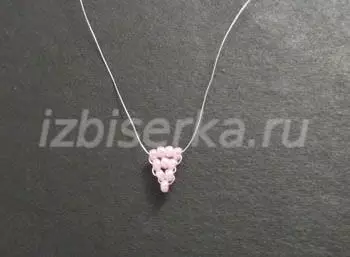
The scheme of weaving the following ten rows is similar: the amount of beads coincides with the number of the row.
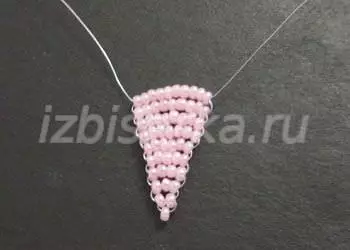
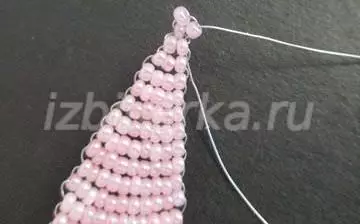
The next step is wearing nine rows of 11 biserin.
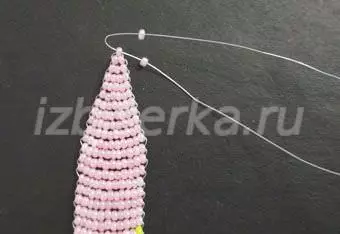
Next, in the twentieth row, we begin to add yellow beads.
We work on such a chronology: 20 row - 1 yellow and 10 pink; 21 - 2 yellow, 9 pink.
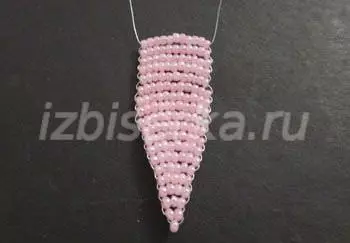
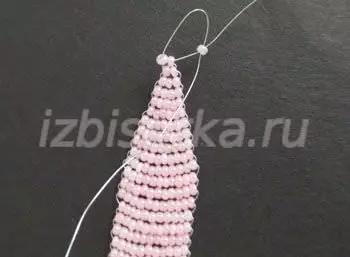
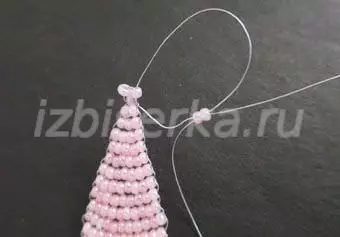
In the following rows, add green and begin to make a burning.
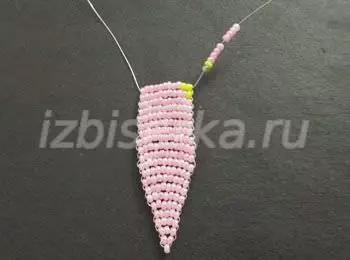
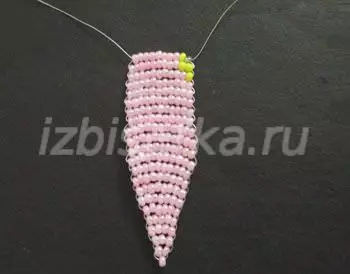
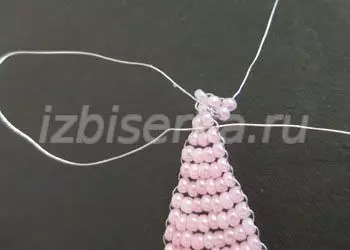
Weaving scheme: green, yellow and eight pink, then green, two yellow, seven pink. In the following, we add one green, but we remove 2 pink beads. 25 row - a pair of green, a pair of yellow, and four pink beads. In further three rows, the number of green and yellow beads is 3 to 1, and the amount of pink decreases to one bead. In the 29th row we ride three green and one pink bead, and in the next just three green beads. Twisting wire ends.
Article on the topic: Knitting needles for newborns: Chapecch and cap scheme
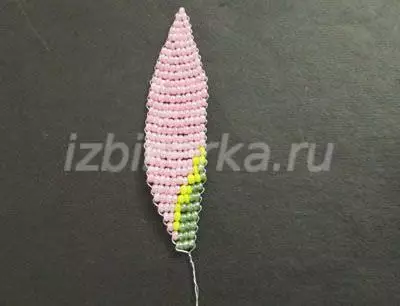
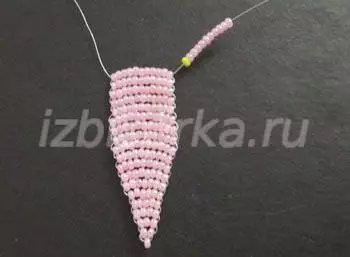
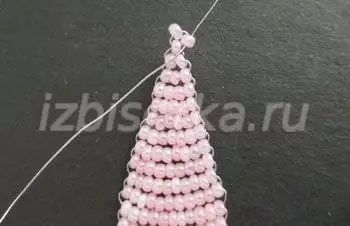
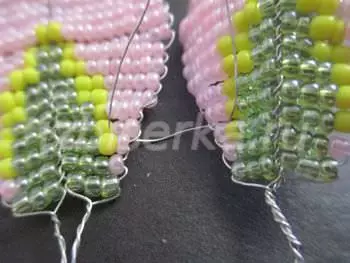
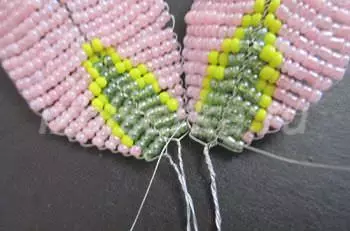
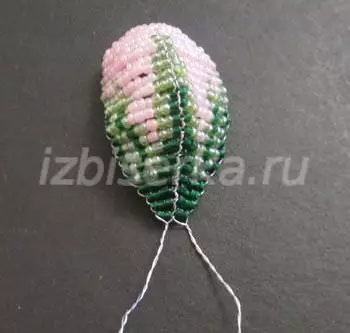
We splled half the leaf, and now you need to do the second. We take a piece of wire, the length of which is 110 cm, spend it through the upper bead of the ready half. The length of the ends should be the same.
We ride one bisper for each part of the wire.
Top end spend through the bottom bead.
Tighten.
We spend between the first and second next to the finished half of the fishing line, which is located closer to the petal.
At the end of the wire, which is closer, we put on a pair of beads and spend another edge through them.
We pass the fishing line between the second and third.
By such a scheme wept the rest of the layers of the petal.

Note! At this stage, we need to weave twelve petals for such a simple scheme.
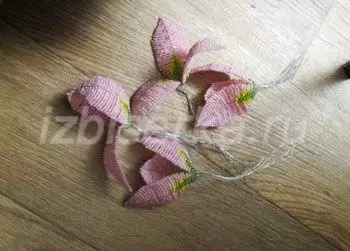
Now you can connect. Cut 15 cm fishing line and draw through 27 and 28 row of two petals. Tighten. Then carry through the following rows.
After that, we attach the same scheme the third petal.
We harvest four flower.
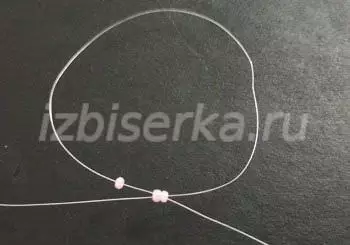
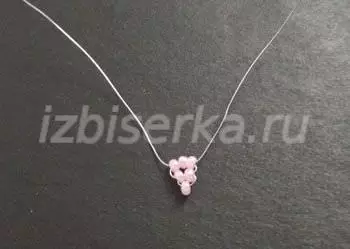
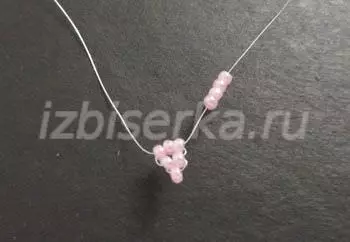
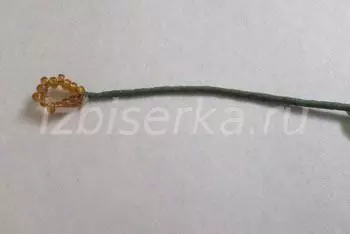
For the manufacture of a pestle and stamens for flowers, take a piece of fishing line, 22 cm long, on which 14 beads are riveted.
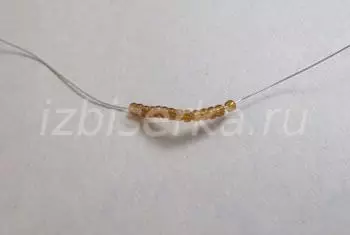
We form a loop and twist the ends with each other.
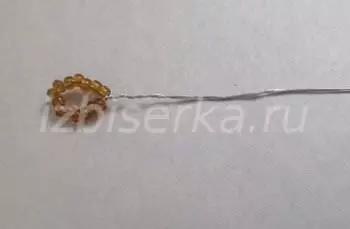
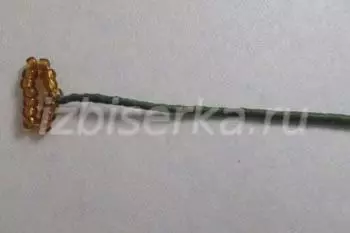
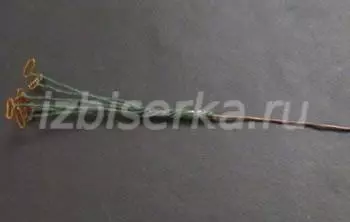
Watch up a green floral ribbon.
Silest a little loop. Total manufacture 15 pieces.
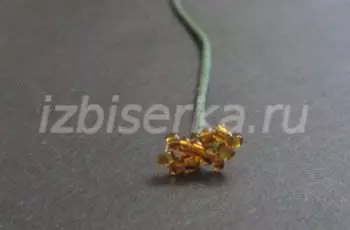
You will also need to make three pestle. They walked along the same scheme. At the end we twist the eight loop.
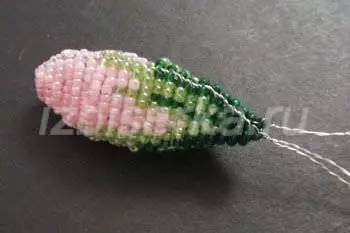
Next, you need to weave the flower of lily, which only flashes. All will be needed six petals, each of them is located on a separate piece of wires 85 cm long. Their work is provided in the following scheme:
1 - one pink; 2 - three pink; 3 - five pink; 4 - seven pink; In 5 and in the 18 rows weave eight pink beery. At 6 and at 17 - nine pink; In 7, 8, 16 rows - ten pink. From 9 to 15 rows weave in eleven pink beads. In 19 row - three pink - yellow - three pink. 20 - one pink bead - four green - pink; 21 - Pink - three green beads - pink; 22 - Pink - Two Greens - Pink; 23 - three green bispers; 24 - a pair of green beads. We close the weaving and twist the ends of the wire.
Article on the topic: Sweet gifts do it yourself for a birthday and the new year from candy
We are gossy ready-made petals in flowers. In one lily three petals. We connect, as in large colors.
Then make a flower that has not yet broke. For work, there will be three pieces of wires with a length of 85 cm. Detailed calculation of Beerin can be traced on the photo below.
After the first petal spllar, the second, and then the third part of the flower.
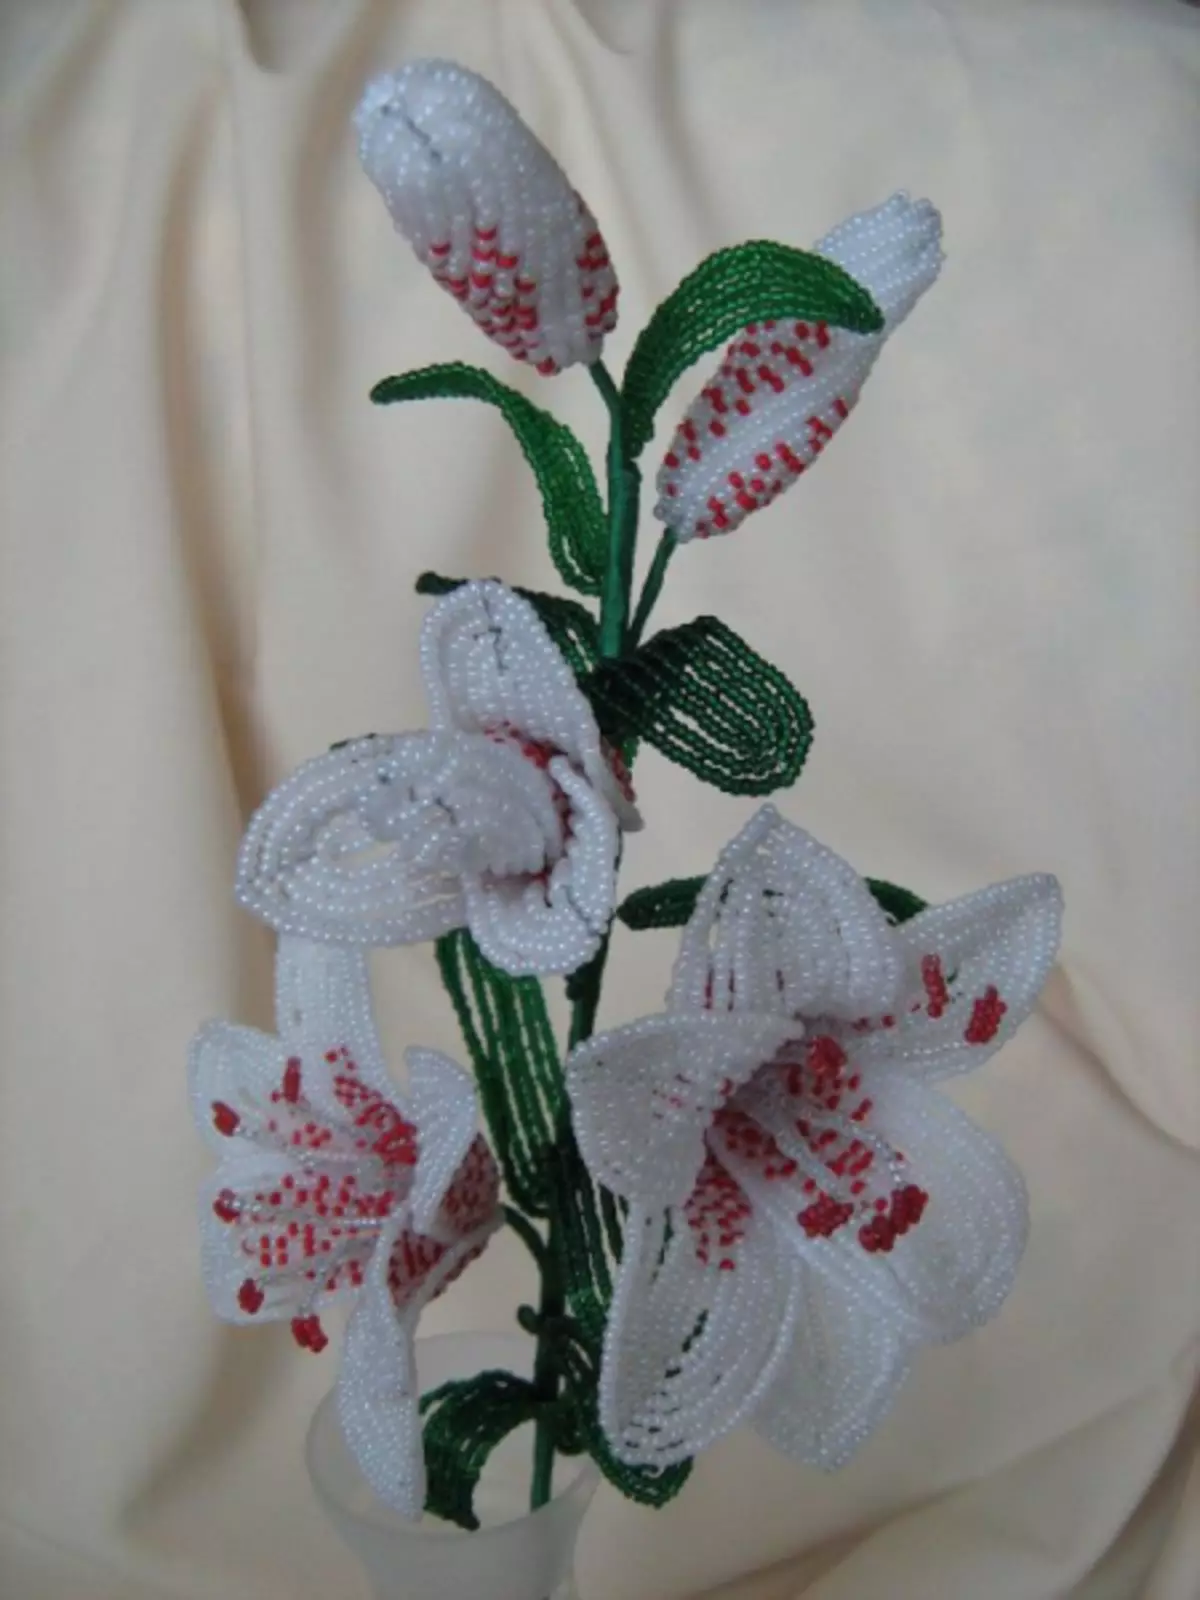
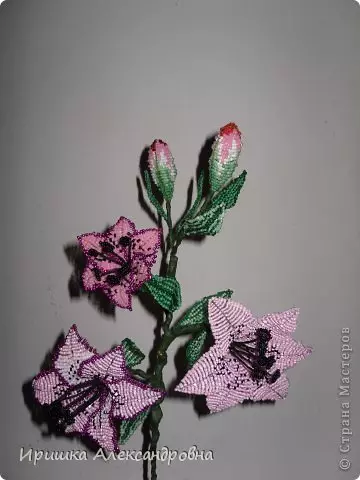
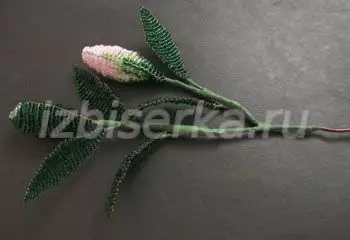
Weaving bud of lily, exactly the same as the flower, which has not yet blocked. The amount of beads and rows are the same. The difference is that with a sixth row we can only be a green beads.
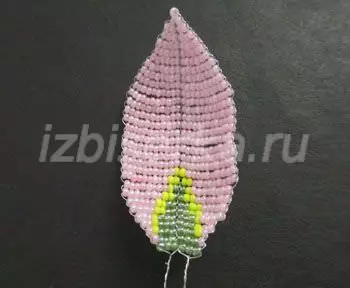
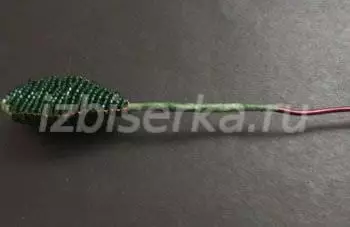
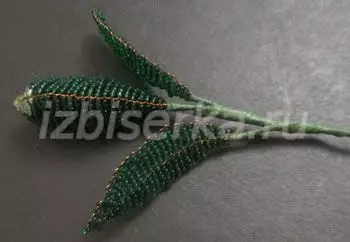
Lisk for lilies will weave in the technique of French weaving, which is shown in detail in the photo. To begin with, we ride 26 biserin, and then make an increase on each side. All need to weave 5 rows on each side. After you splured the ready-made sheet, pull it around.
During weaving, pay attention to the following photo.
Build a flower
We take a thick wire of 1 mm and attach six stamens and pestle on it.
We carry out the finished workpiece through the center of the big flower.
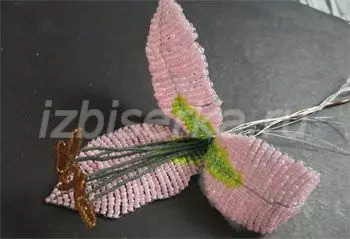
We twist the ends of the wire, wind the floristic ribbon. While working attach two sheets.

We do so with all the remaining flowers.
Now, we take the tolst wire and fastened to the top of the lily bud.
After two cm attach sheet. Another couple - the second leaf.
At the distance of five cm Fresh bud.
Then after 4.5 cm we attach one flower first.
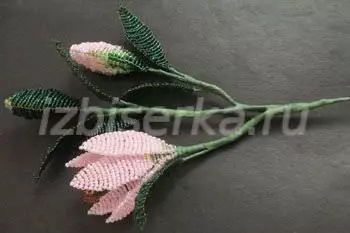
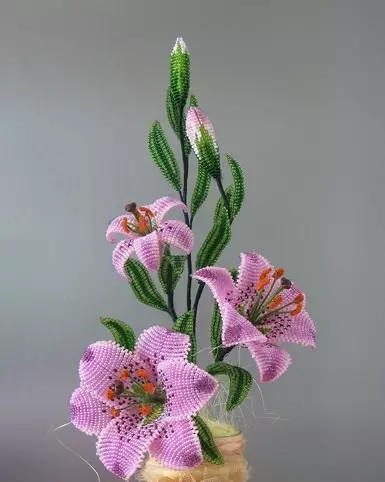
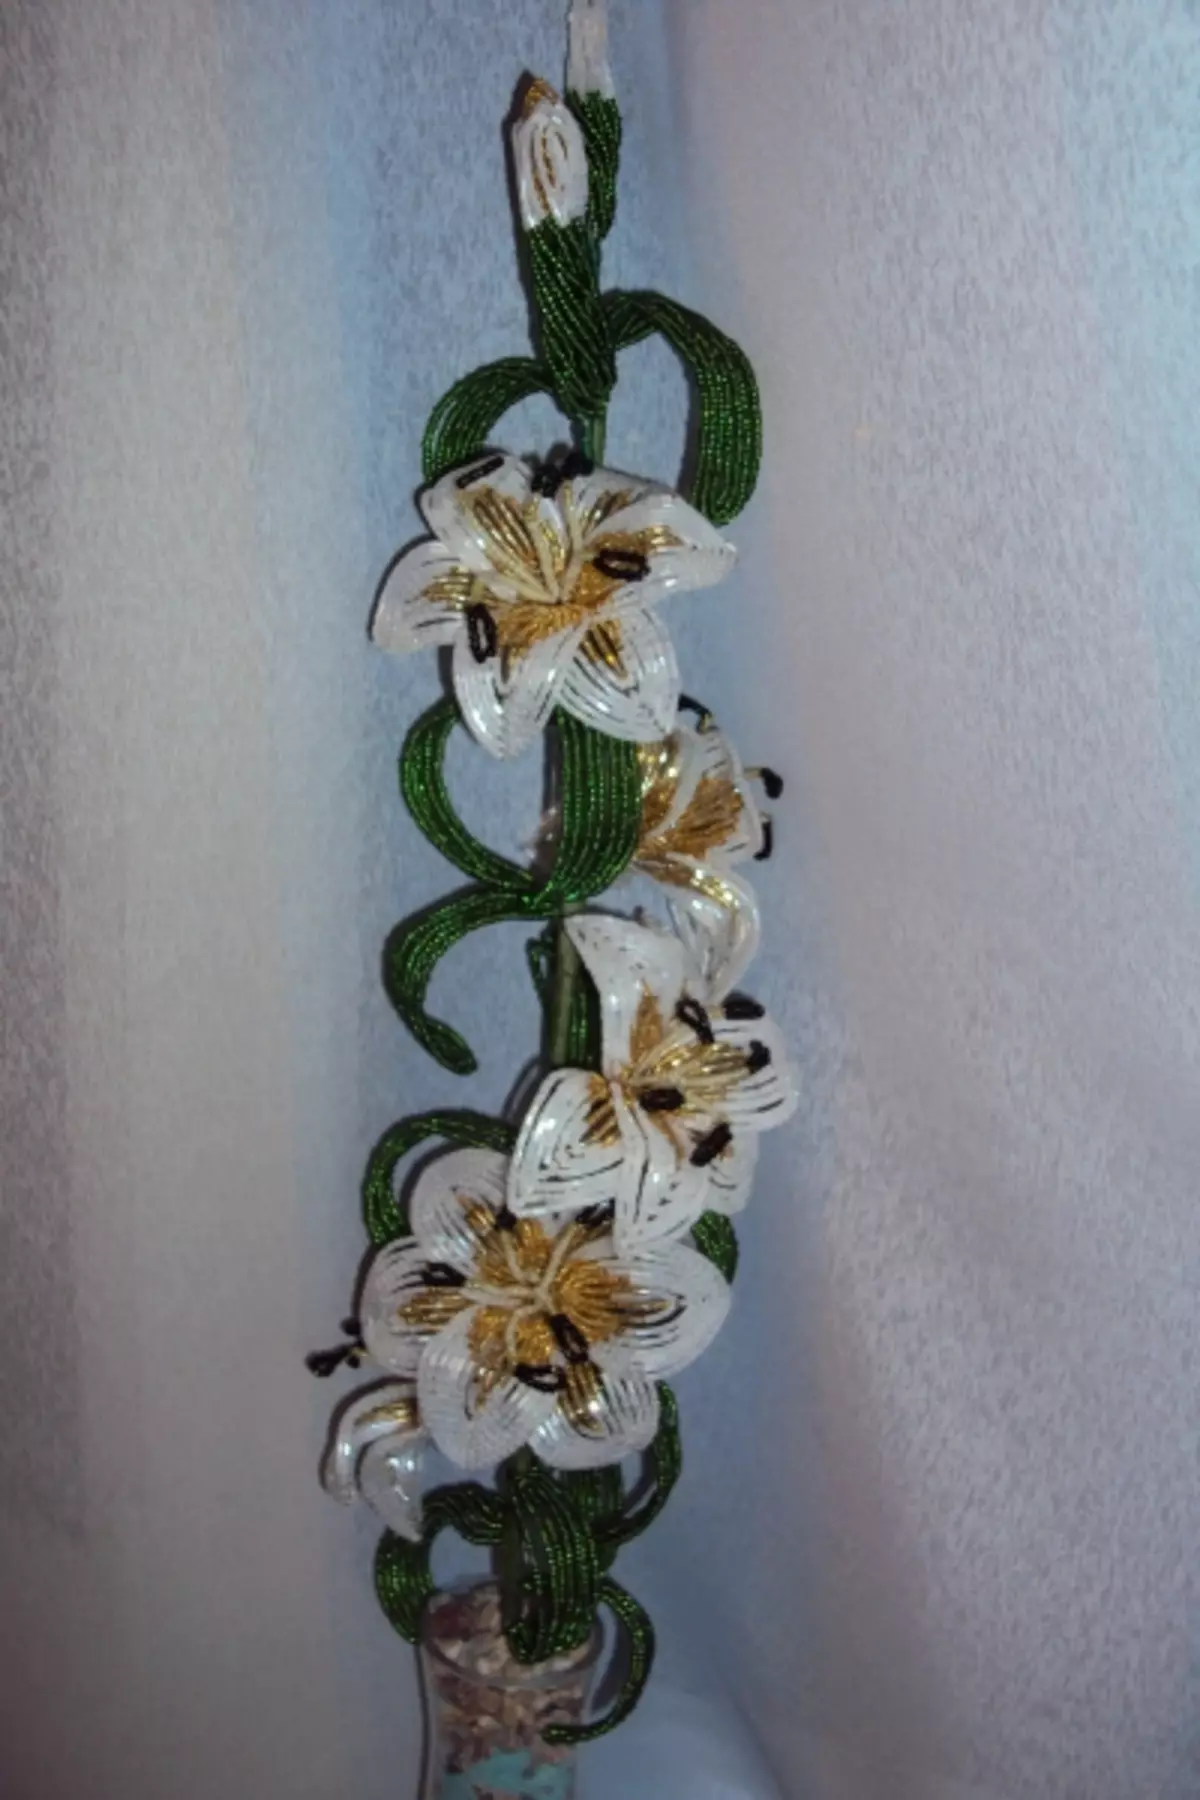
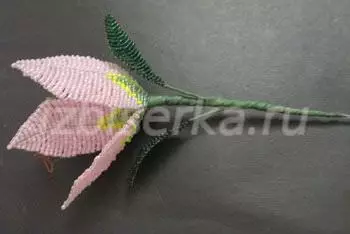
According to such a scheme, the remaining flowers are fed. We put a twig in a vase and pot.

As you can see, weaving such a beautiful twig is not too complicated, so this master class is perfect for beginner masters.
Video on the topic
We offer to see a selection of video for creating lilies from beads.
Article on the topic: Pillowcase scheme Crochet for beginners with description and video