
People, fountaining creative ideas, always cause admiration. It would seem, from unnecessary trash, they make piece, exclusive things. Why do you need an empty package from under the juice? Or a sleeve from the roll of paper? For ordinary people who do not possess creative start, the answer is obvious - they can only be disposed of. But do not hurry. Of these unnecessary ordinary things, you can try to make lamps from clay with your own hands, having received a completely incredible thing.
For the manufacture of clay luminaires, you can use both ordinary clay and polymer.
The material for the model is a polymer clay, or, as it is also called, plastic. It is a mass, by type resembling plasticine. Some species need to "harden" at home by baking in the oven. But there are also clays drying out naturally. They can be painted in different colors or have a natural base. Fixtures made of clay can be used in high humidity facilities, which allows you to beautifully decorate the bathroom, sauna and other rooms.
For the first time, the spread of plastic clay received in the 1930s, in Germany. At first, doll heads were made from her, which were completely identical to the porcelain. Then the use of clay spread the world. Products from it are affected by imagination: dolls, christmas toys, fabulous houses, lamps. From clay make quite unlike things, streaming is rarely delivered. The mass is produced in packages with a separate piece or in tubes like a toothpaste. Such material is convenient to apply fantasy strokes, and the luminaire of clay will be piece.
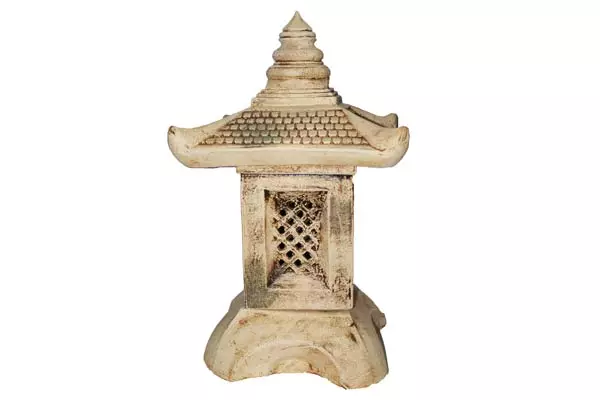
In order to create an unusual interior in his house, add romance and comfort to it, as the lamps from handmade clay can be suitable. Beautiful chandelier can be successfully replaced. Examples can be seen on the network, and it is better to create your own.
Article on the topic: We select flowers for the balcony: sunny side
What do you need for making?
Luminaires made of clay can be used in high humidity premises, which allows you to decorate a bathroom or sauna.
- clay;
- Paper knives for cutting, film to protect against contamination of the table, stencil stencils, they can be made to themselves, which will completely eliminate the similarity of instances;
- The form for a future luminaire of clay, just fit boxes and sleeves, also good bottles and tin cans from under beverages;
- sandpaper paper small size, grind the luminaire made of clay to the mirror glitter;
- Needle, ideal suitable shoe.
Stages of the workflow
You need to get started with clay healing with your hands. This is done exactly as with plasticine. The amount of clay depends on the size of the form. It should be enough to completely wrap the desired caliber. Hands during work should be made with cold water, then the clay will not stick to them, and its particles will not remain on the table or oil.
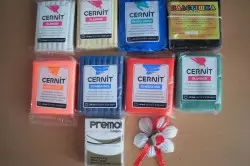
Plastic clay is produced in packages with a separate piece or in tubes like a toothpaste.
Next, the clay dough is rolled by an ordinary rolling pin, specially purchased for this. If you use your own kitchen, then clay particles will be in the pogs for sure. Clay rolls no more than 5 mm thick. The edges can be done thinner so that the wrapping is happening without a thick seam. Then the workpiece is trying on the template and cut off the excess, in the future they can also be used.
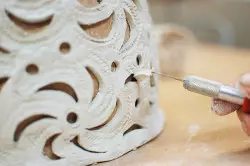
Then the clay sheet is folded on the oilcloth and begin to work. The stencil is superimposed and slightly pressed so that the drawing does not printed from the inside. Patterns of stencils can be purchased in stores for creativity, and can be made of plastic bottles with bent edges.
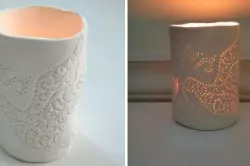
After that, the contours pierce points in increments of 5-10 mm. What is it for? When the clay lamp is ready, the light from the lamp inserted inside will pass through the holes, drawing the ornament contour. For an interesting combination of the color of the lamp holes make a needle, at the end of which there is a drop of paint. Then mixing colors gives an interesting result. Experiment can be infinite.
Article on the topic: How to determine the quality of interroom doors?
Clay begins to fit already in 20 minutes after heating.
After all manipulations with a pattern, the workpiece wrapping around the shape and bonded the edges. It is done like this: the fingers need to be moistened with water and gently smear the seam. The bottom is cut from the layer of clay the same thickness using the shape, it is simply driving and then attached to the workpiece. Now the clay should be given to dry. Immediately it is necessary to make a reservation that the clay is quickly hardening, it will start it approximately 20 minutes after the start of work, so it is worth hurry. Finally, the product can be dried with a hairdryer. Check for hardness and only then get the shape. After that, almost the finished clay lamp can be grinding.
The clay lamp can be covered with varnish.
It looks particularly beautiful in combination with lamp light. Also, for the desired form, the technique of Papier-Masha applies, then the luminaires of clay can be made in the form of anything: flowers, patterns, animals, fairy-tale heroes and other fantasies.
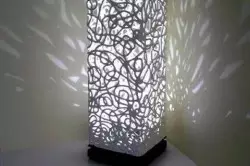
Large lamps of clay are very popular. Work on their manufacture is more painstaking than if you make something that does not require difficulties. To do this, use cardboard patterns of ornaments or even knitted napkins. The difference in the manufacture of lace lamps from the simple is that the ornament is cut into the right places, that is, the likeness of the clay napkin is made, then turns around the desired form and is left to dry.
Some nuances and tricks work
If there is no special tool, then cut ornaments can be cut with a scalpel.
- It is necessary to immediately decide on the appointment of the lamp. If this is a candle stand, the thing is one, and when the electric part is provided, then completely different. The base for the electrical part should coincide with the circumference of one of the parties to the product.
- The oilcloth should be placed on cells 1x1 cm. It is convenient to know exactly the size of your own billet. You can take to work the base of decorative self-adhesive paper.
- It is very convenient to apply punctures connected together toothpicks if you want to outline small circles.
- Cut the details of the ornaments are conveniently scalpel. Circles are squeezed with a pencil gum holder or a felt-meter cap.
- Gently close the seams will help a dry apple for shadows. Put carefully varnish in hard-to-reach places with a syringe.
- Faster to dry the workpiece will help hair hairdryer. Only turn on the moderate mode, otherwise the product will go with a sharp drying.
- Using for an additional decor old "Visulki": they looked at the chandelier well, they can come here.
- We must not forget that hardening will begin 20 minutes after the start of work. You need to keep at this time.
- Before starting work, the bath with water and towel should be ready.
Article on the topic: Why the LED lamp glows after shutdown
Shopping hiking in search of "raisins" for their interior can be postponed if you try to apply your own hands and fantasy. Exclusive handmade things are expensive, so you can reduce costs using the materials that are presented by the manufacturer in free access, the cost of their low. Let the luminaires of clay become the first creative discovery.