
One of the most inexpensive fences for the cottage or private house - from the professional flooring. His design is simple - the inserted pillars to which transverse lags are attached. A stranded straightener is attached to this lattice on the self-tapping screw or rivet. Everything is really easy, especially if you know how to use the welding machine. Although there is a technology without welding - on bolts or on wooden crossbars. In any case, the fence from the professional flooring can be built with your own hands. You can do all work if necessary, perform alone, but when installing sheets is more convenient with the assistant.
Construction with metal columns
The simplest manufacture is a fence with a metal posts covered in the ground. You can use round or square pipes, but it is more convenient to work with square-profiled.
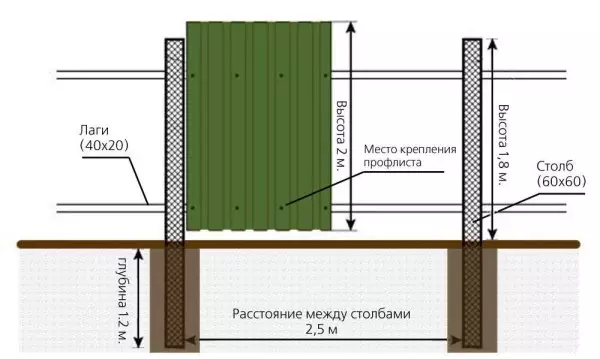
Design of fence made of professional flooring with columns
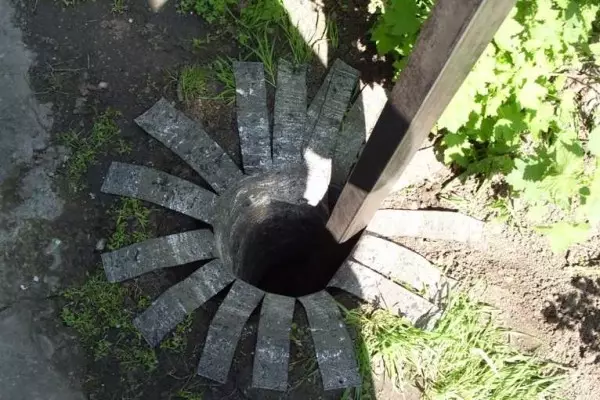
The length of the pillars is taken depending on the desired height of the fence, plus is added from 1 to 1.5 meters to the shock in the ground. Put in the soil is necessary below the depth of the soil freezing. For each region, the soil freezes at different depths, but in the middle of Russia it is about 1.2 m. When determining the depth, to which the pipes burst, it is better to be restrained and make the wells deeper. Otherwise, the forces of winter racks are simply pushed out, and your fence fell (see photo).
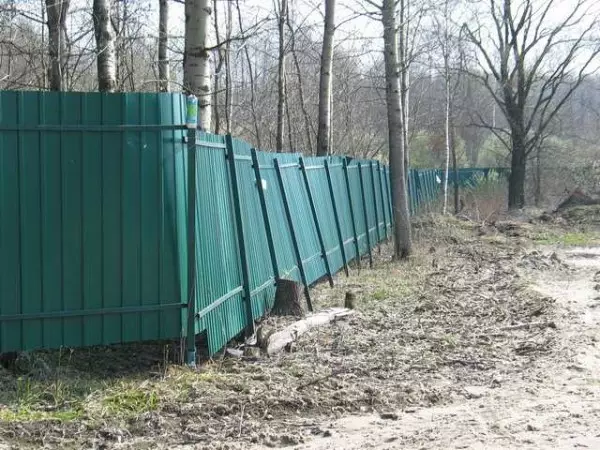
Insufficient bulleting of the support pillars led to the fact that the fence was glanced
For pillars, a profiled pipe is usually taken with a cross section of 60 * 60 mm with a wall thickness of 3 mm. The distance between the columns is from 2 to 3 meters. The greater the thickness of the proflist, the less you can put pillars. If the ground is sinking hard, it makes sense to make distances more, otherwise you can save on the purchase of metal - the thinner, the cheaper and the price difference is essential.
Lagges for the fence from the proflist make from the profile pipe 40 * 20 or 30 * 20 mm. The second option is wooden bars 70 * 40 or so. When using wood, a significant amount is saved, but the tree disappears faster, besides, it is corrosive from moisture. Most likely in a few years you will have lags to change, and they will already be metallic. But how the economy will go for several years.
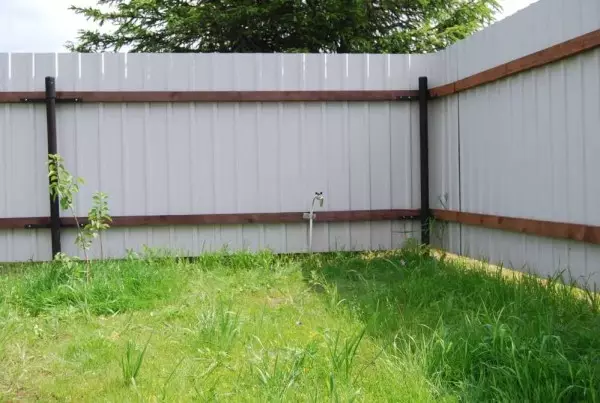
Fence from corrugated flooring on wooden lags
By making a fence from a professional flooring with their own hands with wooden lags, do not forget to carefully treat the wood with an antibacterial composition (for example, Sezheng ultra). It is better to do it in the bathroom - immerse the bars for 20 minutes to the solution completely. So they will serve longer.
The number of lag depends on the height of the fence. Up to 2 meters - enough two, from 2.2 to 3.0 meters we need 3 guides, even higher - 4.
In detail about the choice and construction of the foundation for the fence, read here.
Methods of fastening Lag to the columns
Metal lags weld or between pillars or in front. The first way is more laborious, and more waste is obtained: you have to cut pipes into pieces. But with this location, the lag design turns out to be more rigid: each pillar serves as a support for the sheet and it is less "walking", if you wish along it, you can put a couple of additional fixings.
Article on the topic: how to bring cockroaches in the apartment by folk remedies
If you weld the pipes in front of the post (from the side of the street), the works are less, but it will be necessary to cut anyway and waste will be: it is necessary that the weld seams of two sites occurred to the pole. Is that you give up the distance so that they go smoothly. Then the materials are purchased previously, and then count the step setting step.
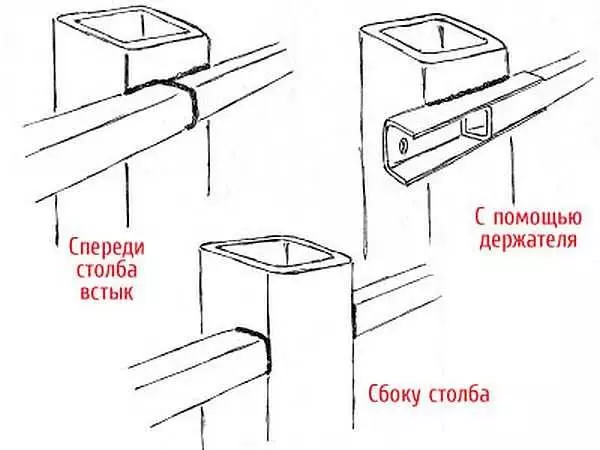
Conduct metal lags to columns in two ways
For fastening wooden bars, holders are welded or on sides - metal corners or P-shaped guides. In them, then drill holes and fasten with bolts or screws.
There is an option to assemble the fence from the corrugated floor without welding. For this there is a special fastener, which is called the X-bracket. This is a cruciform plate with curved edges, which is attached to the self-tapping screw.
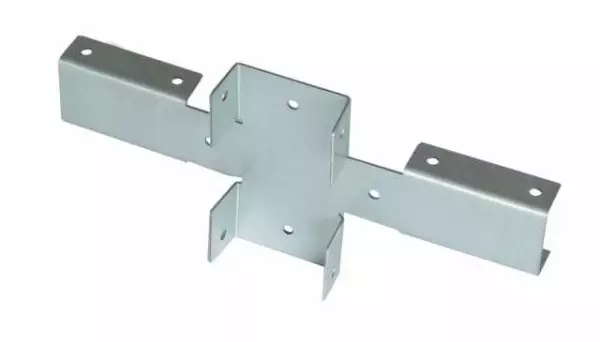
X-bracket for a fence from the professional sheet without welding
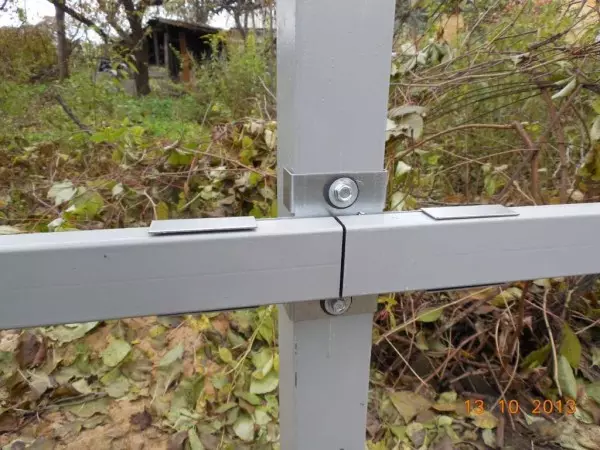
So everything looks in mounted state
Professional flooring for fences
For fences, a professional sheet with marking C - for fences and walls is used. There is still n and ns, but they are not suitable for fences - these are more roofing materials. You can rarely meet the marking a and r, profiles and can be used for fences.
In the marking after the letter there is a digit - from 8 to 35. It means the height of the ribs in millimeters. So C8 means that the professionalist is intended for the fence, and the wave height is 8 mm. The greater the wave height of all the more rigid surface. With strong winds, take at least C10, or even C20.
Sheet thickness - from 0.4 to 0.8 mm. The most optimal option is 0.45 mm thick or 0.5 mm. They are suitable for the fence of up to 2.5 m of height. If you need higher, take at least 0.6 mm.
The height of the sheet is usually around 2 meters, you can find 2.5 m. The width is very different - from 40 cm to 12 meters. Different plants produce various profession in the format.
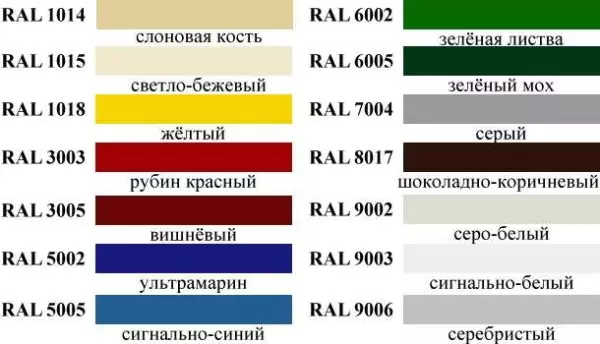
Standard colors palette in which profiled metal sheets are painted
Professional flooring can be galvanized, can painted (painted 15-25% more expensive than galvanized). The paint is applied in two types: powder and polymer coating. Powder coating is more resistant, but also more expensive.
There are sheets painted on the one hand - from the second is a galvanized, covered with ground gray, is from two. Bilateral coating, naturally more than one-sided color, but the view is better, and the service life is more.
This is a view from the courtyard on the fence with bilateral coloring
Supporting pipes and lags for the fence are usually ground, then color. And somehow he was heard that they were painting their dark paint. Attaching then painted on one side, the professionalist get a clearly prominent "skeleton" on a light gray background. On a small plot it happens critical. Pay attention, and building a fence from the corrugated hand, paint the carrying frame into a light gray color. The result will please you: it looks much better from the courtyard.
How to mount a professional carcass
Fasten the sheet with self-draws or rivets. Self-tapping screws are galvanized, there are painted. Pick them in the tone color of the fence. Spin the screwdriver using nozzles.The installation step depends on the wavelength and the height of the fence. The higher the fence, the more often you need to install fasteners. It normally holds if it is mounted on a wave to increase strength, with two lags can be mounted in a checker order, and not one over the other.
Article on the topic: Elimination of a hole in a plasterboard wall
When installing it is important to set the first sheet vertically. Then everyone else will be installed without problems. When laying sheets, the following enters the already mounted on 1 wave. Fasten into the bottom of the wave. It is necessary to install a self-reading. Then the hole is overlapped with a washer and precipitates will not cause paint peeling.
About how to mount a professional on the fence, watch the video.
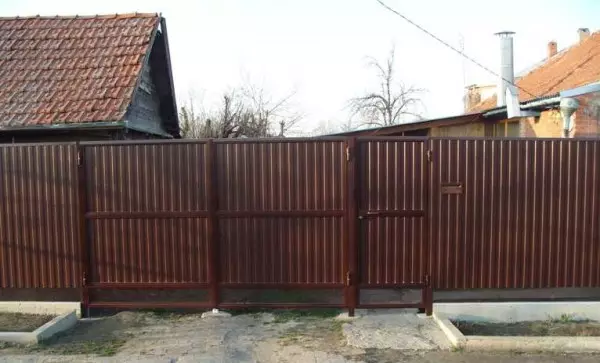
Fence from professional flooring with your own hands: photo report
The fence from neighbors and frontal was built. The total length is 50 meters, the height is 2.5 m. The brown straight professional is used on the front-line, galvanized, thickness is 0.5 mm, C8 brand.
In addition, such materials went:
- On the pillars, the profiled pipe is 60 * 60 mm, the wall thickness is 2 mm, pipes 3 m length;
- On the columns of the gate and the wickets put 80 * 80 mm with a wall of 3 mm;
- lags 30 * 30 mm;
- Gate frame and wickets 40 * 40 mm;
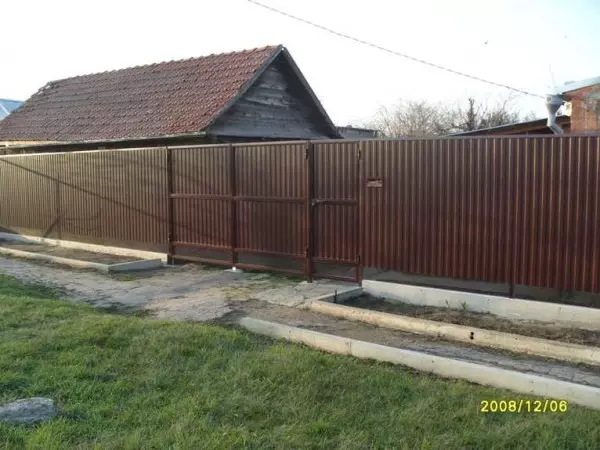
A finished fence from a professional flooring with her own hands built one person
The fence is mounted on metal pillars, between which the base is then flooded. It is necessary for the owners, because before the fence it is planned to break the flower bed (you see the fence under it). Also, he is needed that water during abundant rainfall does not pour the courtyard. Metal sheets are attached not immediately from the ground, but slightly retreating. This gap is closed with a carving - ribbon, which remains in some industries. This is done specifically not to overlap air access in order for the earth faster than the sink.
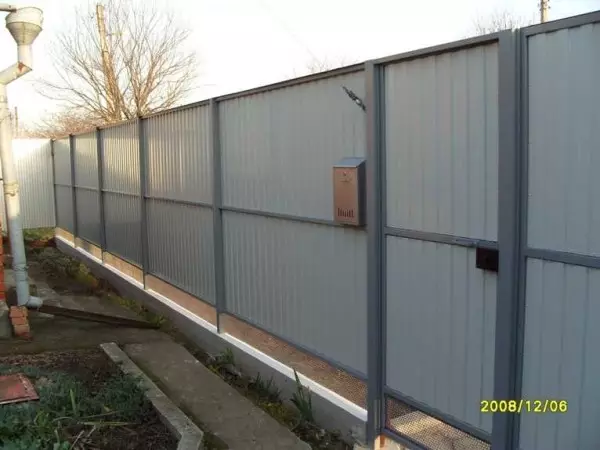
View from the inside on the finished fence
Preparation of metal
The first stage is the preparation of pipes. From a warehouse, the pipe comes rusty to serve it for a long time, you have to consider Ruz, then process "anti-fruner" and after painting. It is more convenient to first prepare all the pipes, process to and paint, then only start mounting. Rust picked up with a metal brush installed on the grinder.
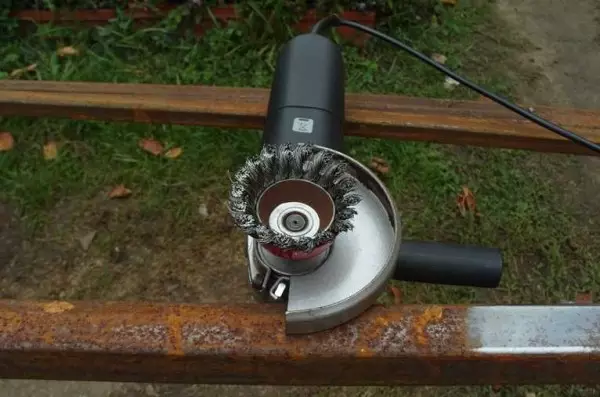
Pipes need to be cleaned from rust
Pipes in the warehouse were only 6-meter. Since the height of the fence is 2.5 meters, you need to bury another 1.3 meters, the total length of the post must be 3.8 meters. In order to save, cut in half into 3-meter pieces, and the missing jokes with a different scrap metal available in the farm: cutting corners, fittings, pieces of different pipes. Then everyone cleared, primed and painted.
Installing columns
The first to put two angular columns. Jama drilled bought in the store a brown. The soil is normal, one hole depth of 1.3 meters went about 20 minutes.
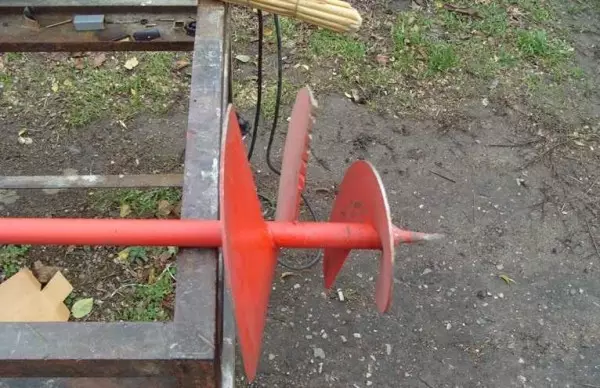
Bur for the holes under the poles
The first pillar was exhibited horizontally and so that he climb over the soil to a height of 2.5 meters. To set the second, it took to repel the height. Used water level. It is necessary to pour it so that there are no bubbles - from the bucket, and not from under the tap, otherwise it will lie.
Announced the second pillar on a repulsed mark (put on the bar, which was set near the hole) and were concreted. When the cement grabbed, the twine was pulled out between the colums, according to which everyone else was aligned.
The fill technology was standard: a rolled regteroid was installed in the well. Inside, put the pipe, poured with concrete (M250) and exhibited vertically. The level was controlled by a plumb. Properly set the pillars - it is very important, otherwise the whole fence will be bothering.
In the process of work, it turned out several times that the concrete was flooded not inside the rolled rubberoid, and between him and the walls of the pit. It's a small pleasure to screamed him from there, because the protruding part was cut on the petals, pinned with large nails to the ground. Problem solved.
Article on the topic: Smokehouse in the country
So recorded runneroid
After the concrete grabbed, they made a portable formwork from the boards, covered with a dense film. With their help flooded the base. So that it is stronger, on the bottom to the columns on both sides, the rods of fittings are welded. The formwork was raised around them.
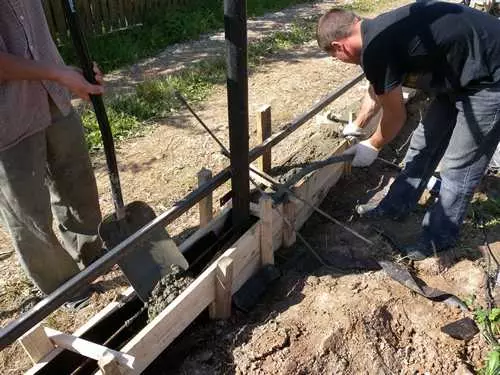
Formwork for socle
Installing jumpers
Purified, primed and painted pipes for the crossbar cut and welded. Cook between pillars. They are also tedious to put it in the level to secure it easier.
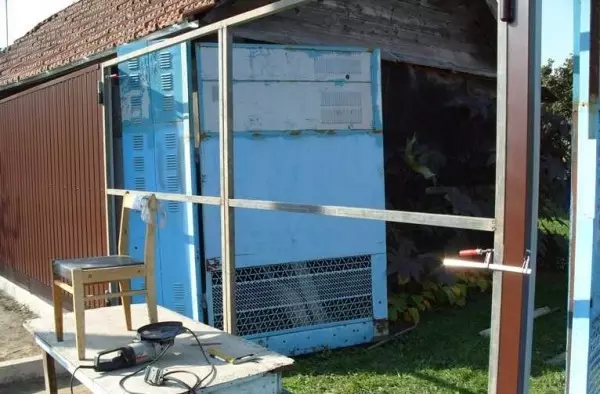
Cook jumpers
After the welding is over, all welding places are cleaned with a wire brush, processed "anti-javic" and after painted.
Installation of the professional sheet
Since the upper jumper passes along the very top of the fence, and it is welcome to level, there were no problems with alignment and installing sheets. Boldly first at the edges, then the intermediate screws were installed. To make it easier to put them smoothly, they pulled a thread between extremes.
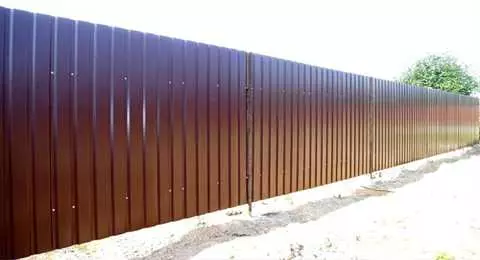
Exactly installed fasteners - also beautiful
After the gates were cooked and attached. As the last barcodes are installed on top of the good elements - the P-shaped profile, which closes the tip of the fence and plugs on the pipes.
The final view of the fence from the proflist made independently
As you understand, there is nothing particularly difficult. It is important to set exactly the pillars and welcome the frame. This is the main task. A lot of time - about 60% goes to prepare pipes - cleaning, primer, painting.
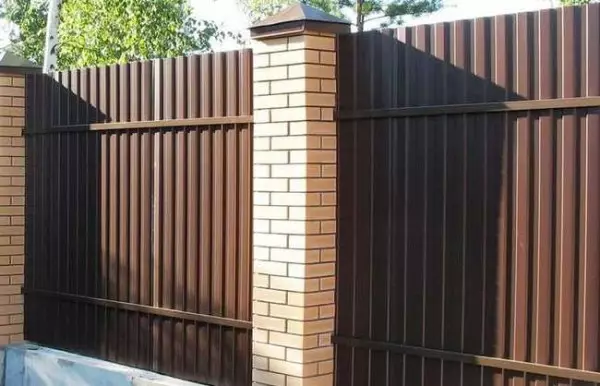
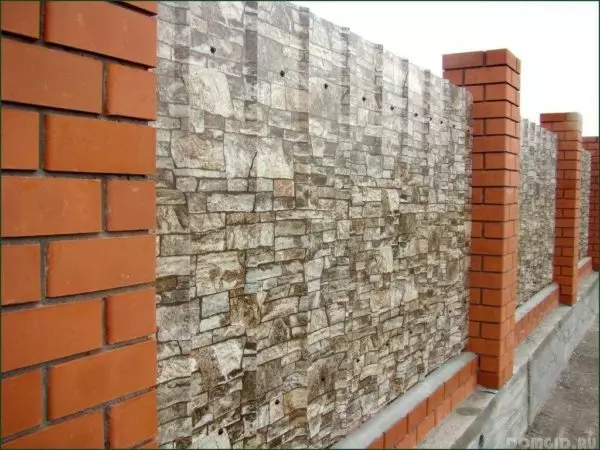
Fence from the professional sheet with brick columns
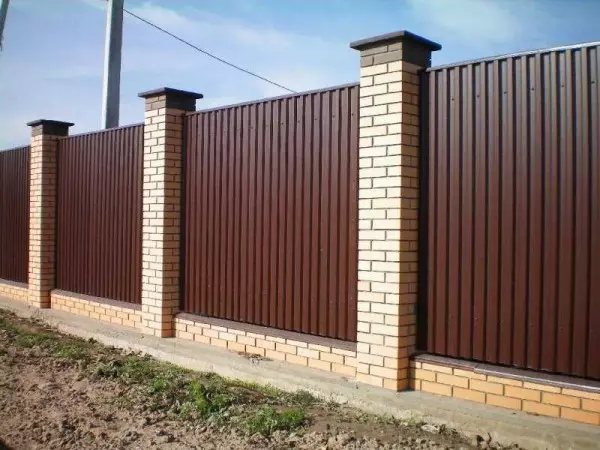
Professional property in combination with brick pillars looks solid
Of course, a fencing with brick columns looks more decorative. If you wish, you can do it, but the time will need more. There are two options:
- Making a full ribbon foundation. But it is long and expensive. On well-drainaged soils, it is possible to make the foundation of a small embedding, it will have to be buried below the depth of the soil freezing. And even though the tape will be non-screamed, a lot of work - for the entire length of the fence to dig a trench, put a formwork, knit reinforcement, pour and then finish. On top to put brick poles. Firmly, reliable, but expensive.
- Make according to the scheme described above: carrier pillars with the basement. Around the pillars lay a brick. This method is less expensive. About how to put a brick poles read here.
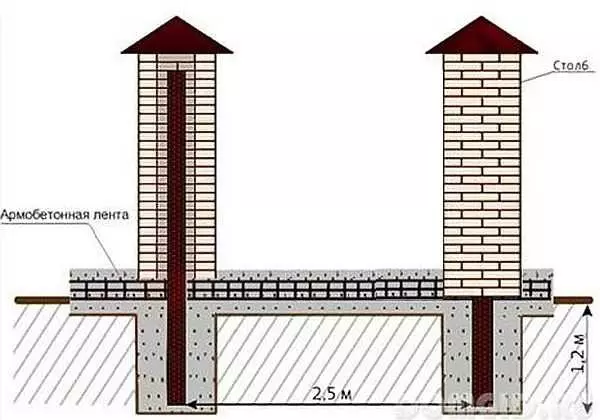
Conceptual image of a fence design with brick columns
All technology is the same, only reinforcement will need more rigid - two belts of two rods with a diameter of 10-12 mm. In the posts it will be necessary to install mortgage elements to which the guides will be attached. Their (mortgages) can be welded to the pipe, after it is exhibited and grabbed the solution.
Stock Foto Design of fences from the proflist
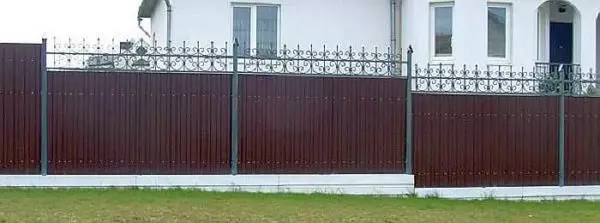
A profiled sheet is combined with a forging, sometimes boils the frame from the profile pipe, a straightener is mounted in it and all this is decorated with metal patterns - forged or welded. Another option to make the fence is non-standard - install the wave is not vertically, but horizontally. A small, seemingly change, and the view of the other. Some ideas in the photo gallery below.
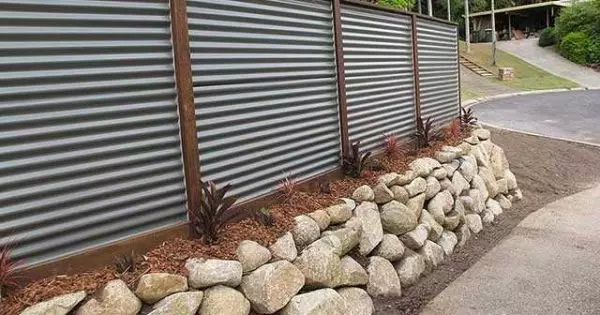
Horizontal fence from the proflist
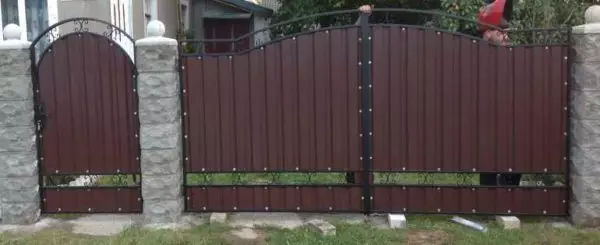
Beautiful combination of stone, forging and red-brown sheet
Pillars made of round metal pipes, to them from the back of the strip, to which the sheet is attached
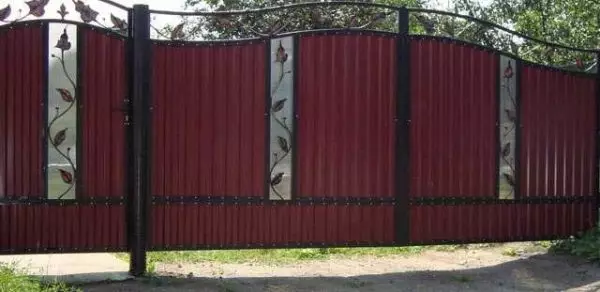
Forging and polycarbonate inserts
More Variations on Forging
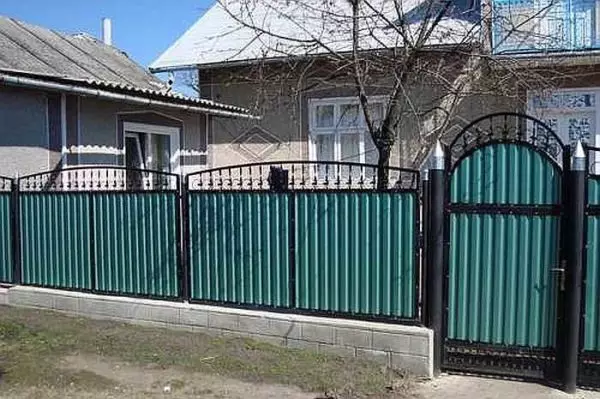
Coloring may be non-unique
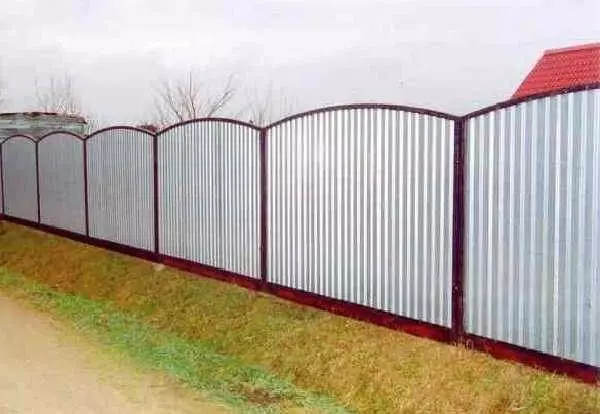
Needed with nonlinear top