
Models of such doors were named due to their design features - canopies, a special guide for which the canvas travels when opening or closing. Recently, the popularity of such doors is gaining momentum. Indeed, the design looks in designer. However, the cost and installation of such doors flies in a penny. Therefore, you can pose such a project as the attached door with your own hands. Moreover, people who skillfully hold the screwdriver, such a thing is quite on the shoulder.
Hinged doors were obtained thanks to the method of fastening, with the help of which they, in the literal sense of the word, were suspended with the ceiling.
Maintenance and tools required for installation
Hinged doors are several types:
- The harmonica consists of several elements bonded between themselves and developing when opening in a compact design.
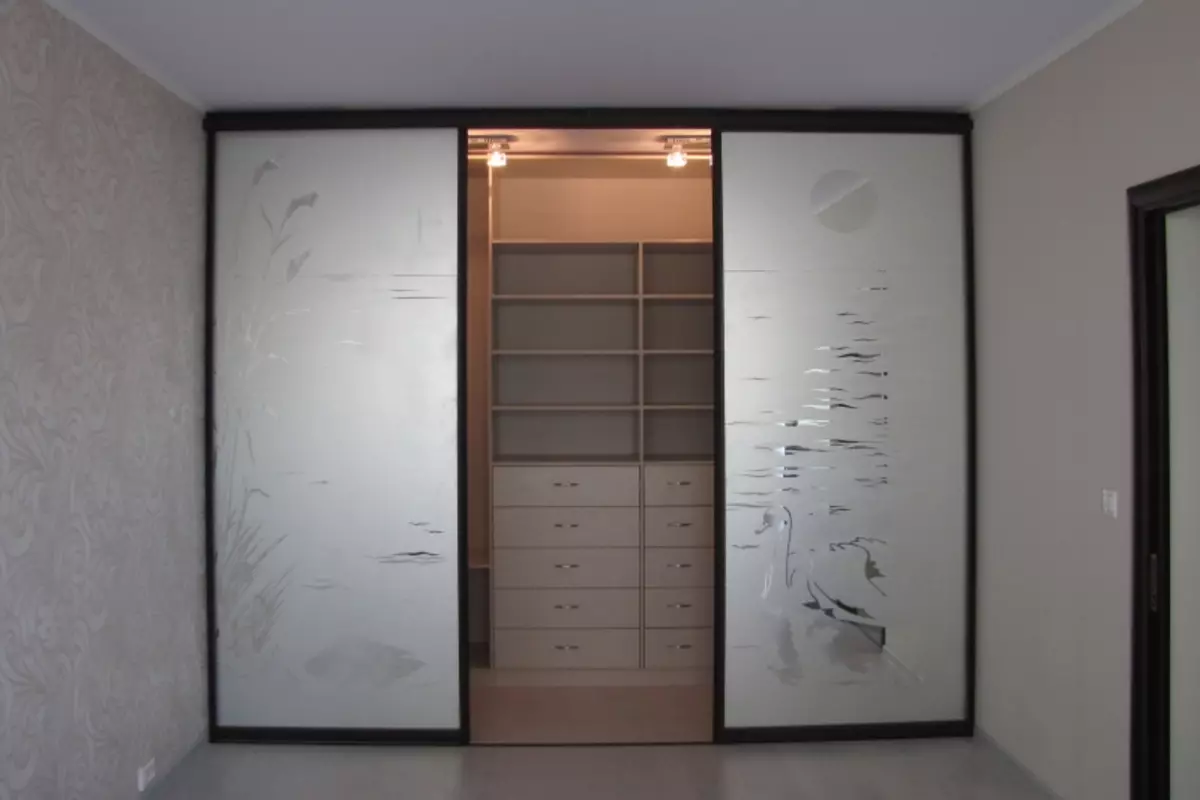
- The coupe involves the movement of one canvas with a standard door.
- The partition is a web design, much greater in size than the standard door. It puts as a designer reception of the separation of the space of a large studio room on the zone.
Montage of each can make with your own hands, but it is worth knowing that it will take great accuracy in defining dimensions. Otherwise, the alteration will entail the repair of ceilings and walls.
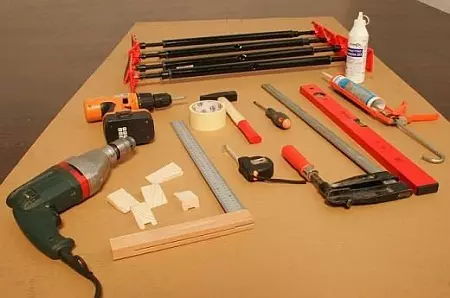
Tools for installing mounted doors: drill, level, pencil, ruler, hammer, chisel.
Tools (they are suitable for any design) that will be needed:
- Capacity for the mixture, tools for plastering;
- Drill and winning drills;
- screwdriver;
- level;
- pencil and square;
- a hammer;
- chisel.
Materials for installation Door-coupe:
- Aligning dry mixes for walls. They must be perfectly smooth, because the door canvas should walk along them freely.
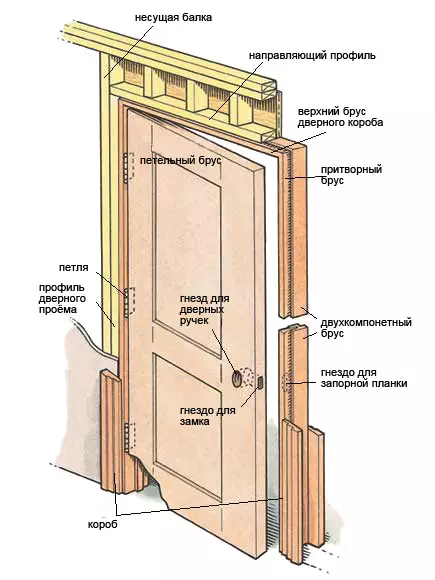
- Guide doors. It can be a wooden timber, respectively, processed, or a vertical element from the door frame, since the attached doors do not attach them.
- Upper and, if the design provides, bottom roller elements. Their length should be 2 times the width of the doorway (+ 5 cm of stock). This is done in order for the design does not fly from the rollers with a wide opening. The quality of the suspensions should be at the height, since the door is heavy.
- Waters door with platbands. In addition, you need to purchase plastic grooves that will close all the flaws of the wooden work. And if the lower rollers will not be, then plastic legs (with inserts) will be useful, which are clins.
- Door furniture. It is worth considering that the handles for such doors are not at all similar to ordinary. They are embedded in the canvas.
- Saws and dowels.
Article on the topic: Bearless toilet - from choice to installation
Stages and features of work
Installation scheme of mounted door.
Wall and door opening should be aligned with divorced construction mixtures, in order for the door design to be exhibited strictly parallel to the concrete base. Non-irregularities are not allowed along the door: it will hurt them, and the service life of the attachment will be short.
The marking of the guides is made as follows. The height of the canvas is measured. The gap is made between the door and the floor of 5 mm (the width of the roller structure is added). The pencil is put mark opposite to each other and the line is carried out. Then this same line is asked with the surface of the floor level, so that the doors spontaneously discussed subsequently.
You need to immediately drill holes for rollers on the guide to avoid cracking of the tree. Further, the guide is attached to the wall, strictly under the drawn line.
Now work begins directly with the door.
The chisel in the ends, if both roller structures are assumed, the grooves are selected.
Approximately half of the wheel. If the rollers will only at the top, then the holes for the "legs" are drilled below, and the groove is chosen directly in the floor. The plastic elements are screwed by self-drawers, and the legs can be inserted into the holes, pre-bay them with epoxy glue (the strength is excellent).
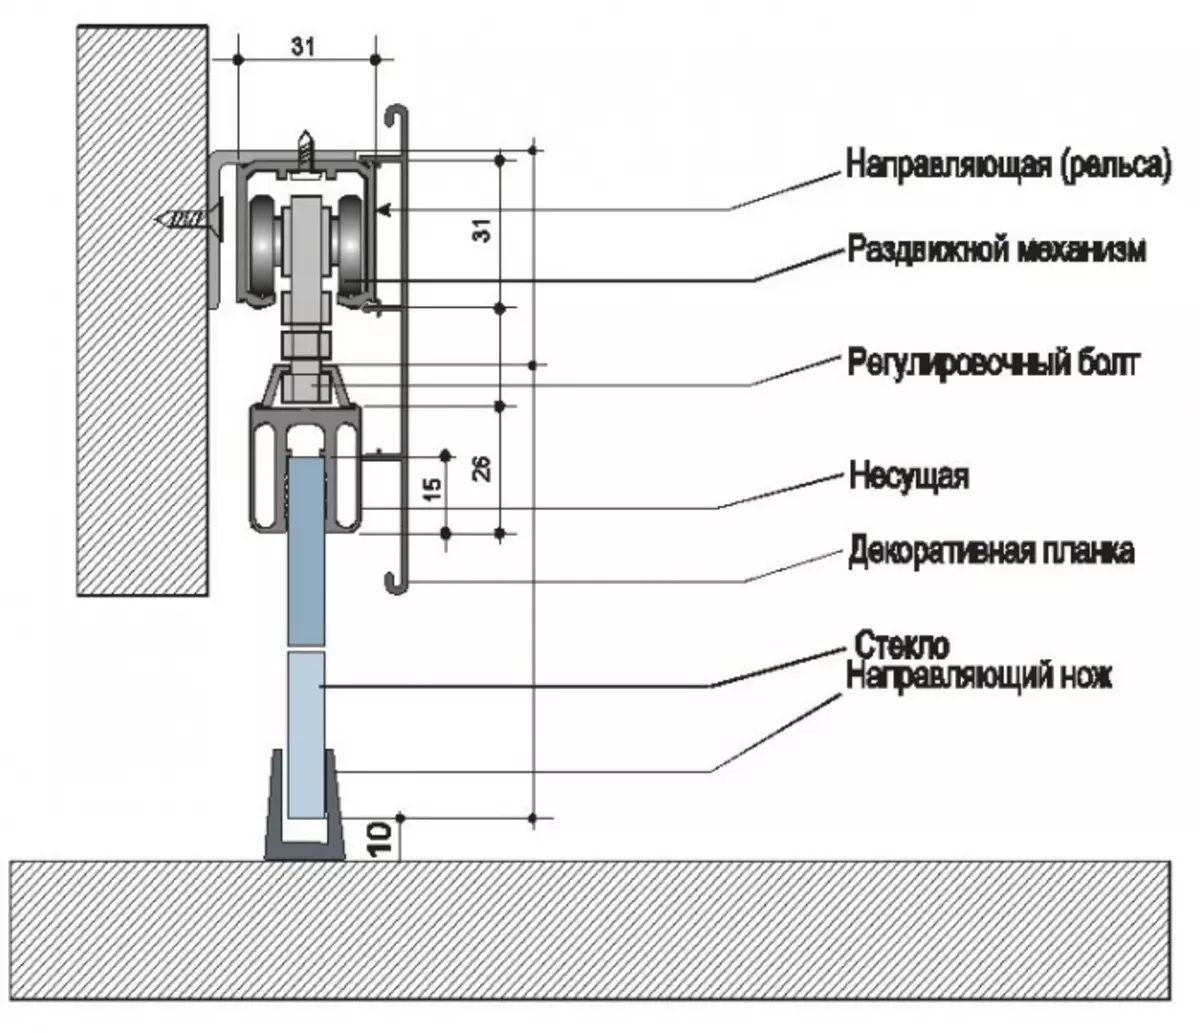
Schema of fastening the mechanism of the sliding door.
Accessories immediately mounted on the door. Make it very much difficult, especially if the handles go with the locks of the vertical closure. Therefore, it is best to purchase the finished door canvas.
Roller structures are screwed to the guide, and the door can be hung for fitting. If everything is fine, the level shows a flawless result, and the door itself does not cause complaints. It is removed, the platbands nail and hang in place for operation.
Hinged sliding doors coupes can have several sash. Installation of their more nodogue, but it does not represent difficulties. Minus all sliding doors - no sound insulation or heat.
Article on the topic: how to make smoke generator for smoke
Nuances Installation of Doors Harmoshaks
To the above described above, you can add roller structures on each sash and the absence of plastic grooves. The presence of the door frame will make such a door finished, if moreover, materials are beautiful initially.
The undoubted plus "Harmoshk" is to find the door leaf within the opening. Due to such a feature, in contrast to the sliding, the number of useful area increases: to the walls adjacent to the doors, you can put furniture closely. Start mounting from the installation process of the box should be strictly in terms of level. You also need to stack the opening and align all the surfaces.
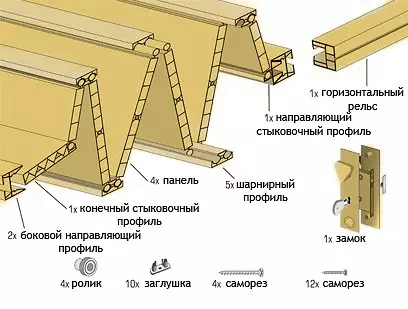
Typical equipment of sliding door-harmonica.
After that, go to the suspension design. The features of such an installation are that all elements must be installed at the same distance from each other. If the doorway is poorly served drilling for fasteners, then you need to use the winning drill and dowels. Vertical guides should be strictly parallel to each other so that the design is tightly and not flipped.
Then the composite parts of the "harmonica" are assembled. Usually the ready-made door has a grocery grocery, so the labor assembly will not be. This also applies to the accessories: the handle is already there. It also happens that the door is not suitable in relation to the doorway. In this case, one of the flaps is removed at all. Perhaps you have to expand the opening, and this is another story, entailing redevelopment. Therefore, in order to avoid additional troubles, it is necessary to choose the choice of doors before buying them, commensurate with the desired with possible.
"Harmoshka" hangs out - the installation is over. Typically, such doors do not have a platband, which frees from additional difficulties.
By minus such a door can be attributed to the opening of the opening, since the design itself is partially overlaps. It can be put in rooms that are not intended for regular repairs: pantry, homemade boiler houses, satisters and so on.
Article on the topic: Wiring in a wooden house with your own hands
Installation of door-partitions
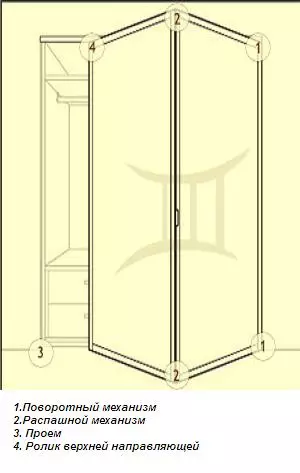
Diagram installation of door-partitions.
The material of the canvase can be anything: from the tree to the glass. The owner is a barin, but the price depends on it. It is not found on such designs as a low price and standards. Everything is done only under the order based on the desired size. And they are usually rather big.
Guides go to the entire width of the ceiling. Quality must be responsible throughout the rigor: if flies, it will not seem little. The number of rollers should not be small. At a minimum there are one by one for every 10-15 cm length.
Such rooms dividers are used by designers currently for studio apartments. This is an excellent way to distinguish between a large space on the useful zones even in a one-room apartment. The disadvantage is only the complexity of installation: it's not to spend it alone.
First you need to decide on the design. Partitions are simple, with one sash or cascading, when you can simultaneously shift several. In the first case, the side partitions are installed still relative to the floor. Middle - on the ceiling guide. In the second case, all three sash must be on the rollers. Here the guide has three grooves intended for the free move each.
It is best to make hinged doors of this type with a groove in the floor. It will be a guarantee of security, especially when there are children in the house.
Hinged doors are beautiful and easy to operate. You can make them yourself, but the installation involves the presence of certain skills, since subsequent use should be safe for all households.