
For updating and finishing interior doors, a decorative plank is used. Interior platbands carry several functional loads as a framing. Set the platbands with their own hands, it is worth only to decide on the installation method.
Functions of the door trim element
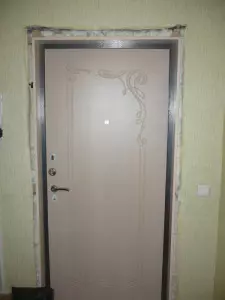
Door platbands on interroom openings are quite familiar decorative element for us.
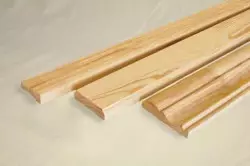
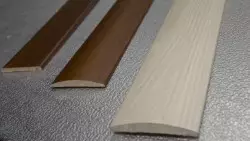
Wooden profiled platbands
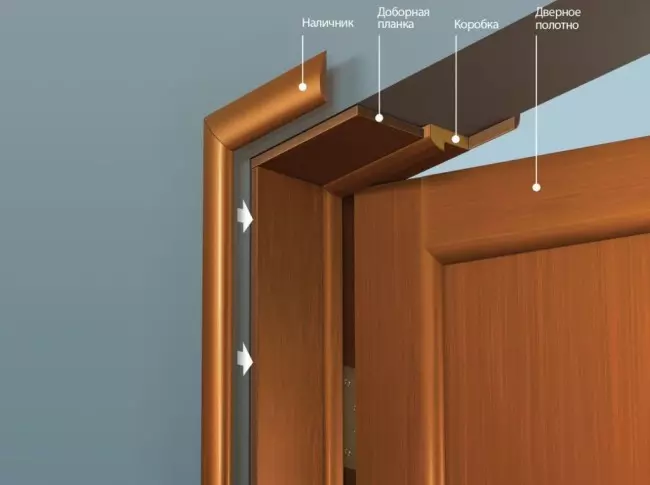
In essence, the platband is a decorative lining that serves as framing the door design. The main function of the part is reduced to cover the gap at the junction between the wall surface and the interior unit or the input unit.
The presence of this element is quite familiar and understandable, but the decorative component is that it is often attributed to the lining, and a number of other functional loads and a number of other functional loads:
- The cash on the door overlaps the lack of mounting work on the installation of the door box.
- Calcarcasts for interior doors at times increase the sound insulation indicators of the adjacent premises.
- The decorative plank prevents the penetration of dust into the adjacent room.
- Finishing doors with platbands is guaranteed to insulate the room from drafts.
Constructive decoration of the opening
To the only function of the door frame in the form of aesthetics to the doorpeth, a number of useful additions are applied. Due to the installation of the platband completes the complex of complete isolated adjacent room in the structure.
Previously, platbands in the form of carved openwork slats framed window and doorways of rustic buildings. Today, fashion for the products of the workshop of workshop is coming back, which can be seen on many modern buildings.

Carved platbands on modern srub
Of course, if in the past times everyone could afford to install carved overlays, because in fact everyone possessed, many and primitive, but skill. So at present, decorate the structure of the openwork not everyone afford.
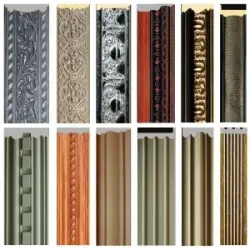
Material Madfish MDF.
Tubes on the door in modern form are plastic, metal or wooden pad, decorated with different kind of material or painted. Elements of the framing of openings can be created from composite materials. Types, forms of decorative elements and how to choose them to the design, everything is described in previous articles, so it is not worth stopping at this now. After all, we have the main task to tell about various ways to install cash.
Article on the topic: The principle of operation thermocouples
The doors of the hidden type of installation do not require the installation of platbands
Install interroom platforms with your own hands for any home master. The main thing is to choose the optimal method of installation, based on personal skills, the presence of tools and the general structural features of the door block.
Preparatory stage
Before deciding on the method of fixing platbands for interroom openings, it is worthwhile:
- End repair and finishing work.
Installation stage of plants
In other words, if the installation of the door is made in the room during repair draft works, then the installation of platbands is done at the final stage. The cash on the openings is set when the walls are already decorated with wallpaper or painted. Sexual coating should also be laid.
It is worth paying attention to that the plinth on the wall of the wall surface and the floor is stacked after the installation of the platbands. Since the plinth frames the door block throughout the perimeter to the floor surface itself.
- Buy platbands on the door.
A cash on the door is not necessary to order from the Master of Carpenter, elements are presented in a free sale in the pavilions of the construction market and in any specialized shopping center.
Finished finished jamming
It is permissible to find the details of both a wide variety of shades and various quality of the material of the outer decoration and the product range of any source materials. Metallic, MDF, Wooden, PVC, composite and other door platbands are also represented by various profile forms.
- Acclimatization of the product.
The purchased products before the start of the installation process should spend some time (several days / week) in the room where they will carry their functional affiliation. The product acclimatization is particularly important if the platband is wooden. This fact is not small, since any material in a variety of climatic conditions takes its size and density.
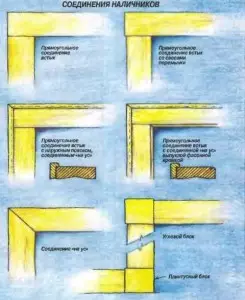
Options for docking on cylinders
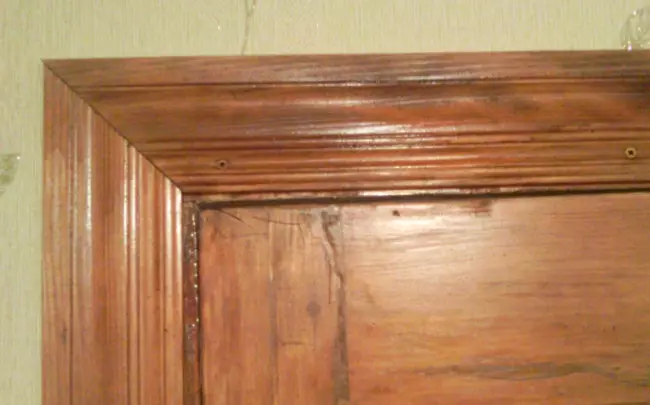
The platband wooden after the installation work (without acclimatization) can be a story and give a slit between the product itself and the adjacent plane.
- Cutting schedule corresponding sizes.
Often the docking of horizontal and vertical slats is made in the so-called, "mouth" (at an angle of 45 °).
Crop the planks in accordance with the height of the block and the width of the opening is not difficult. It is much more difficult to adjust the docking angles so that there are no cleric formations.
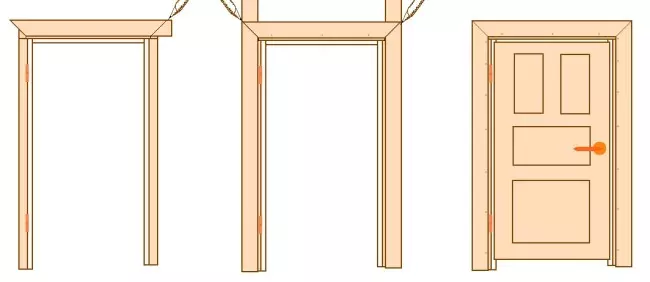
Trimming Molded Planks under the opening
For example, a wooden platband is capable of expanding and give some warning, which in time forms unsightly slots.
Article on the topic: Overhaul of the balcony with their own hands in the panel house: the right recommendations
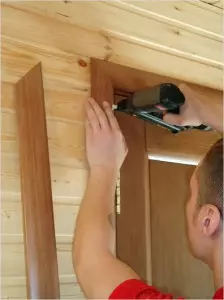
Traditional way to mount on nails
The method of fixing cash on nails is the most common. The main predominant features of the process are permissible to include such differences:
The drilling of holes for finish nails
- simplicity in fixing;
- ease if you need to reinstall or dismantle;
- reliability.
We recommend that work is recommended to stock up the following set of tools and materials:
- Finish nails (40 mm long).
- A hammer.
- Manual drill.
To score nails into the plane plane, without previously done holes, it is not recommended: first, it is not easy, since the product is quite dense, and secondly, you can disrupt the integrity of the finish, which will give not aesthetics to appearance.
- Thin drill (1.5 mm).
- Pencil for marking.
- Roulette.
Nice mount
The installation process itself looks like this:
- On the platband, markers are marked at the place of attachment at a distance from each other about 5-7 cm.
Decorative wood stickers
If you are confident in the ideality of the wall plane, then the product can be secured only in two or three places.
- Fasteners are drilled, where nails are clogged.
The drilled hole will allow you to drown a nail in the plane of the part. The surface is subsequently embarrassed by putty and masks paint, or closes with a decorative sticker.
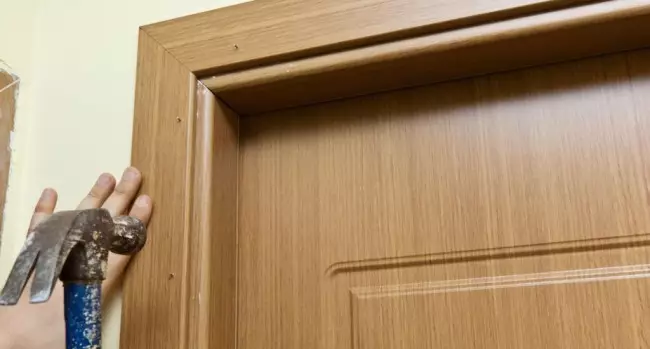
Fixing self-proof
The installation of platbands on the self-tapping screw is considered a standard type of fastening, but not so primitive as the process of using finish nails. The main advantages are permissible to include such differences:
- simplicity in fixing;
- ease if you need to reinstall or dismantle;
- Truly high-quality reunion due to the tight attraction of self-tapping screws.
To reproduce facing work, you will need:
- Selfless (25 mm and D6 mm long).
- Drill.
- Screwdriver.
- Pencil.
- Roulette.
The process of installation of planks using self-uses looks in the same way as when using nails.
Door cash on self-drawing
The only nuance lies in the fact that the hats of self-tapping screws need to be fine in the plane.
Decorative plugs on self-tapping screws
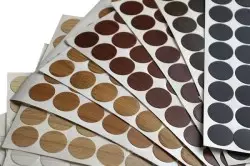
The hole is subsequently covered with decorative plugs under the color of the material used. It is not difficult to find the plugs on the shelves of building stores or pieces in a furniture store. The only thing stores sell them in the sorting of a large number. Therefore, it is permissible to use the same way of disguise as during novels.
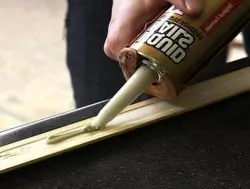
Glue
Special adhesive compositions, for example, liquid nails, are recommended to be used in the case of an ideally smooth wall surface. Specialized glues for wood are manufactured with tinting of different colors, which solves the problem of not neat installation.
Advantages of the Mounting Fashion:
- simplicity;
- Visual lack of fasteners on the surface of the platbands.
The disadvantages are permissible only the fact that, if necessary, dismantling the material, the platbands will simply be separated from the wall.
Landing tickets to "liquid" nails
Materials and tools:
- Specialized glue.
Process of activity:
- On the reverse side, glue is squeezed out of tube across the entire length of the row.
- The platband is tightly pressed against the surface for a few seconds and is left alone from the effects for a while, allocated in the instructions of the glue itself.
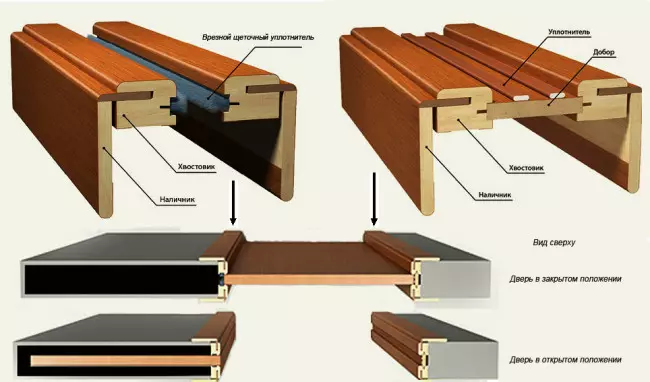
Coolband on latches either pinch / groove mount
Tubes on the latches either, products are still known as a platband with "beak", for quite a long time in the installation of modern door structures.
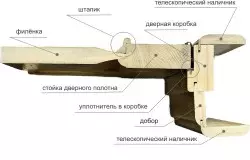
Telescopic platband on doorway
In essence, we are not talking about the pure method of installation, but about a specific product of a specific configuration. If we talked about the fixation of the overhead planks, this element is called a telescopic platband. Looks like a handling in the context of the letter "g".
You might think that once the platband is telescopic, then it is extended. Nothing like this, because this is a simple corner, one side of which in the installation process is placed in the groove, which must be equipped in the end of the door box. The handleager is simply adjustable and moves into this groove.
If the benefits of the product are obvious:
- Hidden Mounting Method.
The disadvantages of such a design are:
- When dismantling or reinstalling the seat (groove) in the door of the door or stratifies the shelf (spike).
- It is better to acquire similar platbands complete with shanks and bad people, where the grooves of the necessary parameters have already been made.
Complete set with telescopic platbands
The groove in the box is made by a special tool, but the installation of platbands includes tricks. In the end of the box along the entire length, you can make the drill to make holes, and then reunite them by manual sampling of wood. We agree that the process is rather dusty and long-term, especially with regard to fitting the size of the groove under the existing spike shelf.
Each of the considered options for mounting door trims on the openings is endowed with their preferential features and disadvantages. Installation equipment can be chosen any, the main thing is optimally weighted and evaluate all the nuances in each individual order.


(Your voice will be the first)

Loading…
Article on the topic: Redevelopment of one-room apartment in two-room