
The Japanese knitting of toys amigurum is increasingly popular. A distinctive feature of these products is the large size of the head in relation to the body and limbs. It gives additional charm and charm toys. The schemes of the amigurum hook dolls will help create needlewomen not one soft cute friend for mood or as a gift to relatives and loved ones, and also please the kids.
Features of technology
A characteristic feature of knitting techniques Amigurum is mating density. This is achieved by replacing the hook diameter to smaller. For example, if the manufacturer of the yarn recommends take a hook number 3, then hook No. 2 is used to work with this material.
Knitting should be dense to not be shown the filler to whom the toy is stuffed.
The basis of the work is the so-called ring amigurum. Thanks to him, there are no holes at the round toys. From how neatly the ring is made, the tumidity of the appearance of the product depends. There is nothing difficult here, but practice is needed.
Initially, it is necessary to drive a working thread around the nasty finger of the left hand a couple of times. This is done with the right hand in which the working thread is located. When the revs are screwed down, a spiral remains on the left index finger, which is carefully removed from the finger, forming a loop. Next, through this loop, the working thread is stretched and pulled out through the ring on the hook. Then the hook has been in the loop again and an ordinary column without Nakida is made.
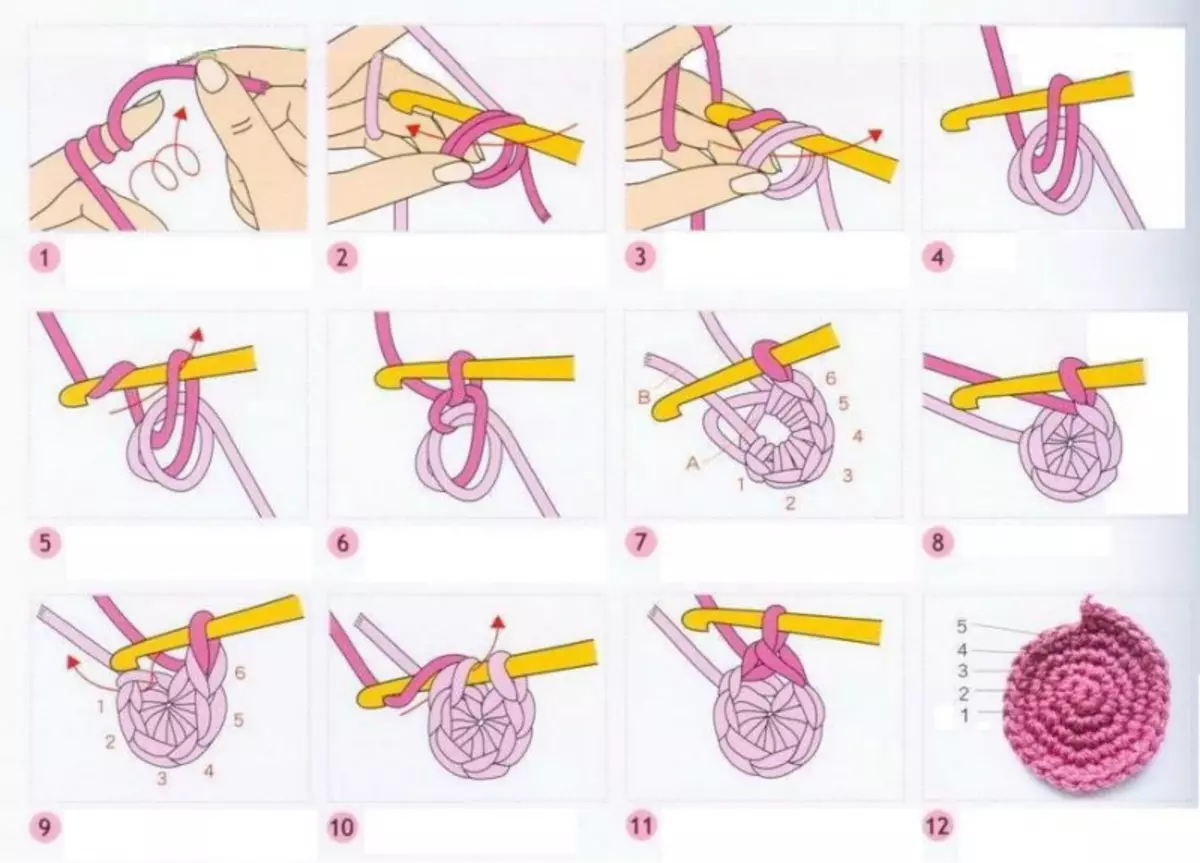
Usually, 6 or 8 hinges are in amigurum ring. Several revolutions of the thread around the finger for the first loop just ensure the density of knitting.
Talking the columns, the ring must be tightened, stretching the thread for the tip. It turns out a circle of six loops, pulled thread.
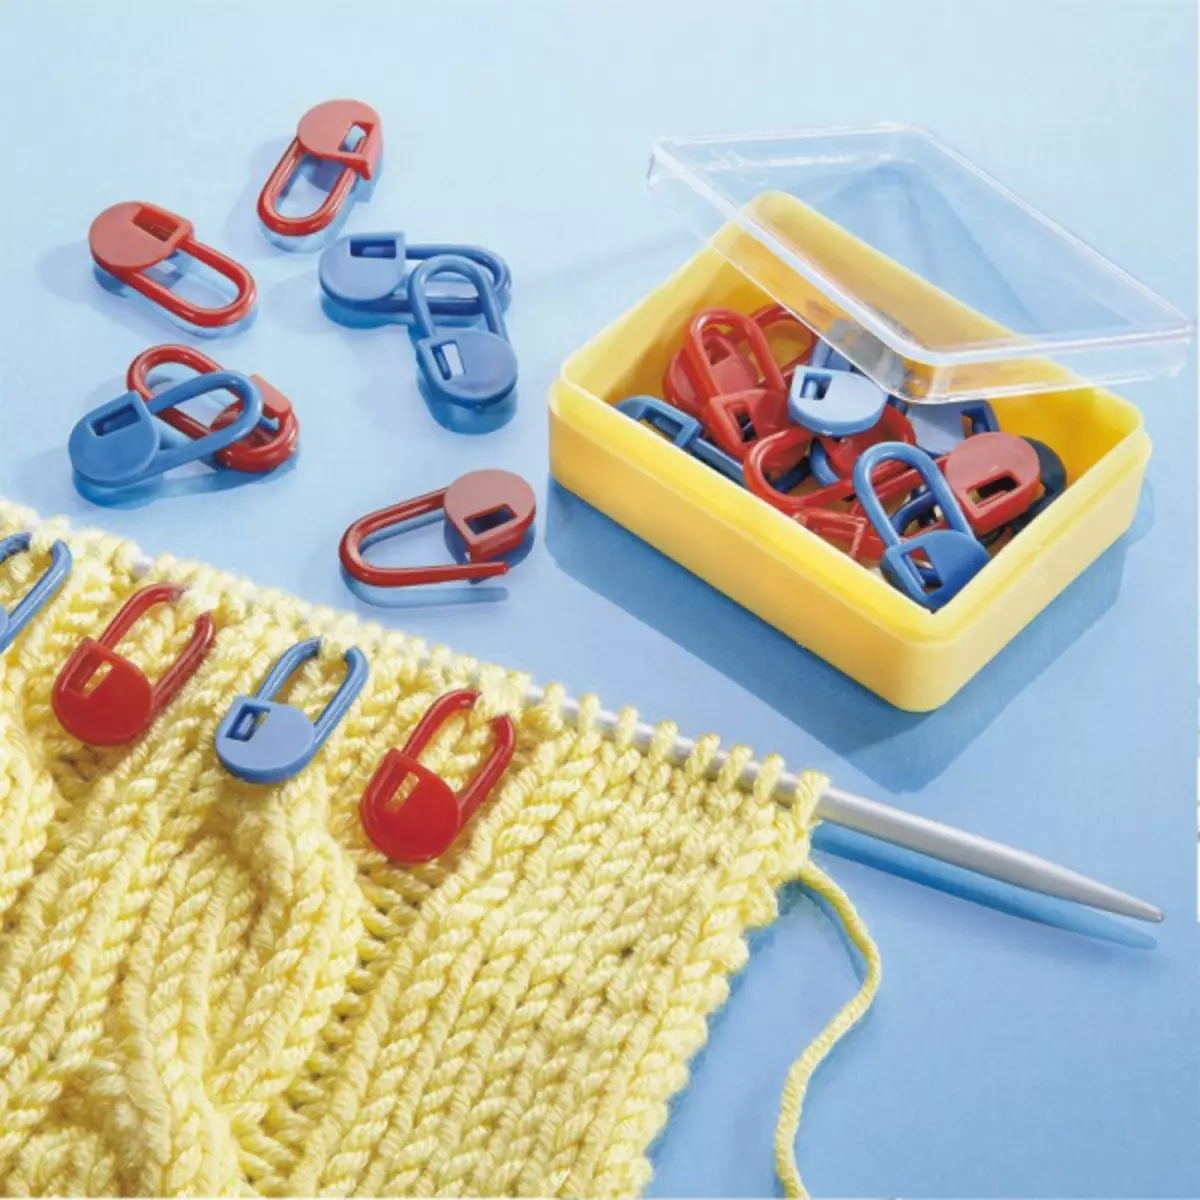
Knit toys not in a circle, as in most technicians, but on the helix. This means that the rows of the product are not closed, and smoothly move from one to another. Since the loop is added in the product, it is reduced, you need to consider them very carefully, otherwise the toy will not work. To simplify this task, masters use different markers in the form of special clips or other color threads. The main thing is to easily delete the mark.
Knitted doll
After reading the description of the process, even a newcomer will be able to tie a wonderful toy. To work, there will be a yarn of various colors, a hook, knitting markers, a filler for soft toys, slices of threads for hair or rolled, beads for eyes, pads and a burning desire to get a pet.
Article on the topic: Paper vine weaving: Master class for beginners with photos and video
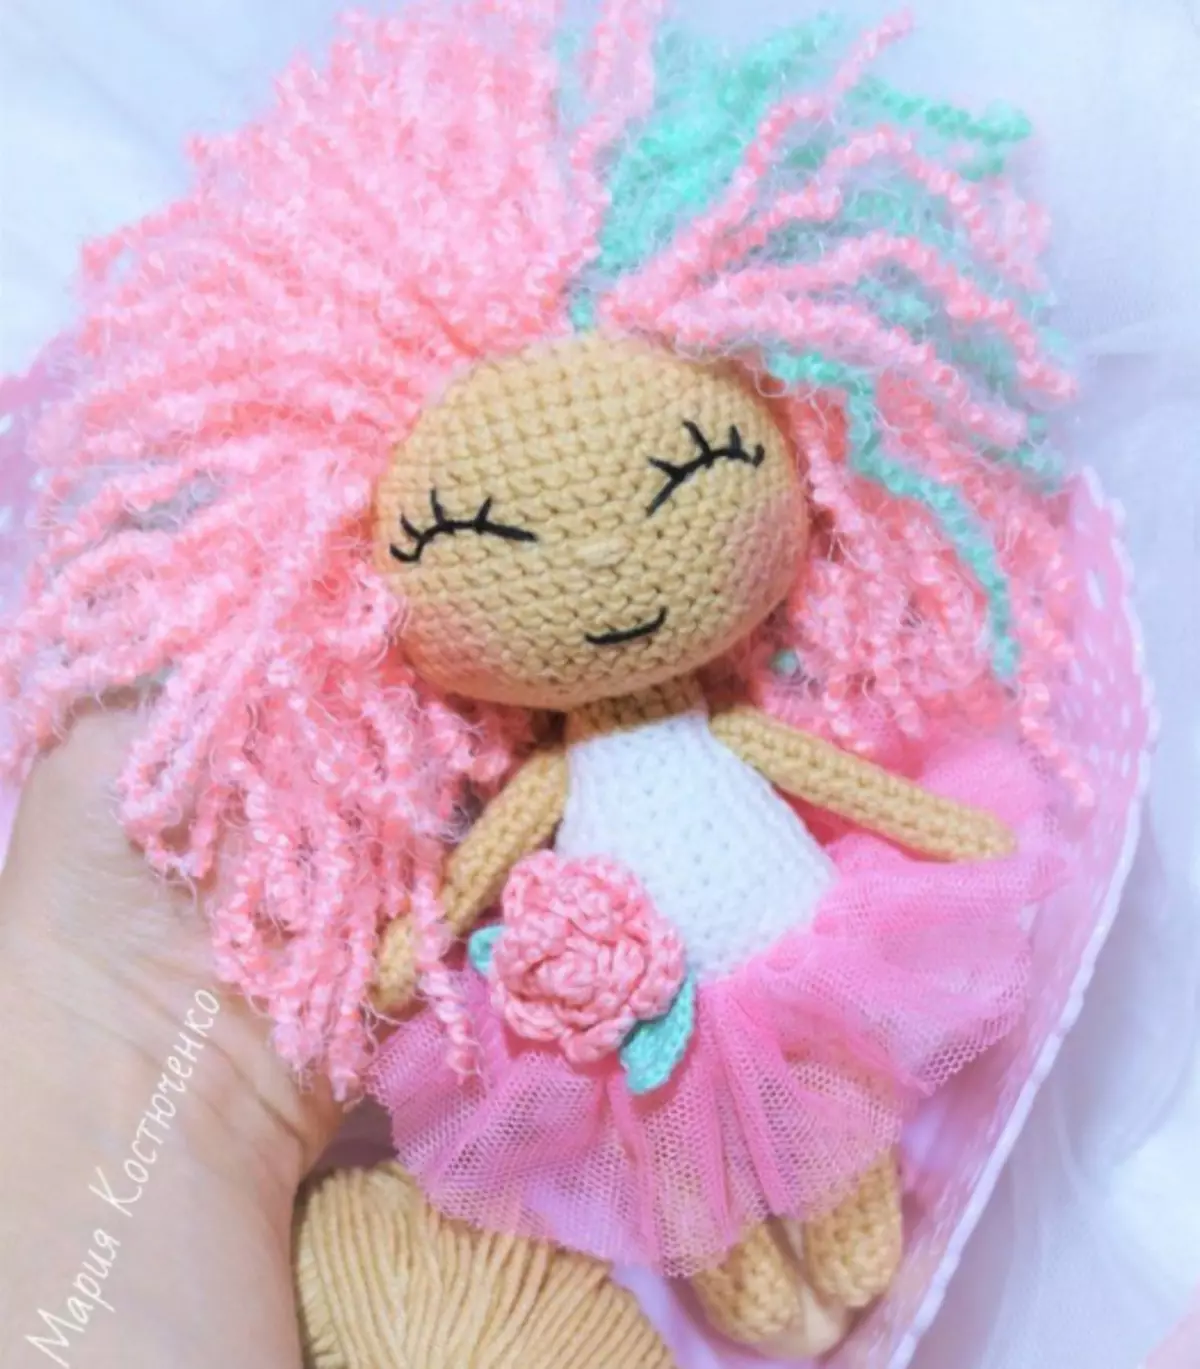
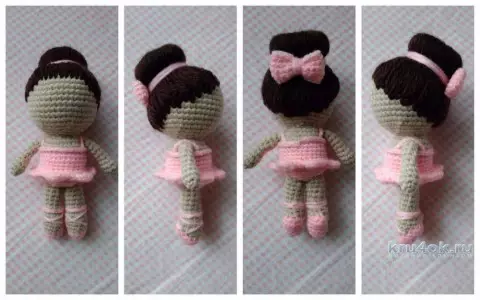
The master class below will help to deal with the subtleties of work and tie here such a cute ballerina.

Knitting begins with a head that goes into the body. They are juggling on the spirals. Ballet pack is not removed and is part of the body. In this place there will be a change of yarn with bodily on pink.
Knit head from beige yarn:
1 row: 6 TB to ring amigurum (knit two air loops, then 6 fails in the first loop, we get a circle of 6 failures). 2 row: 6 add-ons (12). 3 row: * 1 UBF * 6 times (18). 4 row: * 2 UPB * 6 times (24). 5 row: * 3 fails of PR * 6 times (30). 6 row: * 4 UPB * 6 times (36). 7 row: * 5 SB * 6 times (42). 8-15 rows: 42 fails in each row. 16 row: * 5 UBB UB * 6 times (36). 17 row: * 4 Ubb * 6 times (30). 18 row: * 3 UBB UB * 6 times (24). 19 Row: * 2 UBB UB * 6 times (18) - fill the head. 20 row: * 1 Ubb * 6 times (12). 21 row: 12 additives (24). 22 row: * 3 fails of PR * 6 times (30). 23 row: 30 fails. We change the yarn on the pink.
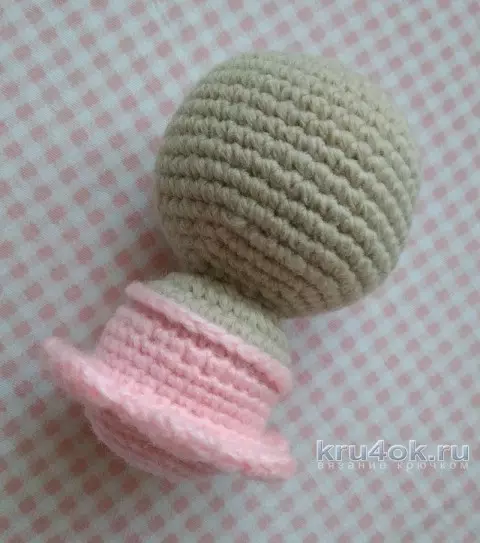
24 Row: We make a rutter - we have a pink thread of 30 failures for the front wall of the loops of the previous row. 25 row: insert the pink thread for the rear walls of the loops of 23 rows of 30 fail. 26-30 Rows: 30 failures in each row. 31 row (skirt begins): Knit * 4 SBT * 6 times (36) for the front wall loops of the previous row. 32 row: * 5 UPB * 6 times (42). 33 Row: Knit Rapport * Skip the two loops, in the 3rd loop of 7 columns with an attachment, skip two loops, connecting column * 7 times. 34 Row: We return to the body, to 30 row, through the connecting columns on the skirt, knit 30 fails for the rear walls of the 30th row loops. 35-36 rows: 30 failures in each row. 37 row: * 3 Ubb * 6 times (24). 38 row: * 2 UBBB * 6 times (18) - fill the body. 39 row: * UBBB * 6 times (12). 40 row: 6 grains, close knitting.
Article on the topic: Narcissus from beads in the technique of parallel weaving with photos and video
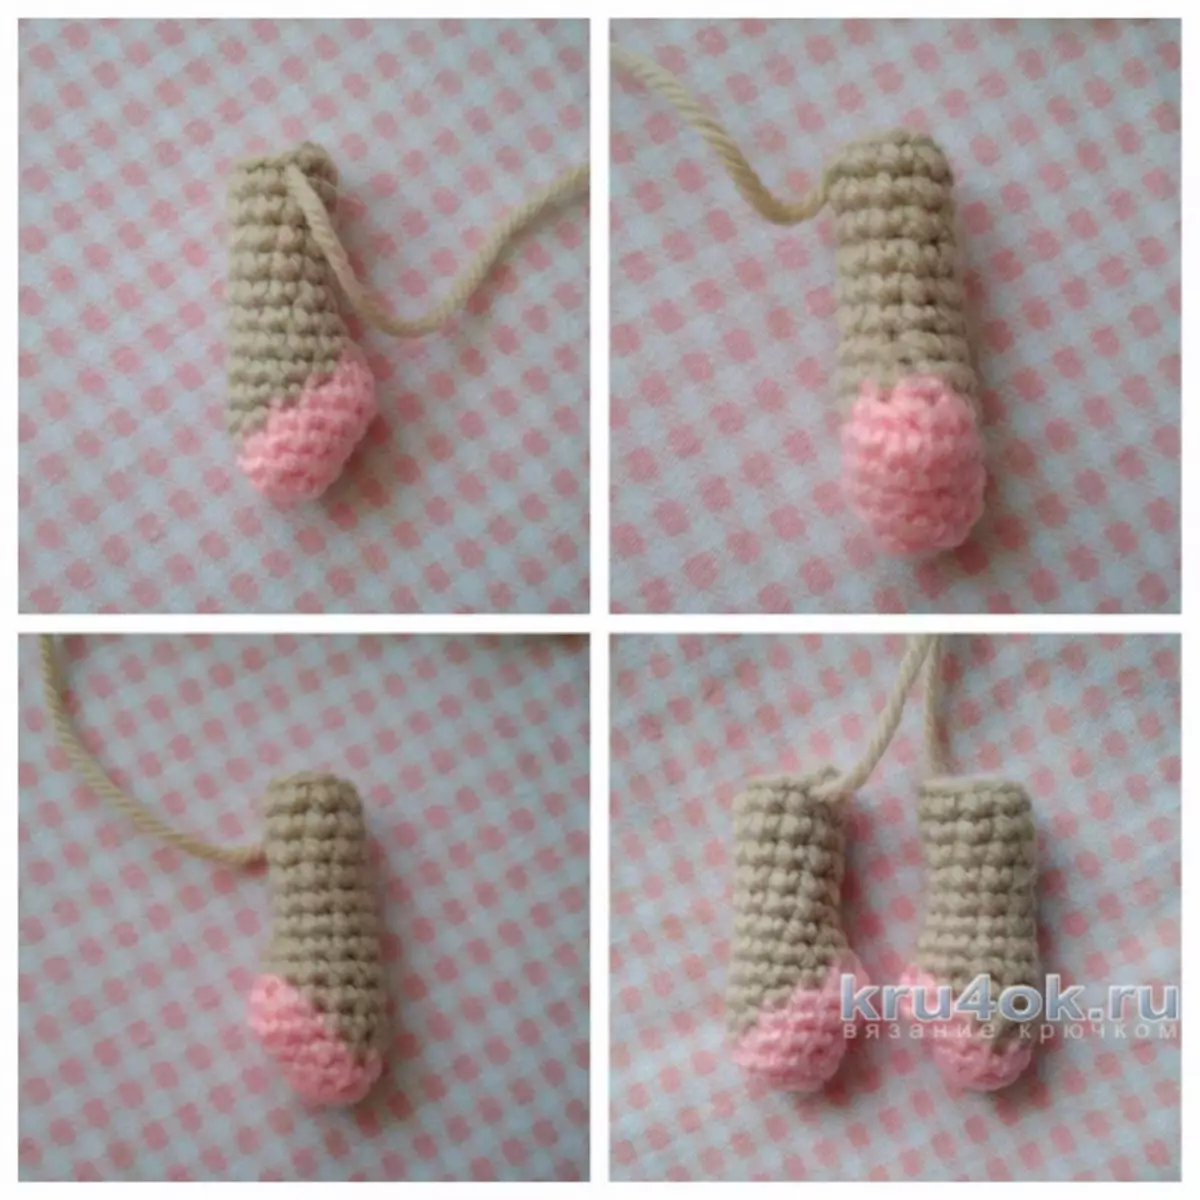
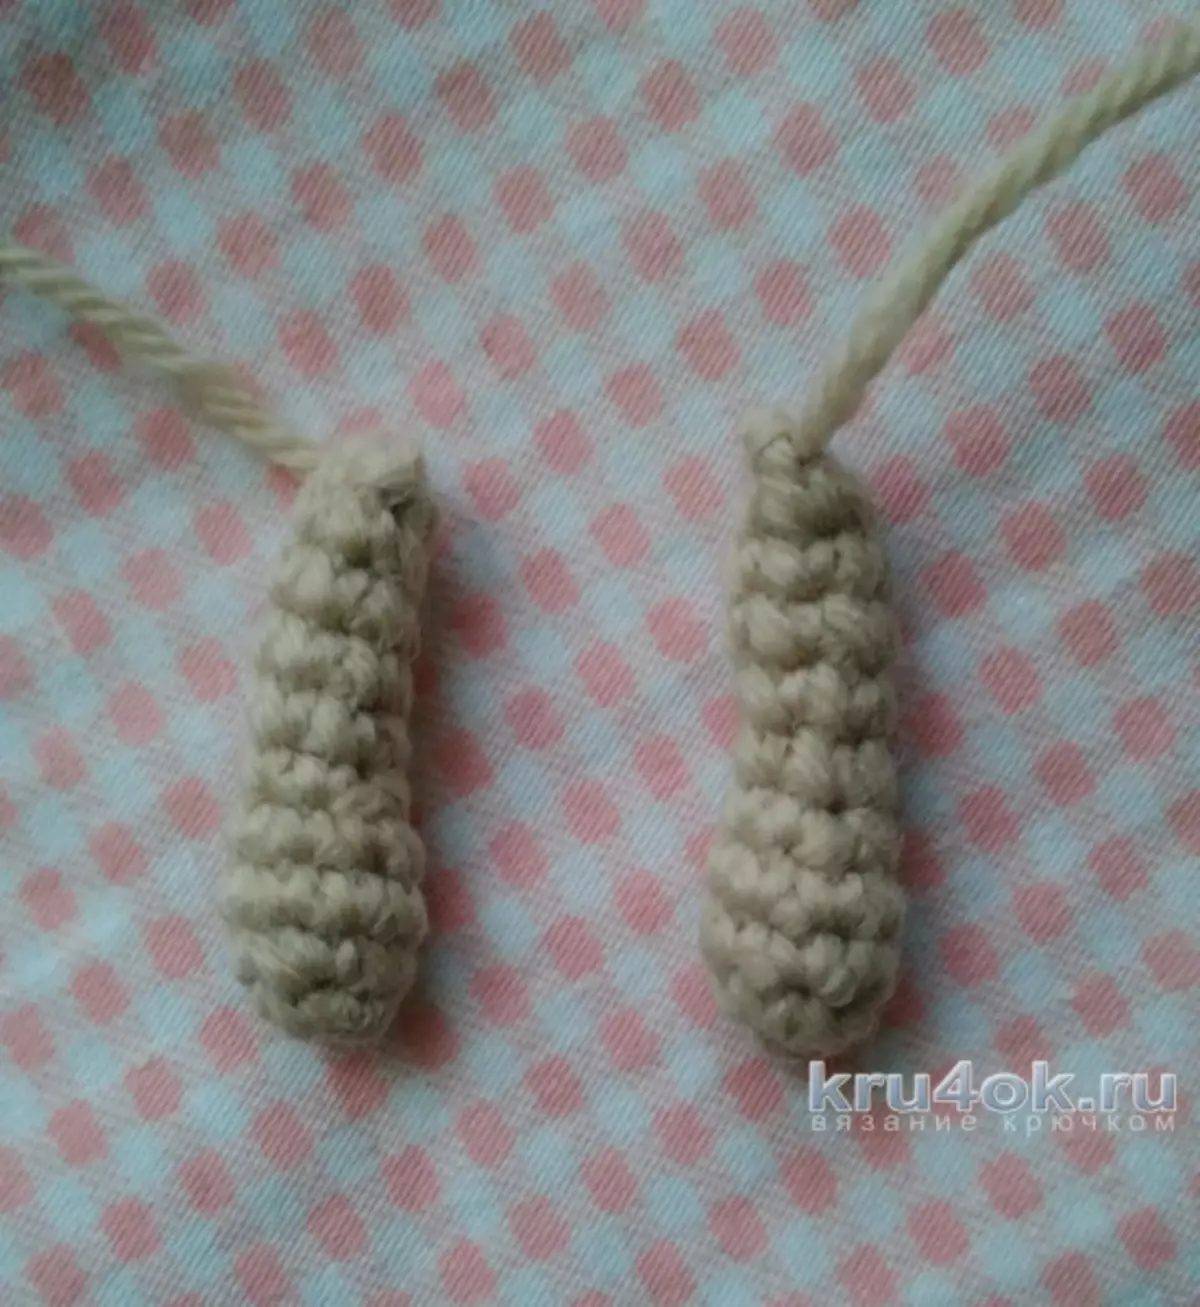
Next, knit legs together with pointers. Pink and bodily thread will constantly alternate. This is done like this: when one column remains without a nakid before the transition, we begin to prick this extreme column in the usual way - we capture the working thread on the hook and get two threads of one color there. To perform a smooth color transition, the yarn of another color is picked up with a crochet (where are two working loops now) and stretches into a loop with a new color through two working loops.
It is necessary to ensure that the haulings of different colors inside the legs were not very compressed, since when stuffing the doll filler will appear suturing and the leg will not be able to fill tightly.
We proceed to knitting feet, which also knit in a circle. We start with a pink yarn: 1 row: 6 ISP to ring amigurum. 2 row: 6 add-ons (12). 3 row: 12 fails. 4 row: pink thread: 1 failure; Body thread: 4 failures; Pink thread: 2 SBS, POSSIBLE, 1 SBI, POSSIBLE, 2 SBS (Total we get 14 fails in a row). 5 row: bodily thread: 6 fails; Pink thread: 7 fails; Body thread: 1 fail (14). 6 row: bodily thread: 7 failures; Pink thread: 1 TBI, 2 subsoils; Body thread: 2 fails (12). 7 row: bodily thread: 8 fails, 1 grade, 2 fails (11). 8 row: bodily thread: 8 UBF, 1 grade, 1 fail (10) - cutting a pink thread, fix it. We will continue to knit only corporal color. Put a foot, paying special attention to the heel. 9-14 rows: 10 ISP, cutting a thread, fix it, leave the tip for the sewing, feed the leg to the end. Knit two details.
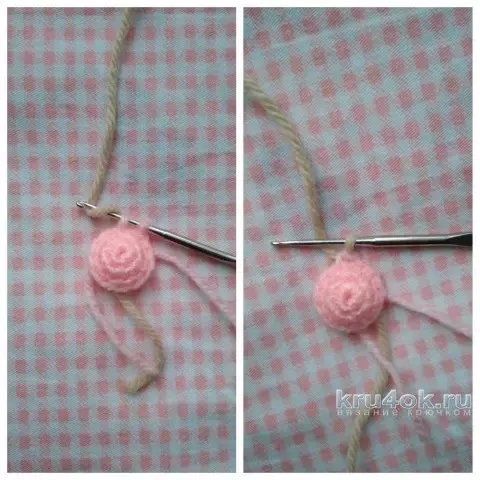
Knit knobs: 1 row: 4 ISBS in the ring amigurum (Mug Amigurum need to try to "twist" to associate the next row). 2 row: 4 additions (8). 3-4 rows: 8 scan in each row. 5 row: * 2 UBBB * 2 times (6) - fill the palm. 6-10 rows: 6 SBS, cutting a thread and fix, leaving the tip for the sewing. Put the handle. Do not forget that the pens have two dolls.
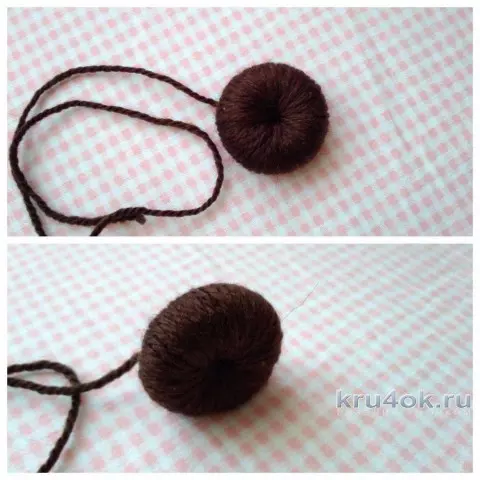
We proceed to the hairstyle of the doll. Gulka is a sphere wrapped in the thread of the same color, which is connected. Looks like a regular ball, but without both poles. When the poles are connected, it will turn out to be a renewed oval, which after stuffing will acquire the shape of the donut: 1 row: 12 air loops closer into the circle, then knit in a circle. 2 row: * 1 UBF * 6 times (18). 3 row: * 2 UBF * 6 times (24).
Article on the topic: Floristics: Master class of compiling bouquets from living colors with video
4 row: * 3 SB * 6 times (30). 5-8 rows: 30 fails in each row. 9 row: * 3 Ubb * 6 times (24). 10 row: * 2 UBBB * 6 times (18). 11 Row: * 1 Ubb * 6 times (12), cutting the thread, leaving the tip is authentic for stitching the ball. We sew a few columns, fill the crosslinked section by Sinyprun and repeat until the circle is over. Then wrap the resulting ball thread of the same color.
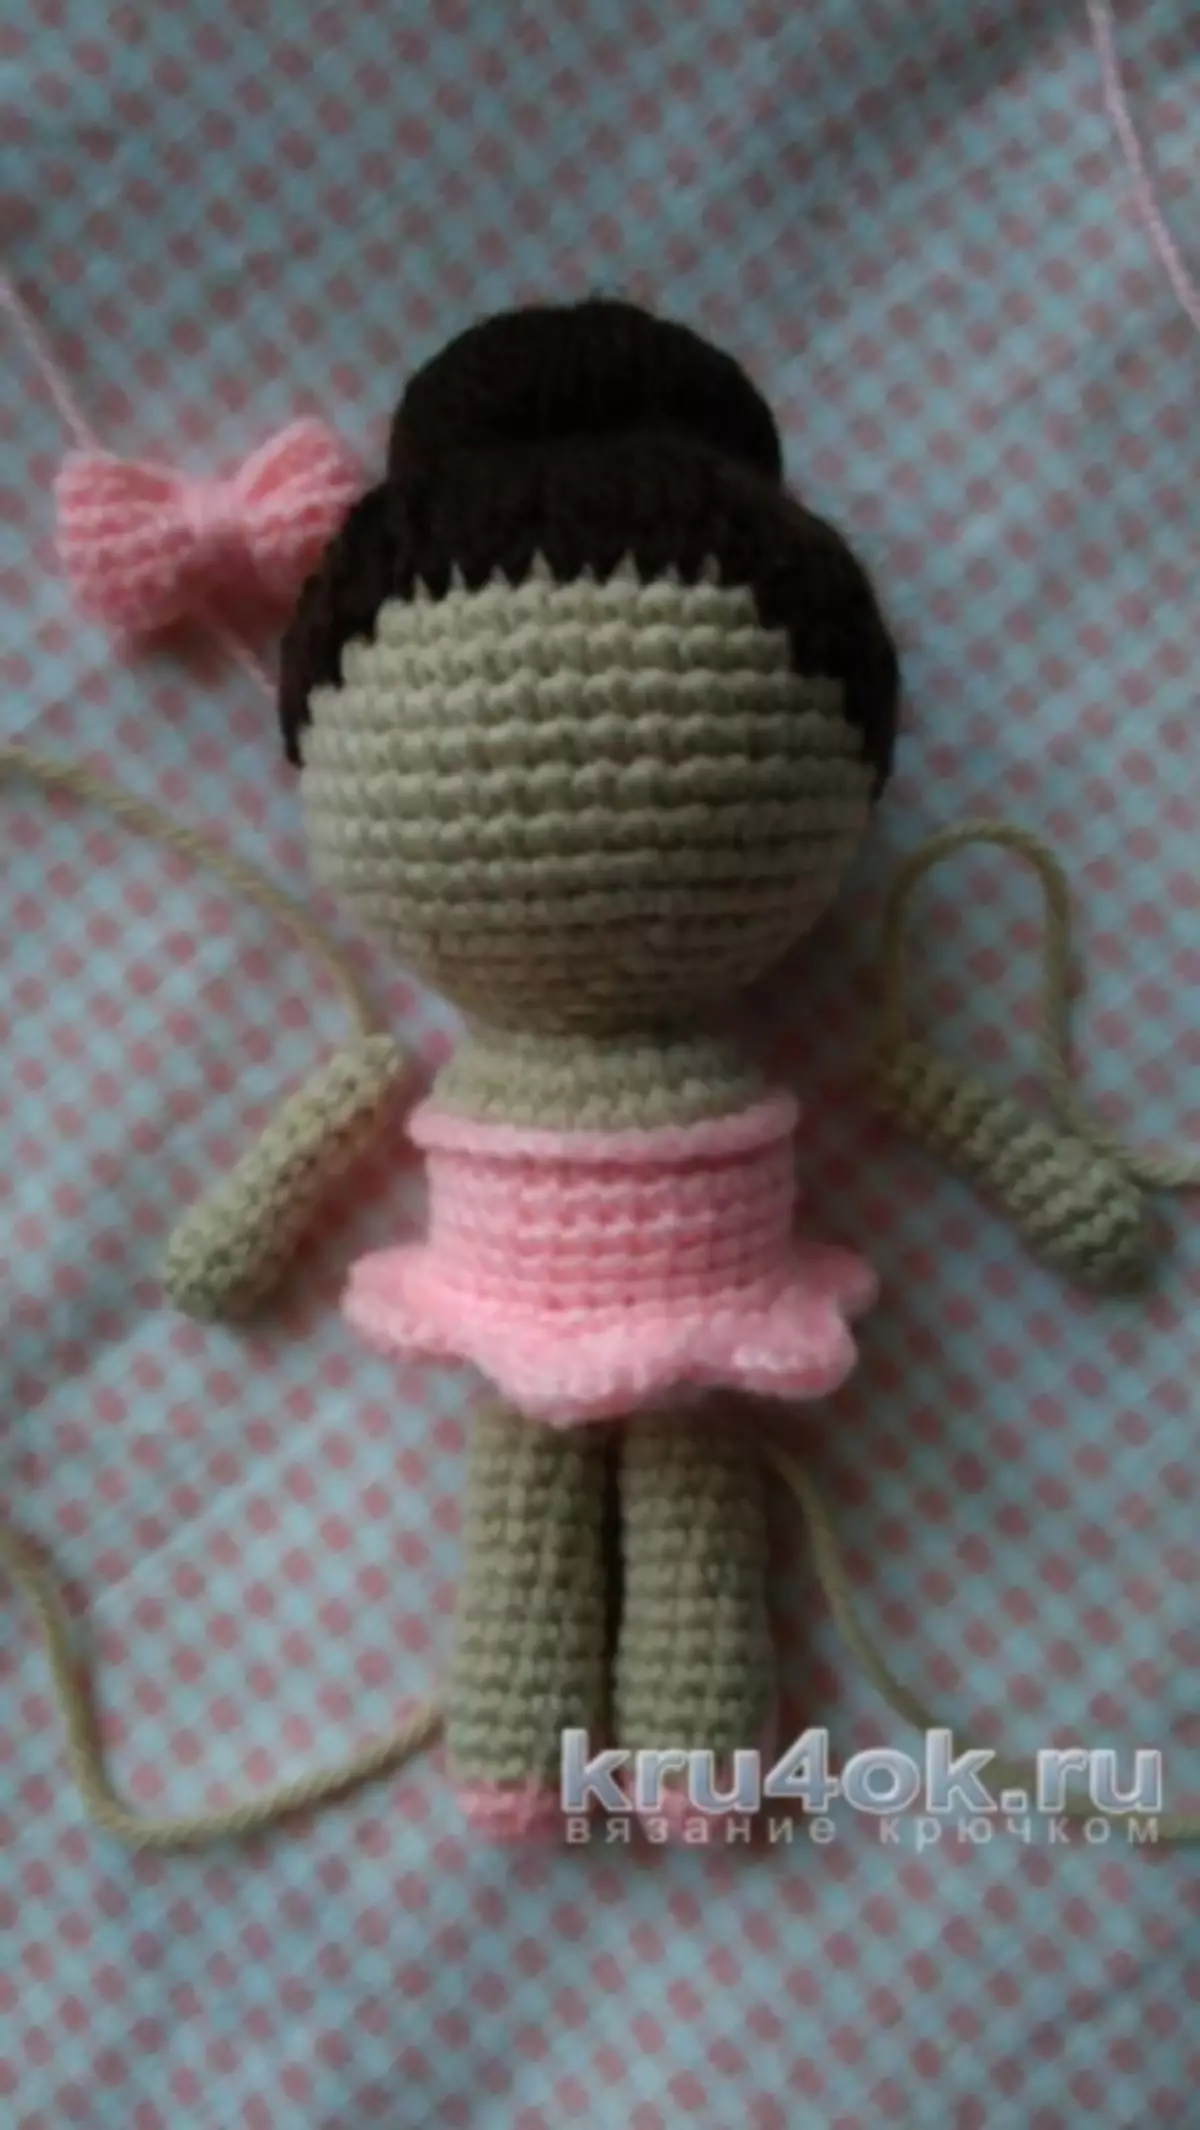
For a beam, you can connect a bow, which will add beauty and elegacity toy. 1 row: 20 air loops closure in the circle, then knit in a circle. 2-6 rows: 20 scan in each row. Watch the resulting cylinder in the middle and get a bow. Filament fix. After making a ballerina's hair.
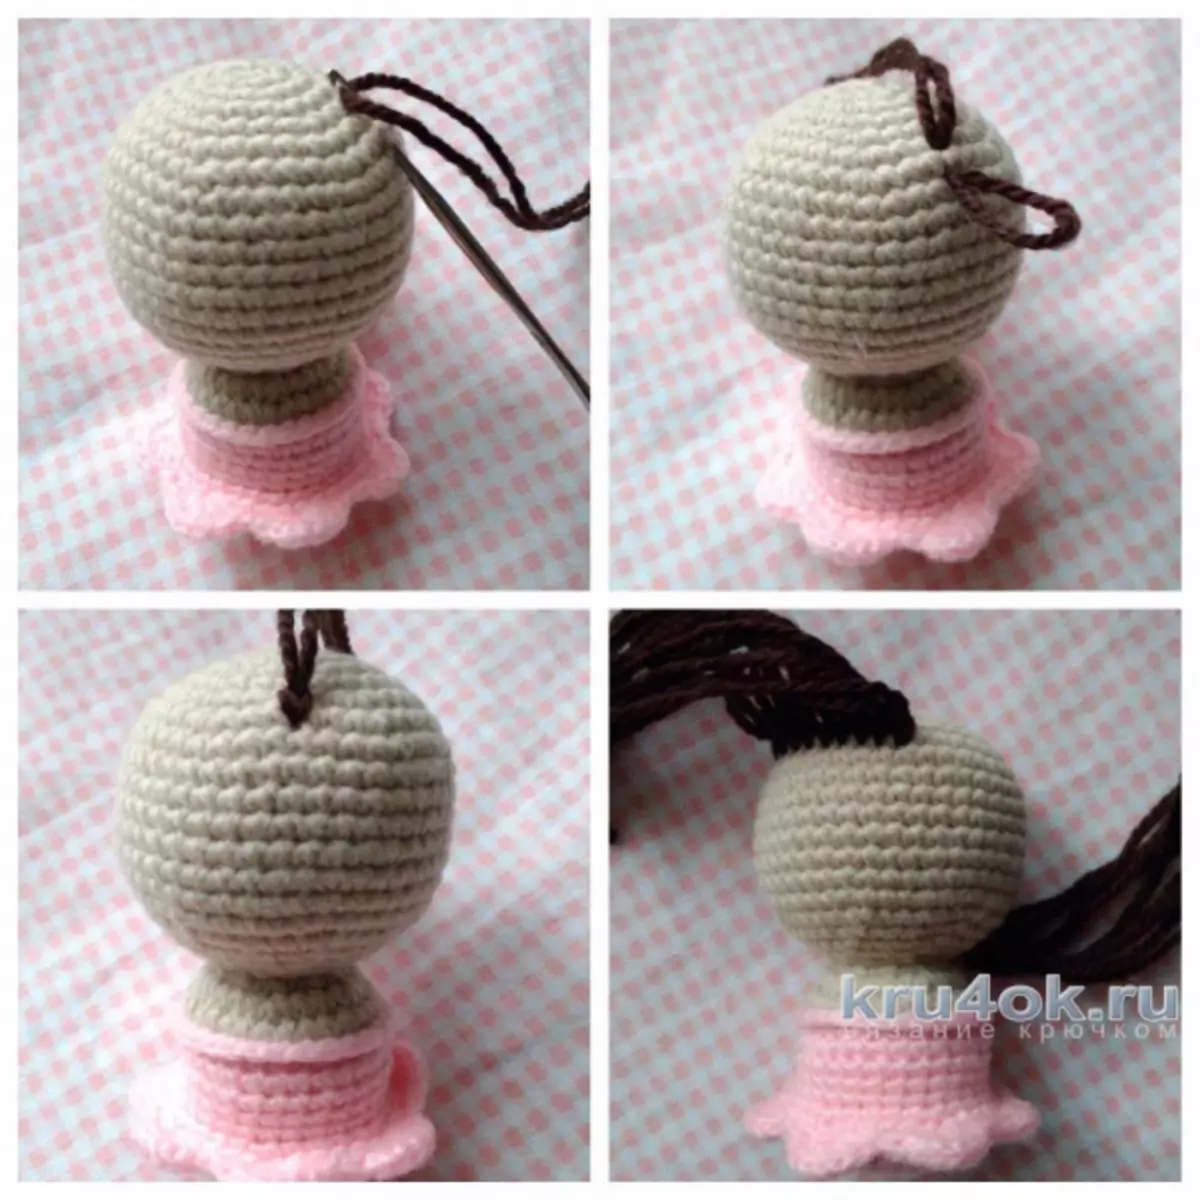
We take a thread of the same color from which a beam was made, and cut them into a segment of 20 cm. On the suture on the body at the junction of beige and pink threads determine the front part of the head. Where there is no seam - before. In the 7th row, fix the first "strand" of the hair in the center, stretching for the center the harvested segment and fixing it. So we have 9 strands. At the back of the head in the 16th row, we fix 7 strands.
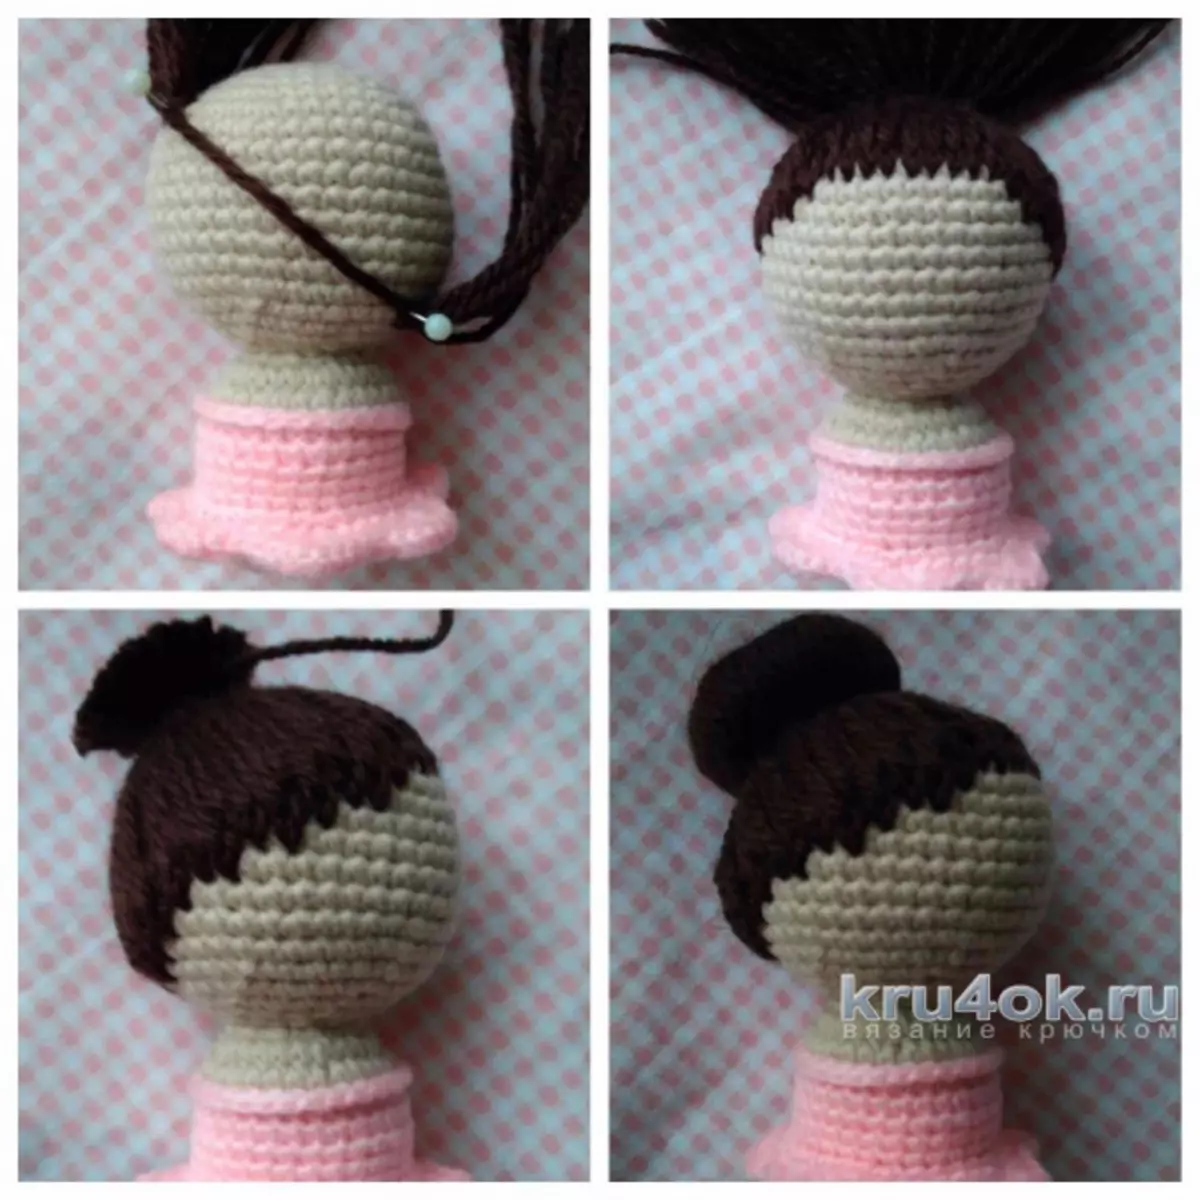
In the same way, we fix the strands along the entire circle of the head. In front it will be enough to do in a row of hair, and on the sides - several rows, so that after collecting hair in the tail, they did not stick to the ballas. You can pretex and squeeze the curls to be easier to understand where to fix them. Makushka Leave Lysoy. After the hair gather in a bundle, it closes.
After the hair is collected in the tail, it is necessary to cut his extra long and fasten the ripple on top.
Next, we collect a toy and take the missing details - straps on a pack.
Krepim on a hairstyle bow, make a lacing a pous.
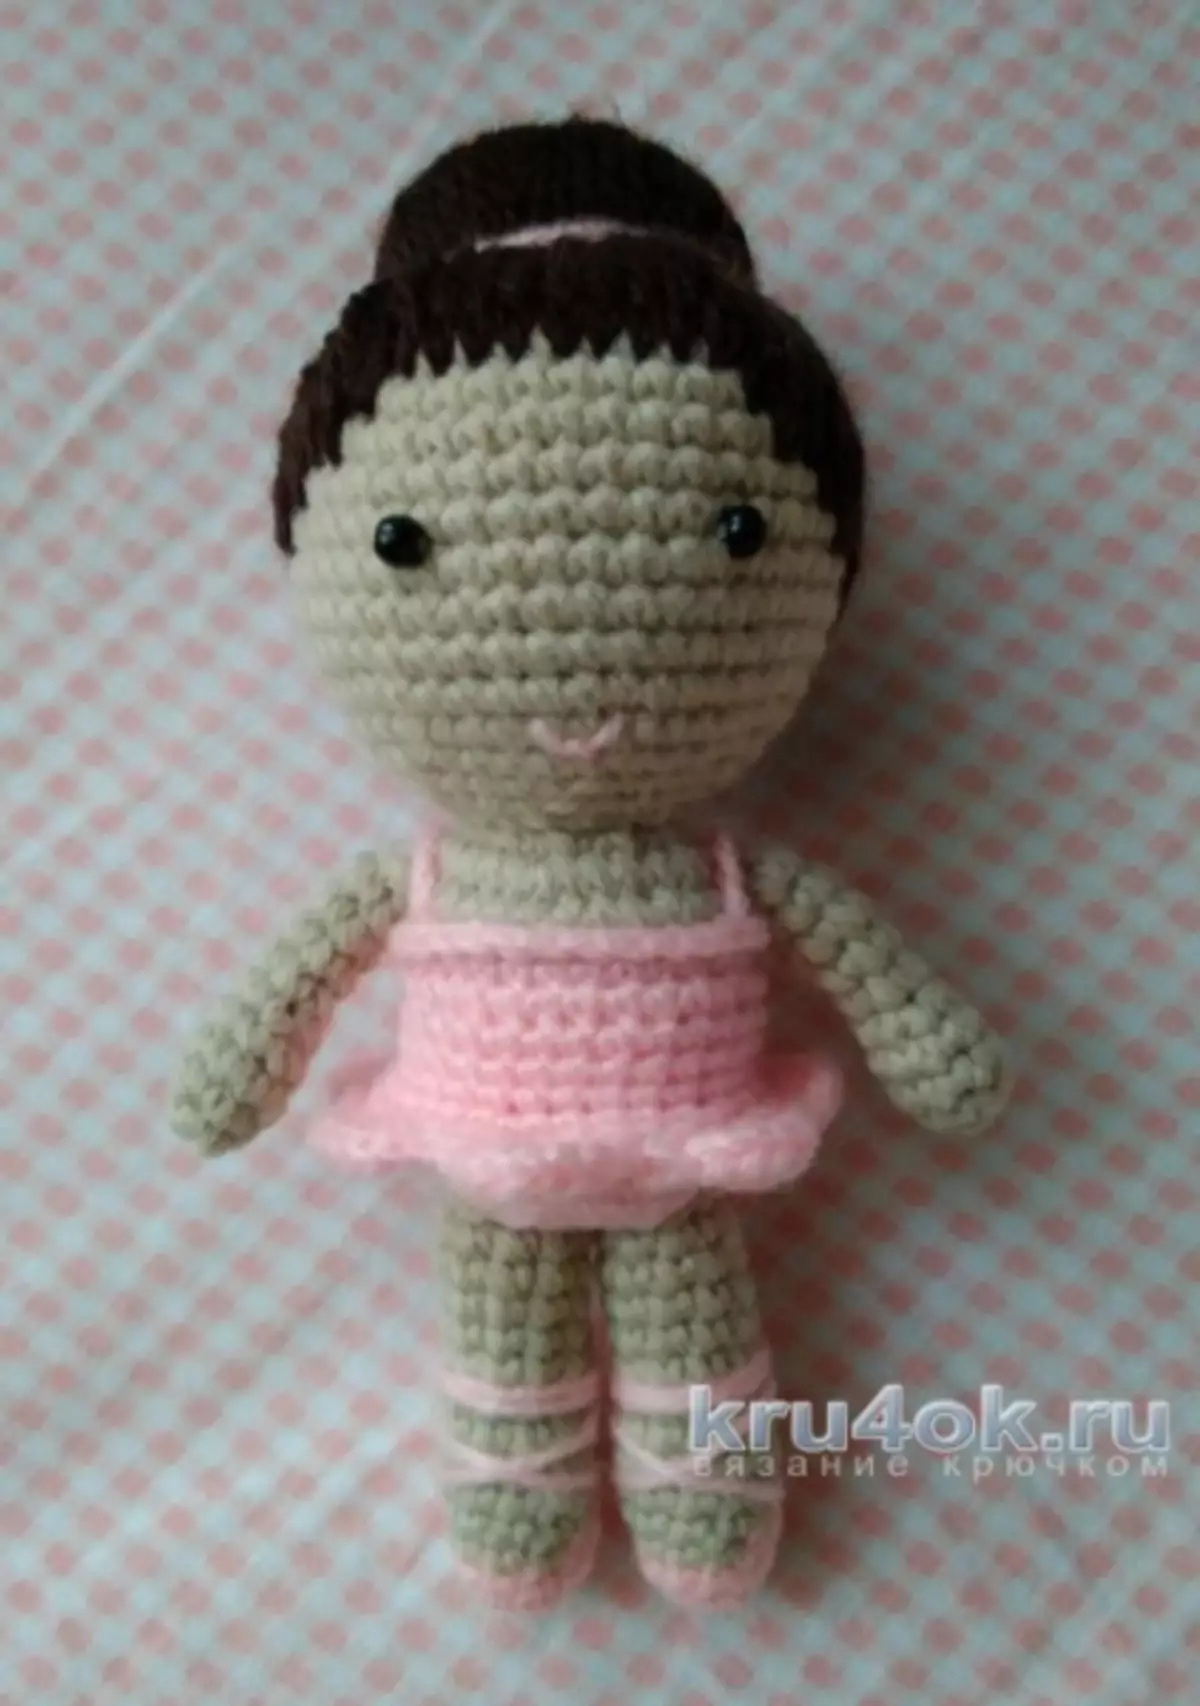
At the final stage, enliven the doll by making her face. For the eye, you can use beads, pre-painting them into brown or black. Embroide the mouth. Ballerina is ready!
Such a toy will become an excellent gift not only for any little girl, but also for adult dancing.
Video on the topic
More details with the technique of amigurum and secrets of skill can be found in the following videos: