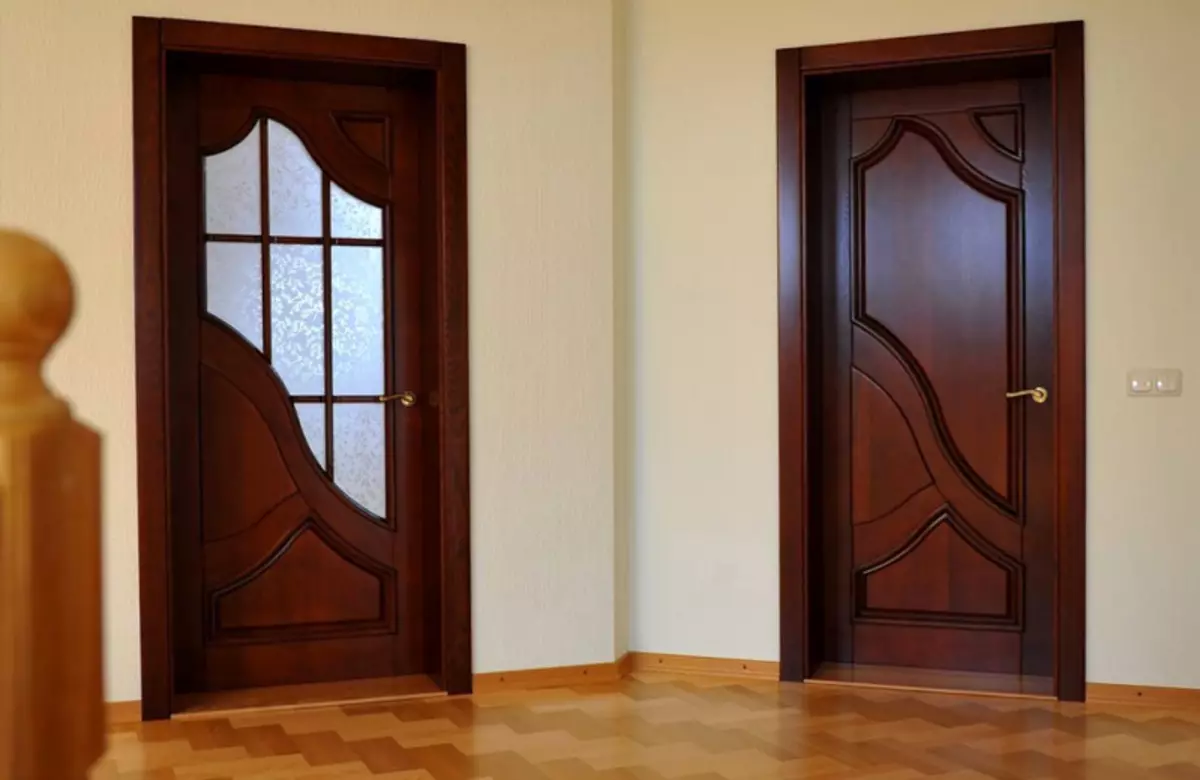
Photo
If you want to figure out how to correctly install interroom doors, try to meet the instructions and every stage of this work as responsibly. You can install the door yourself, but be prepared for the fact that this process is quite complicated and very laborious. The final result fully depends on how accurately and correctly you do each of the steps of the upcoming work. If you decide to install interroom doors on your own, bow to patience and time, as much as possible and scrupulously disperse in the sequence of actions and follow the instructions in everything. If you comply with all the recommendations, you can correctly install interroom doors and will be satisfied with the result of the work.

Before starting the installation of the interior door, it is necessary to decide which doors are applicable in this room, how many flaps will have, and in what direction they will open.
What do you need to know before installing the interior door?
Before you start installing interior doors with your own hands, you need to carefully examine the requirements for the room. There will be no means for the information directly about the doors and the process of its choice.

Types of interroom doors.
Interior doors are installed after the end of the so-called. Pre-trial decoration. That is, before starting to install the design, you need to level the walls, cover them with putty and plaster. All these wet work must be done before. You can start installing interior doors only after all the elements of the room are dried. Otherwise, the box or the door simply leads from dampness. Before starting the installation, you need to finish the draft floor and choose the form and thickness of the future first floor. Thanks to this, you can correctly navigate and install interroom doors, taking into account the height of the threshold. In case you do not repair and change only the doors, you can skip these steps, because On quality of work, they will not affect.
The modern market has a huge range of a wide variety of doors for every taste. They have a different appearance, which allows, without any particular problems, pick up interior doors under the interior of the room. However, in terms of geometric dimensions, everything is a little worse. For example, you can purchase the door, one side of which will differ from another to a couple of millimeters. It seems that such a difference is usually unnoticed, but at the installation stage, even this pair of millimeters will create very large difficulties. Therefore, you do not need to be lazy and shy to measure the faced door right in the store. Upon receipt, be sure to measure the door again. Make sure you delivered exactly what was ordered.
Article on the topic: Features of IKEA countertops

Equipment assembly scheme.
Be careful and in the process of selecting the door frame. Some doors are sold immediately with the box. They already have marking for loops. In addition, in the case of such doors, you can be confident that the manufacturer resist all the sizes. If the cloth is sold without a box, if you wish, you can make it yourself.
There is nothing complicated in the manufacture of the door frame. The material for the manufacture of this design is a box timing. The design consists of horizontal crossbar and a pair of vertical racks. If you do a box for interior doors yourself, when choosing a bar, make sure that it does not have irregularities and black bitch. The bar for assembling the box must have the same thickness as the door canvas. Otherwise, you will not be able to install.
Preparation of tools for work
In order for the installation of the interior door to take place as easily and efficiently as possible, you need to prepare all necessary tools in advance. Better if it is professional. You can, of course, do it and ordinary tools, but in the absence of experience, it is fraught with the fact that you will not be able to withstand the desired accuracy. Therefore, experienced masters recommend using professional aggregates. Not necessarily buy them. Currently, many companies for relatively little money give any tools for rent.
As for the direct list of tools, you will need the following:

Tools for mounting interroom doors.
- A circular saw.
- A hammer.
- Set of screwdrivers and chisels.
- Building level.
- Stuslo.
- Yardstick.
- Hacksaw.
- Miter saw.
- Electrophusmer.
- Electric screwdriver.
- Perforator.
- Castles and loops for the door.
- Wedges and bars of different sizes.
- Finish nails and self-tapping screws.
- Mounting foam.
Step-by-step instructions for installation of door racks and loops
One of the most important and responsible stages of the installation of interroom doors is the installation of door struts. If the installation of these elements is performed with inaccuracies and skews, the door will hang crookedly. And this is not just ugly, but also very uncomfortable. When opening and closing, inconvenience will be created. So at this stage you will need to remember the saying about several measurements and one cut off.
Article on the topic: Arches from plasterboard in the interior of the hallway with their own hands

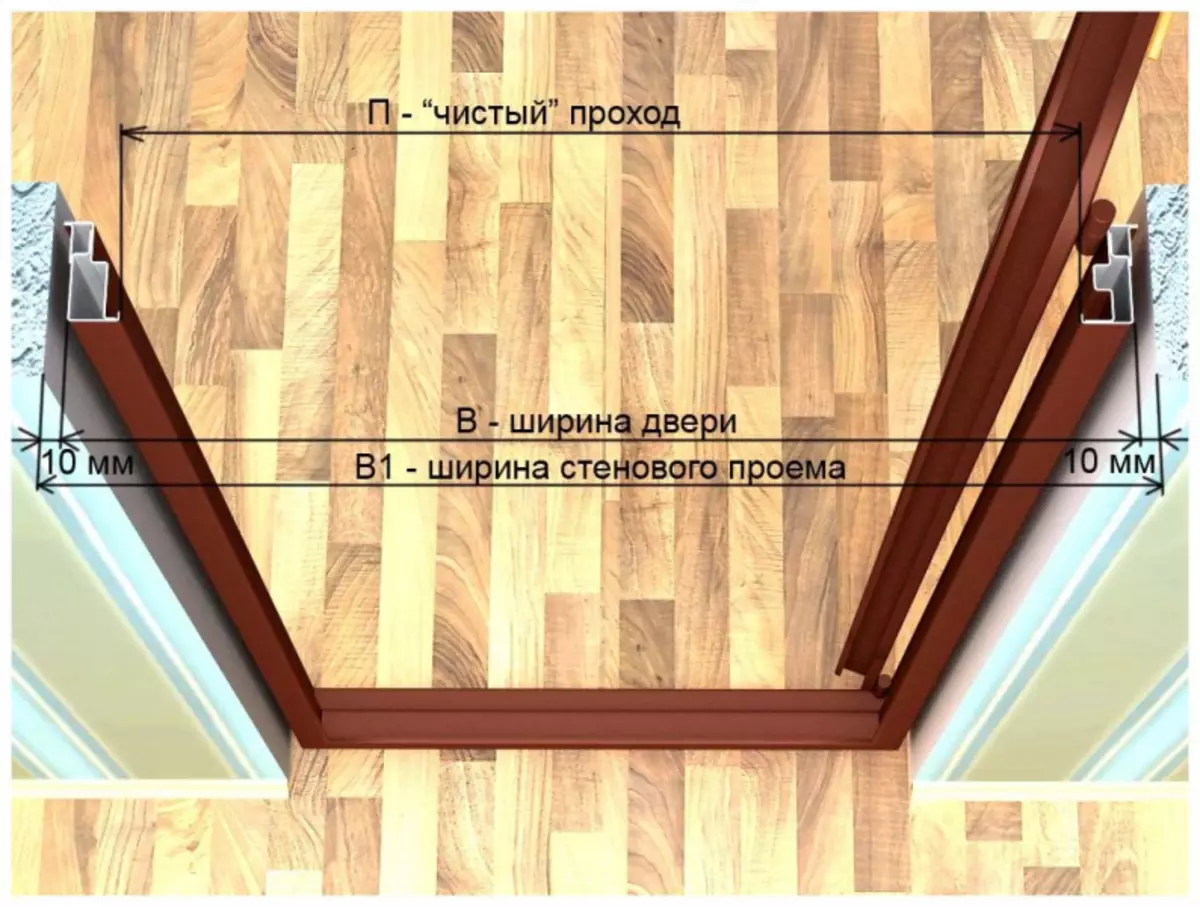
Calculation of the size of the door canvase.
The installation process should be started from the drive device. Take the ending saw and with its help spill the upper parts at an angle of 45 degrees. In the absence of a tracing saw, you can use the hacksaw and stub. Next, you will need to measure the required height from the rack. Measure the inside. The total length will consist of a height directly of the canvas, as well as the lower gap by 10 mm and the upper gap by 4 mm. According to the same scheme, prepare the second rack.
After that, proceed to the preparation of the pod. Similarly, on the inner side, measure the desired length. The total value will consist of a width of the web, the gap from the installation of the lock is 4 mm and similar in the width of the gap side of the loop. Take a permeable saw or stubbling and scolding both ends under an angle of 45 degrees. Carefully make sure that the gaps are included in the inner prodock, and not to external.
Another very important stage of self-installing interior door is the installation of loops. This also directly depends on the ease of operation of the product and other important moments for the user. To the installation of loops, approach the most responsible as possible.

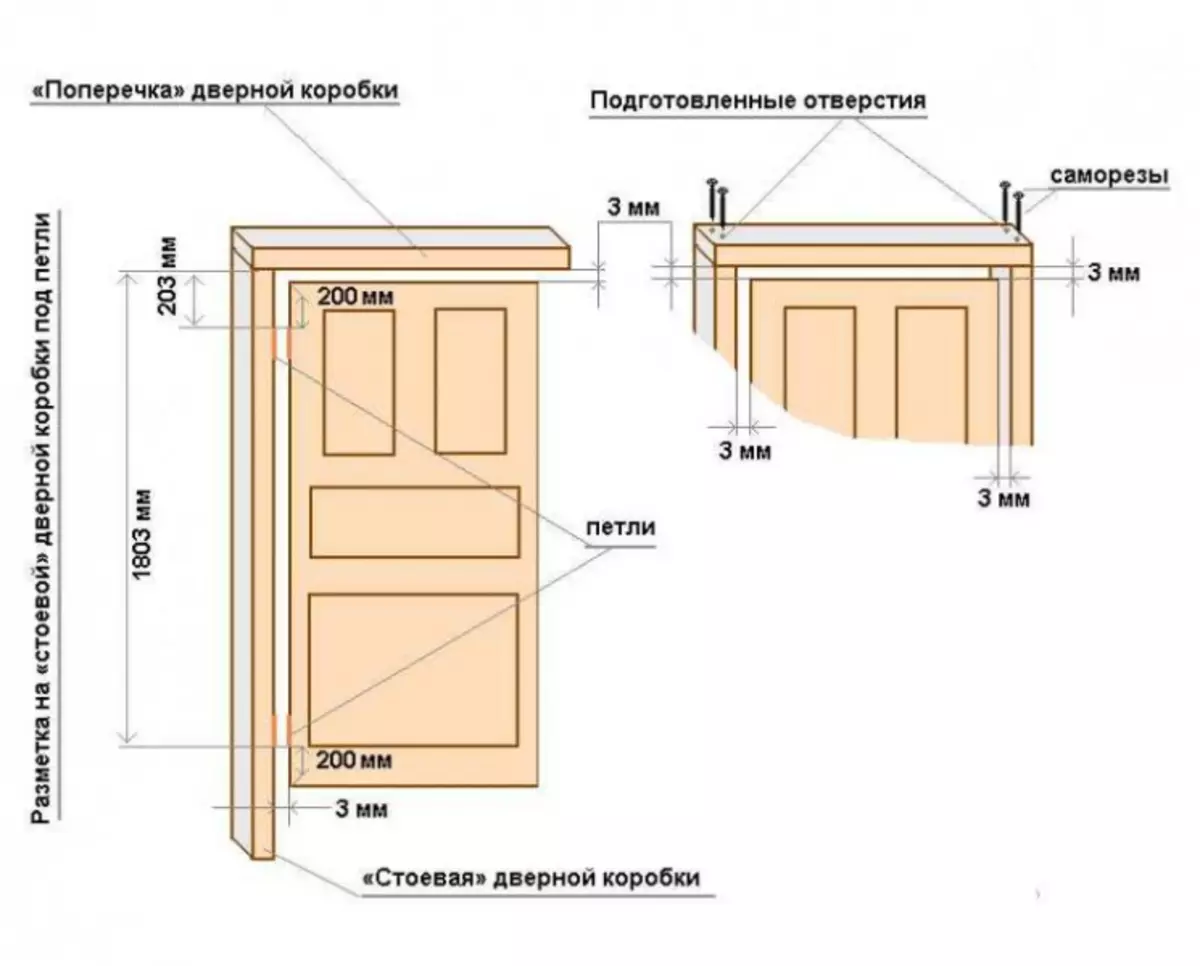
Installation scheme of door loops.
It is very important that the magnitude of the plug and distance from the lower and top edge of the product is correctly suppressed. With a ruler or measuring tape measure, you need to measure 20 cm from the top edge of the inside of the rack. Apply the door loop and circle it along the contour with a pencil. Calculate the depth of installation of the door loop, taking into account its thickness. Do not forget that in a fully folded state of the loop leaves the gap between the rack and the web equal to 4 mm.
You can make the most accurate and quickly prepare a pad for the loop using a milling mill, in the absence of this tool you will have to do with the chisels.
By a similar scheme, prepare a place to install the bottom loop. Everything is done in the same way, with the exception of one point - the distance from the lower edge should be not equal 20, and 21 cm.
Article on the topic: How to choose curtains to high but narrow windows
Take a rack with the installed door loops, attach it directly to the door and make it easier on it for loops. After that, you will only have to make landing places exactly as you did on the rack, and you can go to the installation of boxes and platbands.
Installation of the door frame and platbands
These stages of work also require maximum attentiveness and responsibility. Remember that the final result fully depends on the literacy of the execution of each stage of the instruction.
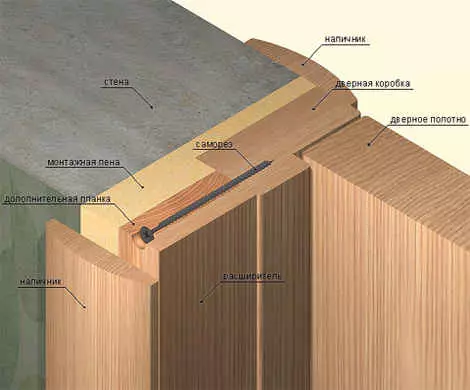
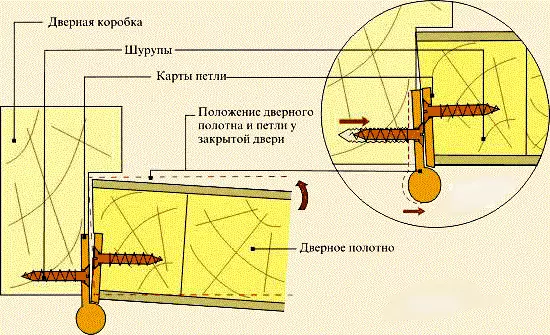
Fastening diagram of a fair plank to the door frame.
Installing the door frame is performed in the following order. First you need to fix the rack to the peculiar. Use for this self-tapping screw. Immediately the mount is performed strictly at an angle of 90 degrees. First you need to prepare a slightly smaller diameter in the box of the hole, and then screw the screws. Otherwise, the box material can simply crack. The collected P-shaped box is installed in the opening. For fixing, struts and wedges are used. Carefully align the box horizontally and vertically, check the flattering level of installation by a construction level, and then fasten the box with the help of screws.
Installation of the door canvase directly comes down to hanging on the loop. After hanging, check how well the door opens and closes. If there are any kind of defects, they need to immediately eliminate. Close the door and insert between the racks and the door bladed suitable spacers. They are needed so that the box is not squeezed under the influence of the mounting foam. Carefully fill the foam gap between the wall and the door frame. After the foam fully solids, the struts can be removed.
When the box and the canvas will be installed, you will only remain fastening the platbands. There is nothing complicated in this, but again be extremely attentive in the process of work. You need to keep angle at 45 degrees and fasten the platbands. For fixing, you can use selflessness, finish nails or glue. Hats nails need to be lost, and the self-tapping screws hide with decorative plastic plugs.
Thus, you can independently mount the interroom door. Follow the instructions, and you will succeed!