
Most of our country is heated with furnaces on firewood. If not at home, then in the country or in the bath it is exactly necessary for firewood. But firewood is bought raw and need to dry somewhere. For this, they are folded in lungs or build special canopies - wood levels or wobbies (they speak differently in different regions). The design is uncomplicated and make a woodworker with your own hands - an easy task.
What are there
Metal sheet will save the walls from the woods (wooden, naturally)
If you do not pay attention to the dimensions that there are two types of canopies for firewood - attached to the wall of some building or standing separately. It is clear that to attach easier and faster, but not always it can be done. Rather, not with all buildings: to add to the wooden walls is dangerous. And not only from the point of view of fire safety. With firewood "arrives", the whole army of bug-tree bugs who will gladly take care of your home. Because to wooden buildings, even with the treated bioprotection wood, there are better wood levels, but if you really want to nourish the iron sheet to the wall. As in the photo. It must be greater than the size of the woven. Then all the bugs (most of them - for sure) will remain in firewood.
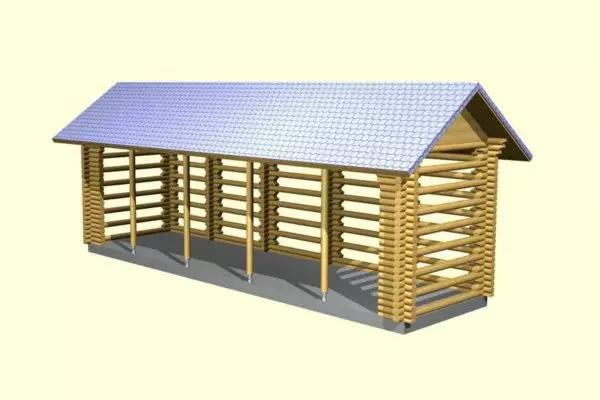
Separately standing wobbers can be completely open - several columns, pair of jumpers and roof. The main thing is that the roof is large enough: it is advisable to make a rarely. And the rest will finish the air and the sun. They say, they will dry out no worse than in more closed facilities. In the regions with abundant snowfall so that the snow is not clogged into the winter at the bottom attaching (stick) plywood sheets. They are removed in the spring.
What the walls do
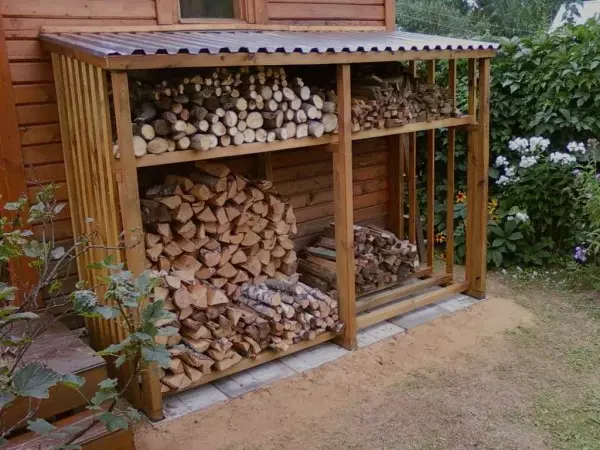
More often wheelsproofs are built with lattice or shrinkable walls. It is better if the boards are packed at some angle - by type of blinds. Then the precipitates even with a blessing wind do not fall inside. But even if the boards are naked with some interval, everything will dry well.
The frames are stuck on the frame, the boards / planks are mainly horizontally, sometimes - vertically, they still make lattices from thin planks or put them with masts. In any case, the gaps for ventilation should be a lot.
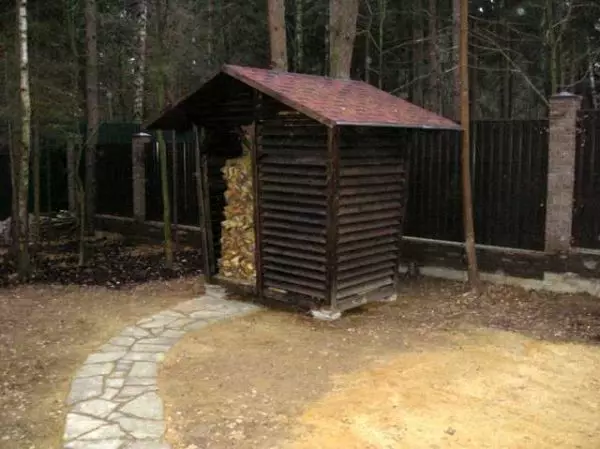
Vertically stuffed planks are rarely found. Such a hangover with a single roof
Does drying speed depends on the method of mounting planks? No comparisons were carried out, so it's difficult to reliably. But one owner argues that if you fill the boards of the maternity (he has 10 cm with a 2 cm with a slit), and each wall in another direction dries faster: for the month.
About the sizes of the slots: they are made from 2 cm to 10 cm. But it also depends on the width of the board. If you leave the gaps very wide, it removes very snow. If the snow is a bit or you do not bother you, you can fill the boards less often. It is also economical.
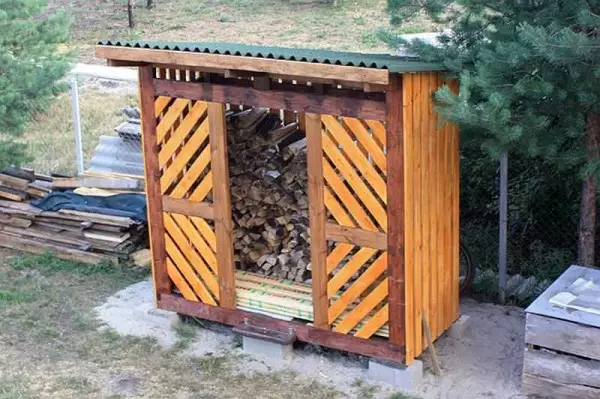
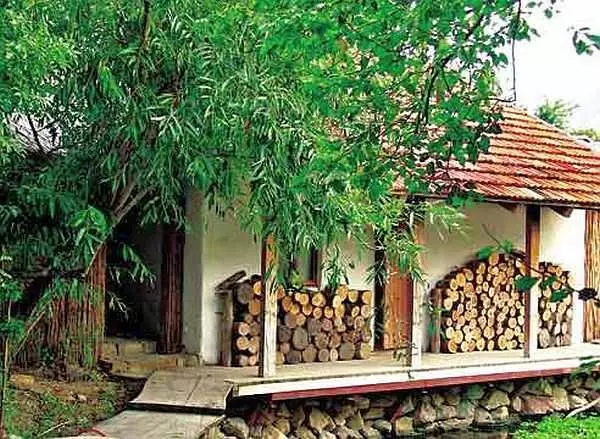
Beautiful woodwood for giving
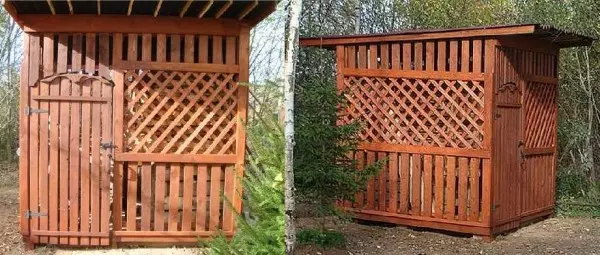
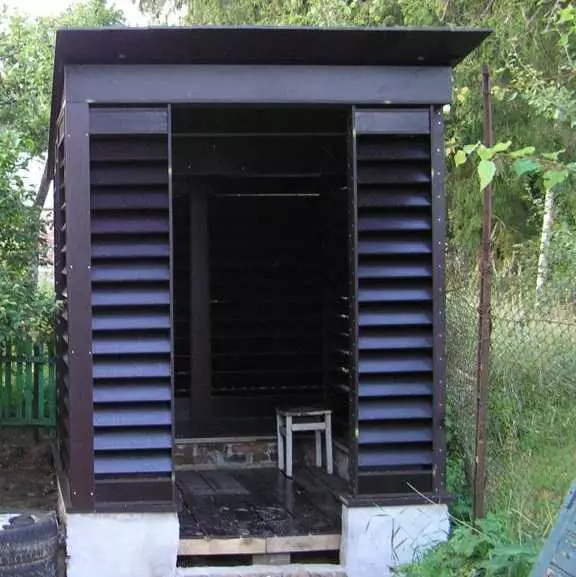
Not all the woodwives have doors (with the doors they are also called the "wood barn"), as in the version in the photo. Often there is not even anterior wall: it is so ventilated more active. The front wall and doors are needed if in your area is suspended, and in general it can be done without them.
Location of flights
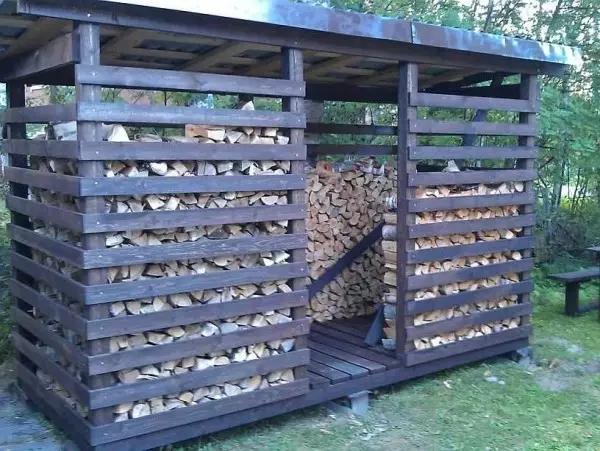
Now a little about the structure of the woodwood. If he is small, and everything is placed in one row, there are no special problems - everything is available. But if large volumes are loaded, it is better to divide the area on the sectors to which the firewood partners will be loaded. Thus, the previously delivered and already filled will not be covered with fresh.
Article on the topic: Marriage of plastic windows
The area is better to focus on the sections, yes so that it was possible to go inside
If the square is square, place the sections so that you can go inside, getting the most dry lamps. To do this, in the middle leave the passage. In depth, it should not be up to the wall, but it is desirable that you only separate you from the wall, the maximum - two rows of flights (and in general it depends on the volumes) - so they will all turn out to be available. With rectangular simpler: they are simply divided by a sector of the partition. For example, as in the photo.
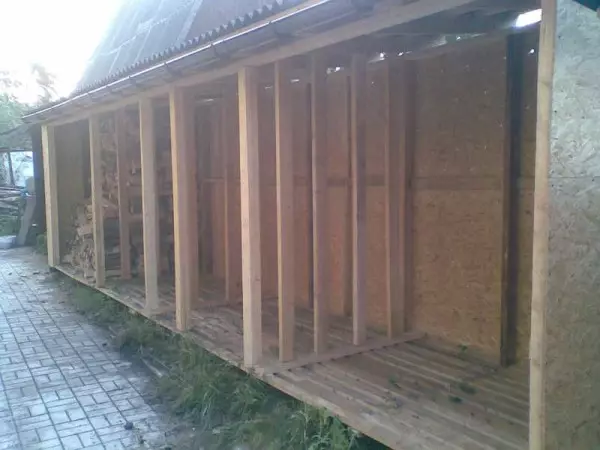
Such a large canopy for firewood - one machine is placed in each section - about 4 cubes. The rear wall is not solid if you look around, there are holes.
And a little about height. The woodwood in the cottage (seasonal) is not needed. Total then you need that one or two cubes on the protostic in the fall / spring, and even then only for the weekend. But if the house is heated, and even a bath, you will have to build something solid. Then, regardless of the planning - a long or square, the height is made about 2 meters. With average, you can download you almost under the ceiling. But the ventilation gap should remain on top.
About how to make beautiful and inexpensive paths in the garden or on the plot read here. The device of the homemade pond can be read in this article, and how to turn it into the fountain here.
We build a woodwoman with your own hands
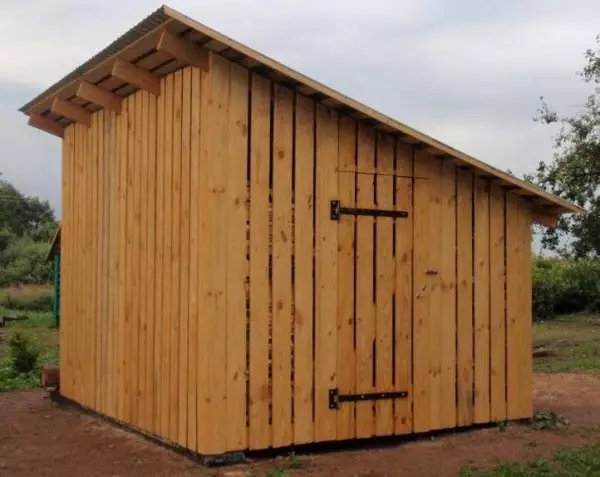
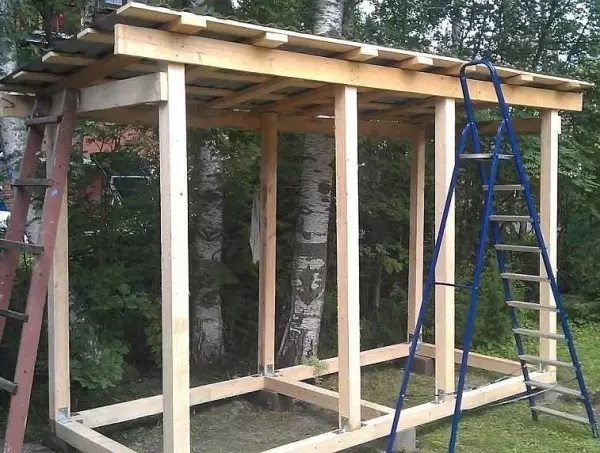
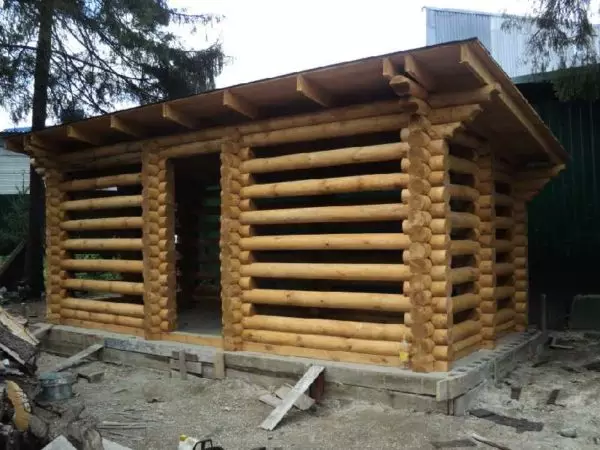
In this section we describe how the woodwoman was built near the house. For the construction of painting, three days "without straining" took. Wrong on the type of frame shed.Materials
Internal dimensions of 1.8 * 3.7 m, the height of the front racks is 2.45 m, the rear - 2.2 m. The total volume turned out to be 13 cubes, but the maximum of two cars are loaded - no more than 10 cubes. And inside, leave the tracks - so that it was convenient to take, not loaded to the top - not all in the family is high. If the download is complete, it will preferably put additionally drives: so that the firewood does not squeeze the plates of the sheath.
The frame is made of timber - racks, bottom and upper strapping are made of bar 100 * 100 mm. The bar is pre-impregnated with spent engine oil. It was collected all the jack, nails, intensified by corners on the screws. For supports, standard minor foundation blocks 200 * 200 * 600 mm in the amount of 6 pieces.
Construction step byagovoy
Starting construction Standard construction - level alignment and billing in blocks. If the soils are viscous (clay of loam, chernozem), it is better to make a sand-gravel pillow. Drop small pittaling 20-25 cm depth, pour and tumble crushed stone, install blocks from above.
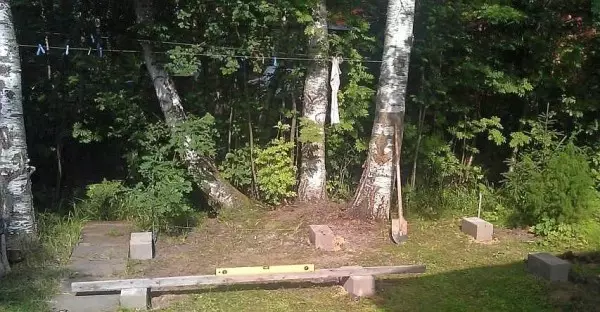
Equalization of the site - the first step of construction of the woodwoman
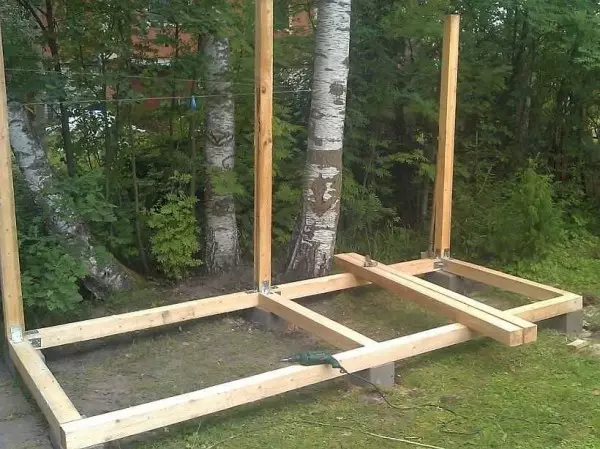
On the blocks are set in two layers of rubberoid, the timber is laid on top. The binding is not joined with the support. If there is a desire, you can drill holes and score studs.
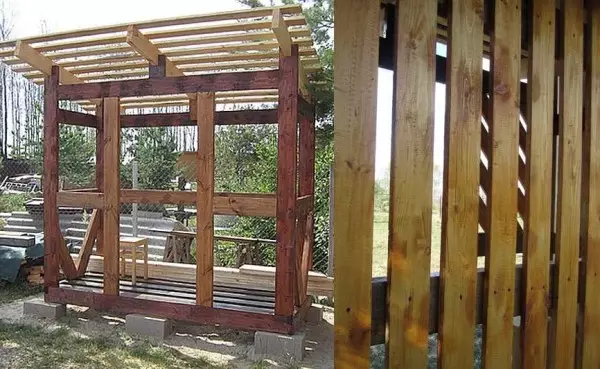
At first laid the bars of the lower strapping, they brought them with nails (80 * 3 mm). Then screwed into the corners on the screws. The next step is to install racks. They are put in the corners and above the intermediate support. The rear racks are shorter than the front - so that the bias of the roof. They were also first set up vertically (they checked the plumb), scored by nails, two on each side. After strengthened the corners on the screws - two on the rack. If there are fears, you can still fasten the plates / nail to each rack outside.
Article on the topic: Fireplace on the street with their own hands: oven, brazier and barbecue (60 photos)
Racks are attached to a bruus of the bottom strapping
The entrance to the wobbie is made in the center. Because of this, the racks are shifted and installed not above the block of support. As a result, there is a small deflection. To eliminate it, put four blocks in the first row, given the fact that the middle will be occupied by the entrance. Especially if there are doors: they decently load the racks, because they need a support.
Ahead intermediate racks are not over the support
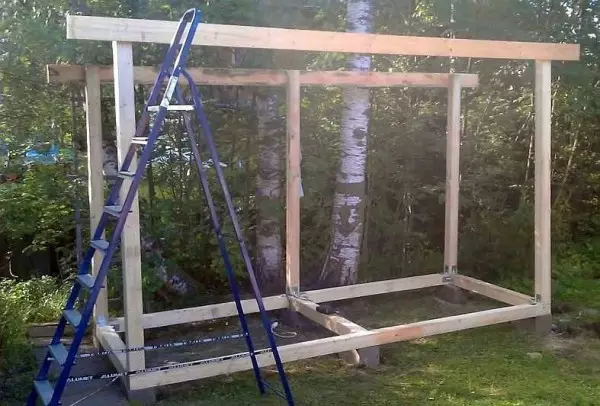
After the racks are exhibited, it comes time to collect the roof. At first, the side boards nailed at the top. They are installed on one tired on the same level with the upper strapping of the rear, shorter part (seen in the photo below). They and rafters are made from a 50 * 100 mm board, the cutter from the board 30 * 100 mm.
The professionalist was used as roofing material, the boards put a plasther under him. Rights of the roof - about 35 cm, the side protrusions are approximately the same. The roof size was chosen so that there were no trimming: smoothly four sheets.
Under Professionalist, Ruberoid is bed - so that condensate is not a drill on firewood: the costs are small, and there is benefits. Ruberoid began to lay down from the bottom, he drove along the sink. Next, with an occasion by 10 cm. It turned out that a drop that fell up simply flows down, not falling inside.
It looks like a woodplane with a finished roof
The next step is flooring floor. It was made of a 100 * 40 mm board. They laid with the slits in 2-3 cm. Next nourish the walls of the walls. It was decided to make a gap equal to the width of the board (100 mm). The boards were nailed with nails, two from each edge. The design turned out well ventilated, however, with lateral wind heavily scores the snow.
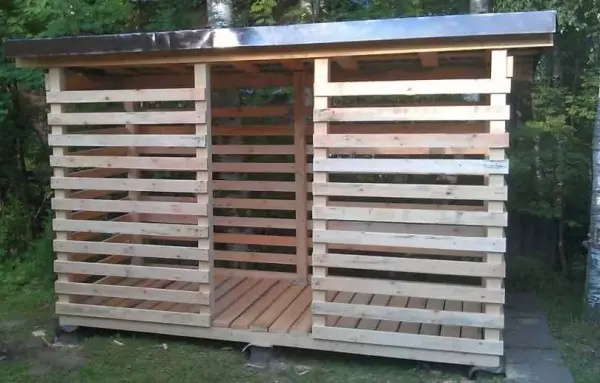
Woodwoman do it yourself almost ready
The last stage is painting. Here we take any composition for wood with bio-protective properties: so that the bugs are less than ate. In this embodiment, painted by Bioteks, the color of the "rosewood".
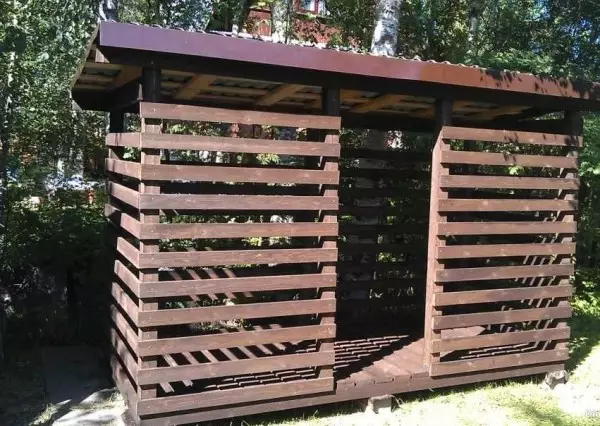
After painting is ready for use
All, woodplane is built. You can repeat this: a difficult thing. Carpentry work on complexity - at the level of high school students. The most complex knots are roofing, but it is very simple.
Another option to build in the video.
About how and how to decorate the plot can be read in this article.
Homemade Woods: Photo
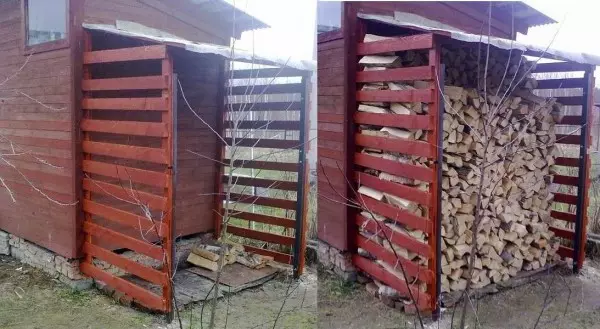
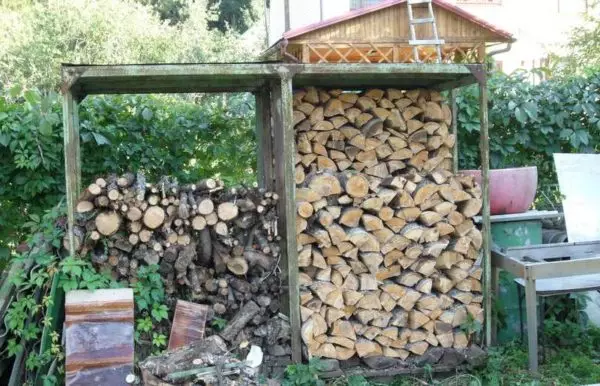
There are still many similar buildings. The differences are small, the principle is the same: the frame is covered with a blackboard with different gaps. There are several copies that have built the owners of cottages or private houses themselves.Dried to the shed waters in the country
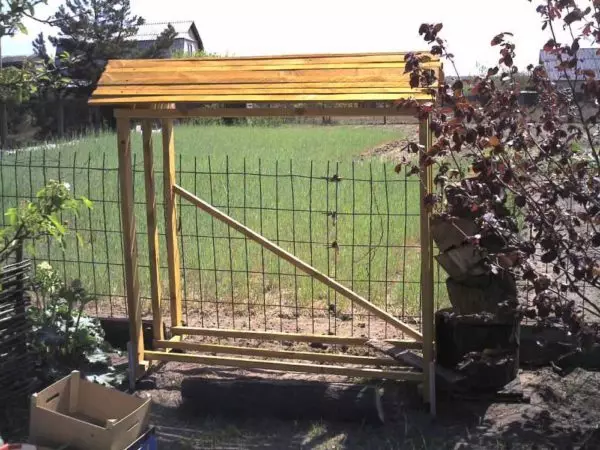
For his construction, only two pipes were needed, which were inserted into the ground and concreted. Two bars attached to them then. Similar bars strengthened on the shed wall. Between them, scored the boards, fastened the roof (trimming of the proflist). To make firewood lay on Earth, put bricks and on them - a sheet of old plywood. For the manufacture of such a canopy, you can use the remains after construction or buy pallets and disassemble them. Just suitable in size.
Simple woodwoman for giving
By the same type made a second canopy. It is further divided into sectors in which there are different firewood. The foundation for this structure was also not done, they removed the fertile layer, fell asleep with sand, tumbled. Put the paving slabs. On her - bars that serve as a support for the crossbar on which the firewood of the lower compartment is lying. It turned out neatly.
Article on the topic: Connecting a washing machine with your own hands
Small woodwood for giving sector division
Standing separately
The roof slope is unusually organized: the front racks are made above, there is nothing unusual in this. But the grooves that hold the halter roof rafters are cut out. That is, the roof is based on the upper strapping, as usual, but on the side racks. With a small snow load, such a design is quite viable, with abundant snow, the roof is unlikely to be.
These are two about the photos explaining the construction process
And this is what happened. The first serious building is a woodwoman with your own hands, and already as good!
Perhaps you will be interested to read "how to make a gazebo from a tree." It can be built in the same style as a wood barn, so everything will look like a single ensemble.
About how the wooden fence can be, you can read in this article.
How to fold a round fullger
Repeatedly, probably saw firewood folded in the cylindrical shape of the lunite (or photo). They look good, and, more importantly, wood dry in them quickly.
Round Flippers for Drying Firewood
Everything is very simple, but without knowing the secret, it does not work well. Below the photo report on which step by step is shown, how to fold round raspice from the bold firewood.
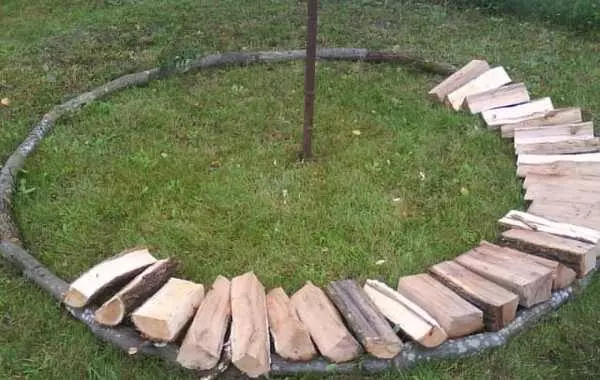
First, stick to securely fasten the pole about 2 meters of height. Around laying chocks of a small diameter. The distance to the center is the double length of firewood (if there is 40 cm firewood, to the center of about 80 cm).
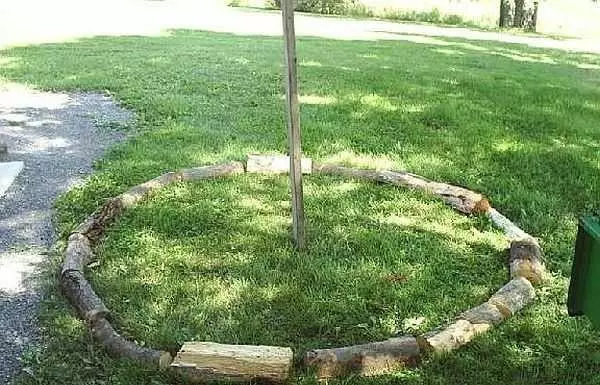
The first step laying round lung
Next lay out the bridal firewood. In one end, they rely on the chocks posted, the second lie on the ground. Stake in such a way that on the inner edge all lay almost oppressive (with small slots). There will be gaps on the outside. It is unresolved - the second row will be put in them.
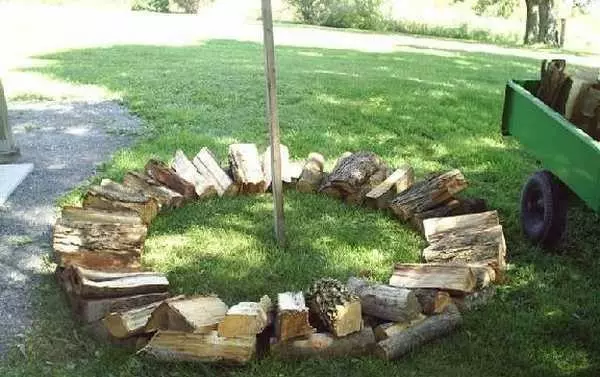
Lay out the first row
The second row is postpone on the first. Trying to fill the gaps. Around the pole start to fold tightly firewood standing.
Continued: lay out the second row, start filling the middle
We continue to lay firewood in a circle and fill in the middle
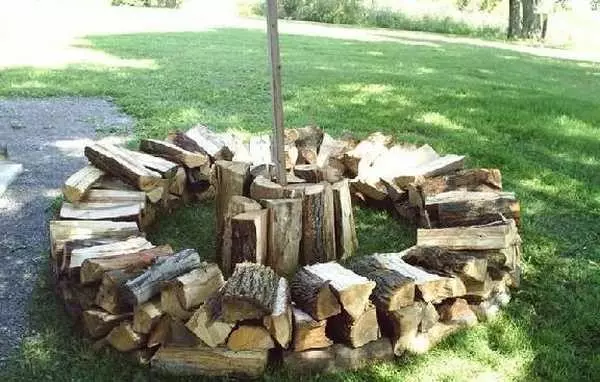
As soon as they noticed that the outer edge of the firewood began to clone down, they post a row in a circle, which raises them. Then continue to fold the firewood as well: in a circle until half the height of firewood (20 cm), then fill the middle. The second row in the middle is not just put, but sticks out in the gap. Try the pieces of wood insert tightly.

Continuation of the process
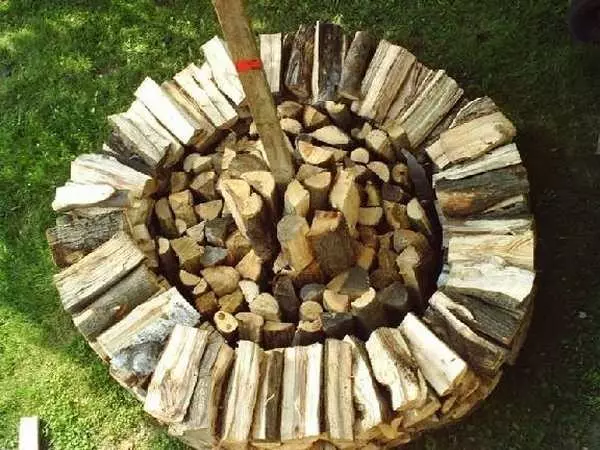
Top view from above
Laying the lunite finished
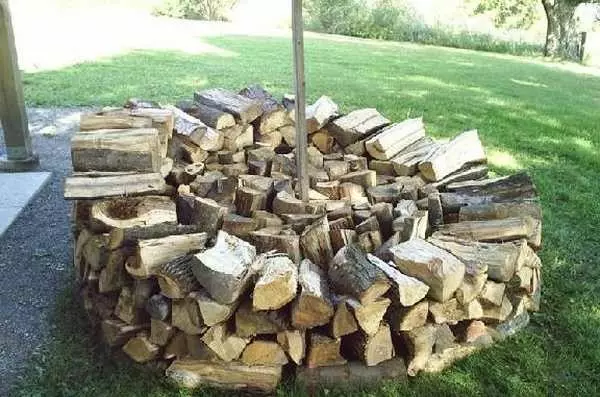
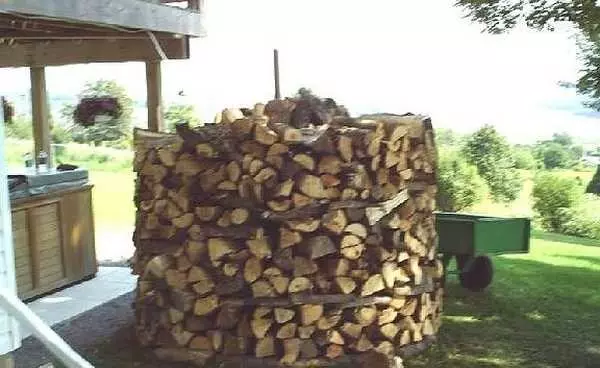
The same process can be repeated with a large amount of firewood. Place two and even three rows in a circle. The dimensions of such wobbies are huge. In the photo gallery, an example of how to fold a large raspice.
Unusual design - Finnish Woodrovnik
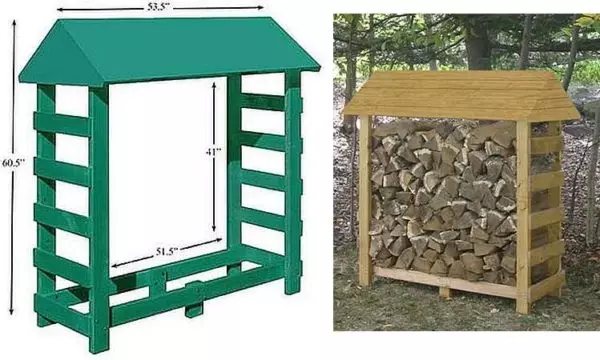
Drawing of a small woodwoman for one happy flight
This is easier to make simple. And in the house you can
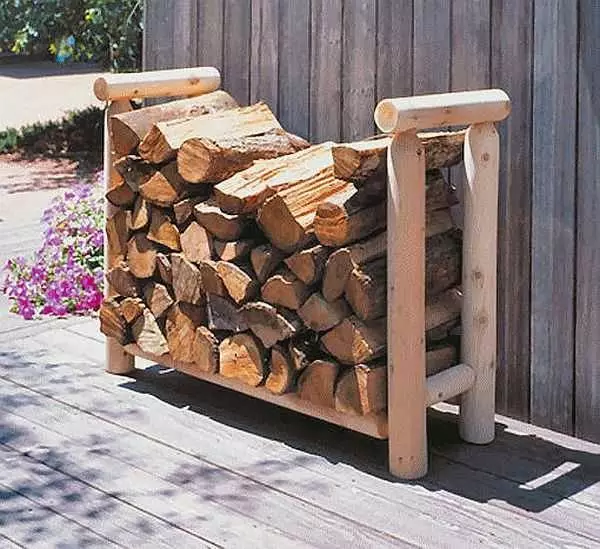
Beautiful woodnitz. Straight hut for firewood))
Lightweight design for a small amount of wood
These triangular structures are also wobbies
Two concreted logs near the wall. That's all the device
A variant of a large rectangular woodwood
The big skell of the roof will protect from the rain. In order for the wind to the wind to the roof
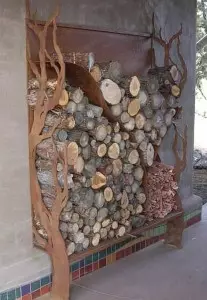
Interestingly and stylish: you can put near the fireplace or oven
From the logs it turns out a beautiful woodcutter, but it costs ...
Metal frame. Missing stiffness (voids), because everything led
This is an option with boards attached by type of blind.
All these models are easily built, some are only the modification described above. We hope you are easier for you to build a woodwoman with your own hands.