
If you have experience with tape measure, level and power tools, you can build furniture from DSP with your own hands. This will allow not only to save money for a domestic budget, but also create original furniture for the kitchen.
Designer furniture has always been highly valued, and this kind of items may even become a family relic, transmitted from generation to generation.
Consider how to make furniture from DSP on your own. Below is an instruction for the manufacture of a stuff and table for kitchen.
Based on this material, you can develop, and after making other items for the kitchen with your own hands.
Manufacturing kitchen stuff
The topping model presented on the diagram below is the greatest popularity. To make such furniture with your own hands, it is necessary to prepare the following items and tools:
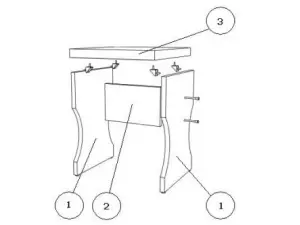
Scheme 1. Kitchen tokeret scheme
- Chipboard sheet or individual pieces;
- pencil;
- line;
- Drill or screwdriver;
- screws;
- paper essay;
- iron;
- hacksaw;
- key 6;
- varnish and brush to cover the toature;
- Lobzik electric;
- Drills 5.6 and 10 mm.
If you plan to immediately do several stools, it is recommended to make a scheme that will significantly accelerate the process of cutting products. You can use the finished example of the drawing to create grids.
According to the presented sizes, parts are fixed, but strictly following the pattern, as a result, do not get the curve product.
After the preparation of the main parts should be processed. At this stage, sandpaper will help, thanks to which the product will get rid of sticking protrusions. Immediately after that, it is necessary to protension the items, because if this procedure is carried out after the manufacture of a stupor, there is a risk of presence of not scratched pieces of dusting.
Next comes the final stage - the assembly. How to make furniture from DSP with your own hands at this stage, well illustrates the following scheme. For a stronger connection, it is recommended to use the config terms. On the sides of the product, it is necessary to determine the fastener of the transverse slats, then do the openings by 0.8 cm in the side parts and 0.5 cm from the end.
Article on the topic: Pattern scheme "Letter" with descriptions with description and video
It remains to attach the seat, for what you need to use metal corners for furniture and 4x16 mm screws for fastening them. Kitchen stool is ready, it remains to be covered with her varnish. You can additionally sew the seat with a cloth for ease of operation.
Kitchen table from chipboard
Dining table do it yourself from chipboard - this is a budget and practical solution. The manufacture of furniture of this kind requires the use of laminated material, since it is covered with decorative plastic, which does not threaten erasing.
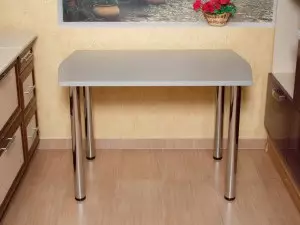
Photo of kitchen table from chipboard
In addition to the main material, you will also need:
- slats end and connecting;
- end edges;
- Shrews.
Even if the worktop is bought the desired size, you still need to process ends. Thanks to this, the furniture made with their own hands will be more attractive, and the table will be protected from moisture. For these purposes, you can use a special Kant for furniture based on polyvinyl chloride or attach the edge tape.
Supports will also be required for the table. It can be finished legs or a one-piece base. Round legs with a diameter of 6 cm and a height of 70 cm are used with the greatest demand.
In the above example, 4 chrome-plated legs of a standard diameter were used, a tabletop from a laminated chipboard with a thickness of 0.36 cm and the corresponding color plastic liner cant with girths. All materials are presented in the photo. Drawings are not required, since the table model is very simple, and all stages are presented in the photo.
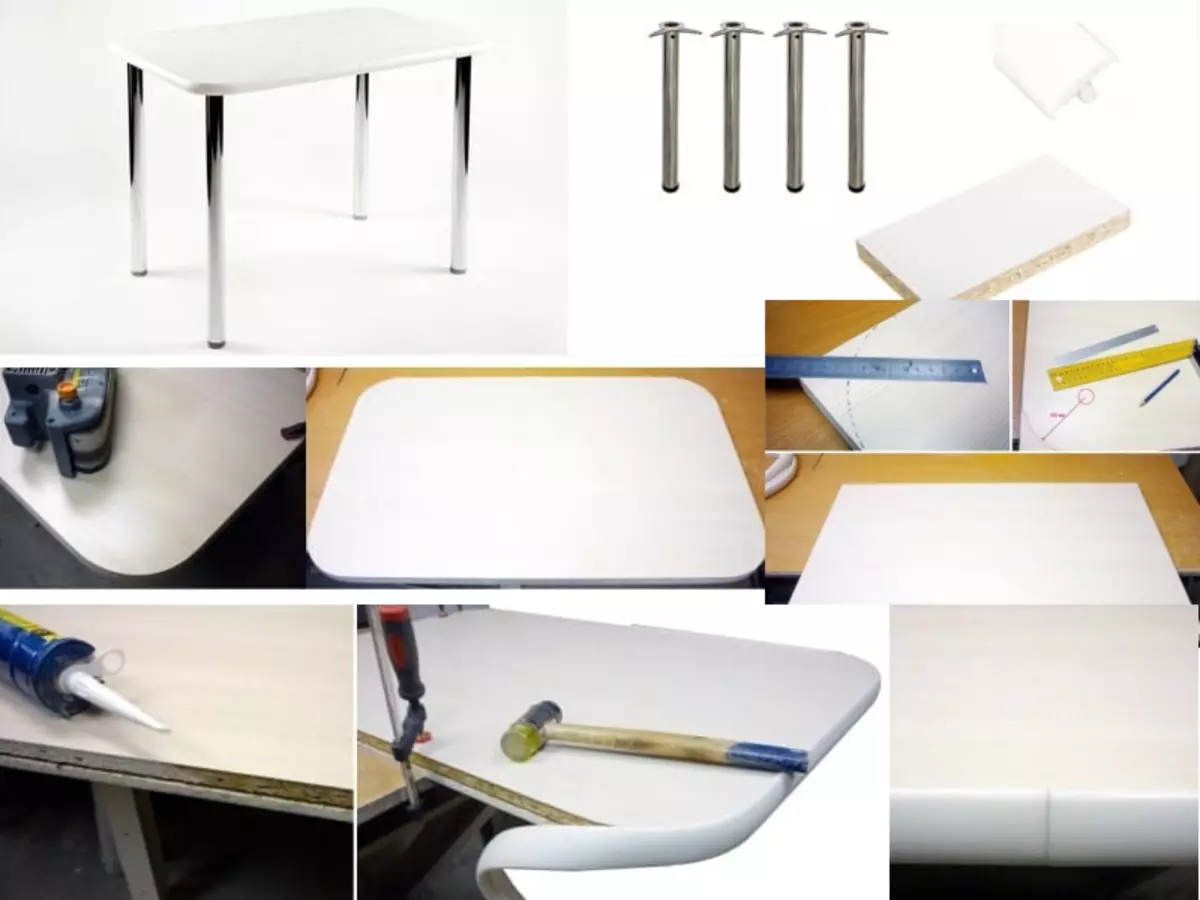
Photo of kitchen table from chipboard.
The sequence of action in the manufacture of the table is as follows:
- The chipboard should be marked by sticking, adhering to the drawing, as shown in the photo. Corner roundings must be at least 6 cm.
- Using an electrolybiz, you need to give a tabletop specified form. It is better to use a saw with reversible teeth, otherwise chips can occur on the plastic canvas. Initially, the material angle should be trimmed with a jigsaw, but with a reserve of 2-3 mm, after which it is to finish rounding the grinding machine.
- Now the grooves for Kant on the instructions described in the photo.
- Then it is necessary to cover the countertops to the silicone sealant, after which it is possible to attach a kant, as shown in the photo. To packing Kant, you should use a refinery from rubber, and upon completion of this procedure, the excess sealant needs to be removed.
- It remains assembling details. At a distance of 10 cm, it is necessary to make marking, after which, using the screws with a hidden head (2 cm), attach alternate holders with a hexagon key, and then insert legs in them.
Article on the topic: Sleeve "Rlan": Pattern, learn the correct construction of the regulated photo and video
At this, the manufacture of the kitchen table is completed.