
Nowadays, the socket on the plinth is increasingly used. It helps to prevent the time-consuming procedure, because you will not need to drill holes or lay wiring in the walls.
This is especially useful in bulk rooms, where the cable is made across the entire apartment quite difficult. Plinth can accommodate different types of cables, as well as high voltage wiring. In this article, we will describe in detail about the plinth sockets and their characteristics, as well as consider the installation procedure in detail.
Advantages and disadvantages of plinth sockets
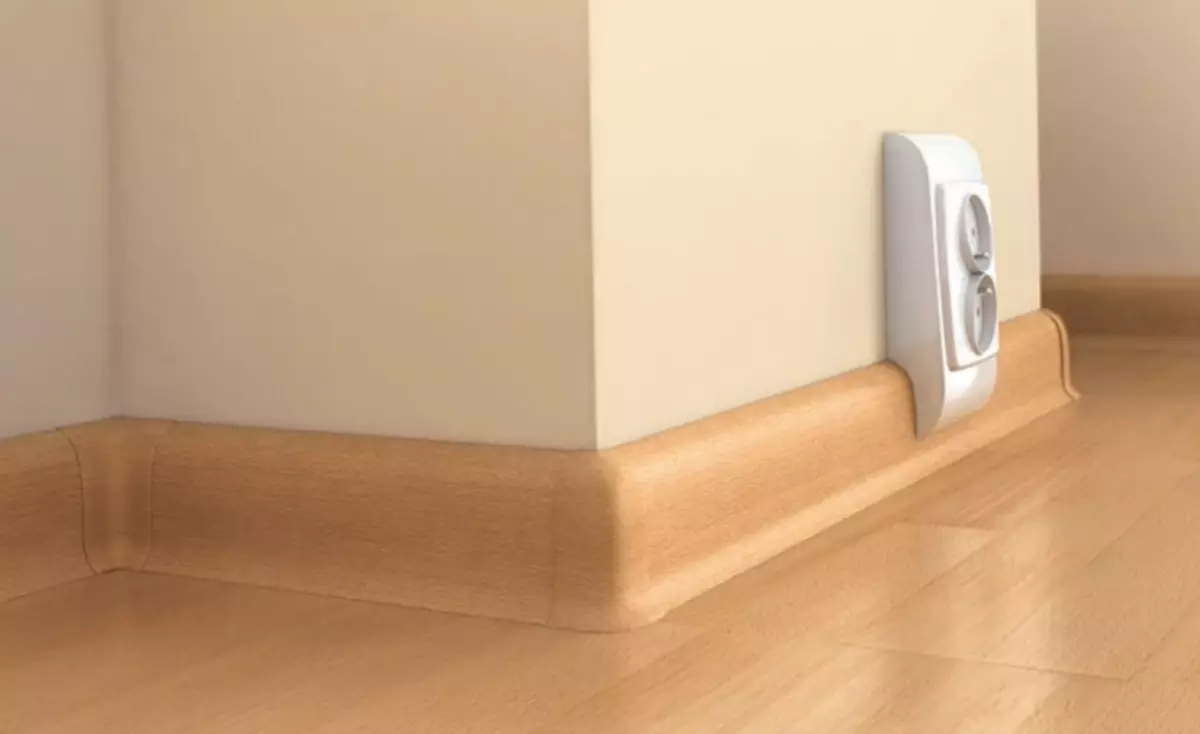
Socket installed on the plinth, invisible and does not spoil the interior
Installing such sockets will easily place the hidden wiring. At the same time, you can install electricity sources in any place convenient for you.
The plinth socket has the following advantages:
- You can easily hide them, which allows you to preserve the integrity of the interior;
- ease of use of electrical engineering, because the furniture will not prevent contact;
- significant savings in the room and minimizing the cost of wiring;
- The possibility of mounting the socket is almost anywhere;
- improving the security level;
- Protection of wires from pets.
The only disadvantage can be considered the possibility of short circuit, if the water falls inside the design.
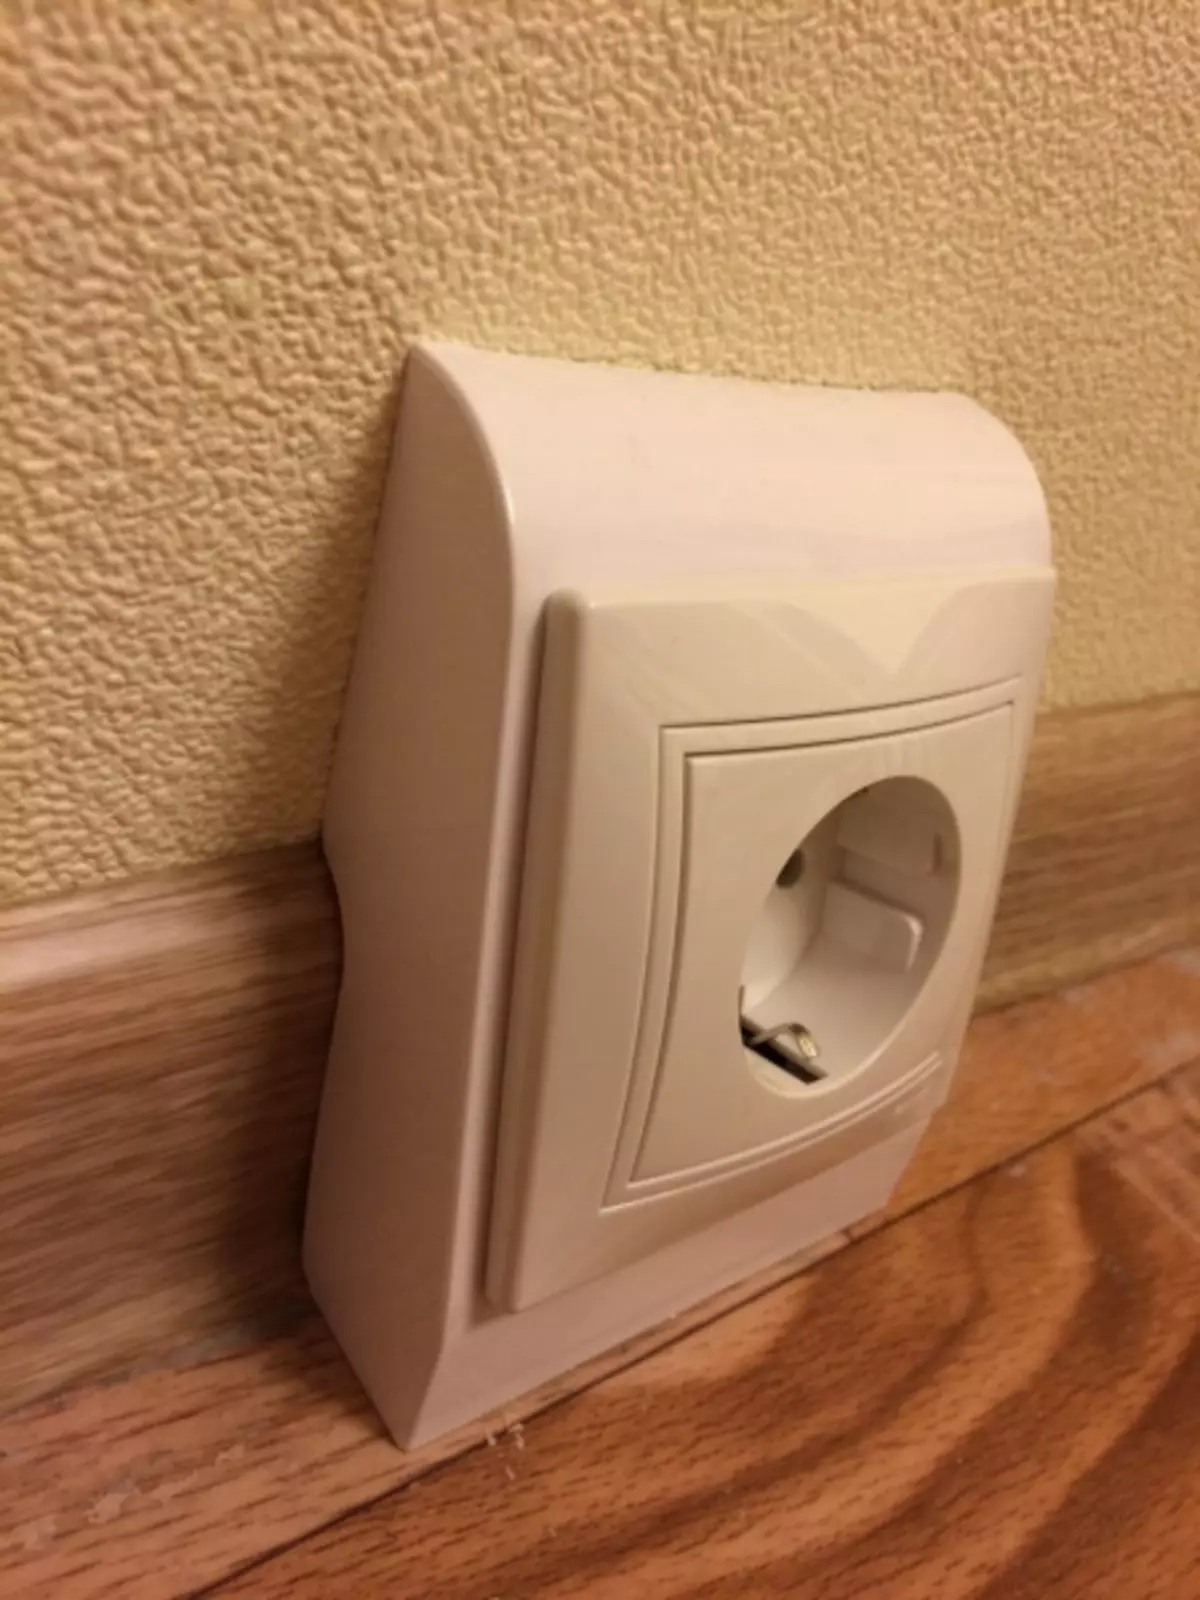
To prevent it, the socket is equipped with a curtain that protects the wiring from moisture.
Specifications
Outlets on the plinth possess the following characteristics:
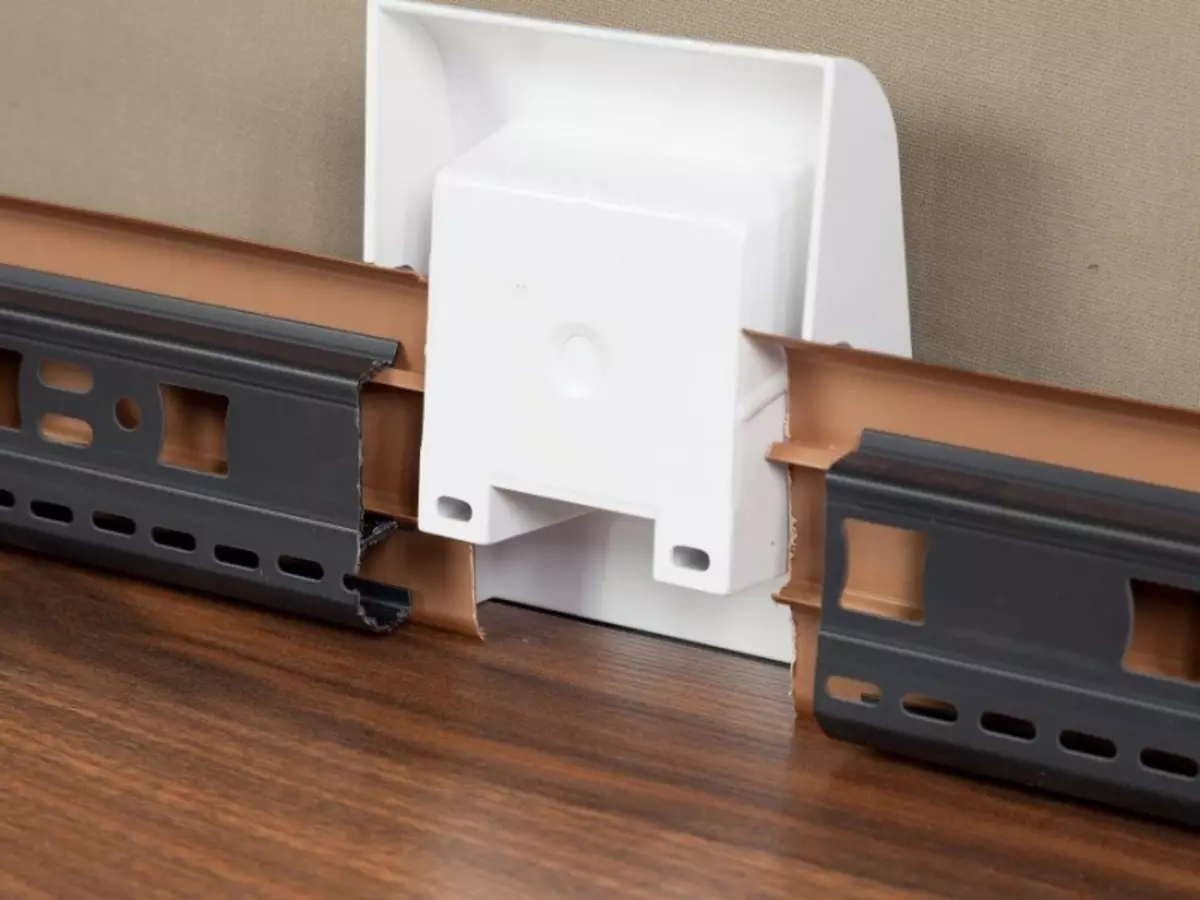
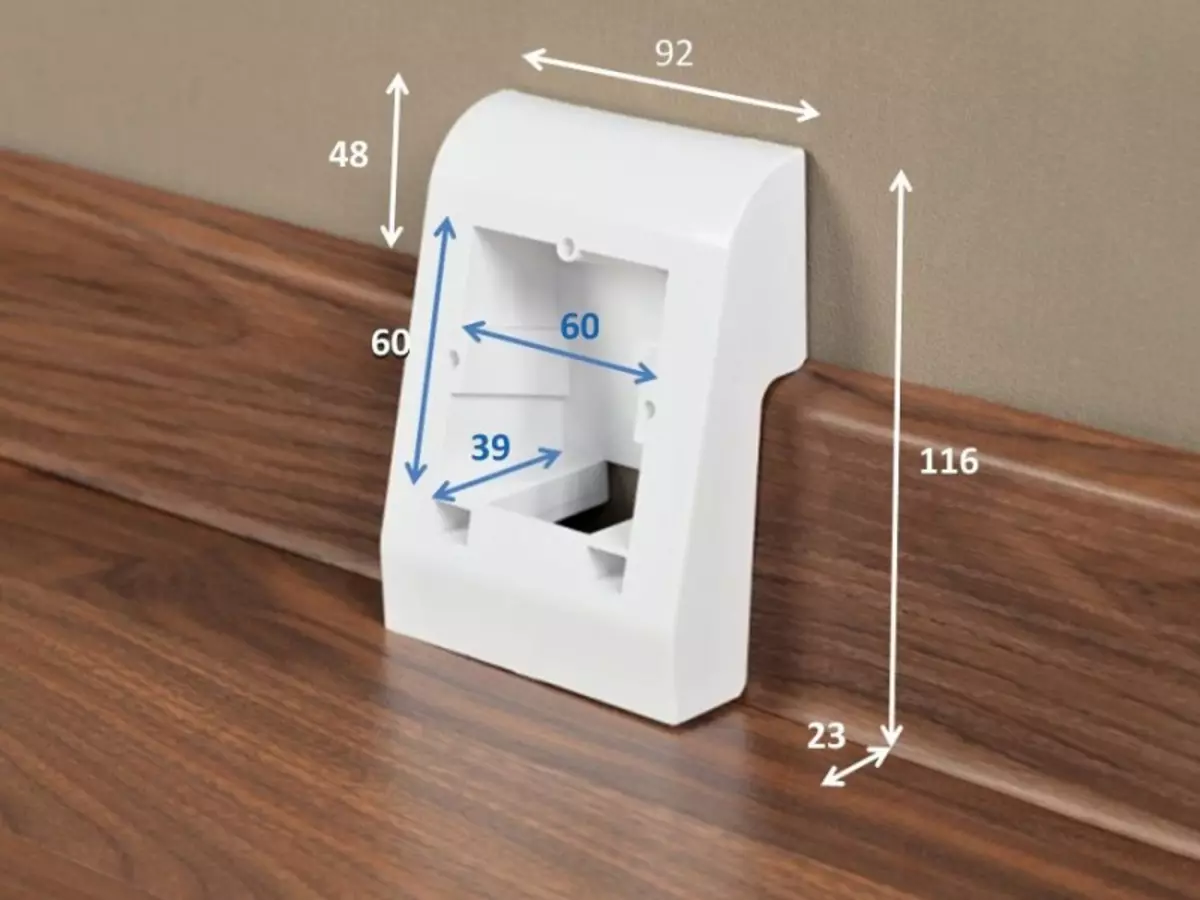
- To install the box, you will need to be approaching the plinth and the socket itself. Podrottor is a box with an adapter at the bottom.
Multi socket comfortable in everyday life
- The main components in production are polyvinyl chloride and laminated film. At the same time, the film has the ability to mimic any texture, be it tree, stone, and so on. Podrottor is made of a more rigid material, it allows you to ensure reliable fixation during installation.
- There are two types of conversion - outdoor and wall. At the same time, the mounting of the wall variant occurs on the wall and the plinth, it does not concern.
- The design of the box is made by universal, you can arrange an electrical outlet there, a network cable, antenna and so on.
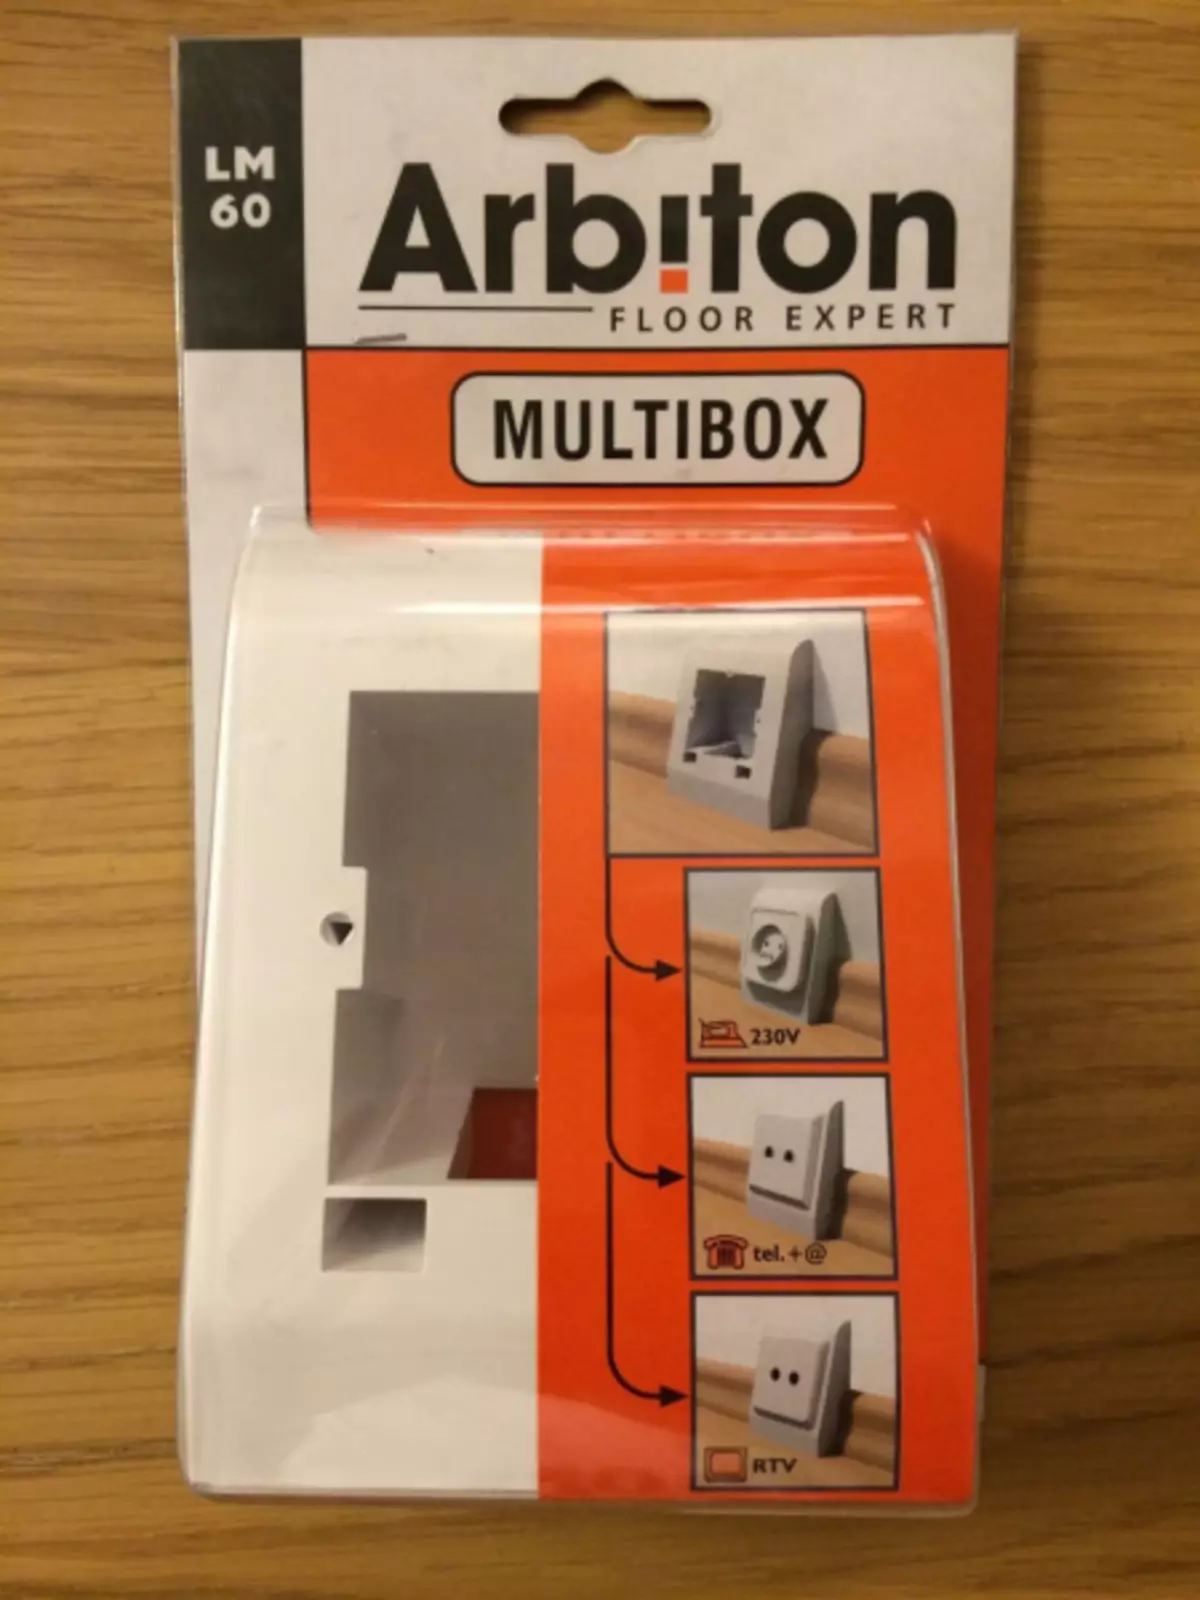
- It is recommended to purchase a box and plinth of one manufacturer.
Setting outlet
The installation procedure is not difficult, so you can easily handle yourself.
For this you need the following tools:
- Perforator;
- screwdriver or screwdriver set;
- construction knife;
- construction level and passatia;
- Self-tapping screws from 6mm;
- Scotch.
Consider that the installation with glue or other mixtures is not a good solution, as they will not be able to provide high-quality fastening of the box.

Outlets Mounted in Plinth with Channel
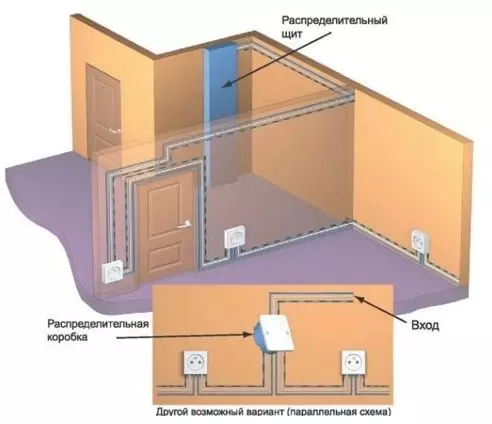
Before carrying out wiring, plinth is mounted with a special channel. There will be an electrically conduction on it.
To do this, it is necessary to remove the protective panels from the design and consolidate the mounting planks, screwing them with self-draws. The markup is carried out in advance. Installation of corners and longitudinal adapters is carried out based on the location of the wiring.
In places where the setting is planned, marks are made. The moldings of the desired dimensions are cut off with a margin of about 5 mm on both sides. For the installation of outdoor pickle in the plinth, the gap is about 65 mm in size. On how to install sockets in PVC slopes, see this video:
For the wall variant, an incision of the upper part is carried out. The edges are processed with a file to prevent possible damage to the wires.
Then from the central cable stretches the wire that is used to connect. It will be needed to cut and process.
After that, the plinth is closed by a protective bar. The box lean to the surface and mark the fasteners.
Next, the holes are drilled and the dowels are clogged. A box is installed on the wall. After that, the openings are paved. The following depicted possible layout schemes.
Next, you can go, directly, to the setting of the socket. Before that, do not forget to unscrew the terminals and attach stripped wires. Try to carefully spin the screws so as not to spoil the product. In order to avoid the possibility of bends, pull up the cable.
Upon completion, connect the voltage and check the performance of the technique. Then install the decorative bar.
Useful recommendations
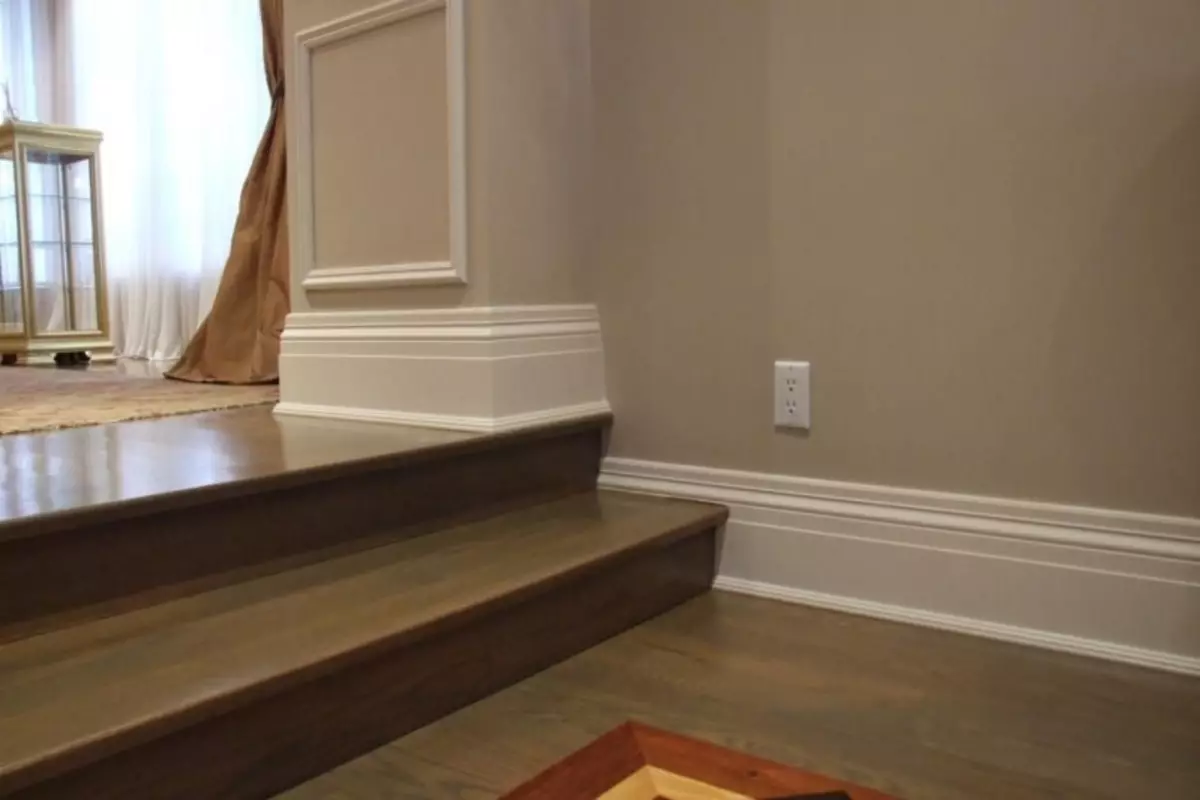
Designs under the socket must have a deep box
Consider that the outdoor option is more convenient for installation, as it is used for many species of sockets.
These designs have a deep box, so there will be no problems with installation. To other types of conversion, it is necessary to pick up a socket with grounding.
When using outdoor products, certain difficulties may occur. So the contamination can accumulate around the design, which are subsequently quite difficult to get rid of.
You can also not put the furniture close to the wall. Therefore, the use of wall conversion is a more practical solution.
During operation, it is necessary to comply with the safety rules. Previously need to turn off the voltage. Wiring should not be damaged, and the bare parts will need to be processed. Read more about Mounting Floor Plinth, see this video:
Thus, with the help of Multibox, you can install a socket in any part of the room, saving time and money for repairs. Thanks to the enormous variety of plinth design, you will pick up the option that you want to taste and suitable for the design of the room.
Article on the topic: How to fix pickups for curtains to the wall?