
Table of contents: [Hide]
- Making countertops
- Cardboard Table Feet
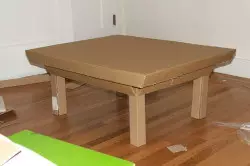
If you have a dense cardboard at home, which you can not find a worthy application, then, armed by our idea, you can easily make a small and enough robust table.

Cardboard table do not calculate for heavy loads, so it is used as a journal.
Such a pole will be designed for moderate loads, it can be used as a magazine or under a computer, the weight of the monitor can withstand.
Please note that the table from the cardboard is best made the corner. In this case, it will receive an additional support for the wall and will be more sustainable and reliable.
You can adapt the general principle of manufacturing a table under its own purposes. To do this, you can independently decide on its shape and size. It is necessary to make it before starting work, to know in advance, with what parameters to make items.
Making countertops
First you need to make a countertop. So that it can withstand the load, for example, from a monitor or laptop, it needs to be done two-level. It is necessary to cut three pieces of cardboard to the stationery knife in the form of a future tabletop. One of them is a detail for top-level, and two others - for the lower level. Cut thin strips from cardboard and bend them with harmonica. These stripes need to be glued to one of the details of the lower tier. To do this, a piece of cardboard lubricate the "moment" glue or use the adhesive gun. The last option is much more convenient.

Drawing table from cardboard.
Strips folded by harmonica are glued by an edge. It is very important that cardboard strips were the same width. To do this, it is best to cut them with a single knife movement or mark the markup very carefully. If the difference in their width is significant, dents will soon appear in the surface of the table top. The denser you put the cardboard strips, the stronger will be the tabletop.
Article on the topic: Brick laying with your own hands
After laying the harmonic, the second part of the lower level of the tabletop is glued on top. When the bottom element of the table top is ready, you can go to the top. It is also necessary to glue the harmonica cardboard strips. When the glue on it is dry, you need to glue the upper and lower components with each other. To do this, use the same "moment" glue or adhesive gun.
From the same cardboard you need to cut strips, width equal to the thickness of the table top, and glue them to its sides. Additionally, they must be fixed by paint scotch. Special attention is paid to the corners.
Back to the category
Cardboard Table Feet
Now you can make the base of the Cardboard table with your own hands. If you perform an angular table of cardboard, then it will take only two legs. They can be additionally supplied with shelves so that your magazine or computer table is more functional. If the shelves are not made, the leg will be a conventional riffness edge.
For one feet of the table, you need to cut 4 identical pieces of cardboard.
For the leg, you will need to cut four completely identical pieces of cardboard. They can be rectangular or square depending on what size leg you want to make it possible. They need to be glued together with the same glue that you used earlier. For the junction of ribs, it is necessary to perform grooves and secure them with glue.
If a deaf leg is made, then the ribs of stiffness are single-layer, while they need to be placed quite tightly. Strips that will perform the role of shelves or ribs hardness, it is recommended to sample 2-3 pieces at a time. In this case, the result will be more reliable.
On this legs and the countertop are ready, they can be connected immediately or after decoration. To finish, you must first leave the table with old newspapers, and then align the surface with tracing, white wrapping paper or kraft paper. The leveling layer of paper must be painted with white acrylic paint. After applying it, the table is ready for decoration. It can be colored painting, decoupage, wicker, etc. Finishing can be performed according to the interior of your room.
Article on the topic: how to paint drywall: small tricks
Thus, make a table from cardboard with their own hands simple enough. To such a table, you can additionally make a chair from the same material. The table can be used under a computer as a journal or for other purposes, it all depends on your imagination.