
Table of contents: [Hide]
- Traditional wooden Zybka
- Round hoop cradle
All the peoples of the world among the necessary things have a cradle for a newborn. In most cases, the cradle for the child was arranged so that it could be slightly shoved.
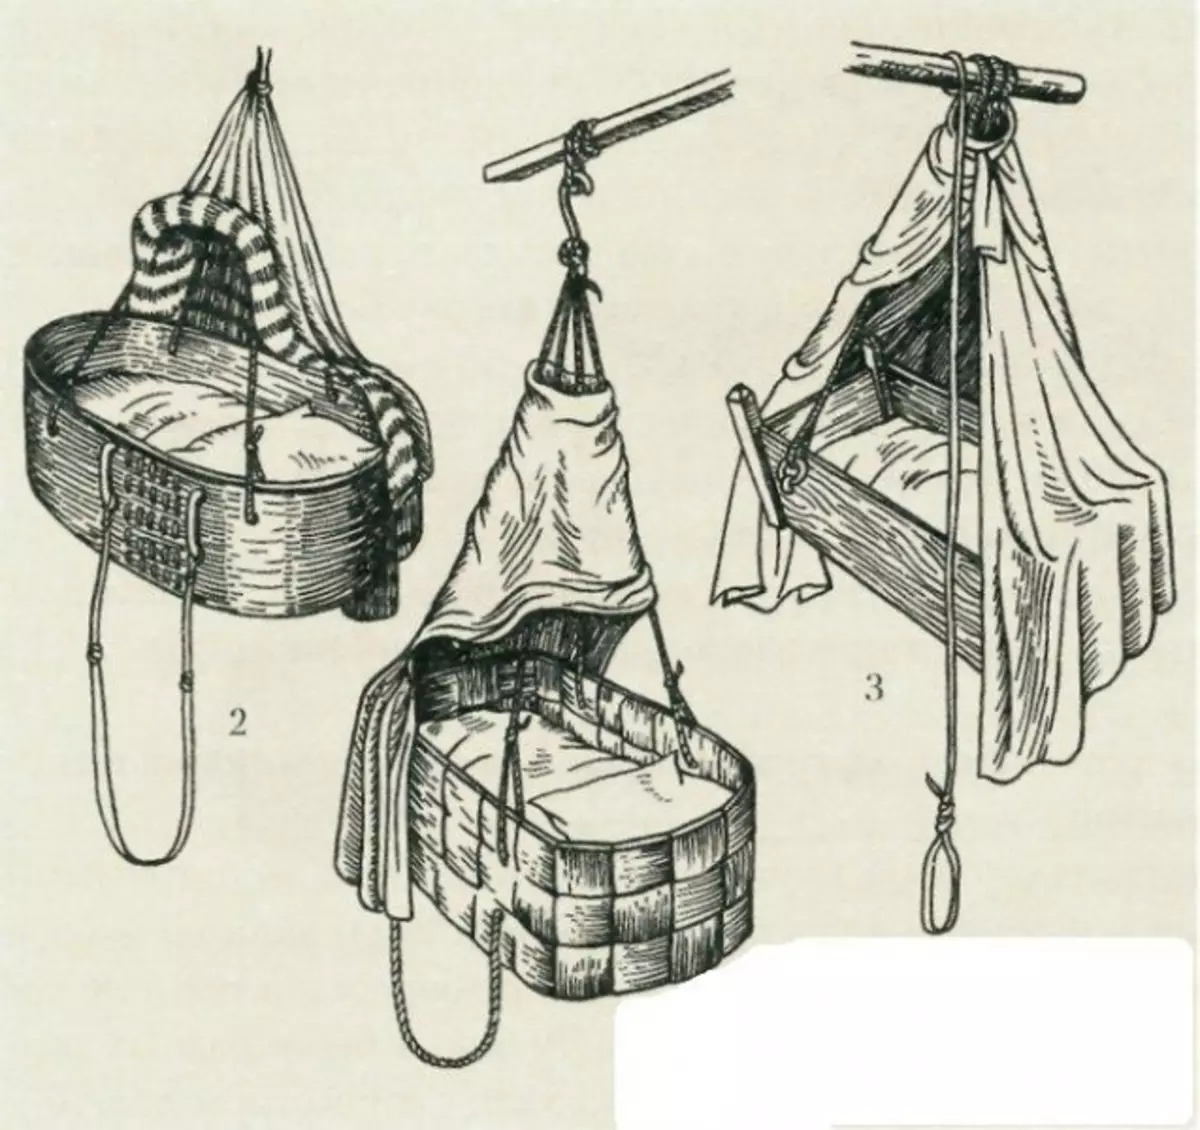
Types of challenging 19th century: 1-beam; 2-lubyana; 3-minded.
It quickly calmed the child and dismissed the mother to perform everyday female duties around the house.
The easiest option of the cradle in Russia was chilling from thin milking box, suspended on the ropes to the mathite of the hut or on a special flexible pole. The nationalities of the Russian North (Kets, Weps, etc.) used for the cradle of a box made from Beresta.
Currently, the boxes are made from all sorts of artificial materials, weave from the vine or sew from dense fabric. Only "mechanism" of children's cradle remained unchanged. As many years ago, the son is suspended to the ceiling so that it can be slightly routing. The best option will be made by your own cradle, in which the baby will be warm and cozy. The material for its manufacture can also serve both a tree or plywood, and cloth, and even yarn if the future mother can knit or weave macrame.
Traditional wooden Zybka
For its manufacture, you will need:
- Thin plate or plywood 1.5-2 cm;
- Electrolovka or tree knife;
- screwdriver, screws;
- Drill and drill set;
- dense tissue (denim or burlap, canvas, etc.);
- Durable rope, cable or bricted braid.
Making a suspended cradle.
- First you have to spread out the paper details of the future bed: sidewalls and end parts. The sidewalls must have a length equal to the desired length of the cradle, and the width sufficient so that the child cannot accidentally fall out of it (approximately 35 cm). Face parts should be made in the form of a trapezium, less from the parallel sides of which will be below. The length of this side is equal to the desired width of the bottom of the cradle. The length of the upper side of the trapezium is selected on the basis of considerations of convenience. The bottom of the cradle was traditionally made from a homework cloth. Modern fabrics make it possible to choose the most suitable material for individual requests. The main requirement for it: it must be dense enough to withstand the weight of the child. DOW CONSTRUCTION, guided by the size of the wooden parts on their lower edge.
- In the sidewalls of the cradle to place and drill symmetric holes for hanging the box. Locate them best closer to the upper corners of the details. On the lower edge of the sidewalls and the end sides, place and drill a row of holes with a constant step of about 3 cm. At the same stage, you can make a carved decor on the edge of the cradle, if necessary.
- Collect the box, connecting the sidewalls with the ends with the help of self-tapping screws. In the plating day at the edges at a distance of 1.5-2 cm from the cut (on the failure of the fabric) or the penta (on a bulk with the treated edge) to do around the perimeter of the hole in the step, which coincides with the pitch of the holes on a wooden box. The edges of the loops wash. Connect the bottom with a box of a thin cable or rope, rubbing it into the holes on wooden parts and a tissue part. Turn the rope or taper into hanging holes and secure the finished hanging cradle on the ceiling in the right place.
Article on the topic: Restoration of bedside tables with your own hands: Delete defects and furniture restoration
Back to the category
Round hoop cradle
In order to make a cozy and soft crib, you will need:
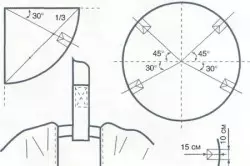
Fig.1. Pattern scheme.
- Little hoop;
- Covenate of dense tissue, a slightly larger than the diameter of the hoop and a length of 2-m diameters and an allowance for the seams;
- Belts, braid or rope for suspension.
- Make a pattern, guided by the scheme in Fig. 1. Dimensions can be selected individually. Scroll to arrange symmetrically, dividing the circle into 4 parts.
- Move the pattern on the fabric and make 2 details. Place and cut slots for fasteners. Bend the valves and become the items, leave the edge of the circle of the hole in order to make the hoop.
- Relief the hoop into the left holes and in the slots to fix straps or a rope for hanging on it.
When the baby is growing, it will be possible to fasten this design obliquely, and from a former crib, a suspension rocking chair will be.
In order to arrange a baby hanging cradle with her own hands, any mom will find a variety of materials and opportunities, doing everything to make the bed comfortable. There, the child will feel like in gentle mother's hands and sleeps all night calmly, giving relaxing and parents.