
Infrared plinth refers to the number of modern devices designed to heat the rooms. An efficient heating device is distinguished by compact dimensions and some features of the installation.
Like any high-quality heating system, this device provides a uniform heat distribution, due to the fact that the principle of its action is based on convection, but in addition to it, such plinths produce infrared radiation, providing full heating and creating a comfortable atmosphere in rooms where this equipment is installed.
Features and Benefits of Design
Warm electric infrared plinth attracted consumer's attention, deserving trust, due to its effectiveness, practicality and efficiency. Convection provides constant movement of air masses.
During this process, the warm air rises to the ceiling, and the cold is lowered and as if the device is drawn.
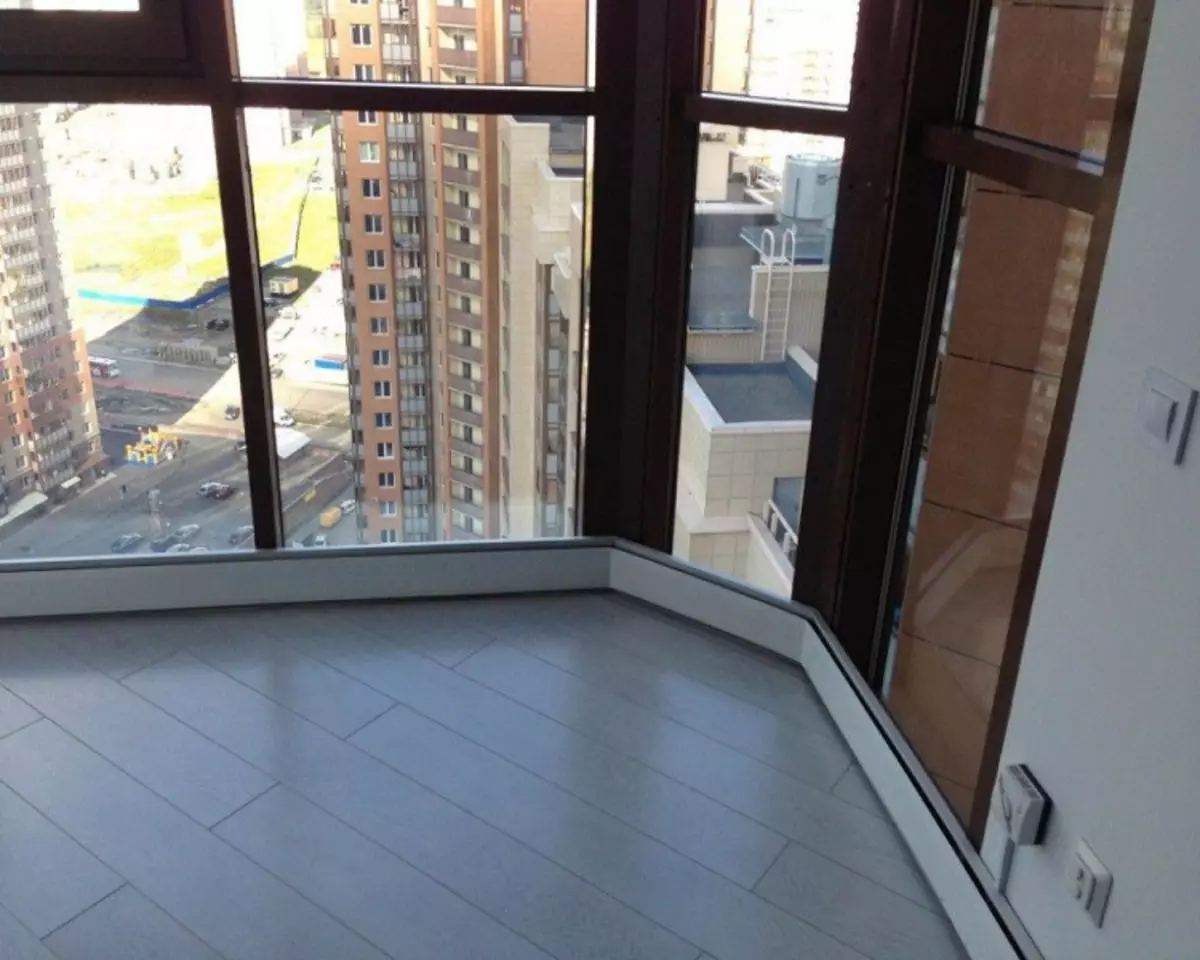
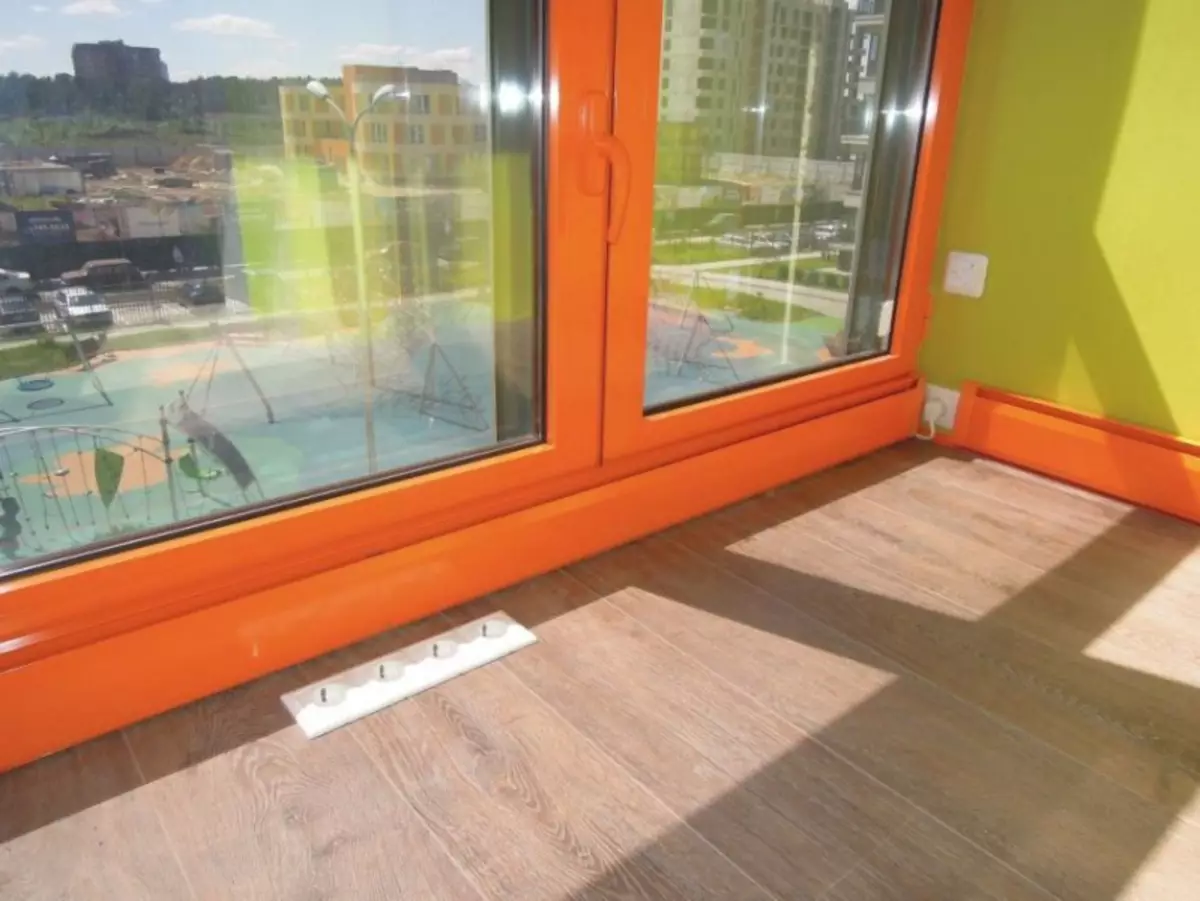
Warm plinths are often installed in apartments with panoramic windows.
Such a circulation guarantees the creation of the atmosphere and comfort in the heated room, but the peculiarity of such a plinth is in the ability to generate infrared radiation, providing full heated heating of the lower part of the room.
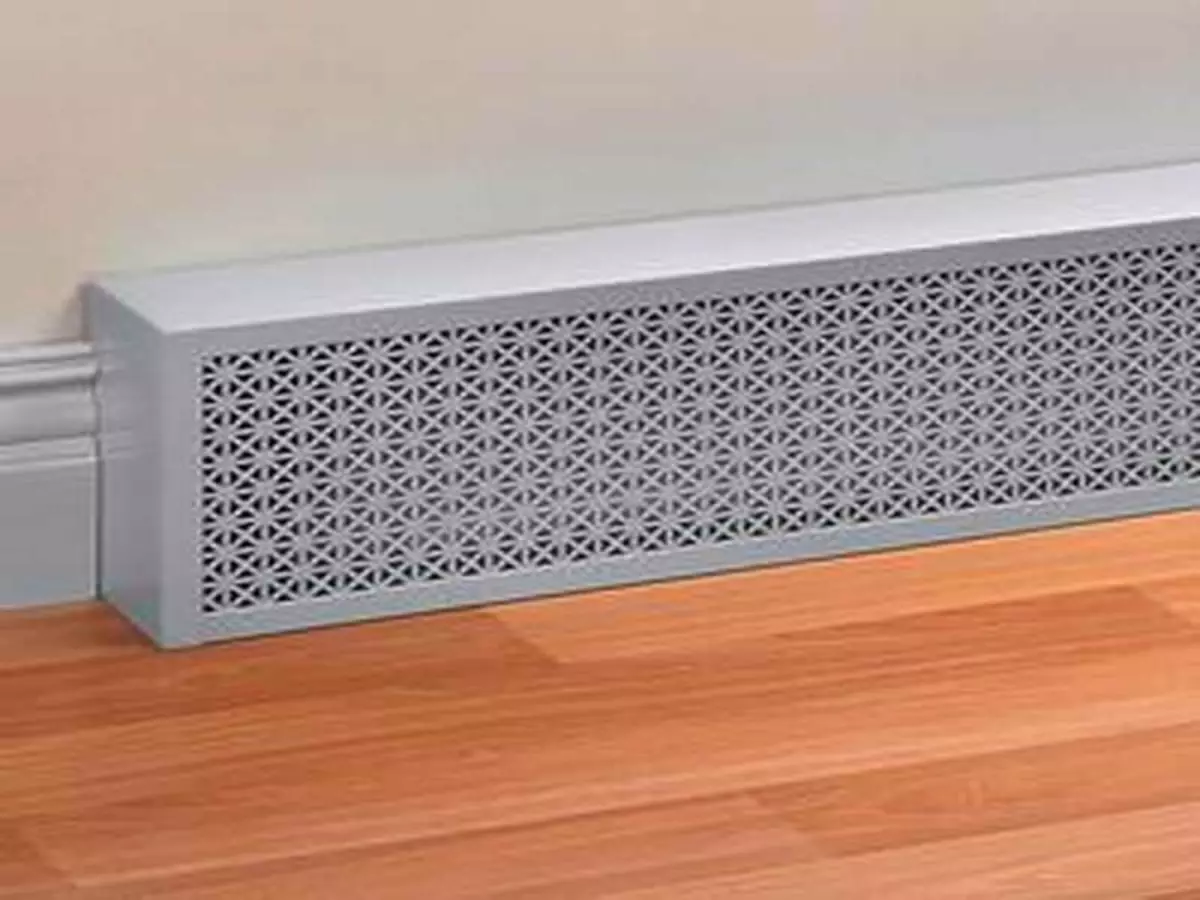
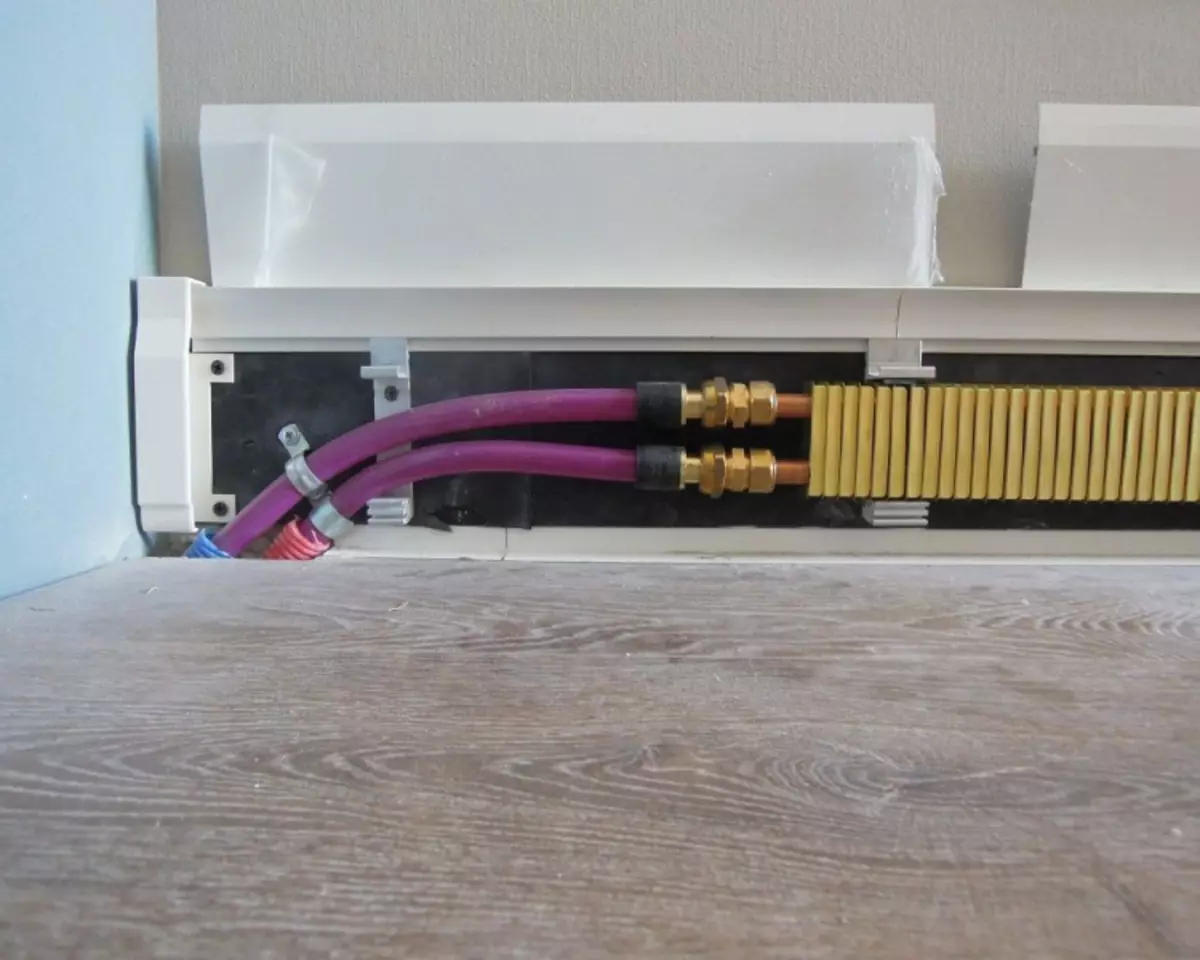
Inside the device there are electrical tagged power, equipped with fins, the area of which is large enough. This allows for a short time to achieve the desired temperature in the room where infrared plinths are installed. Installing aluminum panels makes it possible to obtain infrared radiation.
The equipment is characterized by modest dimensions and high efficiency.
The heating element and the reflector are enclosed in the housing, for the manufacture of which materials that do not emit harmful and dangerous evaporations are used when heated.
The infrared heating device is able to convert electrical energy into thermal.
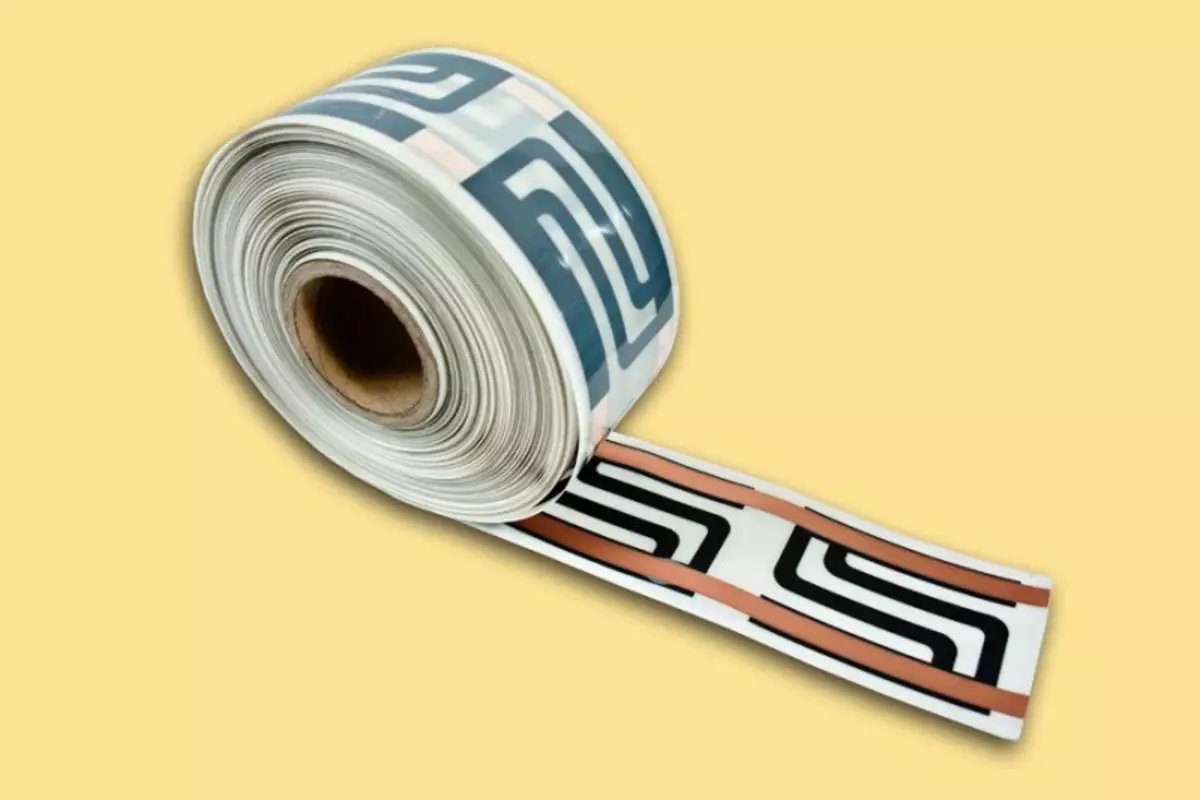
The device runs from the network with a voltage of 220 volts. The basis of the unit is a flexible heating electrical cable, hidden in a multi-layer braid made of polymeric materials. Be sure to have a heating temperature regulator.
Among the advantages that this design has:
- ease of installation;
- Small dimensions;
- creating a healthy microclimate indoors;
- uniform heat distribution;
- Heating of walls and adolespace;
- protection against the appearance of fungus and mold;
- High degree of economy.
Article on the topic: Review about interroom doors on rails and rollers
In addition, this equipment is not dangerous. The possibility of fire is excluded, and it is impossible to burn when touched. It means it is advisable to install an electric IR plinth in children.
The equipment provides effective room heating, due to the fact that the streams of warm air, rising along the walls, contribute to their warming, and, reflecting from the walls, heating the room at all levels.
Installation
The use of an IR electric plinth for arranging warm rooms is quite justified due to the design efficiency and ease of installation of equipment. All components are located around the perimeter of the room and do not attract attention.
Such heating systems do not violate the overall style of design and fit into any interior created, since there is a huge selection of decorative panels, which are hidden the elements of the device.
Plinths work on the machine, so you don't have to engage in adjustment
Electric infrared plinth can be mounted in those rooms where the radiators of central water heating are already installed.
The use of the system is simplified, thanks to full automation. This makes it possible to achieve cyclicity of inclusion and, accordingly, significantly saved energy spent and material tools.
The equipment of the aggregate timer allows you to create the necessary microclimate in the rooms, performing a connection exclusively for a certain period of time. Refining the heating system is carried out in the place where the decorative element is usually located (ordinary plinth). All components are mounted throughout the perimeter of the room, achieving a significant reduction in heat loss due to cold walls. For more information about heating plinths, see this video:
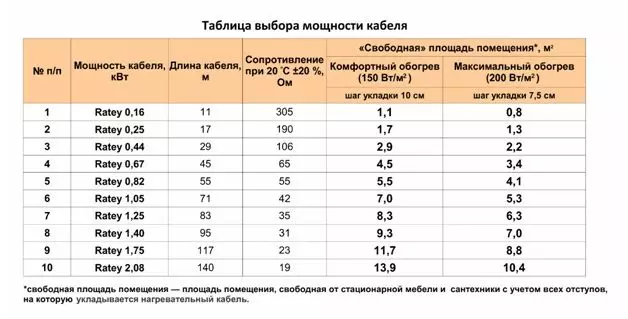
Calculations are based on the size of the perimeter of the room
Before starting to install, some calculations should be performed, as a result of which the number of heating elements and decorative panels will be known to install. To do this, it will be needed to measure the perimeter of the room, where equipment will be installed, or to determine the wall area on which it will be placed.
Article on the topic: Making a massage rug for children with their own hands
Now they choose the cable, the cross section of which will depend on the number of electrical slats installed. For mounting one plank, you will need a cable with a cross section of 2.5 cm². When working with other products, it is necessary to carefully examine the manufacturer's recommendations.

Cut the plinth to the wall and tick the point
For the surface of the lungs and thin interior partitions, a drill perforator will be required to perform work and fasteners in the form of screws and dowels.
Installation consists of several simple operations:
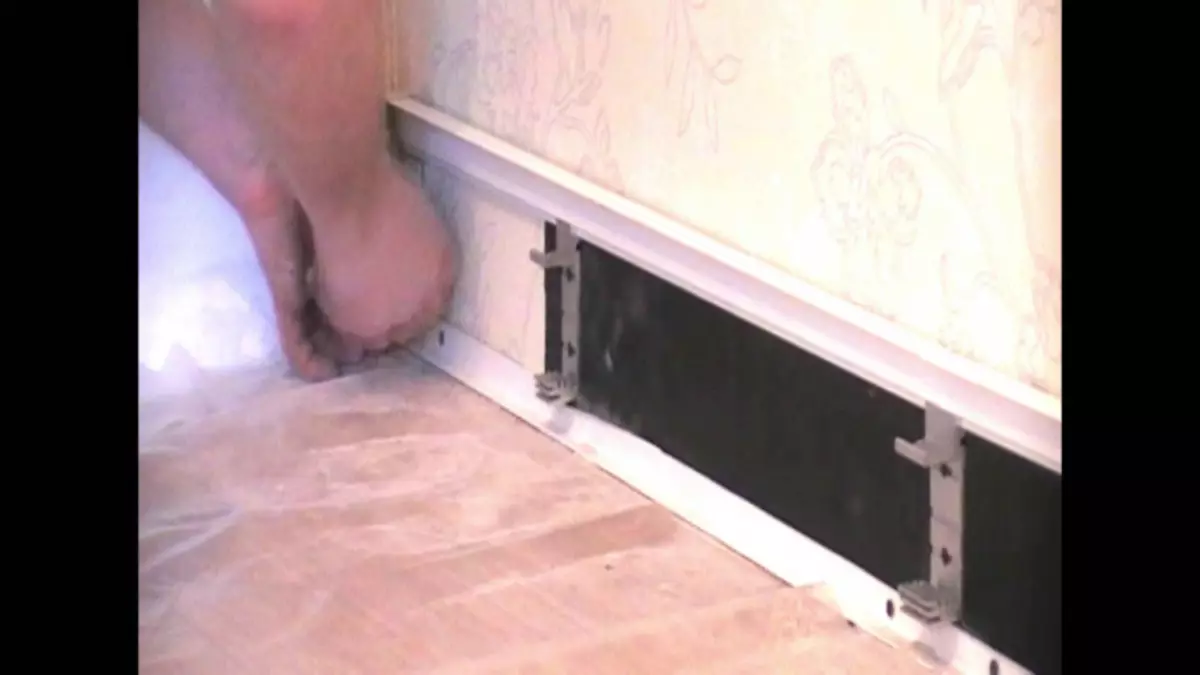
- With the help of a laser construction level, it is necessary to beat off the horizon throughout the perimeter of the room, noting the first line at an altitude of 1 cm from the floor, and the second at the height equal to the height of the decorative panel. On the surface of the wall, the heat-insulating foil film is fastened, contributing to the effective reflection of heat and improving convection.
- At the wall markup to the surface of the wall, the rear panel of the plinth and the construction pencil mark the fastener points.
- In the noted points you need to drill holes and drive into them plastic dowels. Now you can secure the rear panel of the plinth with the help of screws.
- The next stage - hanging the brackets to which the heating shade is installed. It is connected to the network, as well as the thermostat and temperature sensors, and also organize grounding.
- The final stage is a decorative panel fastener made of aluminum.
Pluging the top cover of the plinth, start the installation of the regulator and temperature sensors. For more information about heating plinths, see this video:
By connecting, you should not use one feed socket for more than 10 panels. Otherwise, the permissible load on the wiring will be exceeded.
Installing the temperature controller is carried out in accordance with the instruction attached to the device. It must be located at an altitude of at least 1.5 m from the floor in the immediate vicinity of the power supply. After connecting the hardware, you can start testing the equipment if there are no shortcomings and malfunctions, then we introduce the system into operation.
Article on the topic: Ways to see a balcony siding with your own hands outside