
It happens that you will go to the sea, and the weather is warm there and warm during the day, but not in the evening. After six hours the sea becomes cool, and you do not know what to wear. Because in the sweater is very warm, and in the summer T-shirt it will be cold. As an option, we will show for beginners an example of a jacket of crochet motifs, which will beautifully warm you up with summer evenings.

Detailed example of viscosity
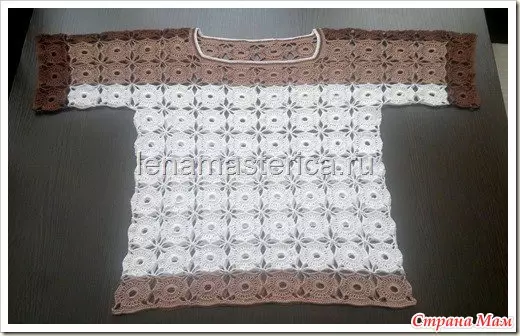
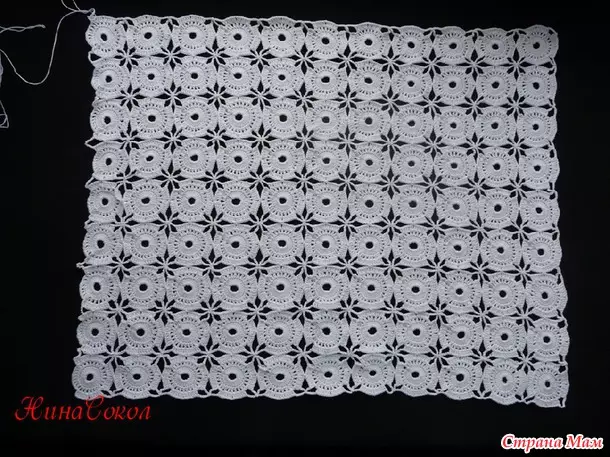
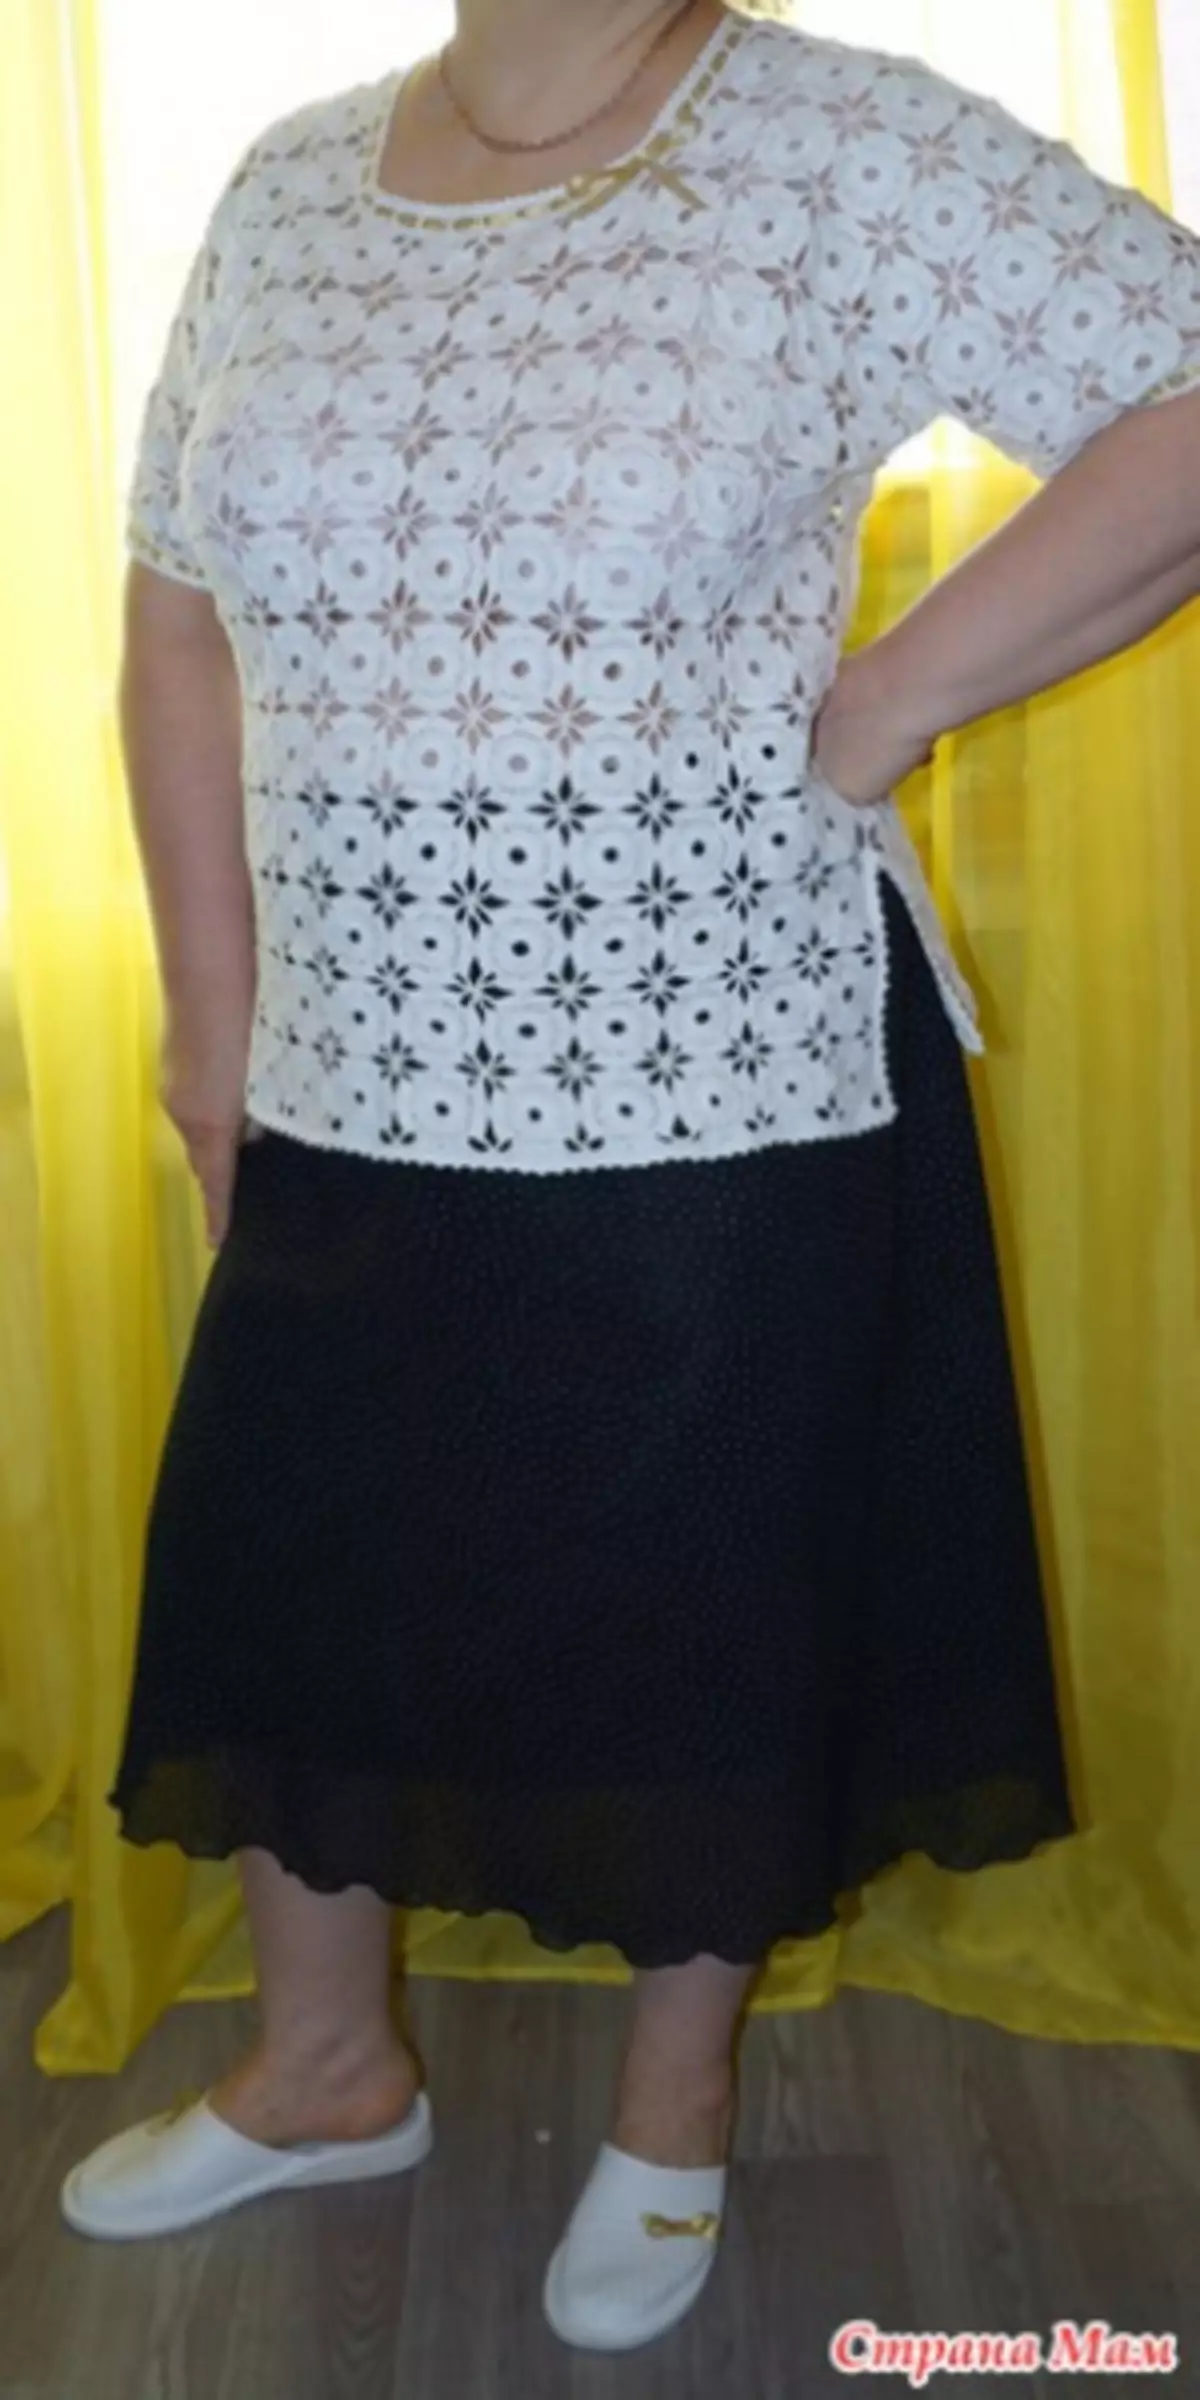
For example, we took such a beautiful blouse. As written in the description, this product you can associate individual motifs or by the connecting motive in the last row (but there is one minus - then you have to remove a lot of extra lattice). In this master class, we will show how to link such a blouse with uninterrupted knitting. Do not be scared, it is quite simple and no need to remove extra tails. Type of sweatshirts in the original:

In order to create this product, you will need only yarn and hook. For women of large sizes, there will be about four hundred grams of yarn, and for young girls you need three hundred grams.
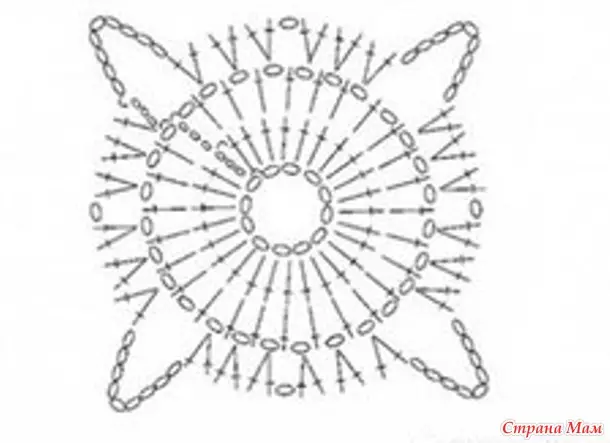
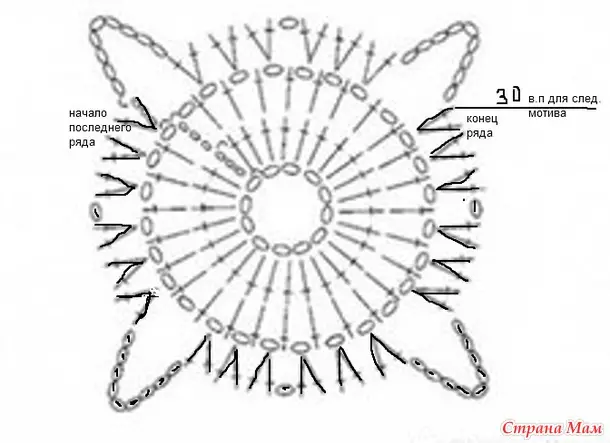
The most basic schemes of the product. Let's analyze to start in the schemes the method of knitting, and then on the finished products.
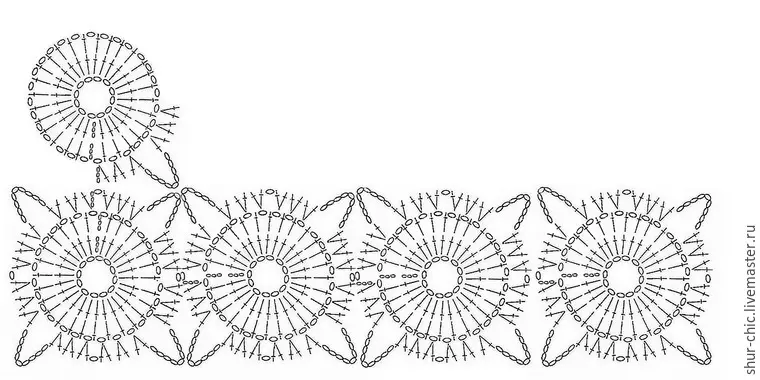
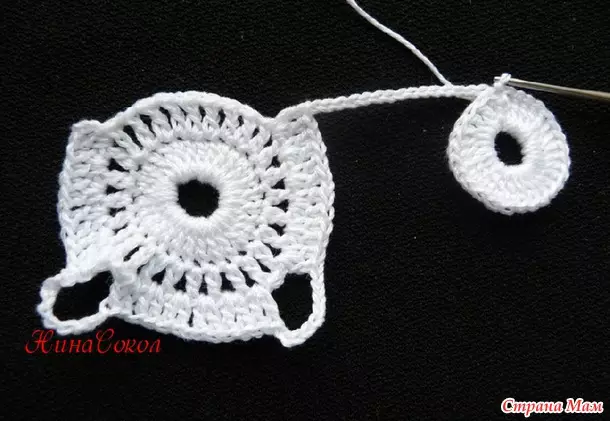
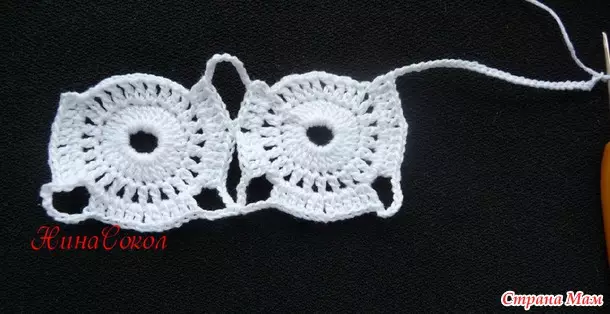
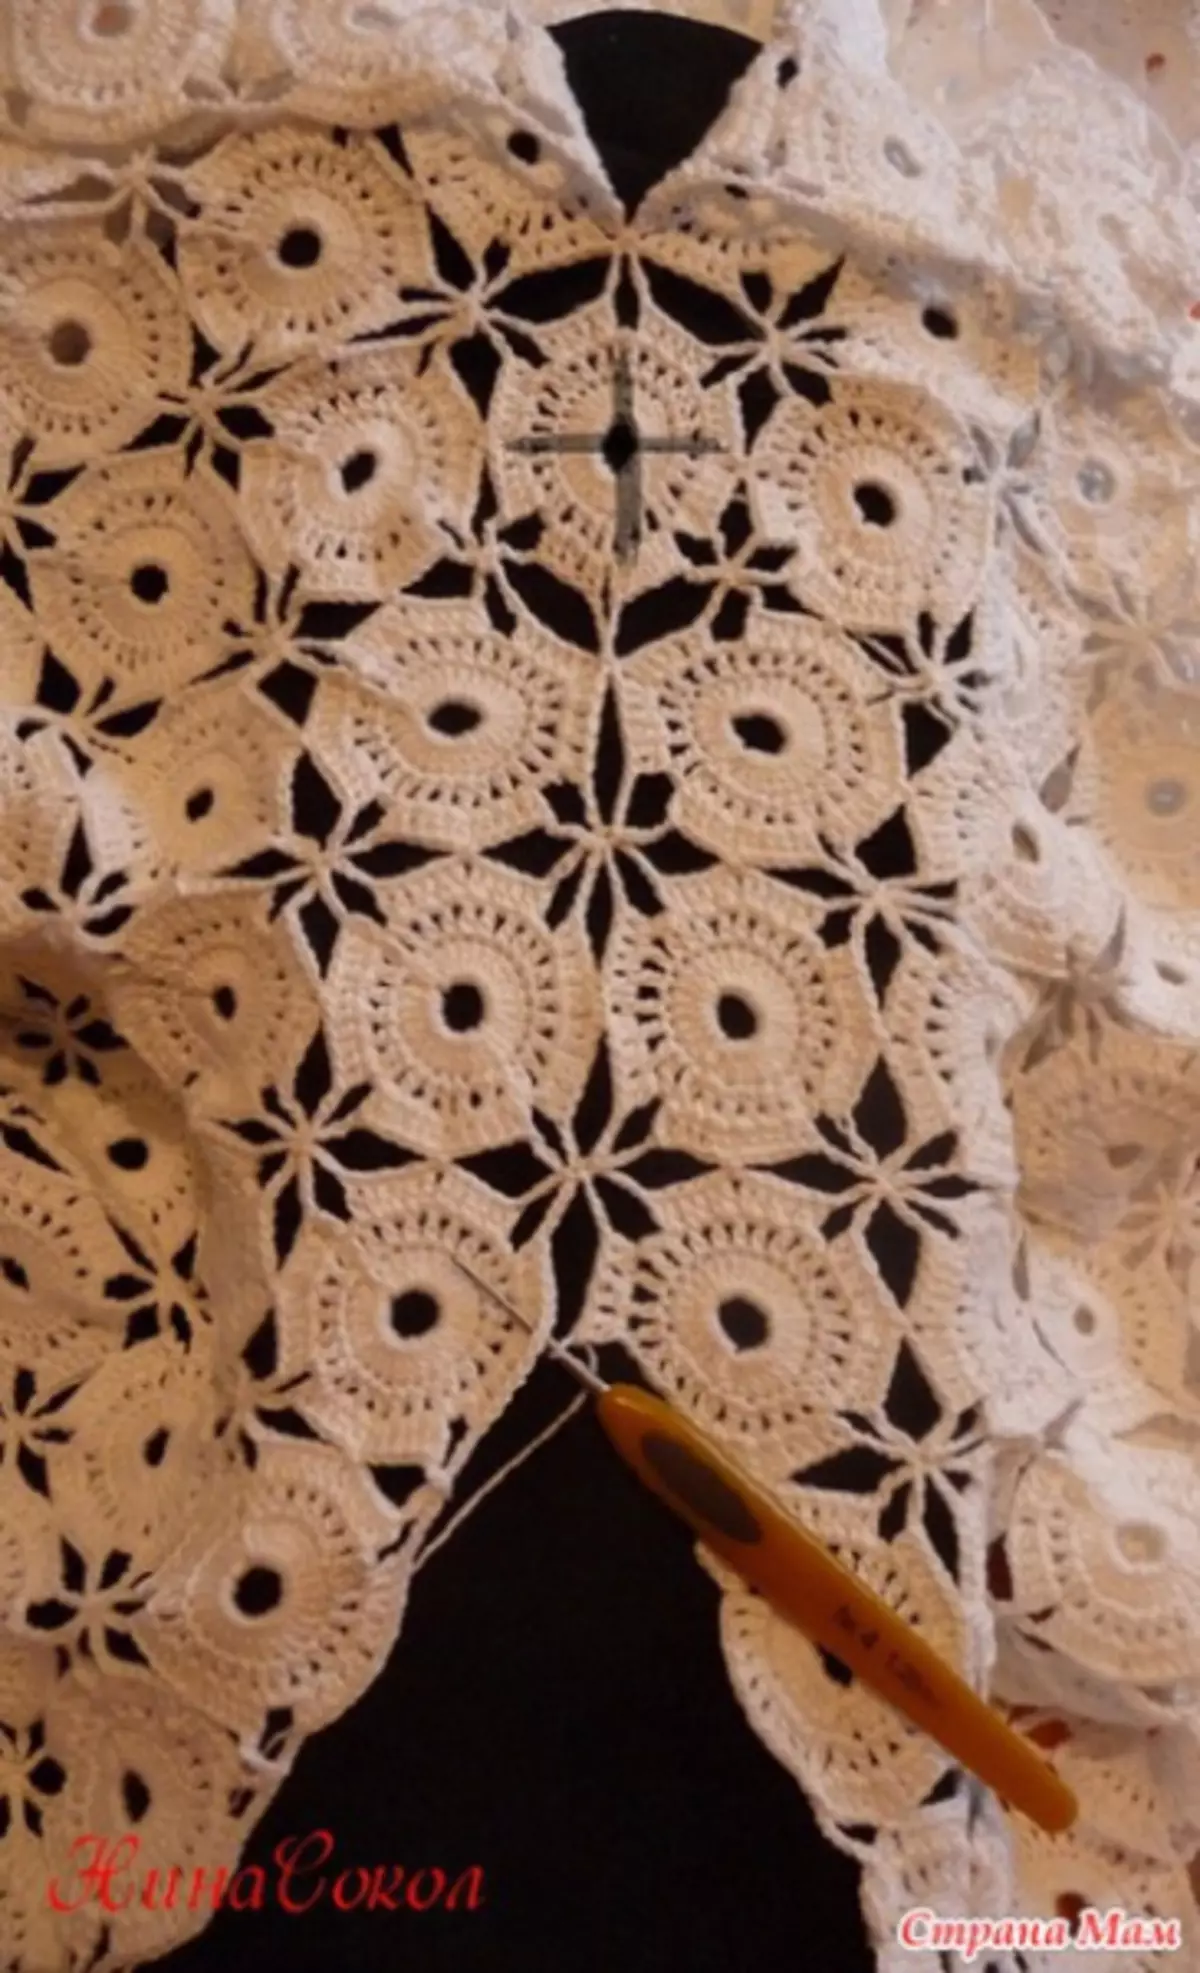
Motive scheme. The last row of the first motive must be administered not to the end so that in the future it can be easily connected to the motives. Then, according to the scheme, we will need to tie a chain of nine air loops. We make another chain of 12 air hostels and closer in the ring.
After that we knit the next motive. The columns rise across the chain of three air loops and insert the first row.
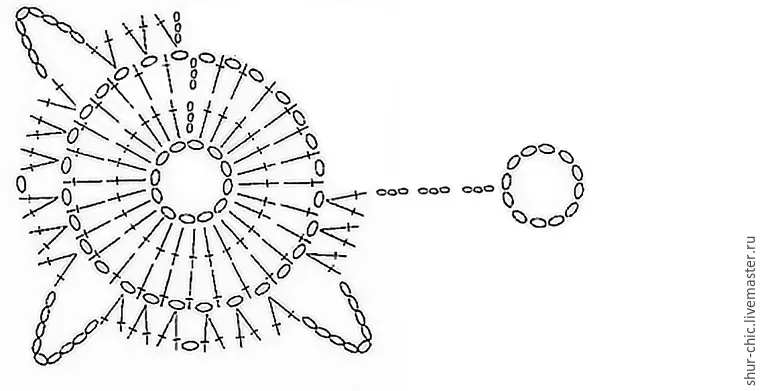
When you have a third row, you need to connect the corners of the motives. He is not fully told and immediately go to the next motive.
Article on the topic: All you wanted to know about the dishwasher
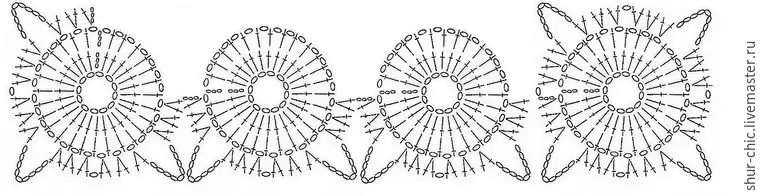
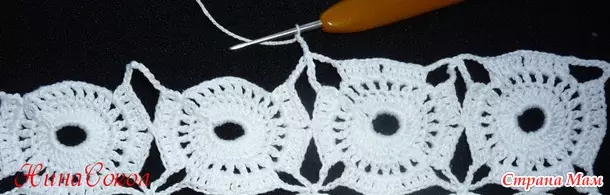
After tied the desired width of the product, fully prevailing the last motive. Then we carry out the rest of the motifs in the first row. And go to the second row.
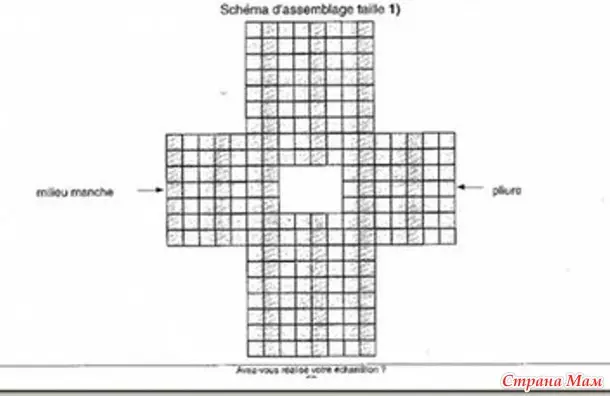
And also a scheme for connecting motifs. The places where you need to connect are highlighted with a green dot.

And the last photo is the location scheme of the motifs in the blouse.
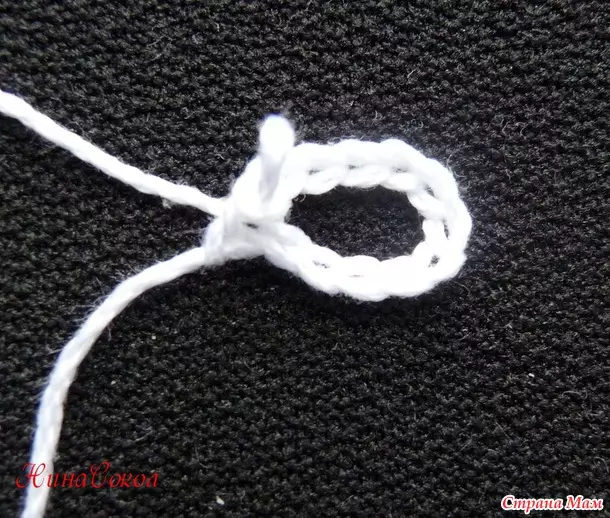
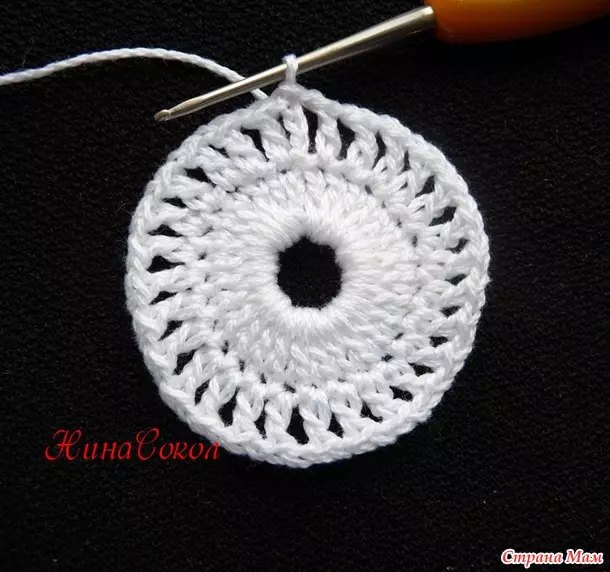
Now consider the phased process on the example of knitting. Insert twelve air loops and closed the connecting column into the ring.
In the first row, the motive is in line with three lifting loops and then in a circle twenty-seven columns with Nakud.
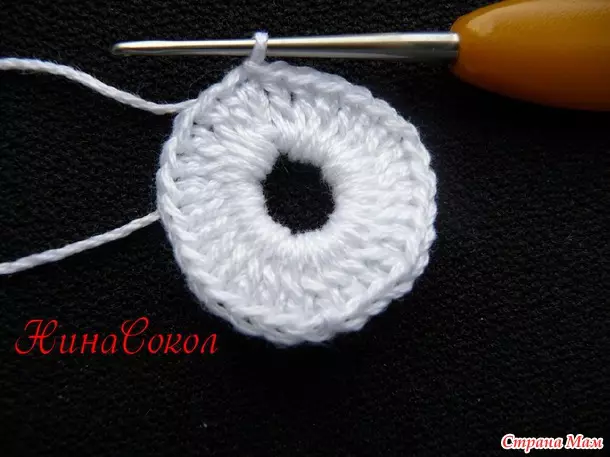
In the second row of the motive, we are proving a column with an attitude and an air loop into each loop of the previous row (or 4 VP in the first loop and then a column with Nakid + VP).
We are not completely in full, but only what is allocated in the following scheme. We swell up three times on a pair of columns with an attachment in one loop, then we make a air loop, after two times three times two columns with Nakud. Next, we make a chain of nine air loops, we continue to knit the above-mentioned analogy, by skipping two columns with an attachment and an air loop in the previous row.
That's what happened:
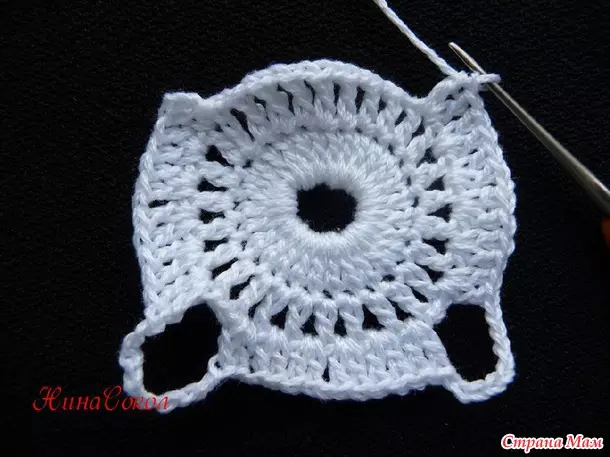
We encounter a chain of thirty air loops.
From the edge, count on 12 loops and closer to them in the circular column.
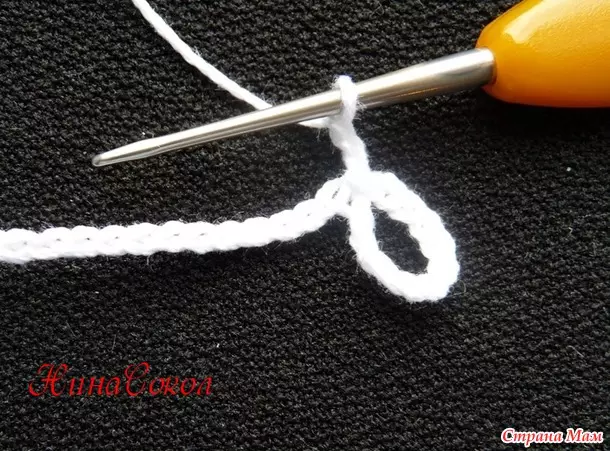
Then we encourage three air loops and connect them from the third loop from the edge of the chain.
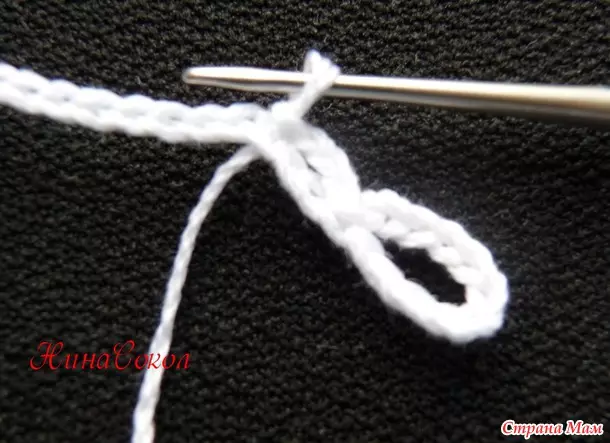
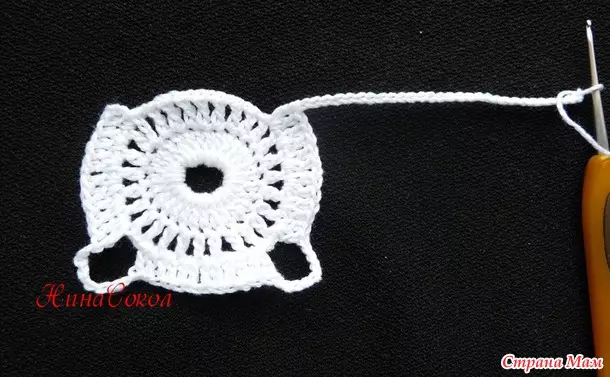
Then I knit 26 columns with Nakid - the second row of the second motive was accumulated.
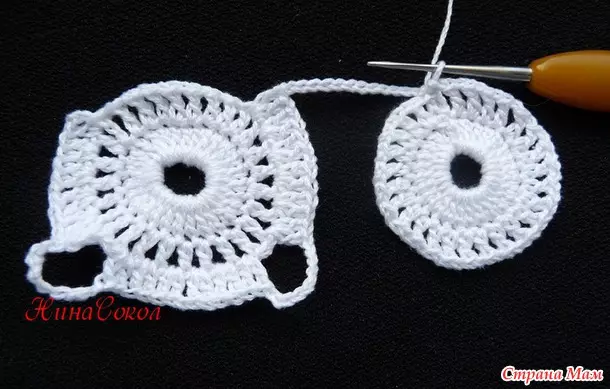
The next row knit the same as the previous one.
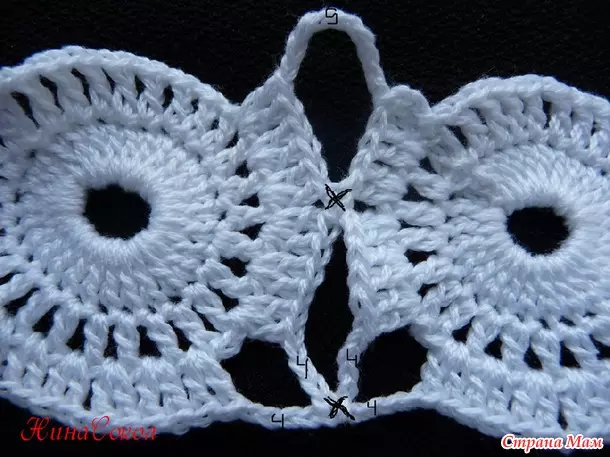
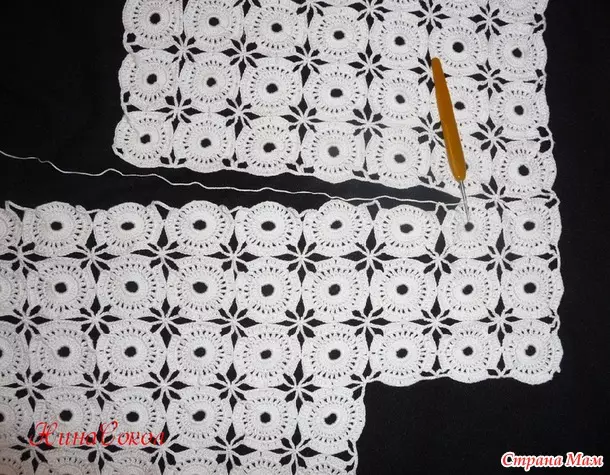
The next step is to connect the connections of motifs. The photo shows the places where they need to be connected, and the number of loops for the connection.
We assign the motifs for this scheme to the required width of the blouse.
Article on the topic: Hook headband for beginners: master class with video
After that, we are tied by the top of the first row of motifs.
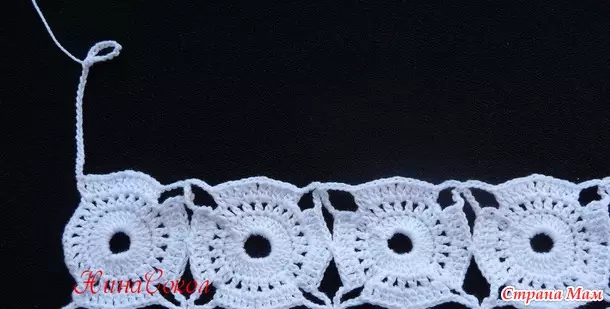
In the same way, they see the first half of the product.
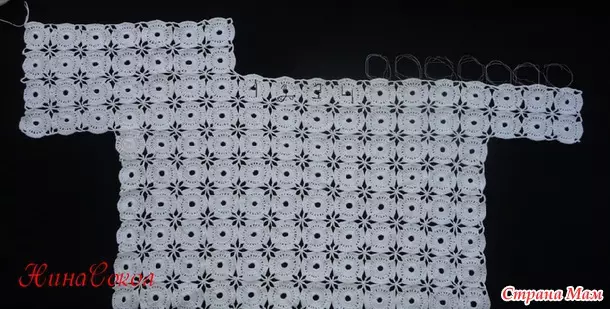
Then we begin to raise the sleeves on the sides. The photo marked four motifs - this is a neckline.

Then we feed the back of the product separately.
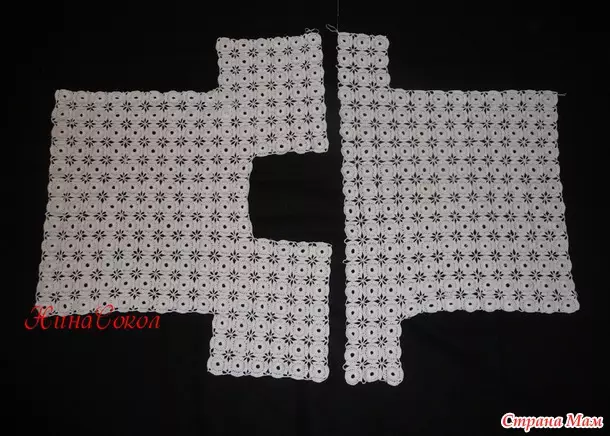
We begin to connect the top of the last row of the back with the front of the sweatshirt.
Connect the side edges of the sweatshirt.
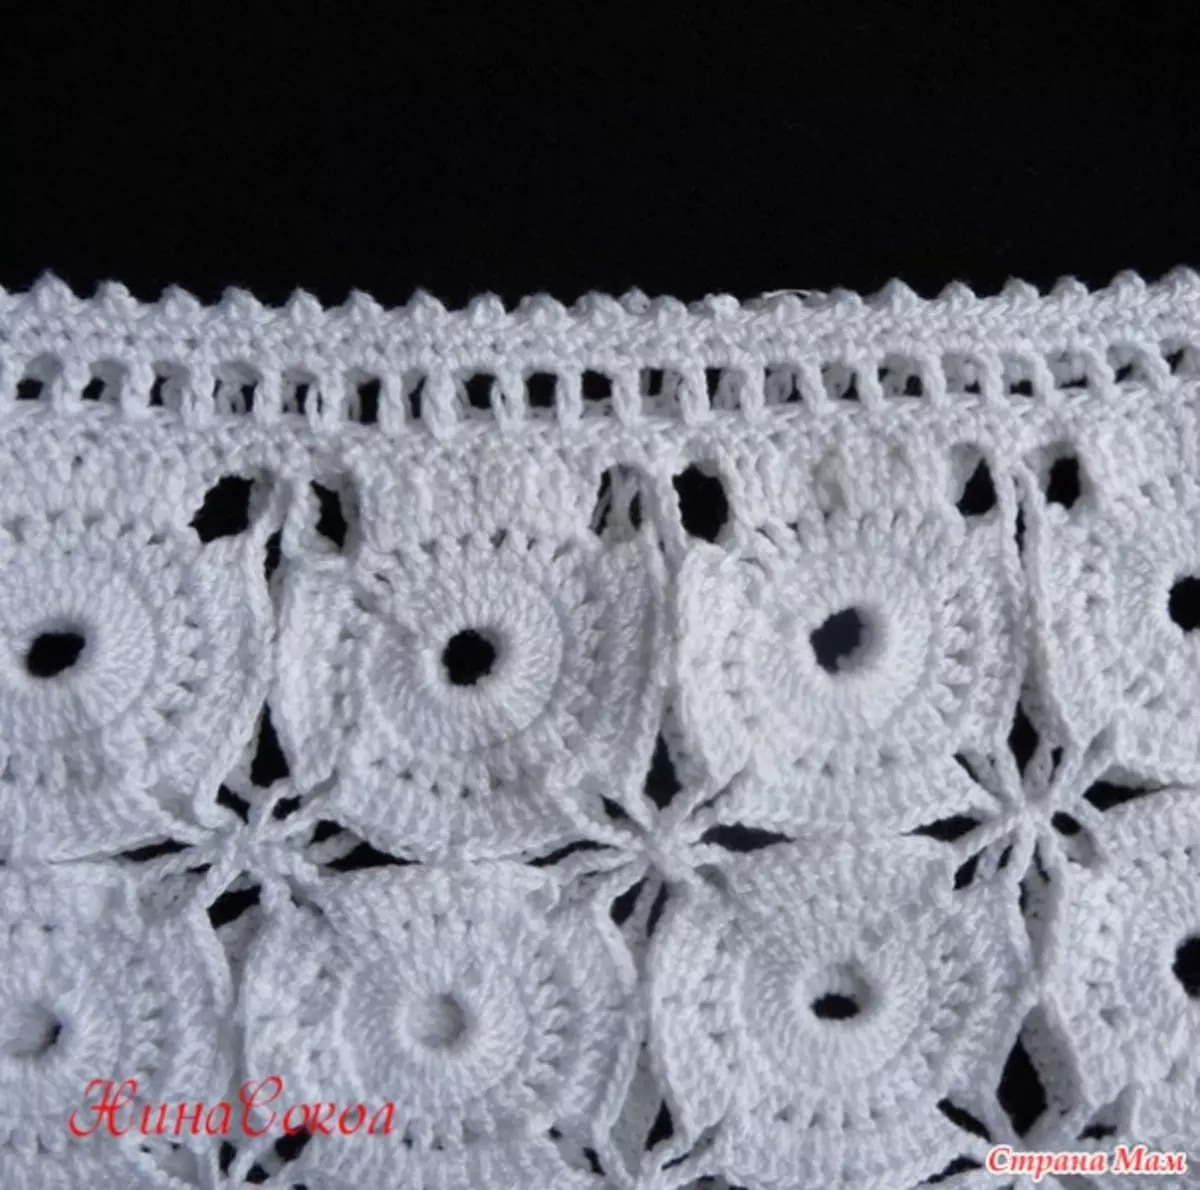
Now we start to raise the trim. It can be a column without an attachment, a column without a nakid with a pico. Or another option that is shown in our master class. That's what happened in us in the end:
Here is such an excellent option we turned out.
Video on the topic
In these video wizard also describe in detail and show all the stages of creating products.