
Almost until the end of the twentieth century, all the plinths were made of wood. They were rakes with a beveled outer surface. Over time, manufacturers of building materials began to market various modifications of floor panels from plastic.
Since the life of a person in everyday life has become increasingly related to the subjects of household appliances (televisions, computers), there was a need to wiring cables for various purposes within their home.
The presence of bare wiring under the walls of the premises left a bad impression on the view of the interior of the rooms. Installing plinths with cable channels solved this problem.
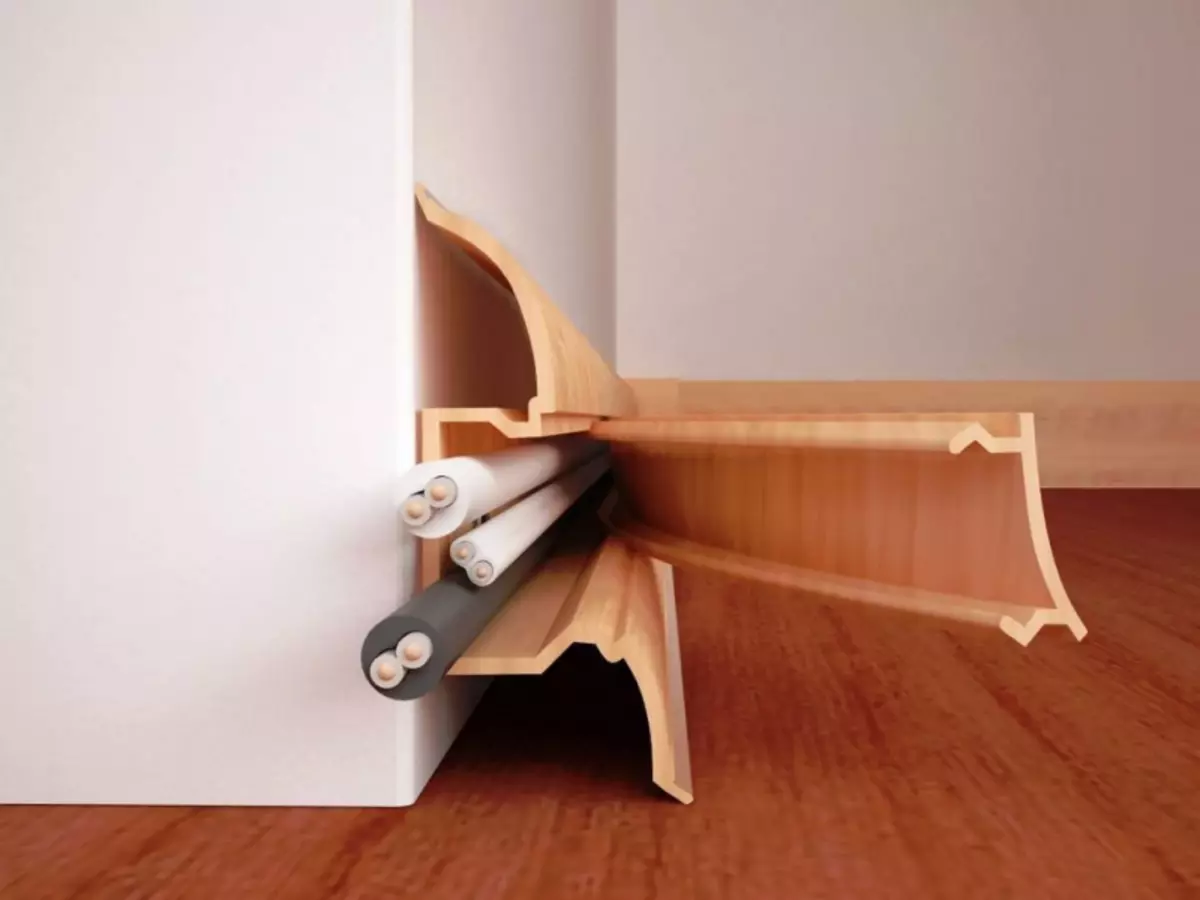
Device of plastic plinth with cable channel
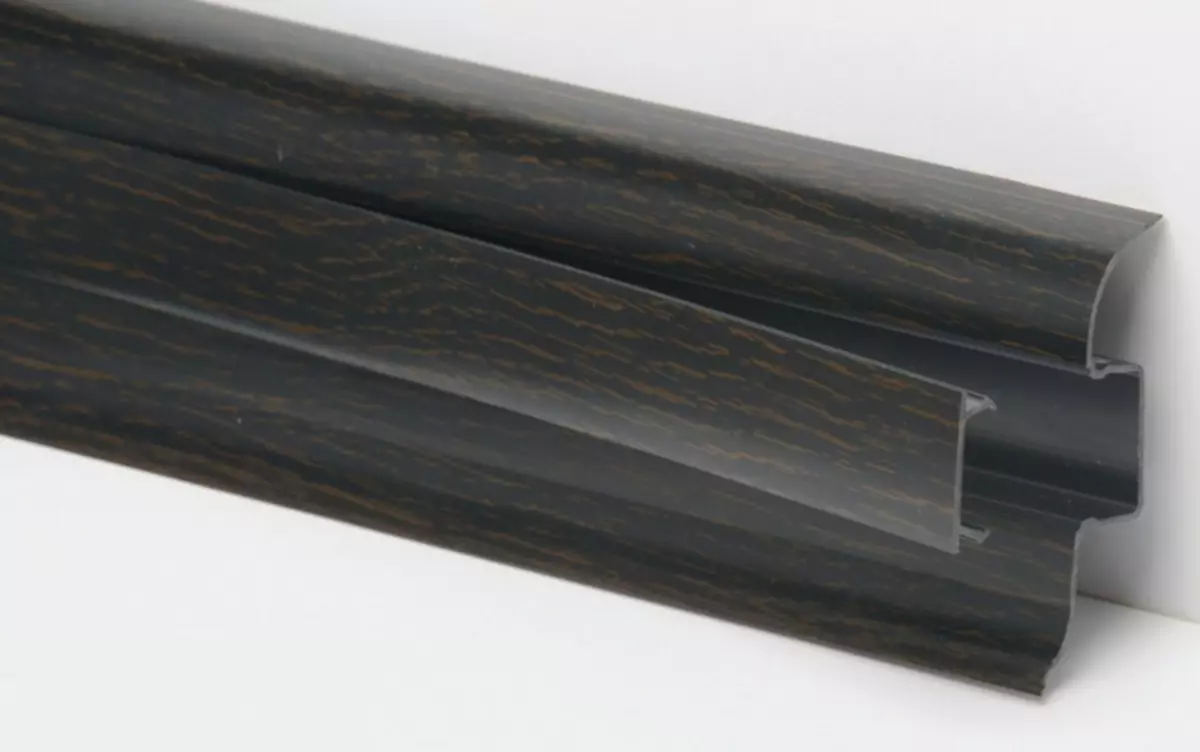
Decorative panels with a groove for hidden wiring are made of plastic painted in different colors, including imitating the structure of valuable wood. Channel for wiring can be located in the middle of the panel or its top.
Plinth device
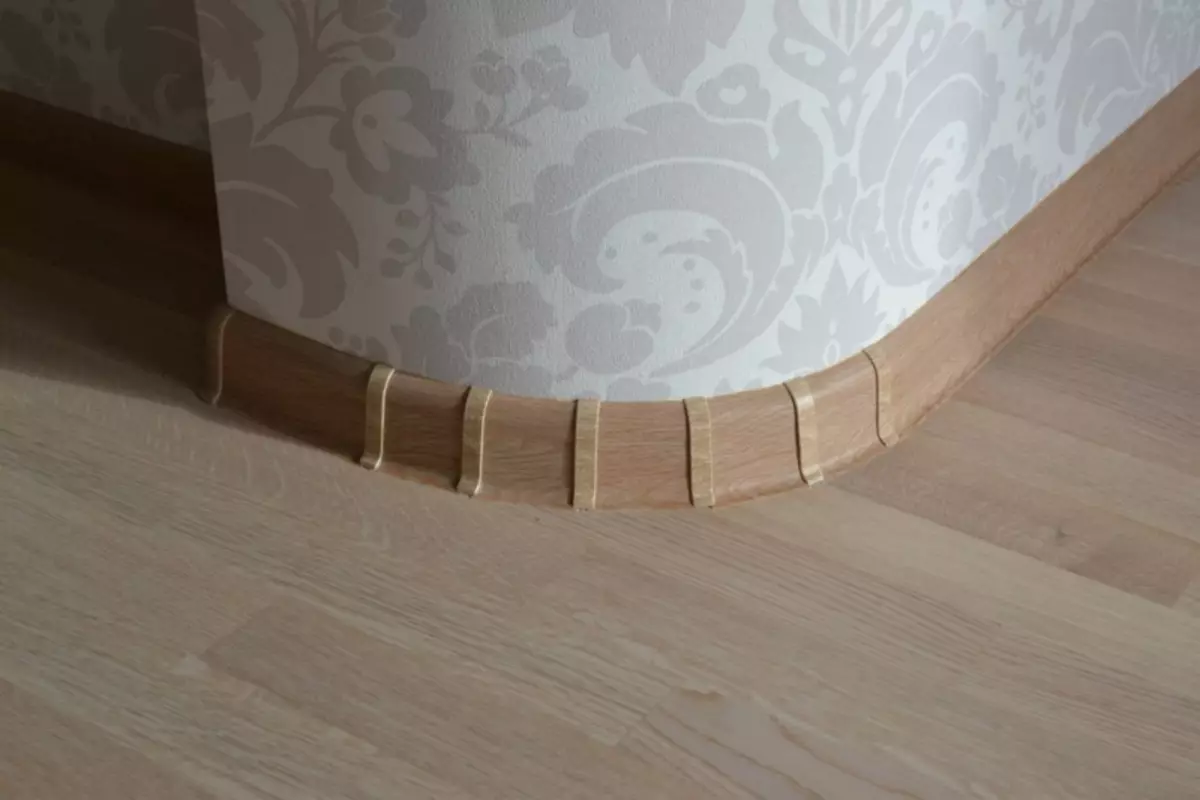
The channel is closed with a decorative lane of P - shaped section. Connecting intermediate and angular parts are made in such a way that they do not interfere with the passage of wires. In the doorways, the cable is placed in the deepening of the floor and close on top of the threshold bar.
Usually, the channels are placed on TV and Internet
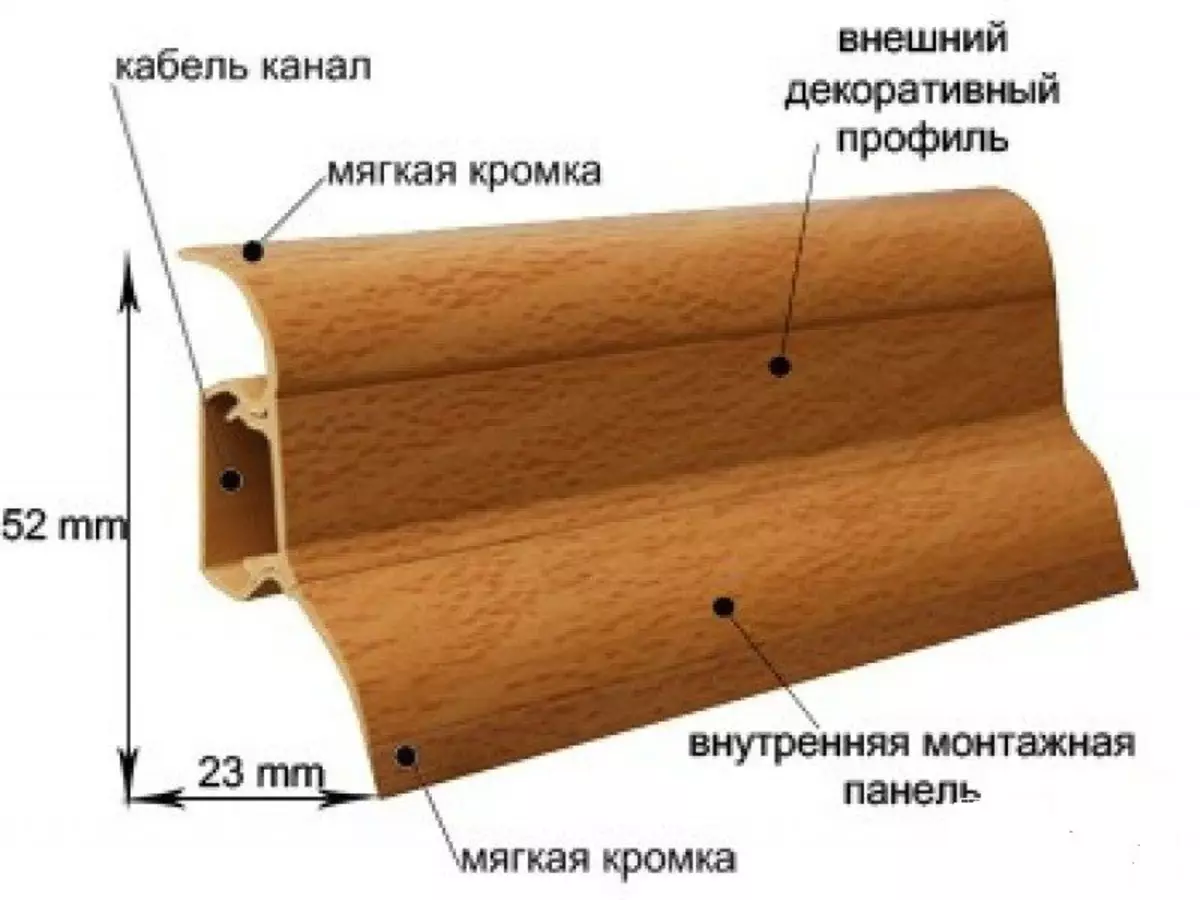
In the section, the decorative lining has a height of 52 mm and a width of 23 mm. The sinuses at the top and bottom of the canal are also used as additional channels. As a rule, only two wires are placed in the cable channel: the Internet and TV cables. This is quite enough to provide a means of communication of their own housing.
The liner closes the channel so tightly, which is visually difficult to notice the location of the connection of the plank with the plinth. The simplicity with which the installation of a plastic plinth with cable channel does not require professional training.
The consumer, at least once performing the installation of the cable plinth, with his own hands, does not want to acquire the decorative planks of another design.

The main advantages of plastic plinth
- The top rubberized edge of the panel allows you to tightly lay down to the wall with minor irregularities.
- The decorative panels are sold in a wide color assortment, which makes it possible to choose a panel to any placing interior color.
- Resistance to ultraviolet effect practically does not limit the service life of the panels.
- Plinths are easy to clean, retain their primordial look over the years.
Article on the topic: We put PVC tiles to the floor: stages and nuances
Calculation of plinth needs
When calculating the plinths, do not forget to deduct from the perimeter width of doorways
The need for plinth is determined by the calculation of the total length of the perimeter of the room minus the width of the doorway.
Having this data and the fact that the panels are made with a length of 2 m and 2.5 m, determine the desired number of cable plinth strips.
You can use the table to determine the number of plastic panels, based on the size of the room area:
| № | Room Square | Number of strips L = 2 m |
|---|---|---|
| one | 20m2 | 5 pieces. |
| 2. | 30m2. | 6 pcs. |
| 3. | 40m2 | 7 pcs. |
Accordingly, the calculations of the quantities, internal, external corners and connecting slats are calculated. If each set is one additional part, it does not hurt.
Installing baseboards with cable channel
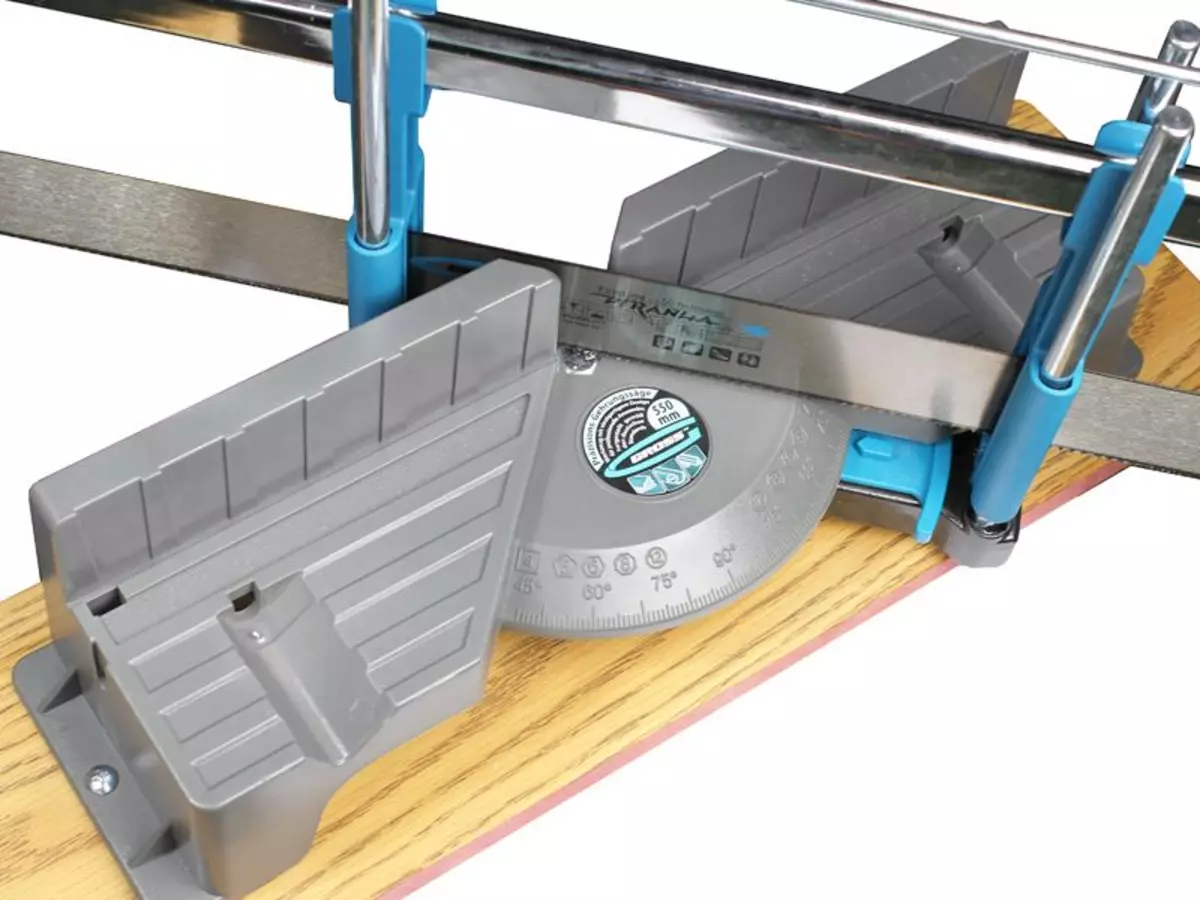
Stuslo
Before starting the installation of decorative panels, you need to prepare the necessary tool:
- hacksaw;
- Stuslo;
- pencil;
- dowels;
- screwdriver;
- Perforator;
- dumping;
- roulette;
- rolled along concrete;
- a hammer.
Plinth Installation Instructions
Who does not know what is a stub, explain. Stuslo is a hard form in which the plinth is stacked. Having placed the hacksaw blade in the shape of the body shape, make a perfectly smooth transverse section of the panel. Also with this device, the part can be cut at an angle of 45to.
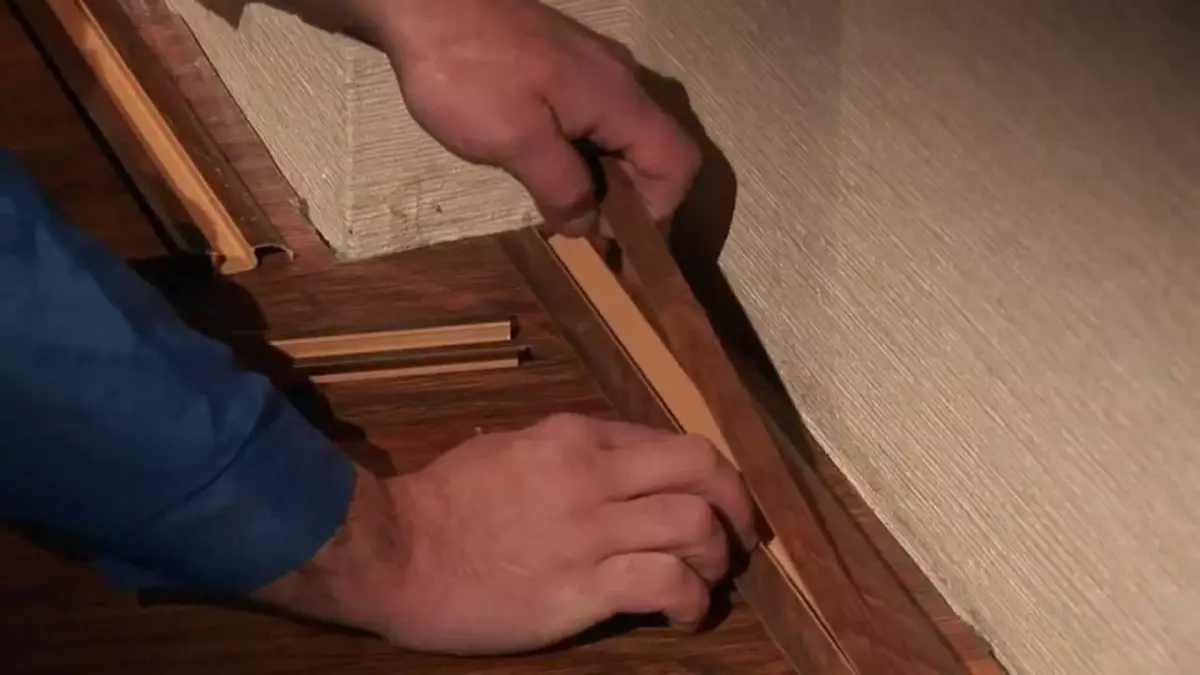
Before mounting the plinth, the profile of the cable channel is removed
Installation of plinths are carried out in several stages:
- Wall adjoining places to flooring are cleaned of dust and dirt.
- The segments of the plinths of the desired length are harvested.
- Remove the profile from the panels.
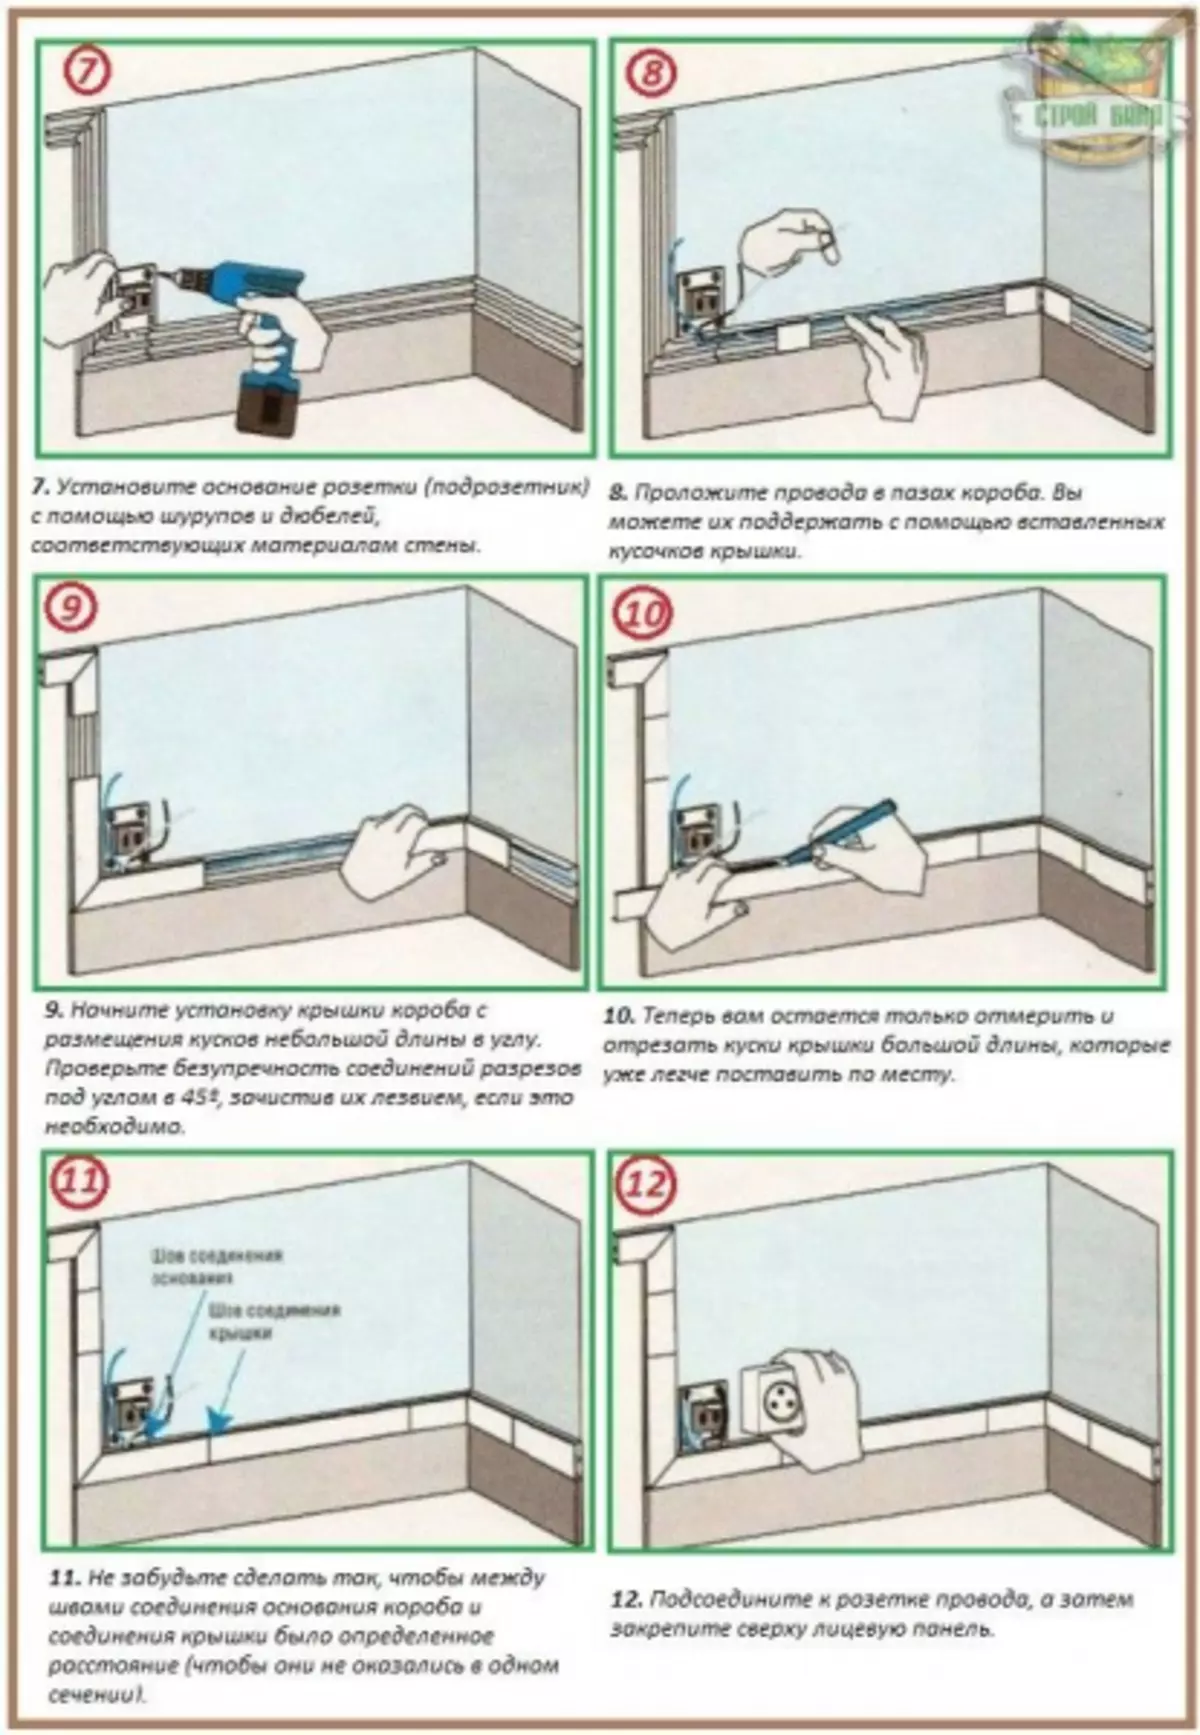
- The panel is pressed against the wall and make the markup of future fasteners with a pencil.
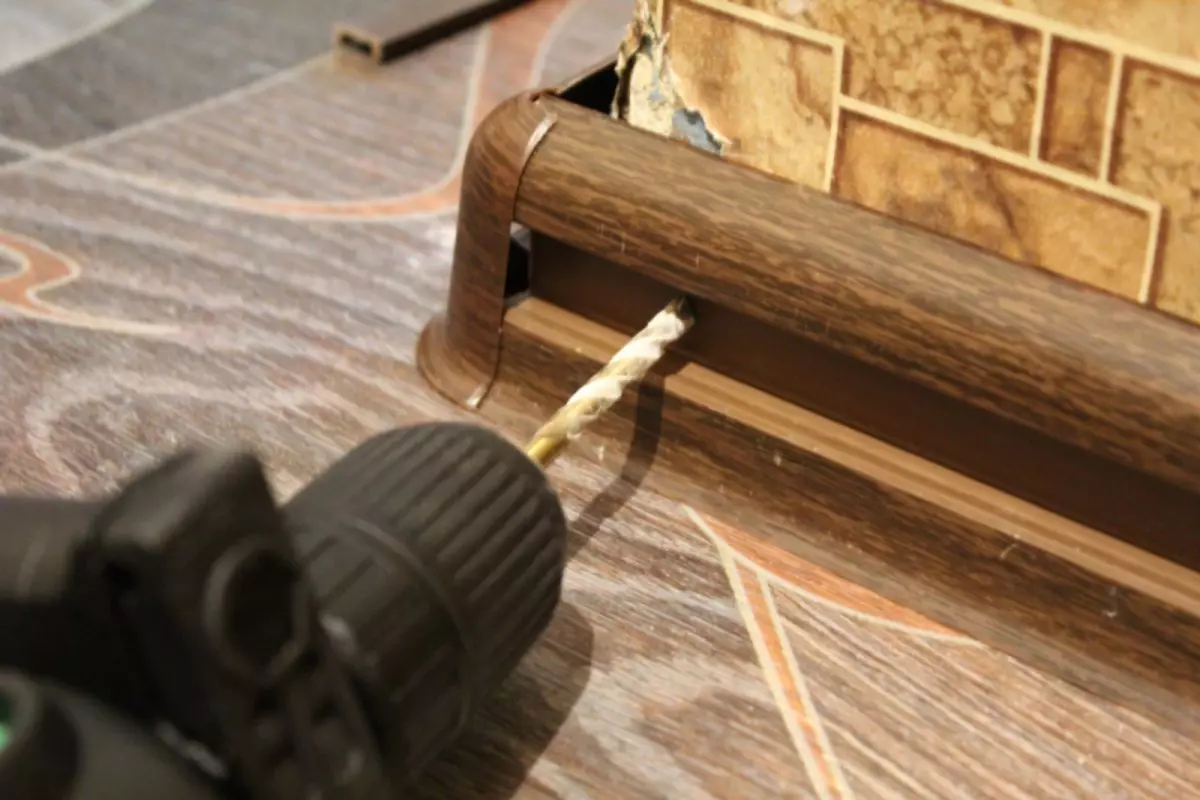
- The perforator through the bottom of the channel is drilled holes in the concrete depth of equal length of the dowel.
- The distance between the holes is maintained with a length of 300 - 400 mm.
- In places with an uneven surface of the wall of the hole drill more often.
- Installation of dowels produce from the corners of the room.
- In the side wall of the channel make holes for entering the cable.
- The cable stretches in the baseline channel.
- The output of the cable is placed in a pre-prepared stroke in the wall.
- The cable is connected to the outlet.
- In the corners, compounds and at the ends of the plinths produce mounting connecting parts.
- Cable Channels Close Profile. For details on how to mount the plinth, look at this useful video:
If you need to install additional wiring or replacing the panel cable, it is easy to dismantle. Remove the core. Sculpt the screws from the dowels. The panel is prompt and under it put a new wiring or change the old cable to a new wire. Then all actions are repeated in the reverse order.
Article on the topic: What to choose materials for facade decoration