
Table of contents: [Hide]
- Surface under painting
- Handling and alignment of walls
- Starting shovel
- Application of the finish layer
- The final stage of preparation
One of the most popular and promising ways to finish the walls today is their painting. This method of finishing can be called a worthy alternative to any other: from wallpaper to a variety of tiled materials. To obtain an ideal result, careful preparation of walls under painting should be carried out. This is necessary in order to ensure uniform and accurate paint. How to prepare walls under painting, not everyone knows.
Alignment of walls is a mandatory process before painting.
Surface under painting
Depending on which surface you plan to paint, you can use various ways to prepare. The main types of surfaces that are subject to staining are as follows:- The surface of a smooth finishing material (wallpaper, panels or tiles);
- Relief finishing material;
- smooth plaster with putty;
- Texture plaster.
For each type of surface, various preparatory activities are provided. The most time consuming is the process of preparation with shtlocking and equalization of the surface by plaster. The steps that are included in it in various combinations contain other preparatory processes.
Back to the category
Handling and alignment of walls
When painting the walls, it is necessary to pay special attention to the elimination of various defects: irregularities, cracks, gaps. To eliminate surface irregularities in several ways:
- shuffle
- poll
- Align with GLC.
It is possible to resort to grinding of the walls only if the concrete wall or the plaster already applied to it does not have damage and has sufficient strength. In this case, you can remove the fine upper coating layer with grinding bars or sandpaper.
Scheme shocking the joints.
Article on the topic: Accessories for Cornices: Consider the main options
Consider the need to process the old surface with an antiseptic and applying primers on it. If the fungus or dampness damaged the coating in some places, then these areas must be carefully cleaned and close with a solution identical to the composition that was used during the previous plaster. As a result, the surface should not be smooth, and the dropper of the level of two opposite sides should not exceed 2 mm. After that, you can proceed to the next step - putty walls.
If there are significant damage to the coating of the walls or with significant differences in terms of the level, there are two versions of wall preparation: re-plastering them or separated by plasterboard. Determine the more suitable way you can consider your financial capabilities and aesthetic preferences.
In the embodiment of any of these methods, you will need to completely remove the old coating from the walls. You should not leave the plaster in some places in which it seems to you even strong. After this walls are trimmed with plasterboard or re-apply plaster.
When you get a flat surface, it must be treated with a primer and leave for 5-6 hours. Only after the complete drying of the walls can be moved to the next phase of preparation.
Back to the category
Starting shovel
Preparation of walls to paint should include applying a layer of putty on top of plaster. Directly on plasterboard or plaster paint is not applied. The fact is that the porosity of these materials and the ability to absorb moisture well will not allow the paint to lie down a uniform layer. As a result, you can get at all the same color on which they were calculated, and all surface roughness will only be noticeable.
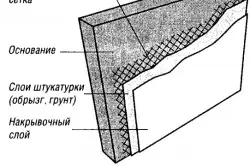
The starting putty is applied first. It should include small sand, due to which the mixture can be applied to the wall with a thick layer (about 3-4 mm). In this case, the cracks in the composition will not appear.
Article on the topic: how to lay a soft tile
Wall shuttering circuit.
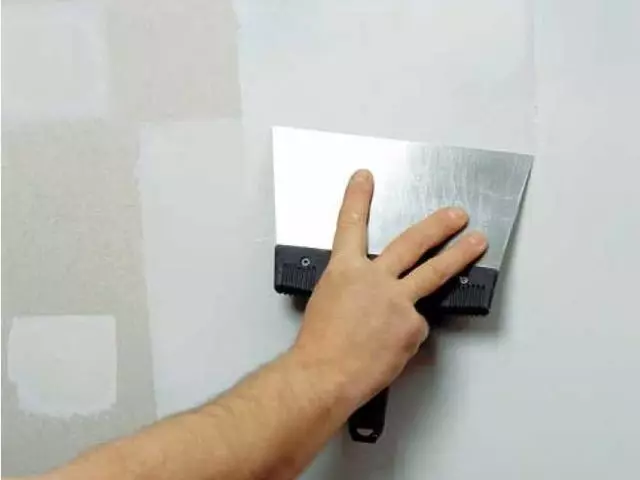
The main work is performed by a spatula of a width of about 60-80 cm, a narrower spatula (20-25 cm) will be needed for recalling irregularities. To further apply paint, it is better to reinforce the starting layer. To do this, you need a grid with cells about 2 mm from Capron. You need to put a putty on the wall area, in size, the corresponding piece of grid with a thickness of 2 mm. The grid must be pressed to the spacing spatula. The finishing putty is applied from above. The time of setting the starting layer is 45 minutes.
Do not need to smack the surface at this stage too carefully. The main thing is that there are no places without putty and recesses in its solution. Thin tubercles that can remain at the edges of the spatula, it is better to rush when the solution will freeze. No need to apply a solution with too small portions, in which case the coating layer will not be holistic.
After applying the coating, you need to give 6-8 hours for a burnt. Use the abrasive grid with marking 120 to perform grinding. All major irregularities will be removed, but the surface will still have a grain structure.
Back to the category
Application of the finish layer
Preparation of walls under painting involves the elimination of the grain of their surface, it can be achieved by the finish putty.It has no sand or other large particles, so it allows you to create a smooth surface. In addition, she poorly absorbs moisture, and the paint will impregnate it deeply.
The technology of its application is the same as in the case of a starting putty, but the layer should be not more than 1.5-2 mm. Otherwise, the coating cracks. Perform putty perfectly even much easier if its layer is thin.
After applying the finish putty, you also need to grind the surface. Use for this abrasive grid with marking 60-80. It is necessary to perform grinding carefully, as you can completely rush the coating.
Article on the topic: Plasterboard plasterboard under the wallpaper: the need for procedure and features
The finishing coating can be applied in several layers if the first time could not get a smooth surface. Define the presence of defects with the lamp. The more powerful it will be, the better. Place the lamp so that its light falls on the Coso wall. In such a position, all the slightest irregularities will give a shadow, and you can detect even small differences. Eliminate them need during grinding.
Back to the category
The final stage of preparation
When the last layer of finishing putty will dry and will be polished, the surface must be primed. Before this, the walls are cleaned of dust and other small particles. To do this, you can use dry rags or vacuum cleaners. In no case do not wipe the walls with wet rags. After that, you can start painting.
There are some features of the preparation of other surfaces. Wood you only need to polish. Using clouds can only be used in places with noticeable defects. Such a surface must be treated with protective compositions and reveal by the veneer if necessary. After that, you can apply lacquer or paint.
Decorative stucco or wallpaper is not needed. In their textured surface, primer is applied (glue for wallpaper and composition of penetrating action for plaster).
Now you know how to prepare the walls to paint. Depending on the initial conditions, the preparation may provide for the implementation of various stages.