

A few weeks ago, I needed a source of constant voltage 7V and a current of current in 5a. He here went to search for the desired BP in the direction, but this was not found there. After a couple of minutes, I remembered that under the hands in the backup there was a computer power supply, and this is the perfect option! Having embarked on the brains gathered in a bunch of ideas and after 10 minutes the process began.
For the manufacture of a laboratory source of constant voltage, it will be necessary:
- Power supply from computer
- terminal block
- Light-emitting diode
- Resistor ~ 150 ohms
- Tumbler
- Heat shrink
- tie
The power supply may be found somewhere not needed. In the case of targeted acquisition - from $ 10. Cheaper I have not seen. The remaining items of this list are kopeck and not deficient.
From the tools you will need:
- Adhesive gun A.K.A. Hot glue (for LED mounting)
- soldering iron and related materials (tin, flux ...)
- Drill
- drill with a diameter of 5mm
- Screwdrivers
- Sideboards (nippers)
Manufacture
So, the first thing I did is checked the performance of this BP. The device turned out to be good. You can immediately cut the plug, leaving 10-15 cm on the plug side, because He can come in handy. It is worth noting that you need to calculate the length of the wire inside the power supply so that it is enough to the terminals without stretching, but so that it does not occupy all the free space inside the BP.
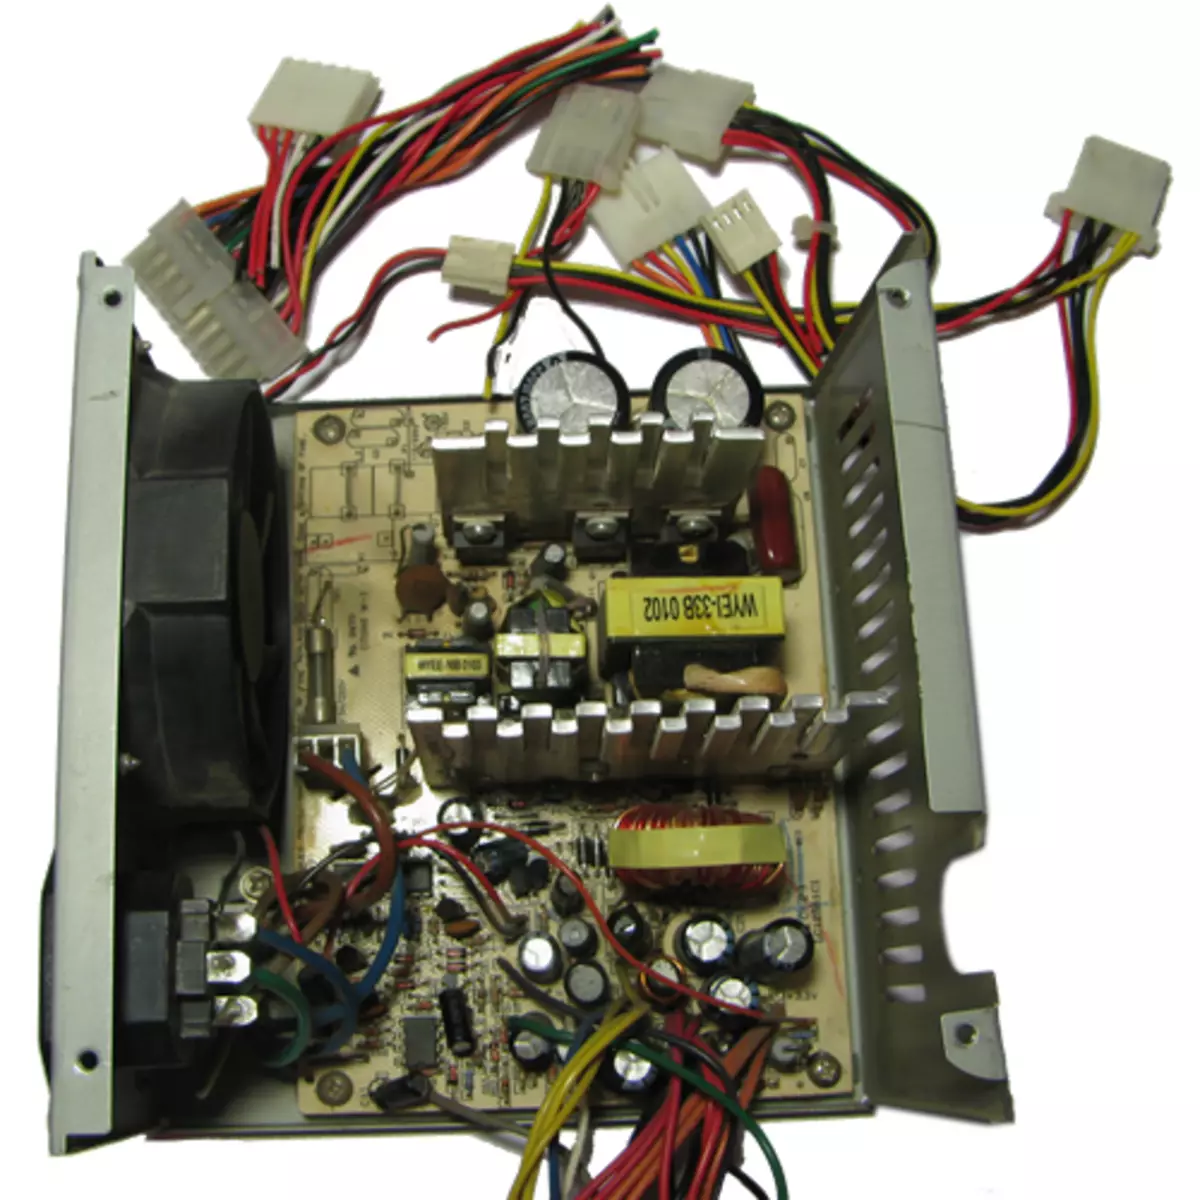
Now it is necessary to divide all the wires. For their identification, you can look at the fee, or rather the sites to which they go. Places must be signed. In general, there is a generally accepted color marking scheme, but the manufacturer of your BP may have painted wires otherwise. To avoid "misunderstandings" better identify wires.
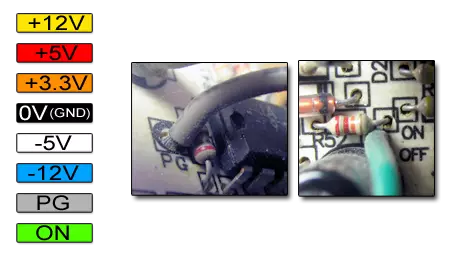
Here is my "wired gamma." She, if I'm not mistaken, and there is a standard one.
With yellow on blue, I think clearly. What do the two lower colors mean?
PG (Sokr. From "Power Good") - the wire that we use to install the indicator LED. Voltage - 5V.
ON - wire that needs to be closed with GND to turn on the power supply.
Article on the topic: Pepple Crochet Pig: Master Class for Knitting Little Hat
In the power supply there are wires that I did not describe here. For example, violet + 5VSB. We will not use this wire, because The border of the current for it is 1a.
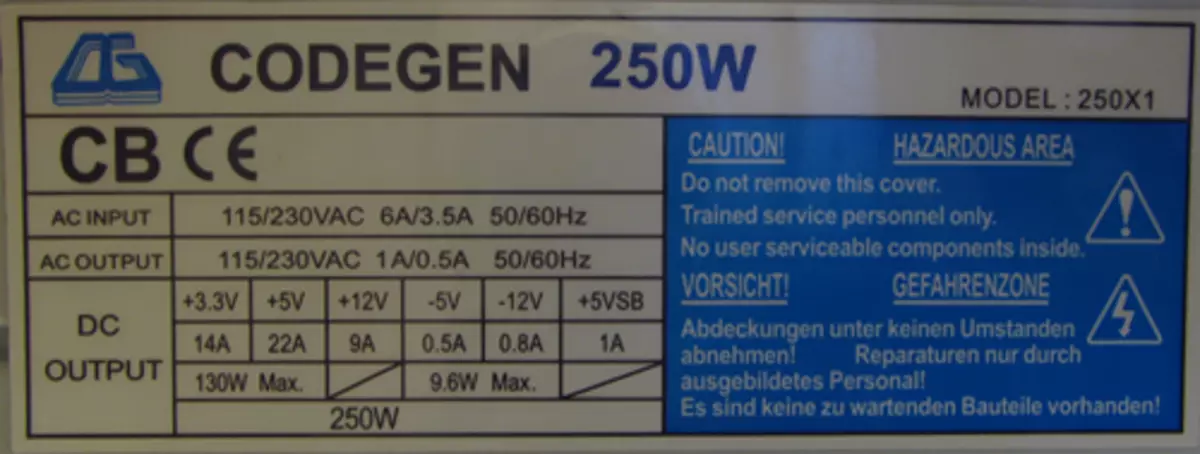
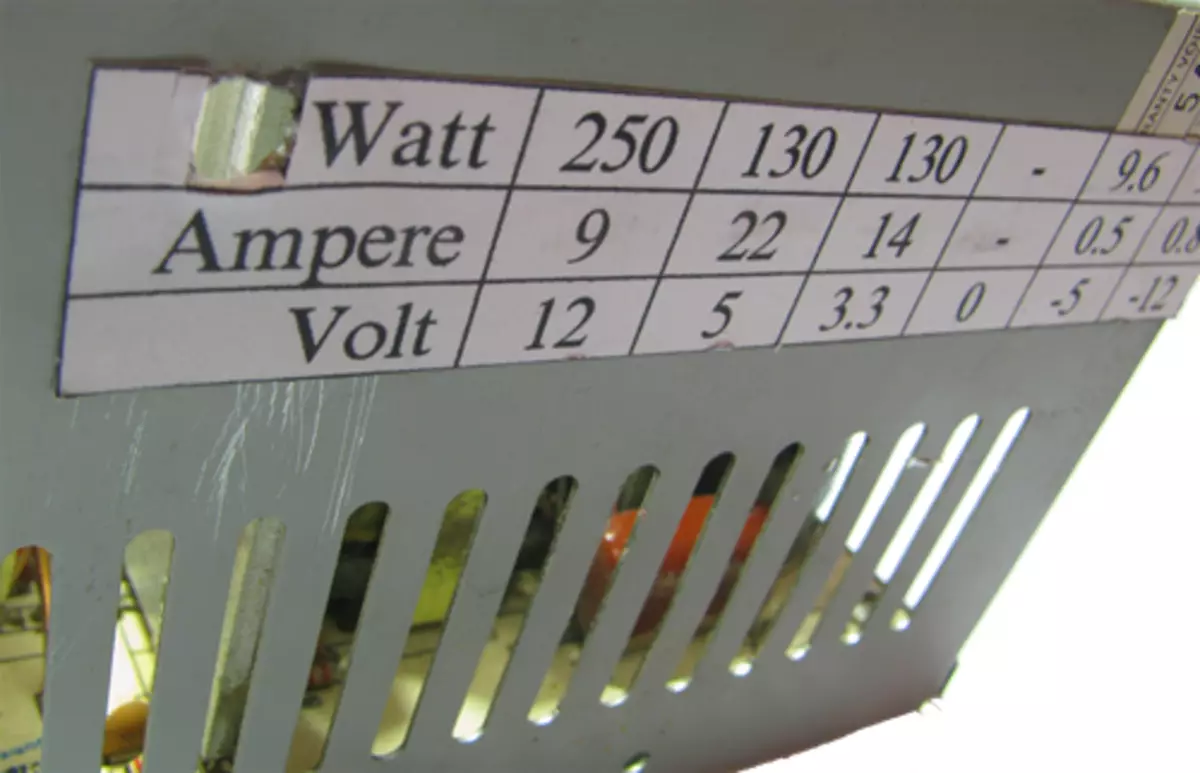
While the wires do not interfere, you need to drill a hole for the LED and make a sticker with the necessary information. The information itself can be found on the factory sticker, which is located on one of the parties of the BP. When drilling, you need to take care that the metal chips do not get the device inside the device, because This can lead to extremely negative consequences.
I decided to install a terminal block on the front panel. At home there was a block on 6 terminals, which arranged for me.
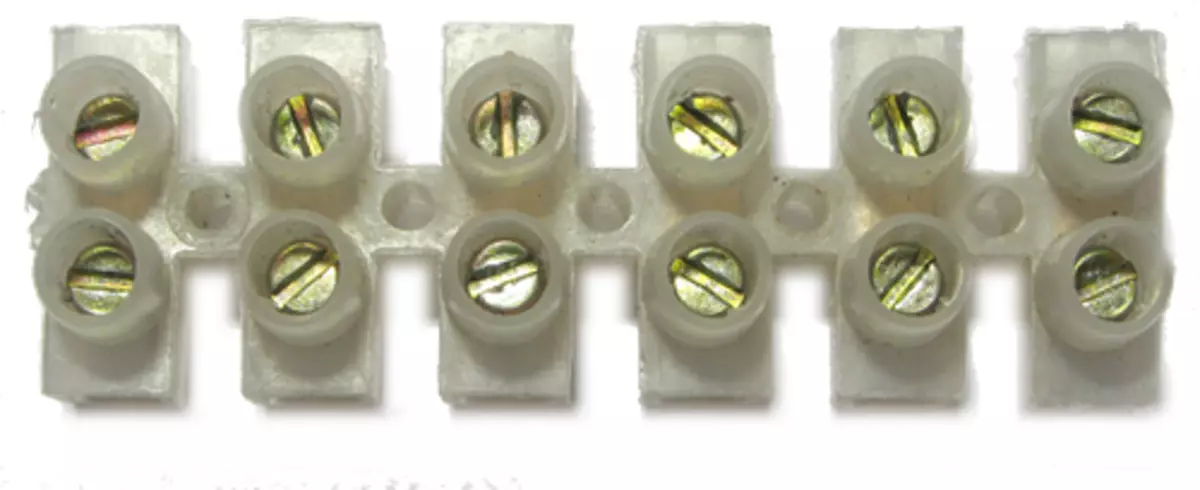
I was lucky, because The slots in the BP and the holes for mounting the pads coincided, and the diameter approached. Otherwise, it is necessary to either explore the cuts of BP, or drill new holes in the BP.
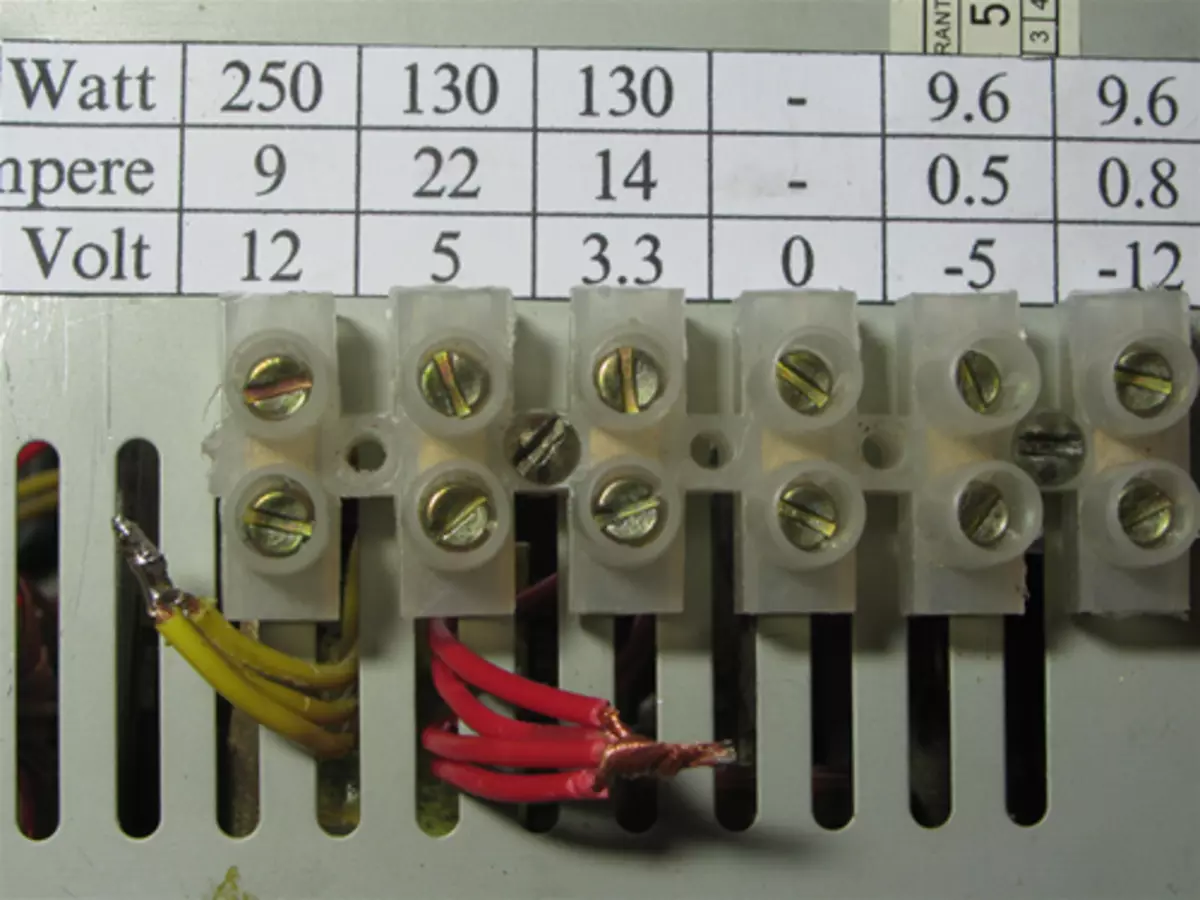
The pad is installed, you can now remove the wires, remove isolation, twist and brown. I detected 3-4 wires of each color, except for white (-5v) and blue (-12v), because They are in BP one by one.
The first is lightened - brought the following.
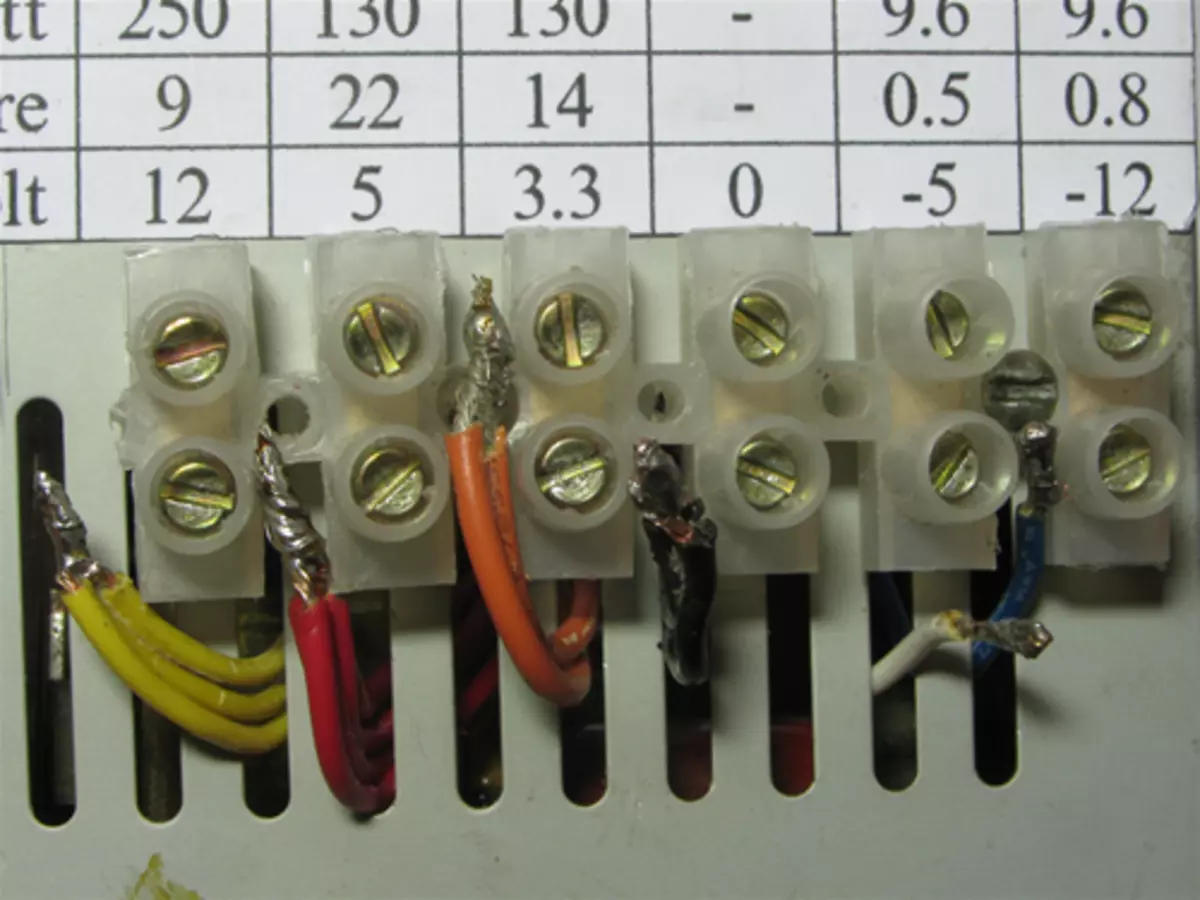
All wires are served. You can clamp in the terminal.
Install LED
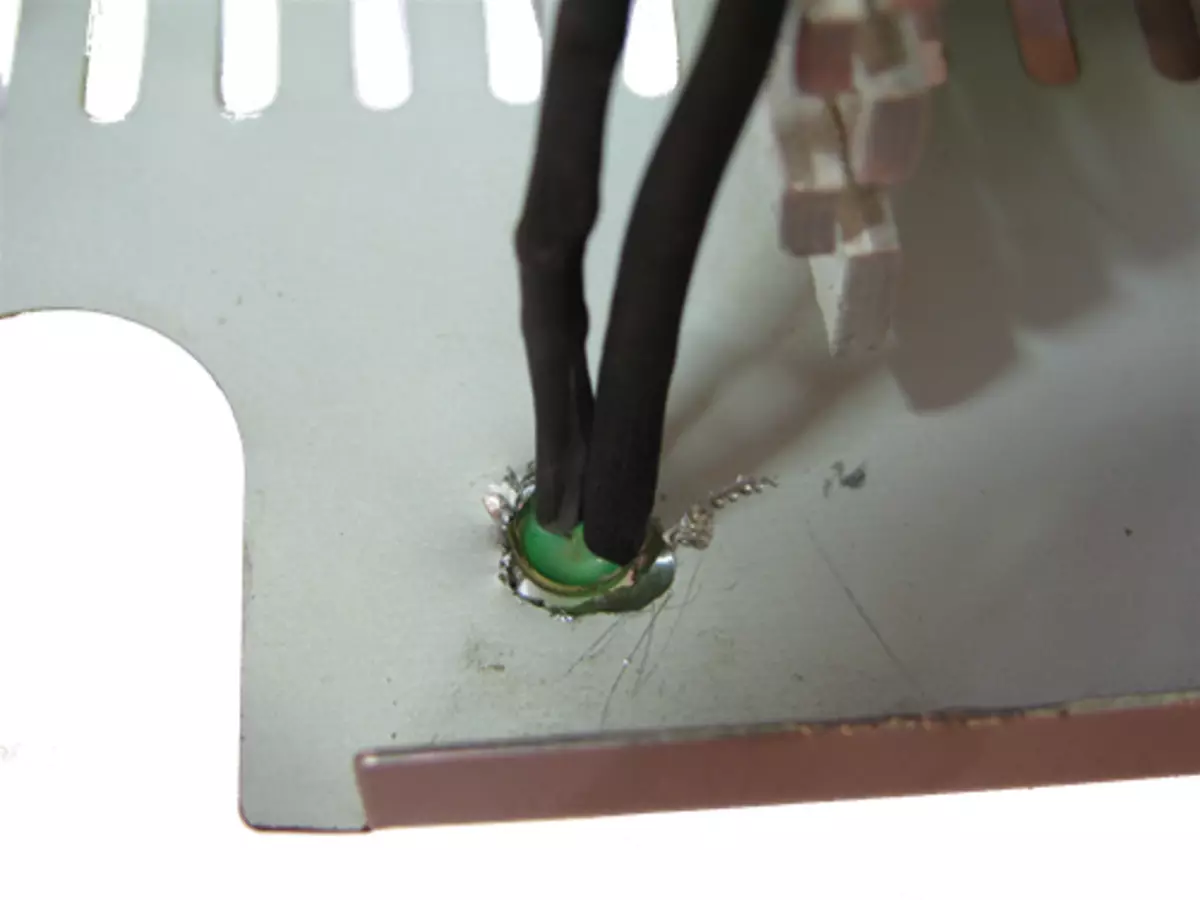
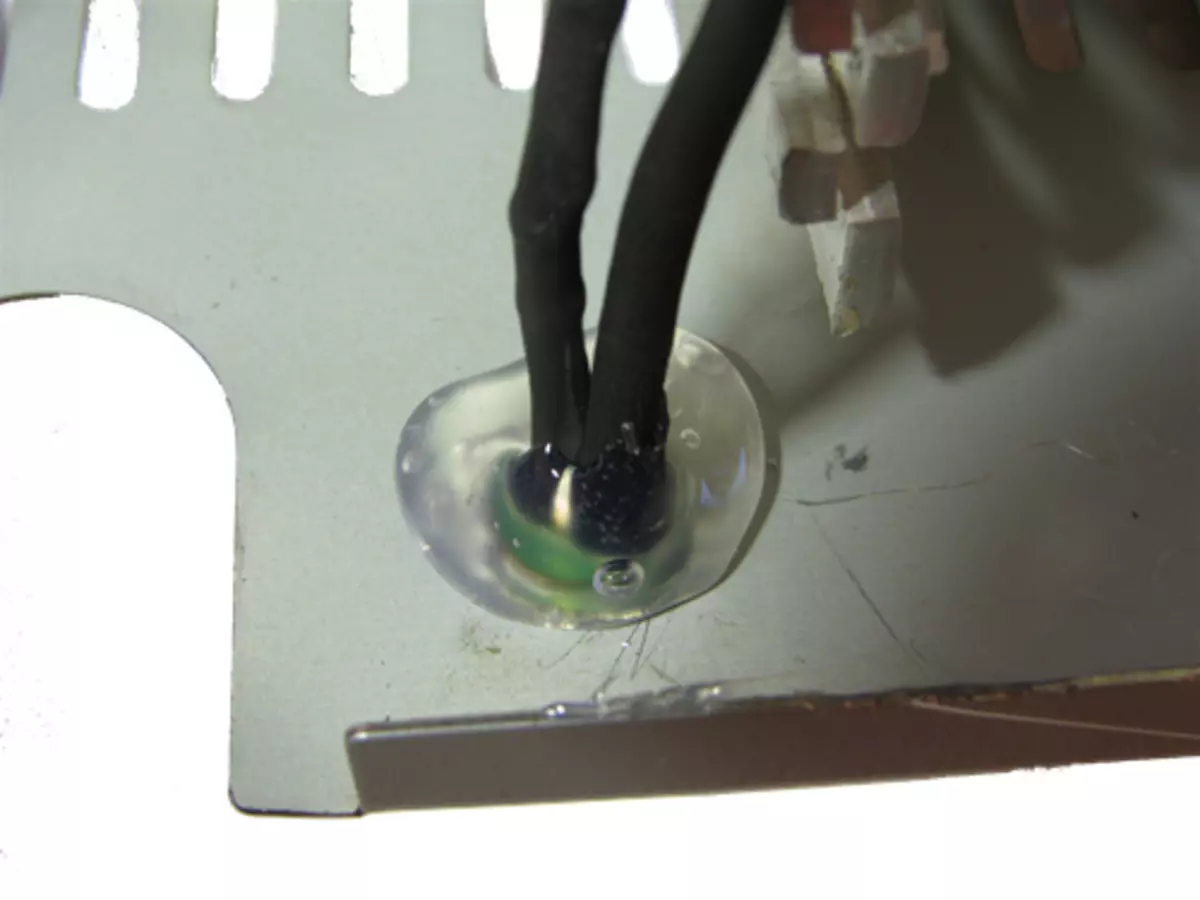
I took the usual green indication LED. An ordinary red indication LED (it turned out, somewhat brighter). On the anode (long leg, less massive part in the head of the LED) we solder a gray wire (PG), which is pre-planted with a heat shrink. On the cathode (short leg, a more massive part in the head of the LED) first we solder the resistor by 120-150 ohms first, and to the second output of the resistor, we solder a black wire (GND), to which we also do not forget to pre-put the heat shrink. When everything is soldered, we turn the heat shrink on the conclusions of the LED and heat it.
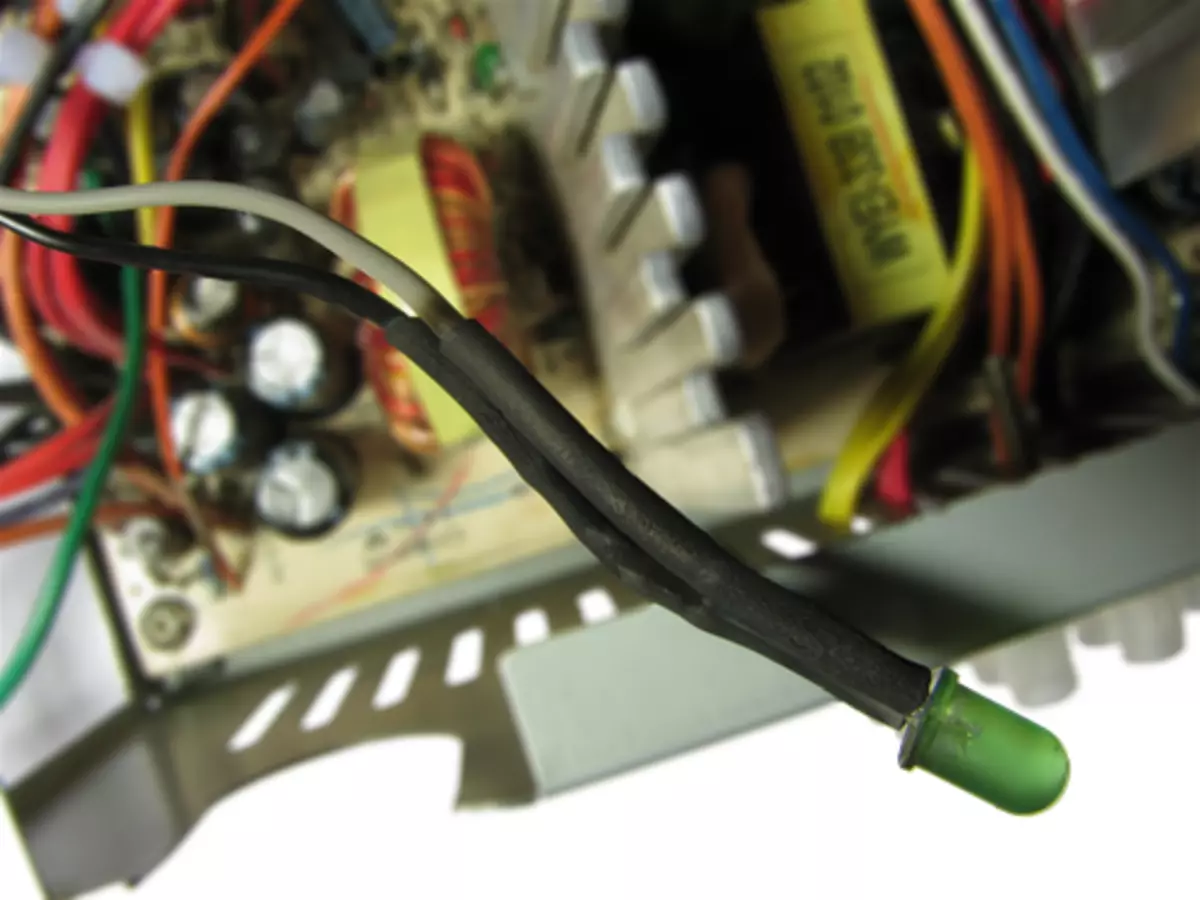
It turns out such a thing. True, I have a little overheated a heat shrink, but it is not scary.
Article on the topic: Snowman do it yourself from healthy materials with photos and video
Now I install the LED into the hole, which I drilled at the very beginning.
Bulk hot glue. If it is not, then you can replace super-glue.
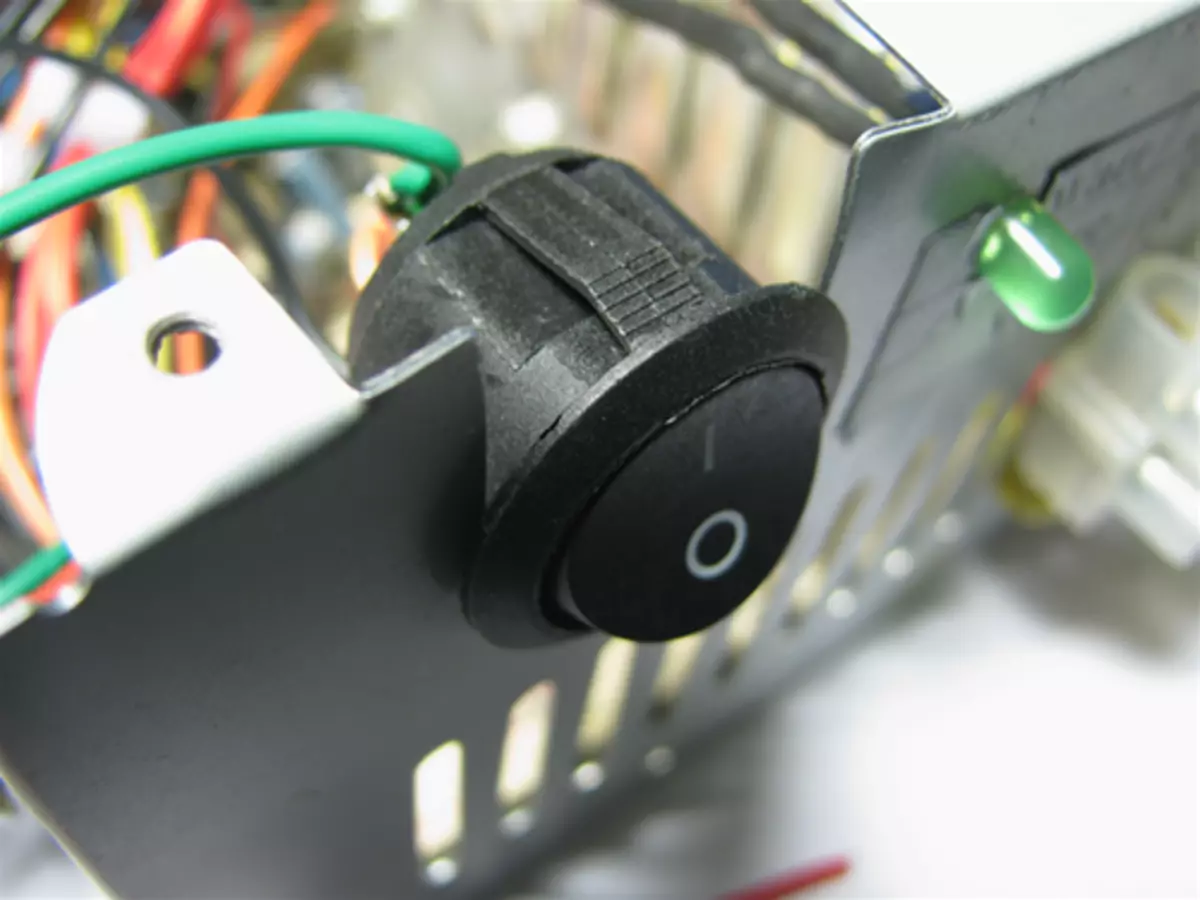
Power supply switch
The switch I decided to install in the place where the power supply has extended the wires outside.
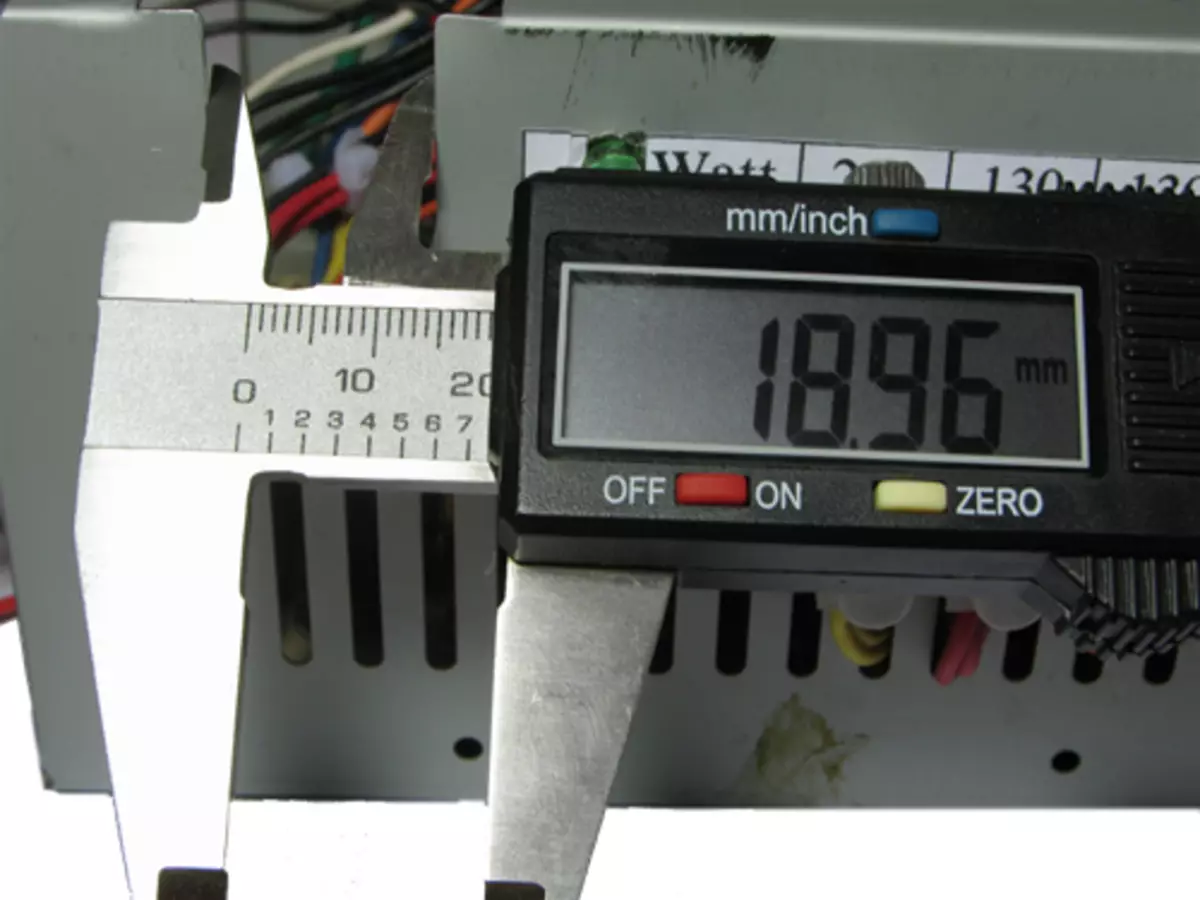
Measured the diameter of the hole and ran to look for a suitable toggle switch.
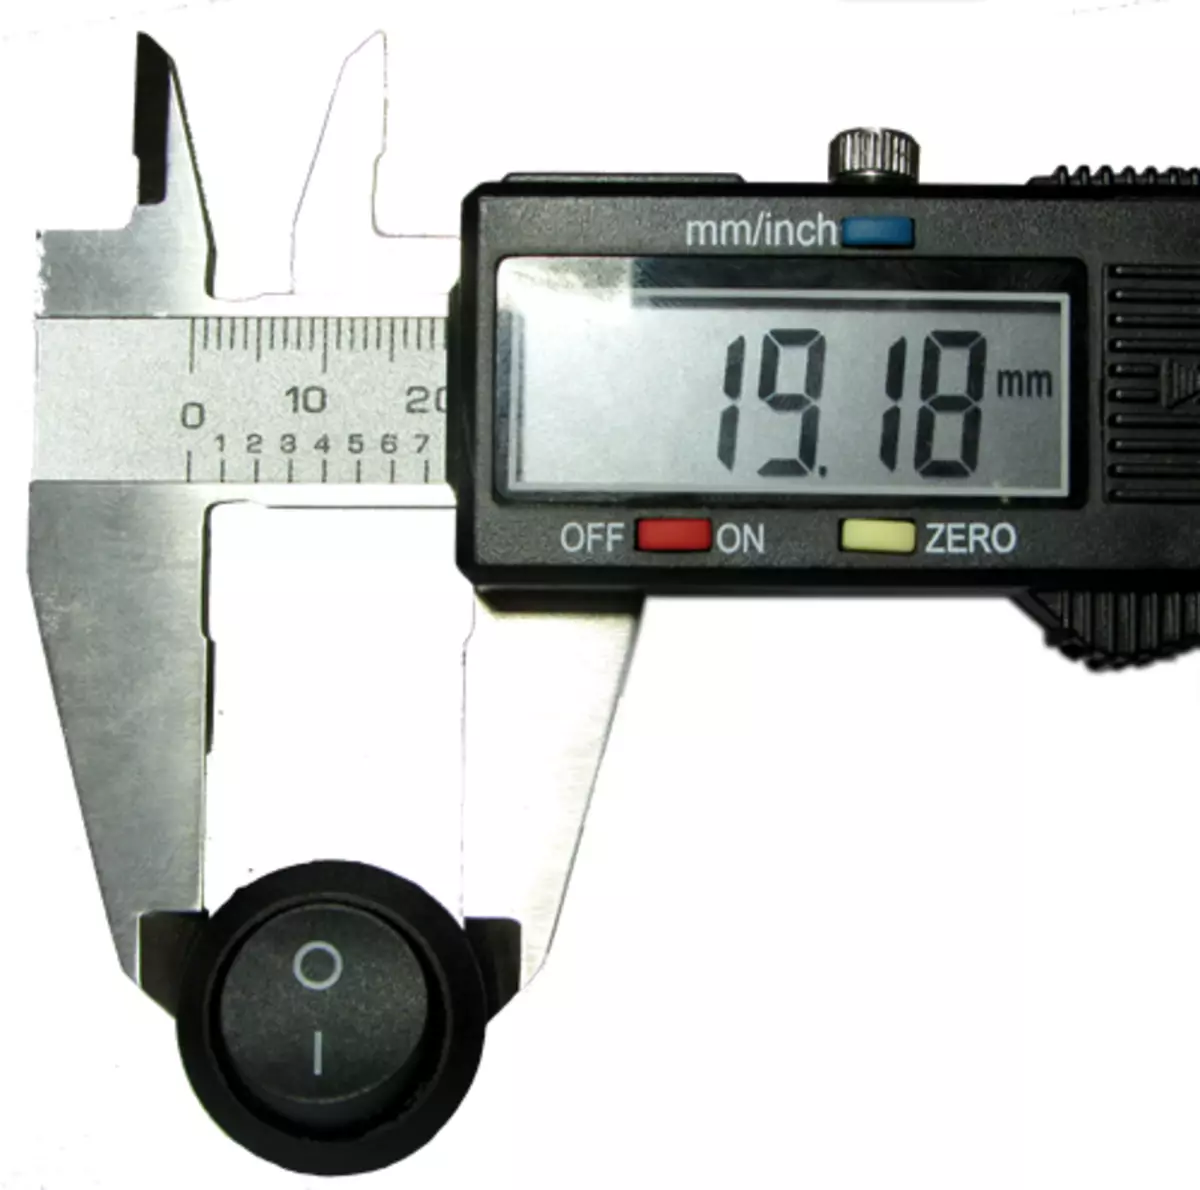
I had a little hit, and found the perfect switch. Due to the difference in 0.22mm, he perfectly got into place. Now ON and GND remains to the bedroom, then install it in the case.
The main work is made. It remains to bring marafet.
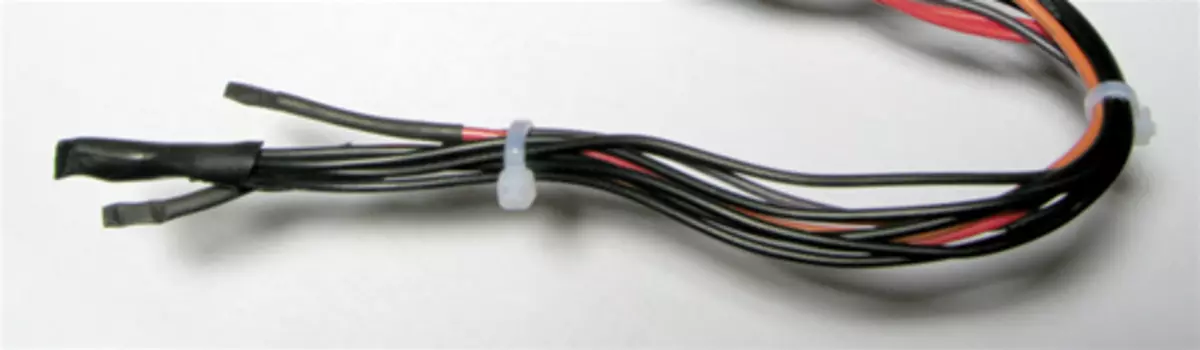
Wiring tails that are not used to isolate. I did it a heat shrink. Wires one color is better to isolate together.
All shoelaces neatly place inside.
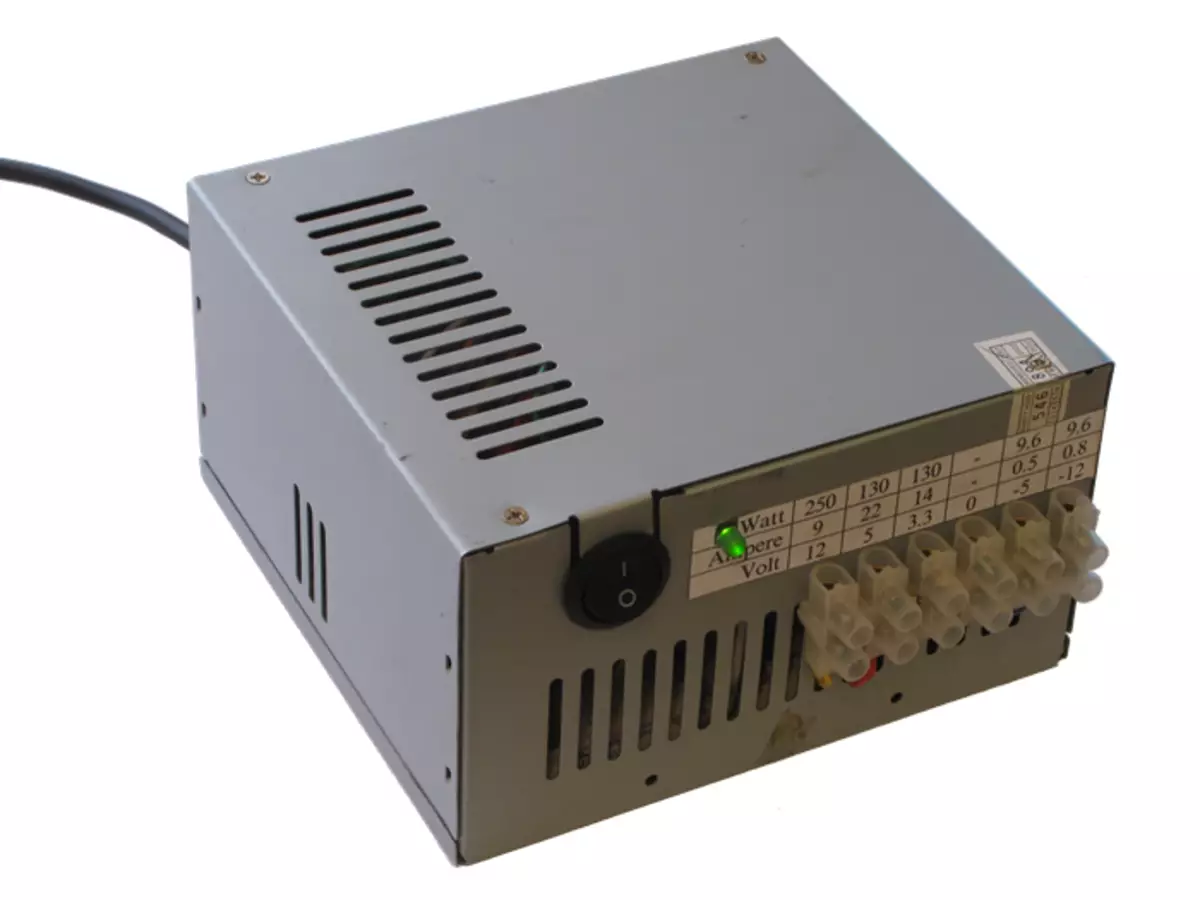
We screw the lid, turn on, bingo!
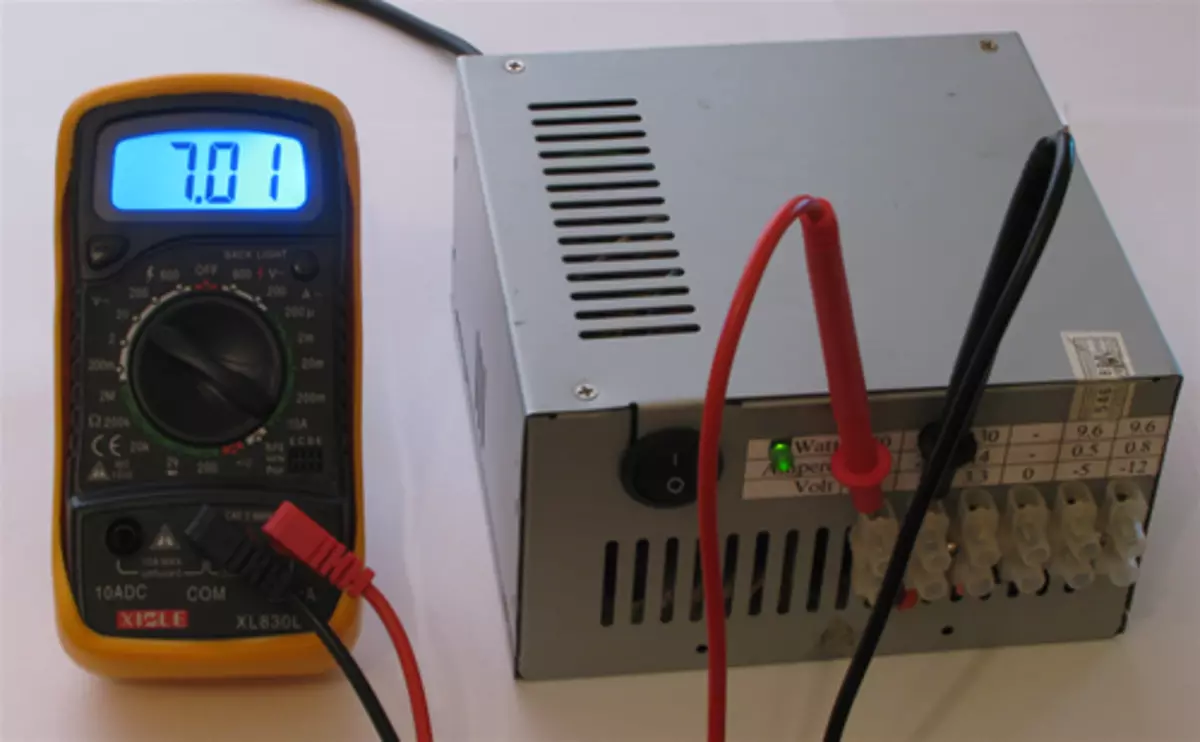
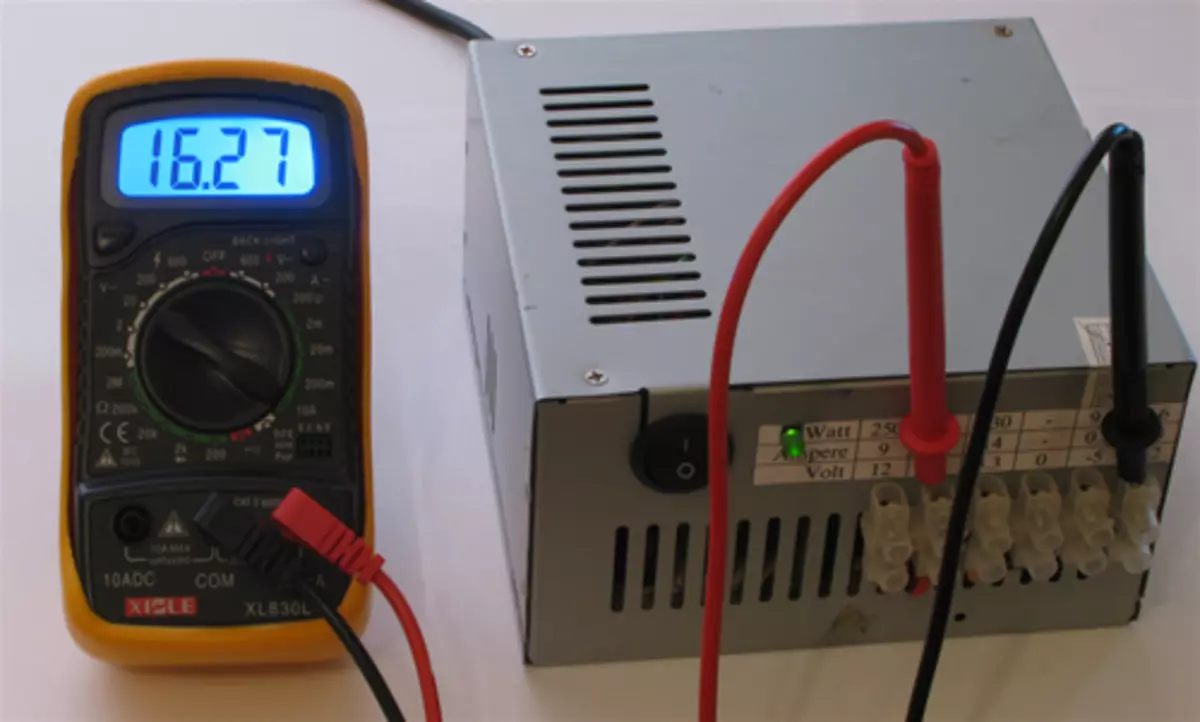
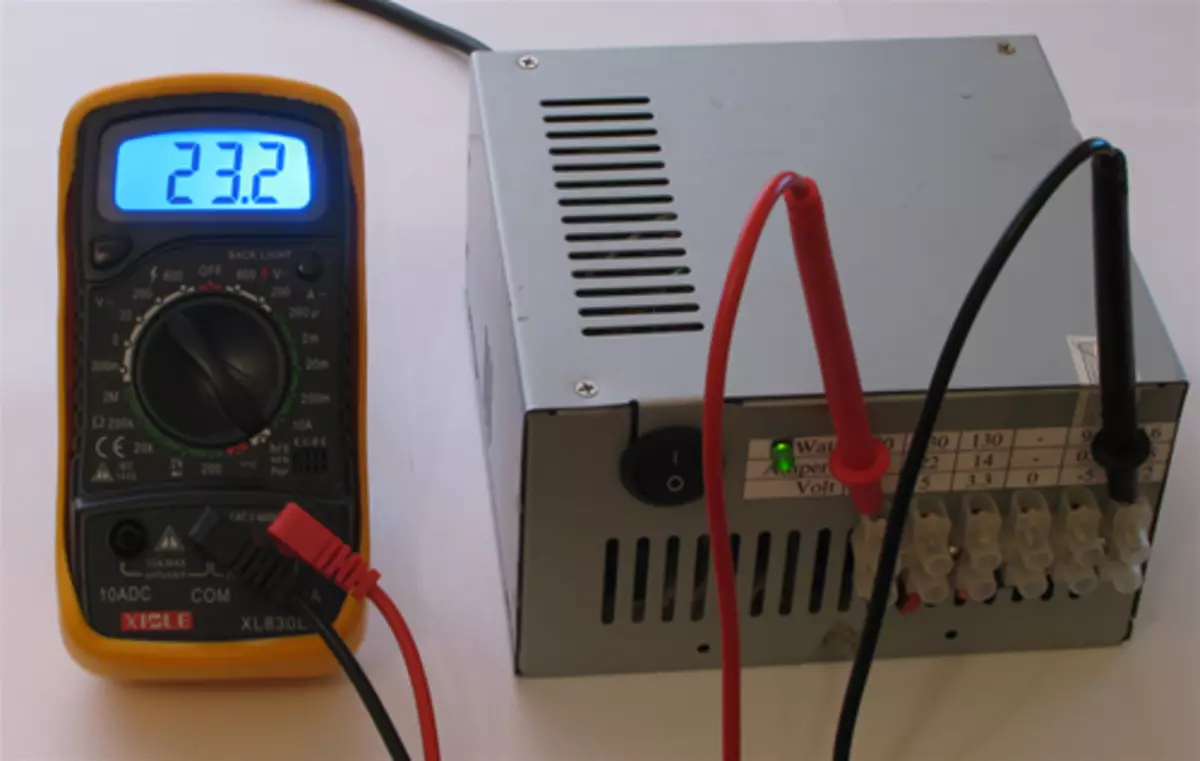
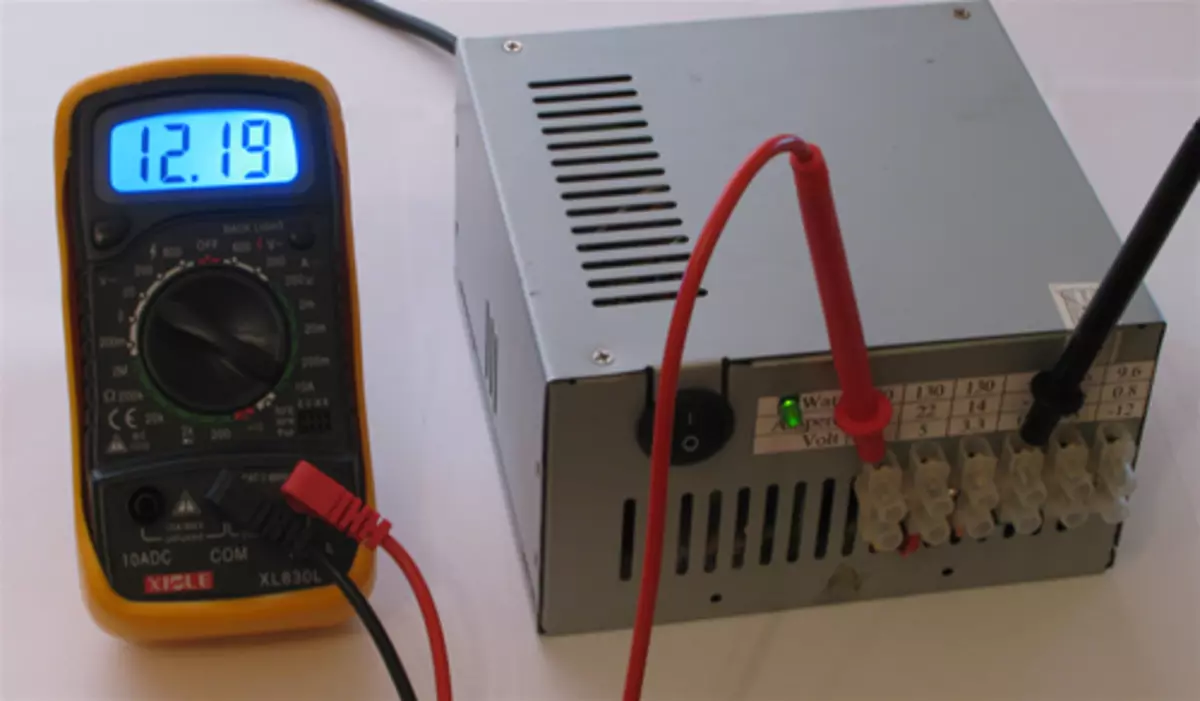
This unit can be obtained a lot of different stresses using the potential difference. Note that this reception does not roll for some devices.
Here is the spectrum of stresses that can be obtained.
In brackets, the first is positive, the second is negative.
24.0V - (12V and -12V)
17.0V - (12V and -5V)
15.3V - (3.3V and -12V)
12.0V - (12V and 0V)
10.0V - (5V and -5V)
8.7V - (12V and 3.3V)
8.3V - (3.3V and -5V)
7.0V - (12V and 5V)
5.0V - (5V and 0V)
3.3V - (3.3V and 0V)
1.7V - (5V and 3.3V)
-1.7V - (3.3V and 5V)
-3.3V - (0V and 3.3V)
-5.0V - (0V and 5V)
-7.0V - (5V and 12V)
-8.7V - (3.3V and 12V)
-8.3V - (-5V and 3.3V)
-10.0V - (-5V and 5V)
-12.0V - (0V and 12V)
-15.3V - (-12V and 3.3V)
-17.0V - (-12V and 5V)
-24.0V - (-12V and 12V)
Article on the topic: How to stroke bed linen, and is it necessary at all?
So we got a source of constant voltage with protection against KZ and other buns.
Rationalization ideas:
- Use self-shielding pads, as they suggested here, or use terminals with insulated lambs, so as not to be enough in the hands of scolding once again.