
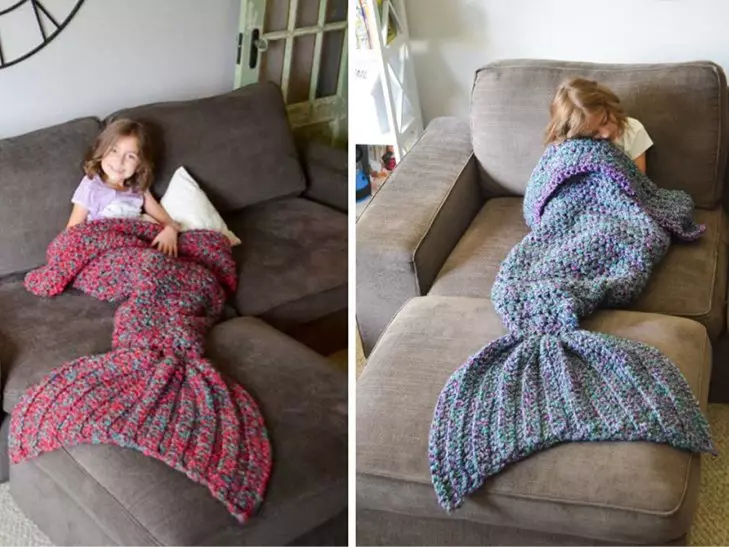
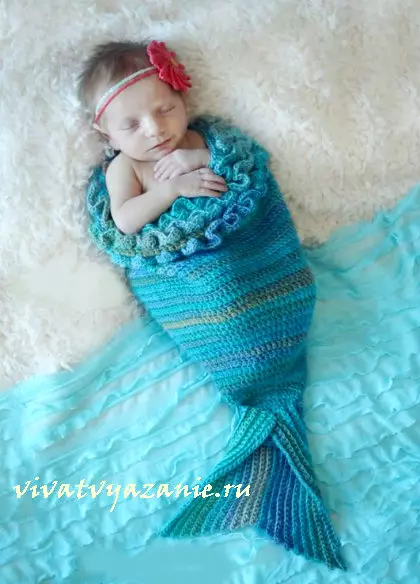
Everyone in his life saw cartoons or films about beautiful girls with a fish tail. If you want to please and surprise a small girl, then the ideal option will create yourself plaid "Tail of Mermaid". With this magic and extraordinary blanket, the baby will feel the fabulous hero that admired, looking at cartoons.
To associate such a plaid will not be difficult. Currently created many techniques and drawings for knitting such a product. Create such a wonderful plaid can be any most convenient knitting tool. However, when using the hook, the TV tail will be more pleasant and gentle. Even inexperienced master can make such a cover, using a detailed description.
Most often, when creating such a plaid, the following types of yarn are used:
- Acrylic;
- Terry;
- Fleece.
The product from acrylic yarn has a higher quality, it can be washed in a washing machine, but its cost is quite high. There are more budget types of yarn, for example, fleece or terry yarn.
First method

Most often, the mermaid tail knit crochet, let's figure it out how to create it yourself on an example of the plaid of 117 centimeters.
Before starting the manufacture of the plaid itself, create a trial first to identify the density of the yarn.
Knit 6 rows of 7 semi-solids and 1 column with Nakud. There must be a square with the sides of about 10 centimeters.
And only then begin to knit the plaid itself. At the beginning of the knit chain of 82 air loops.
In the first row, the front side knit 1 semi-sololbed with 1 Caida in the 3rd air hook. After that, knit 1 semi-slim with 1 nakid to all air loops, in the end there is 80 loops.
The second row is the wrong side. Knit 2 air hinges, then 1 semi-solitary with 1 nakid in each loop of this row. We repeat this series until the product reaches 61 cm. Then end the knitting in the wrong row. After that we will narrow the product, creating the shape of the tail. The first row knit on the front side of 2 aircraft, after that 1 semi-solid with 1 nakide in the next 8 capetles, then we are tied together 2 semi-solol with 1 nakid. We continue this step to the end of the row, forming 72 loops. Next, knit the second row on the involving side of 2 air loops, then 1 semi-sololbitsa 1 in Caud in all the loops of this row. Thus, knit another 4 rows.
Article on the topic: Tunic Crochet: Scheme and Description of the fillet knitting with photos
Now let's knit 2 air loops 1 semi-solol with 1 nakida in the next 7 kettops and tune together 2 semi-solol with 1 nakid. We are tied up to the end of this series, forming 64 loops. Then knit 5 rows just like the 2nd row. In a new row, knit 2 air loops, then 1 semi-solol with 1 Nakud in the next 6 kettops. Sing together 2 semi-solids with 1 nakid and thus finish a row by making 56 loops. And again knit 5 rows of the same methods as in the second row. In the next row, knit 2 air loops, 1 semi-solitary with 1 Nakud. Singing together 2 semi-solol with 1 nakid. We continue to the end of the row. It turns out 48 loops.
Now we make another 5 rows according to the 2 row method. In a new row 2 air loops, a semi-solol with Nakud in the next 4 loops. Singing together 2 semi-solids with 1 nakid to the end of the row. We form 40 kettles. Then in 5 rows we repeat the 2 row method. We finish with this part of the product, performing 2 seams - vertical rear and bottom. We proceed to creating the fins of 2 parts. Knit a chain consisting of 38 air carelets. In the first row from the front side, knit 1 semi-sololbed with 1 nakid to the fourth air hinge. Then we knit 1 semi-solitary label with 1 nakid to each next air loop, it should be 36 kettles.
In the second row on the involving side, knit 2 air loops, then 1 semi-sololine with 1 nakid, with a hinge in the loop of the previous row and capturing the loop from the wrong side for a stretch, as shown in the picture below. Then we repeat this action until it remains 3 semi-solol with 1 nakid. Turn, leaving untouched the non-sick loops of the row.
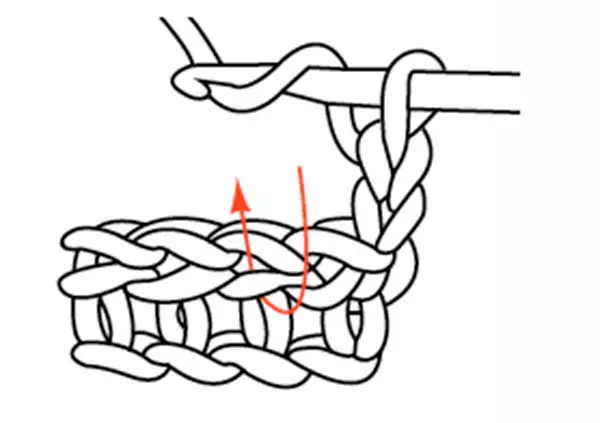
In the third row, we knit 2 air loops, 1 semi-sololine with 1 nakid, pulling a hook in the loop of the previous row and capturing a loop from the wrong side to a broach, as in the second row, and make it up to the end of the row. Then you need to repeat the second and third row until 21 loops are obtained.
Article on the topic: How to sew a scarf with your own hands - master class
It remains only to sew the side of the tail to the main canvase at the bottom edge. Attaching the thread with a connecting loop to the upper right corner of the tail. We sew the top of the tail with the bottom of the main canvase.
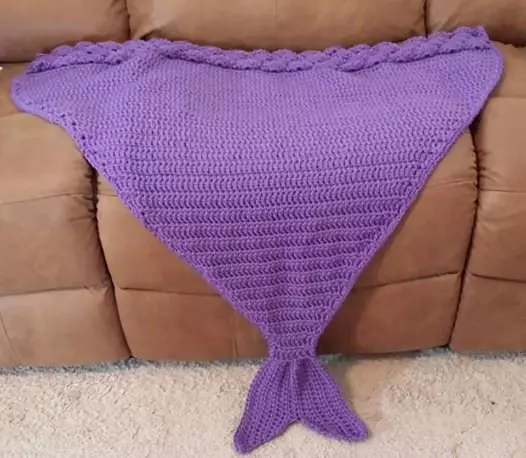
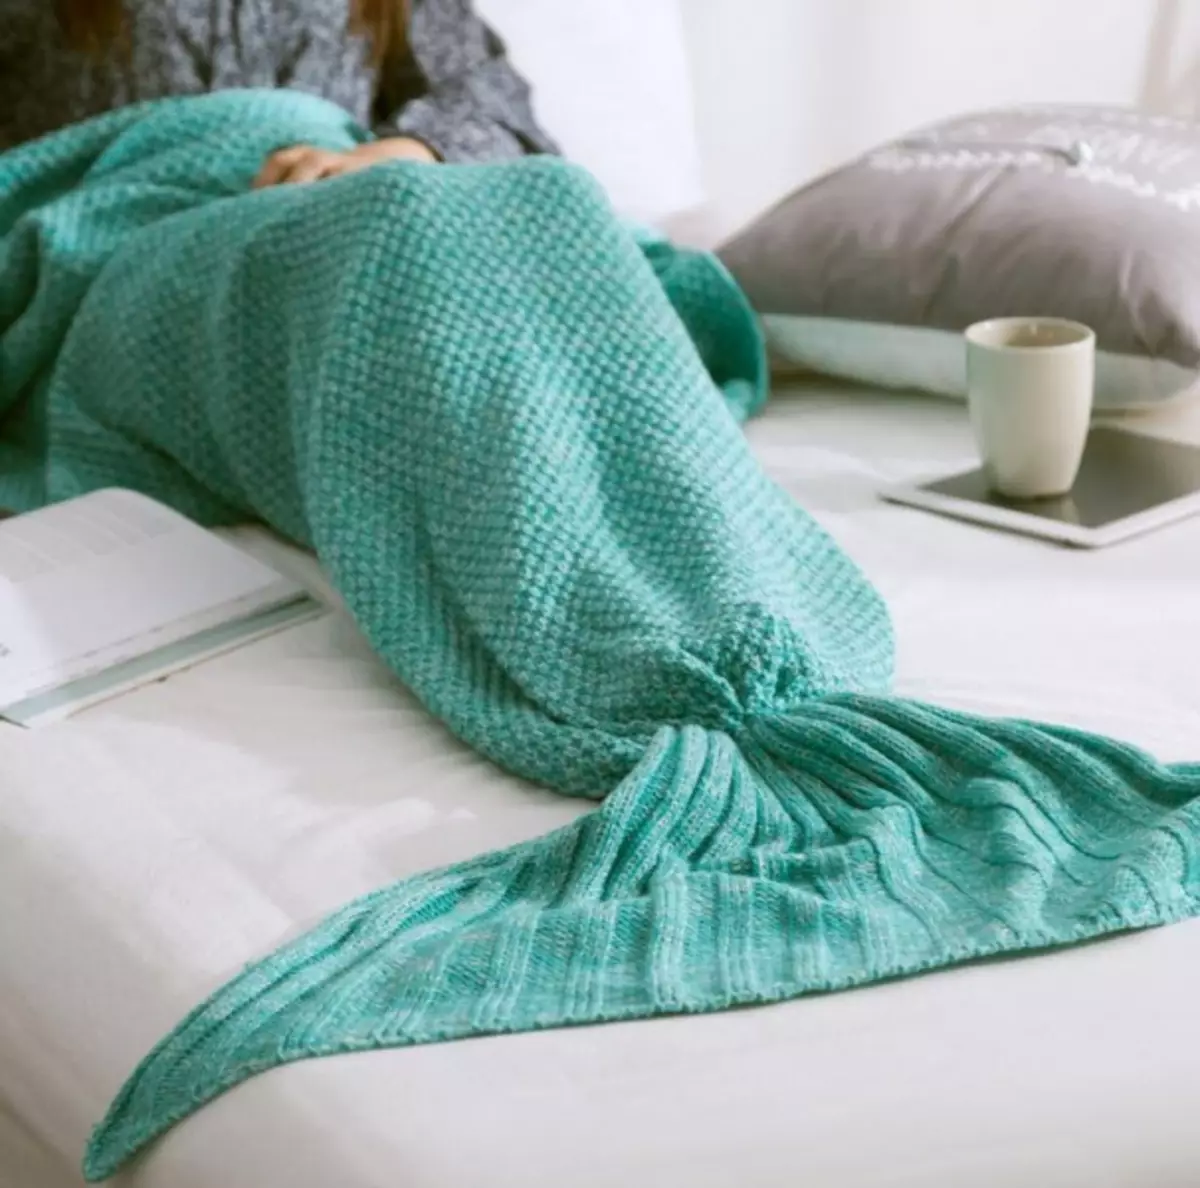
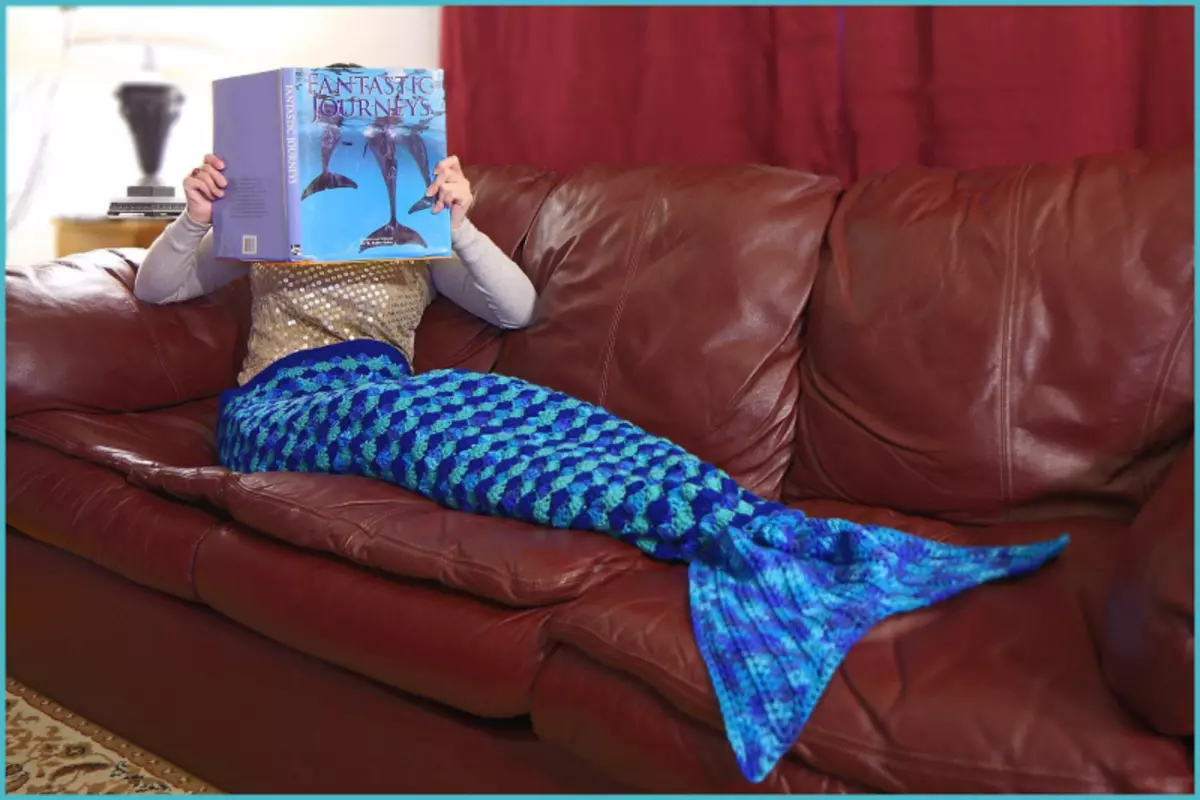
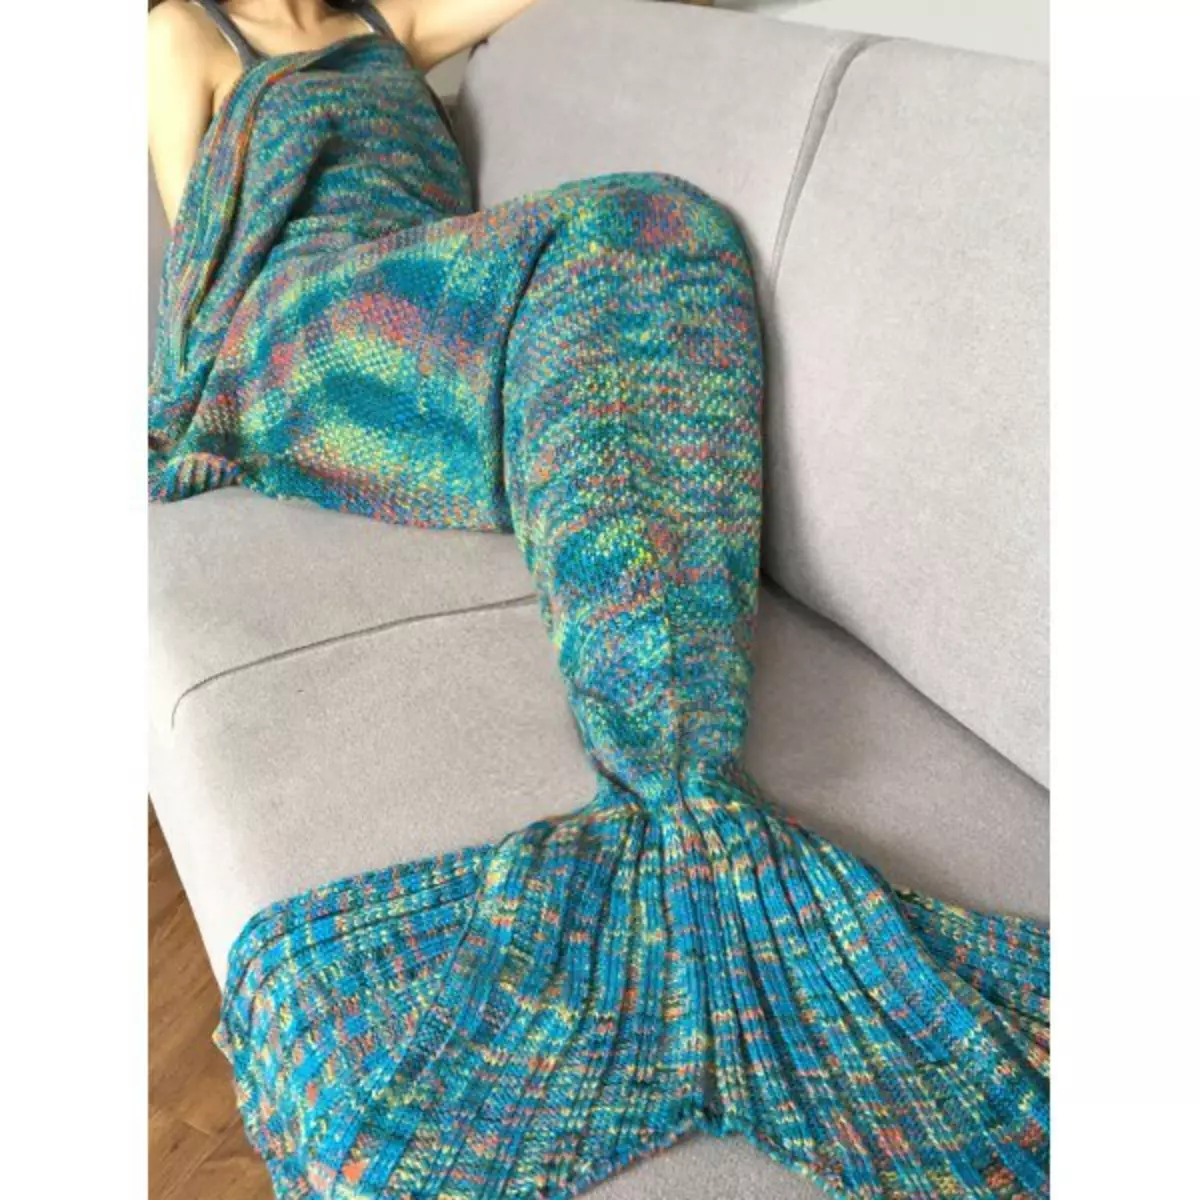
That's ready the fabulous mermaid plaid.
Second way
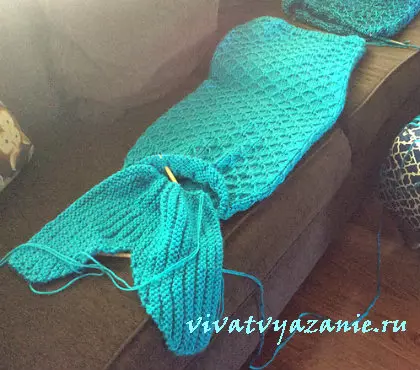
Basically, this product is knitted with the help of a hook, but not all needlewomen own them, so let's look at how to make such a mermaid tail with the knitting needles. But first it is necessary to decide what size will our future product, it will be for an adult or for a small child. It is advisable to make an exemplary pattern, that is, calculate the length, the width of the plaid on top and bottom.
After that, knit the pattern of the pattern and consider the desired number of loops for a set. And counting, after how much, it is necessary to add and subscribe a loop so that the tail is expanding and prested in the right places. It is more convenient to knit such a coat of two fragments: the main part and fin.
Below is a drawing of the pattern of the main part.
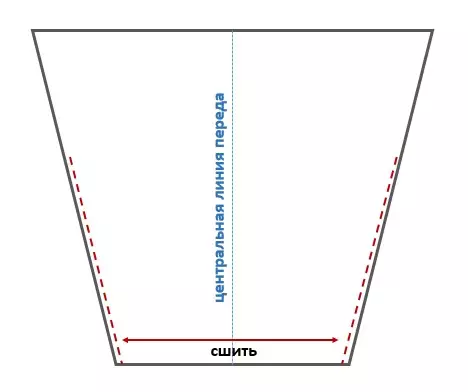
It consists of a canvas that fit in the form of an elongated trapezium. Sooh is just one, it goes in the center of the back of the very narrow part and about one third to the top so that it is convenient to climb on this plaid.
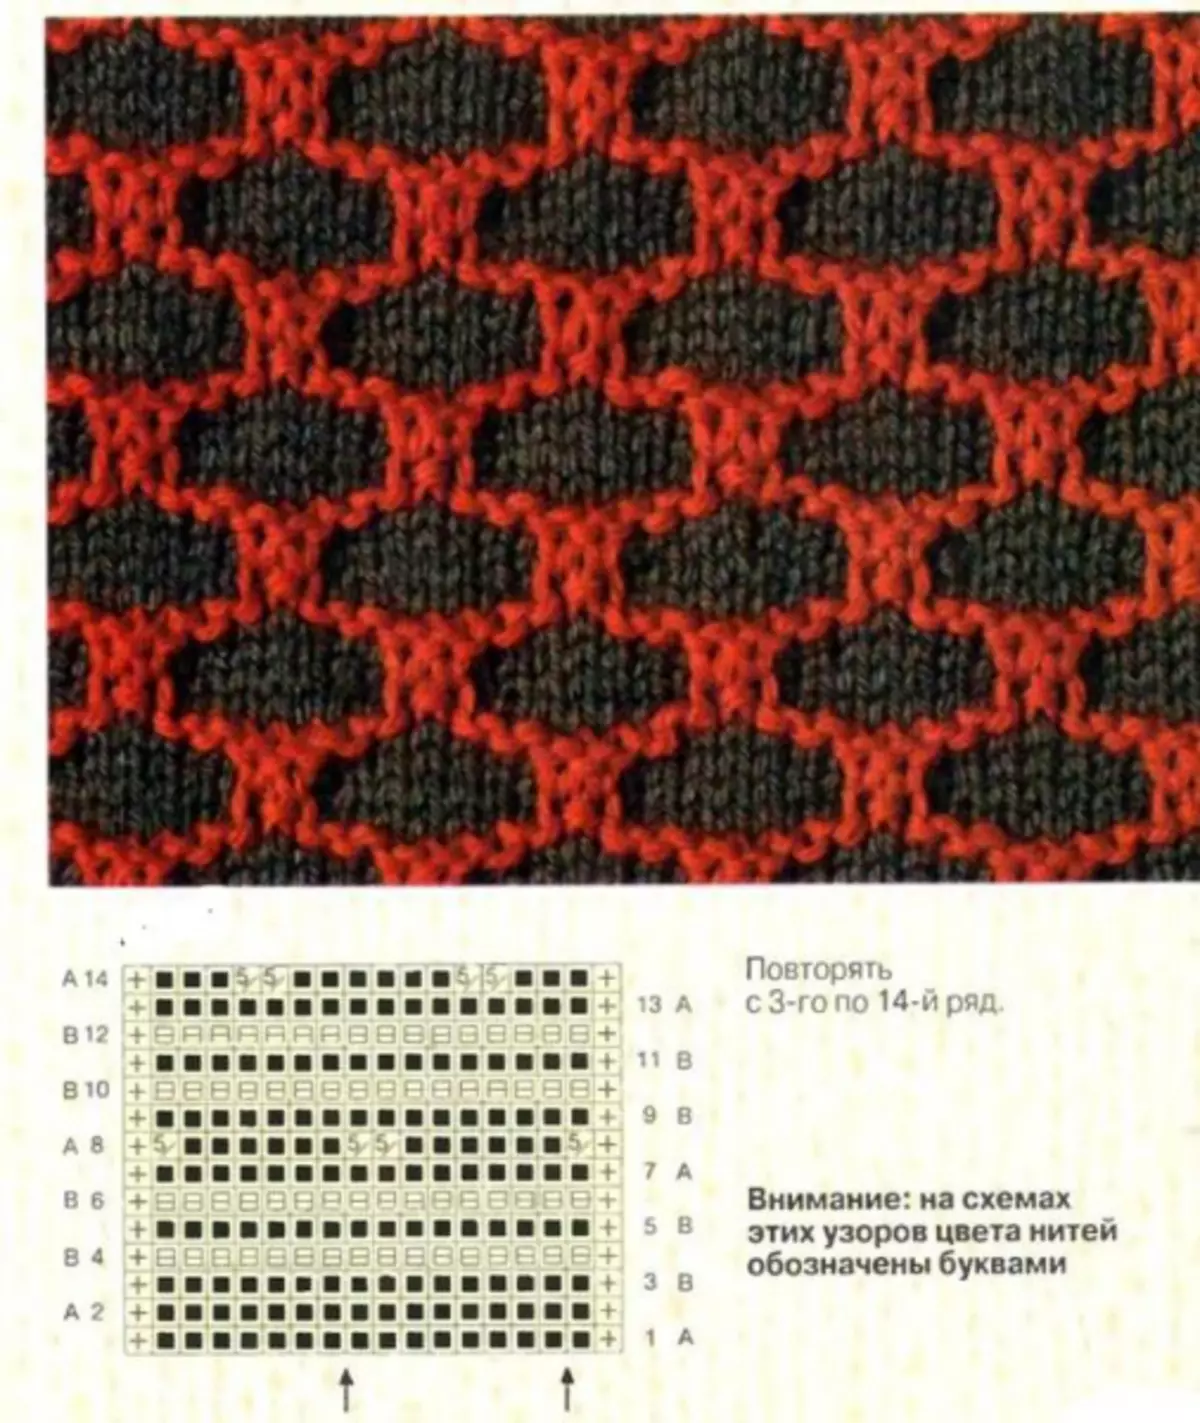
Depending on the desire and selected pattern, you can begin the mating of the product from above or below. Patterns can be selected a wide variety. For example, the pattern is very similar to fish scales, its scheme is presented below.

If I want the tail to be more fabulous, you can use a wavy pattern, with one or more colors:
You can also use some kind of lazy jacquard pattern, for example:
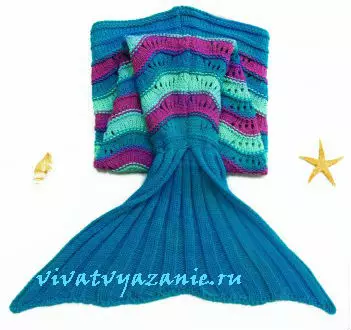
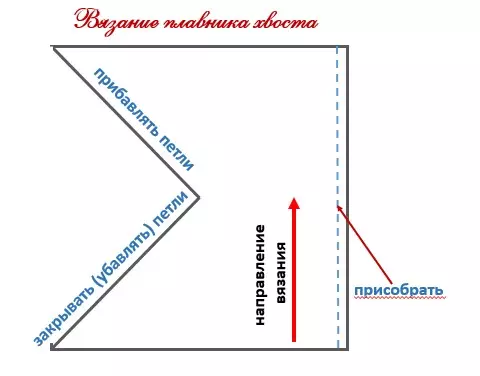
The fin is the easiest to knit from the side part, alternating the bands from 2 rows of the front and 2 row of the invalid stroit, as in the image below:
Article on the topic: Sleeveless knitted, for women: Pattern for beginners
At the same time, on the left in the course of the knitting at the beginning of even rows, we close one loop at the beginning, and then add the same number of times with air hinges at the end of the odd rows in one loop, so that a peculiar neckline of fish tail was released. On the right side, before collecting the product, you can barely sharpen with threads of the web from the edge, as shown in the drawing.
Now you can collect our tail. First, we sew the main part, about the knees, that is, only one third of the product remained on top of the free.
The top of the fin is slightly assembled on the thread, while correcting its width over the stitched bottom of the main part.
Now we sew the tail to the main part, the seam should turn out in the middle of the fin. You can also put the fin insert the main part into the main part and sew at the same time.
Video on the topic
The beautiful plaid of the Tail of the Ruslocks is ready and will please any baby and even an adult, giving feeling like a beautiful fabulous hero. And so that everything turned out and the issues did not have any questions, several video master classes.