
Openwork and mesh drawings are most famous in crocheted, they are very often used in creating things for summer and decorative details into the house. When the rims are studied, such drawings will be given without much difficulty. The grid with a crochet with the scheme will be dismantled in detail in this article.
Knit oblique grid
To create products, we need only:
- Yarn, it will be best if you choose smooth and monophonic threads;
- Hook.
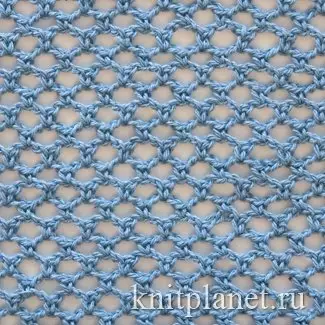
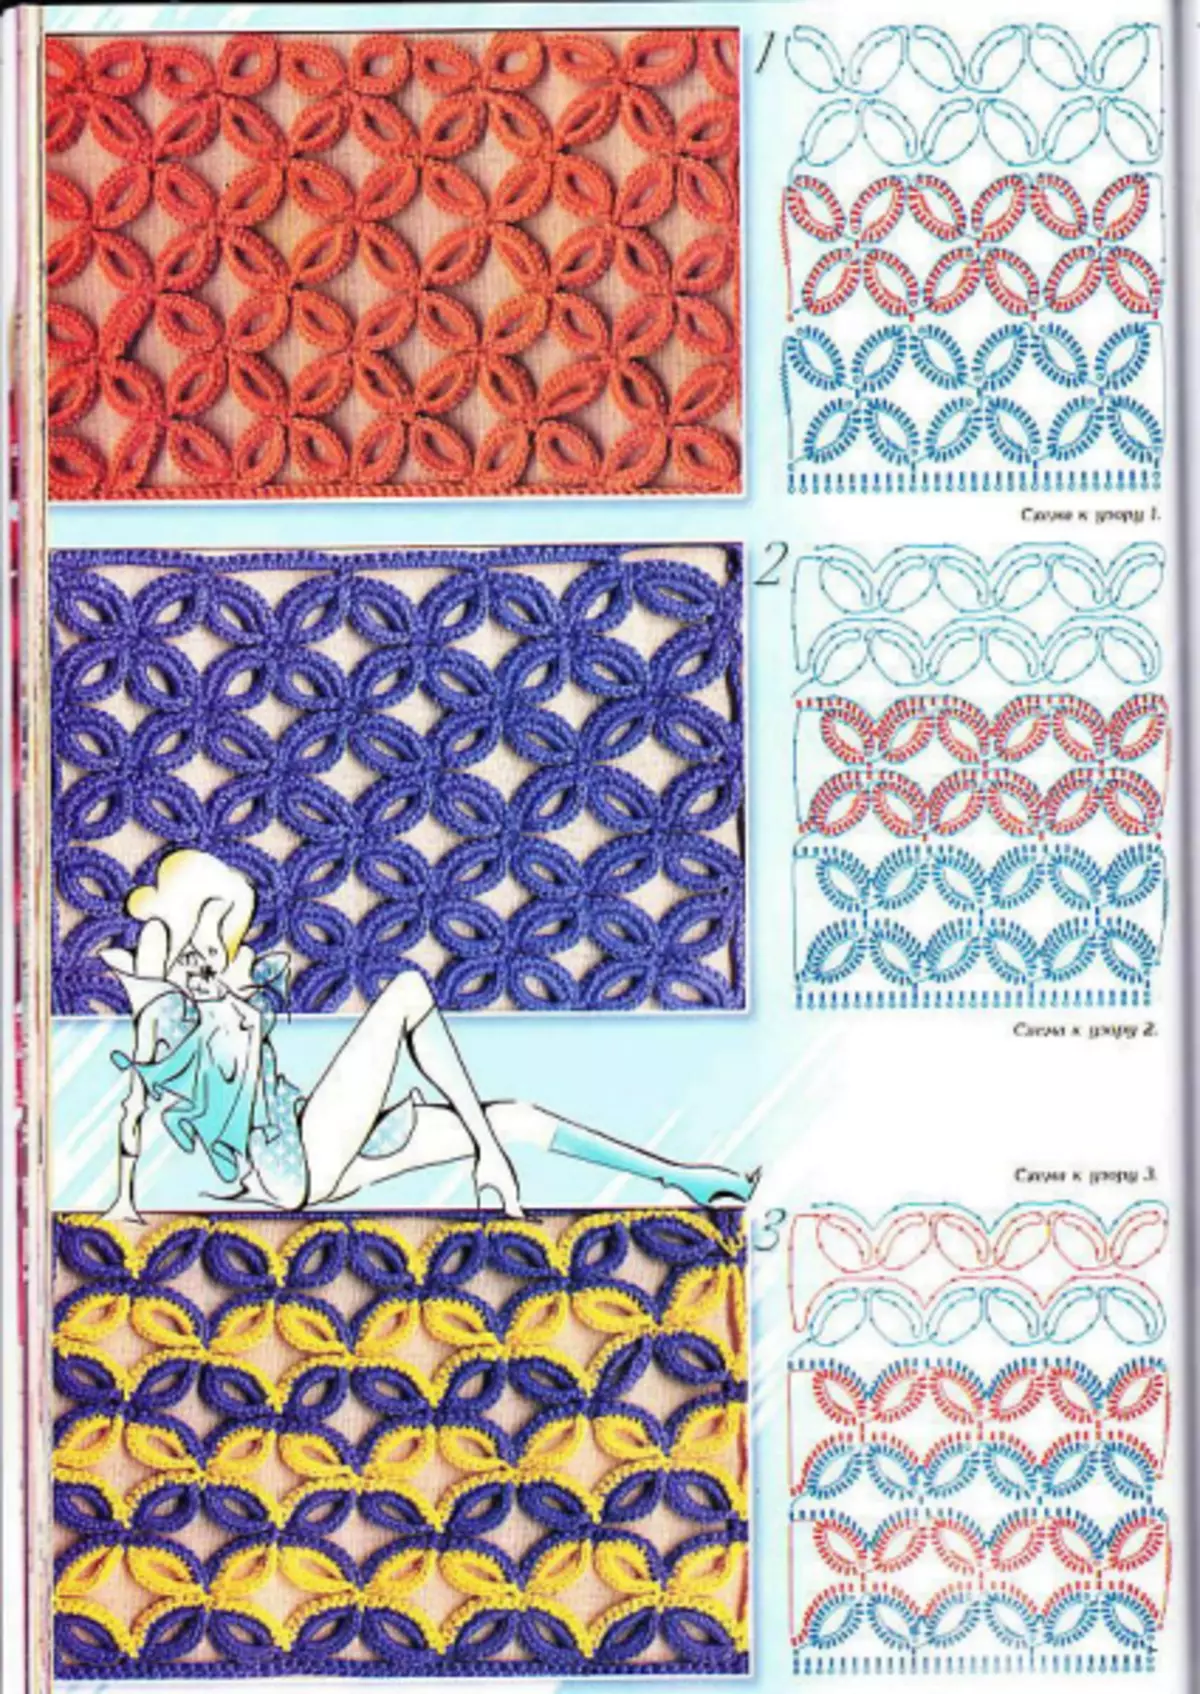
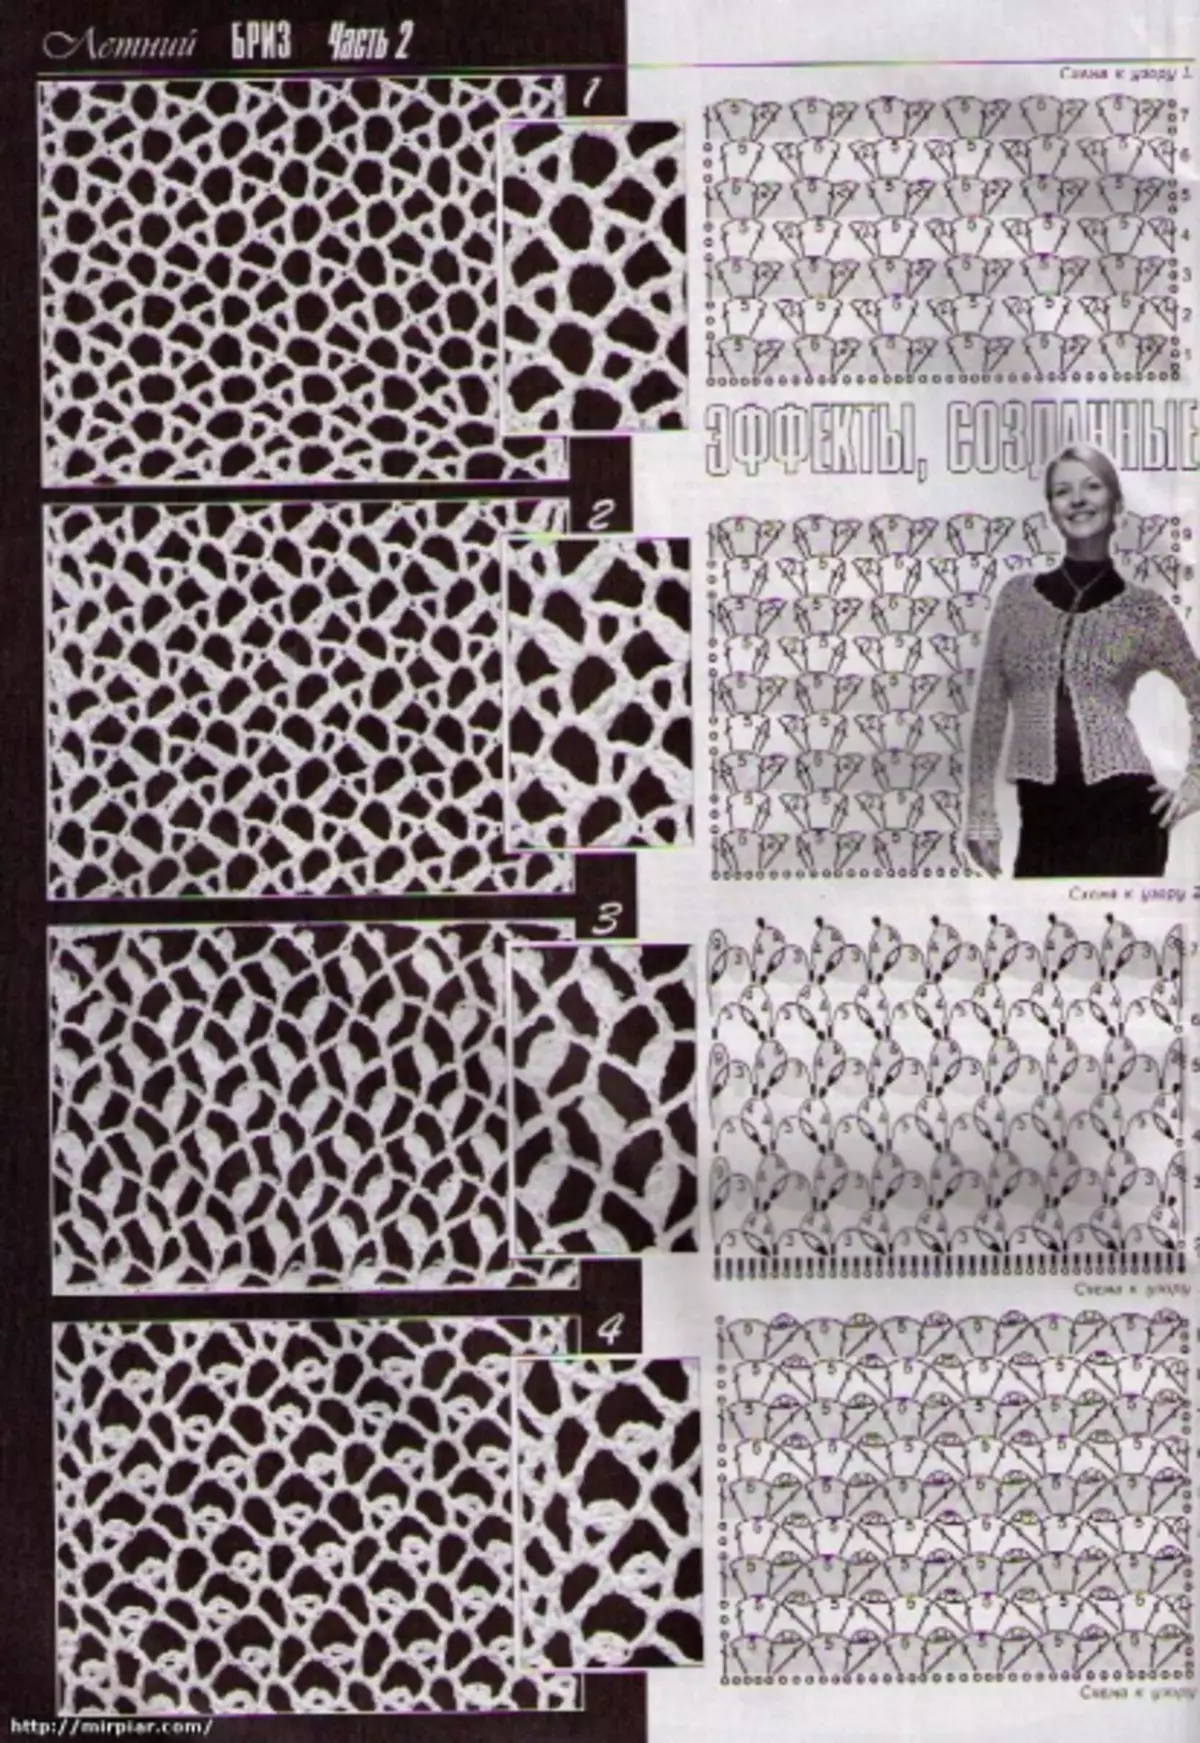
The oblique grid is created by chains of air looplets of free length. They are attached with the help of "from under the army" for the chains of the previous series using columns without a nakid or a connecting column. The shape of the cells can be changed a bit if you make a mounting of 2-5 columns without a nakid. The height of the edge columns also affects the shape of the cells.
Knitting order of oblique grid:
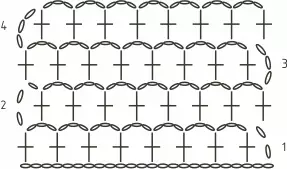
- We recruit the chain of air hopes. To associate a classic oblique grid, it is necessary that the amount of looping is to be multiple 3. In addition, we recruit another 1 loop so that the drawing is symmetrical, then type 4 hinges for lifting in the 1st row.
- We have a 1st row with an alternation of columns without a nakid and an arches of 3 air hopes. The columns are knitted, always missing 2 loops in the dialed chain.
- From the 2nd row, the amount of lifting looping reduce to 3. And we continue to knit, strictly tied the columns into the central penetration of the arches of the previous row.
- All the following rows knit the same as the 2nd row.
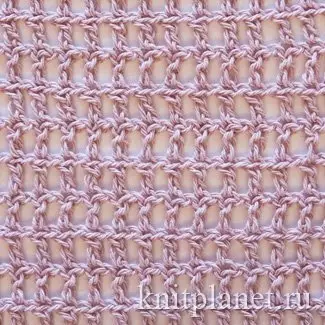
Pattern scheme in the photo below:
You can knit more openwork meshes, if you do the arches, for example, out of 5 air hopes. Then the columns with Nakid are preserved, passing 3 loops.
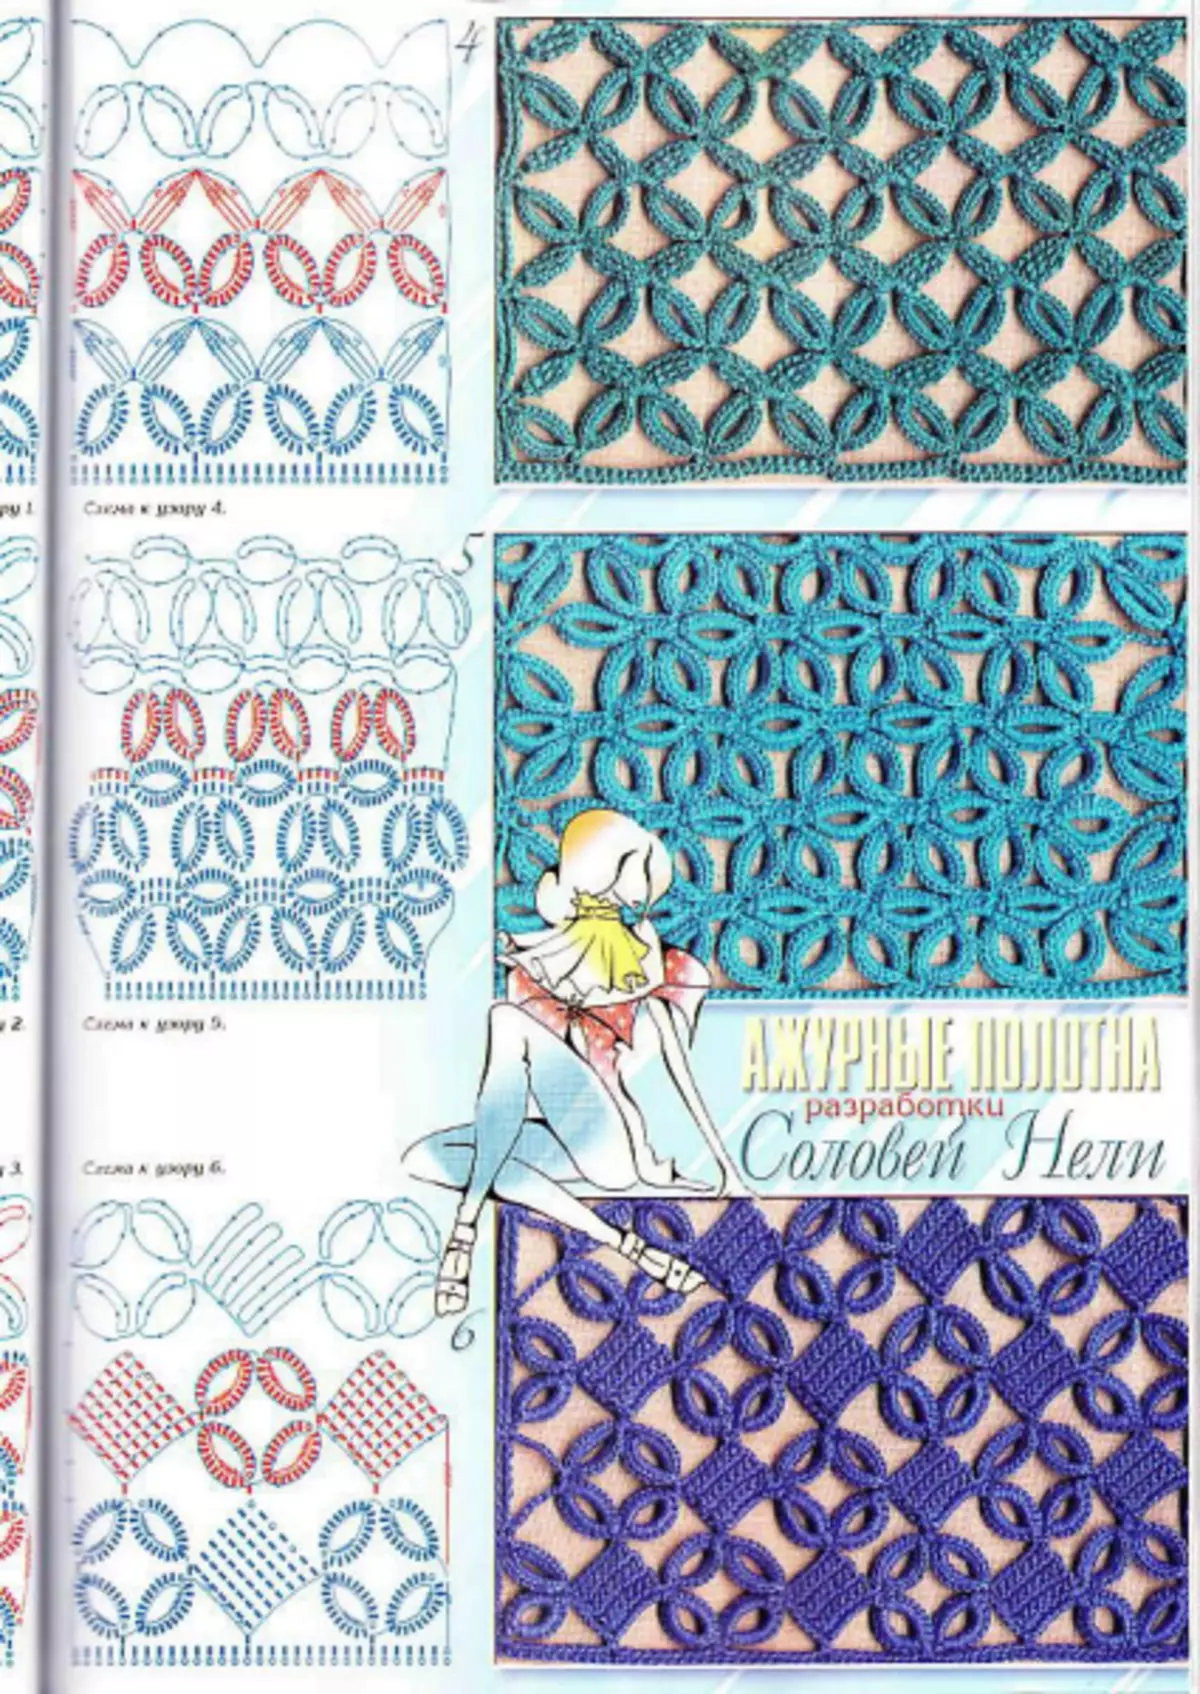
Option with Pico
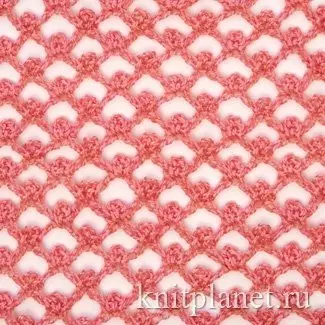
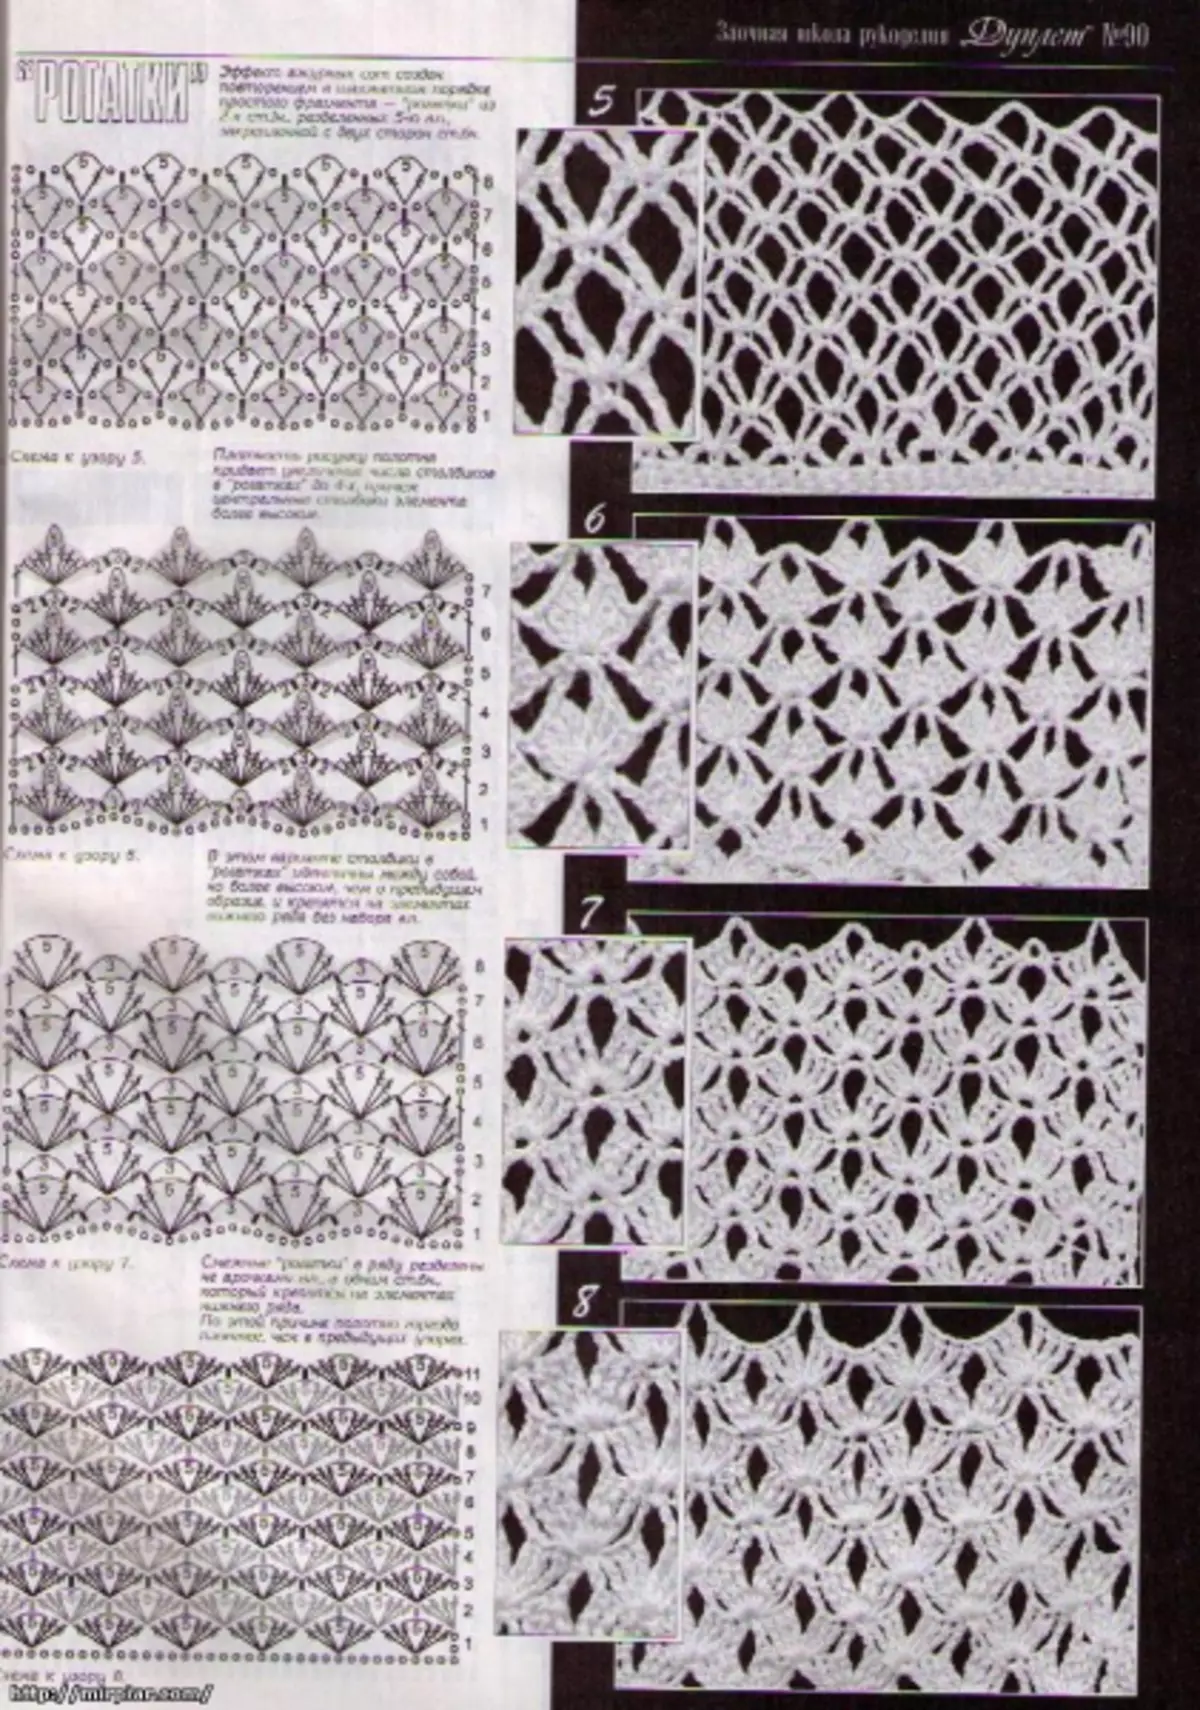
The grid with pico is the original version of the classic braid mesh.
The effect is attached to the loops of Pico, taken, as a rule, their 3-air hopes. Best of all this pattern looks when wearing very thin threads.
The order of knitting grid with pico:
- We recruit a pigtail with the amount of looping, multiple 4. In addition, you gain 3 more loops for lifting.
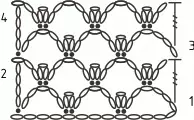
- The 1st row knit like this: in the 11th shelling from the hook, they are inserted by the semi-solol, now we knit pico from 3-air hoppers, then once again a semi-solidbell, fasten it in the same loop. We recruit 5 air coverings Arches, we skip 3 loops and insert the semi-solol, then pico and again semi-solol. This method finish the row. Only the last half-heartband knit strictly into the last loop of this row.
- In the 2nd row we will make 3 lifting loops and then 3 air hinges, it should be 6 kettops. In the central loop of the arches of the previous row knit the semi-solol as in the 1st row, pico and another semi-solol. We repeat this action to the end of the row. And there are 2 air loops and in the last penetration of the 1st row fix the column with two camids.
- In the 3rd row, we recruit 6 aircraft for lifting, then continue to knit according to the scheme.
- All other rows knit just like the 2nd and 3rd row.
Article on the topic: Easter basket made of newspaper tubes
Scheme of this picture:
This drawing is very popular when knitting openwork products, especially when creating children's clothes and clothes for the beach.
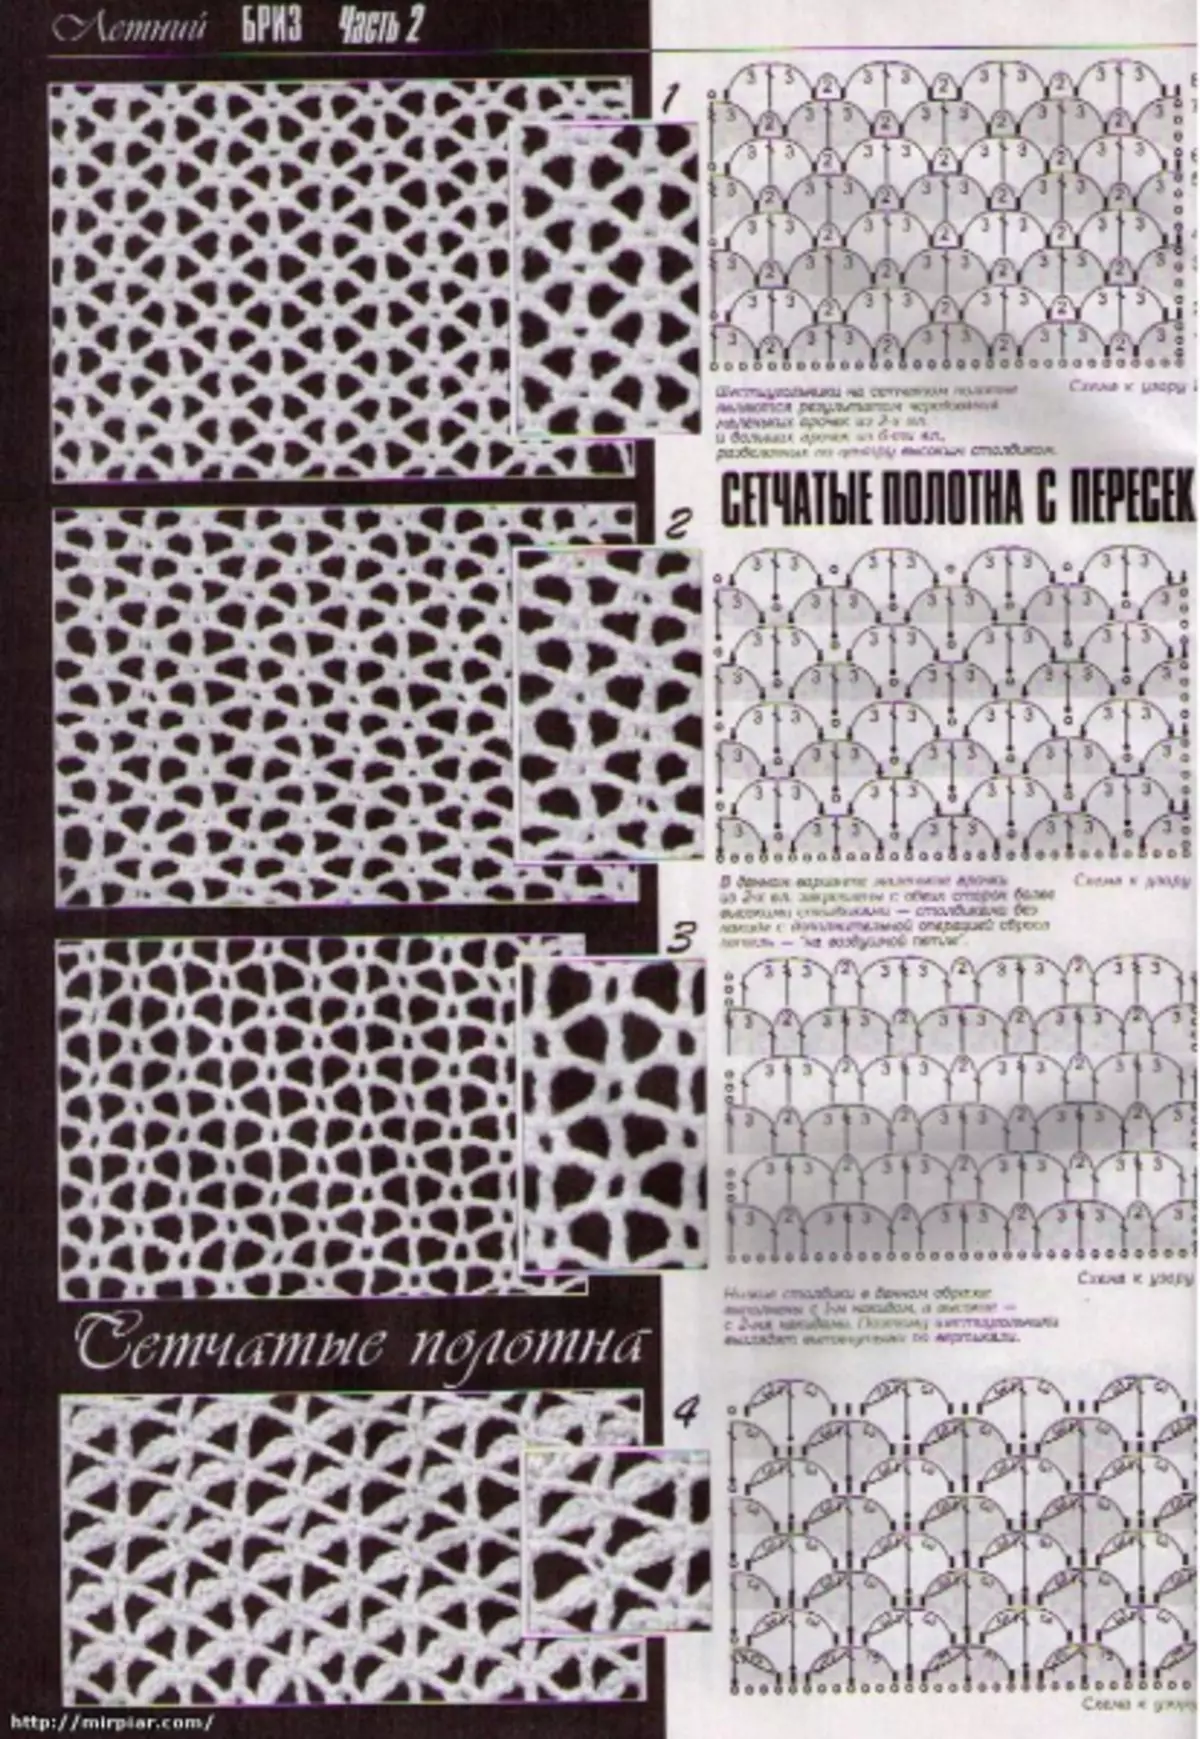
Filey grid
Among the most famous and most commonly used crochet directions is a fillet knitting. Because with it, you can associate not only clothes, but also beautiful blankets, napkins, and so on.
The classic fillet grid is the basis for creating wool carpets. This drawing is absolutely simple, consists of alternating columns with nakid and short arches from air hostels.
File mesh knitting order:
- Knit chain from an even number of air coverings of the intended length. In addition, we have 2 more loops for lifting.
- Knit column with 1 Nakud in the 1st cover of the chain immediately after the lifting loop. After that, we recruit 1 air looping and knit another 1 column with 1 nakid, while skipping 1 loop in the base chain.
- Similarly, knit all the other rows.
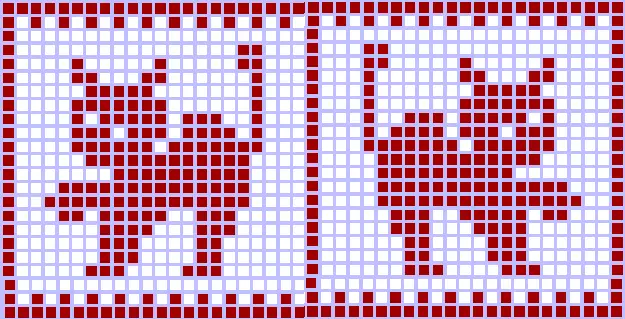
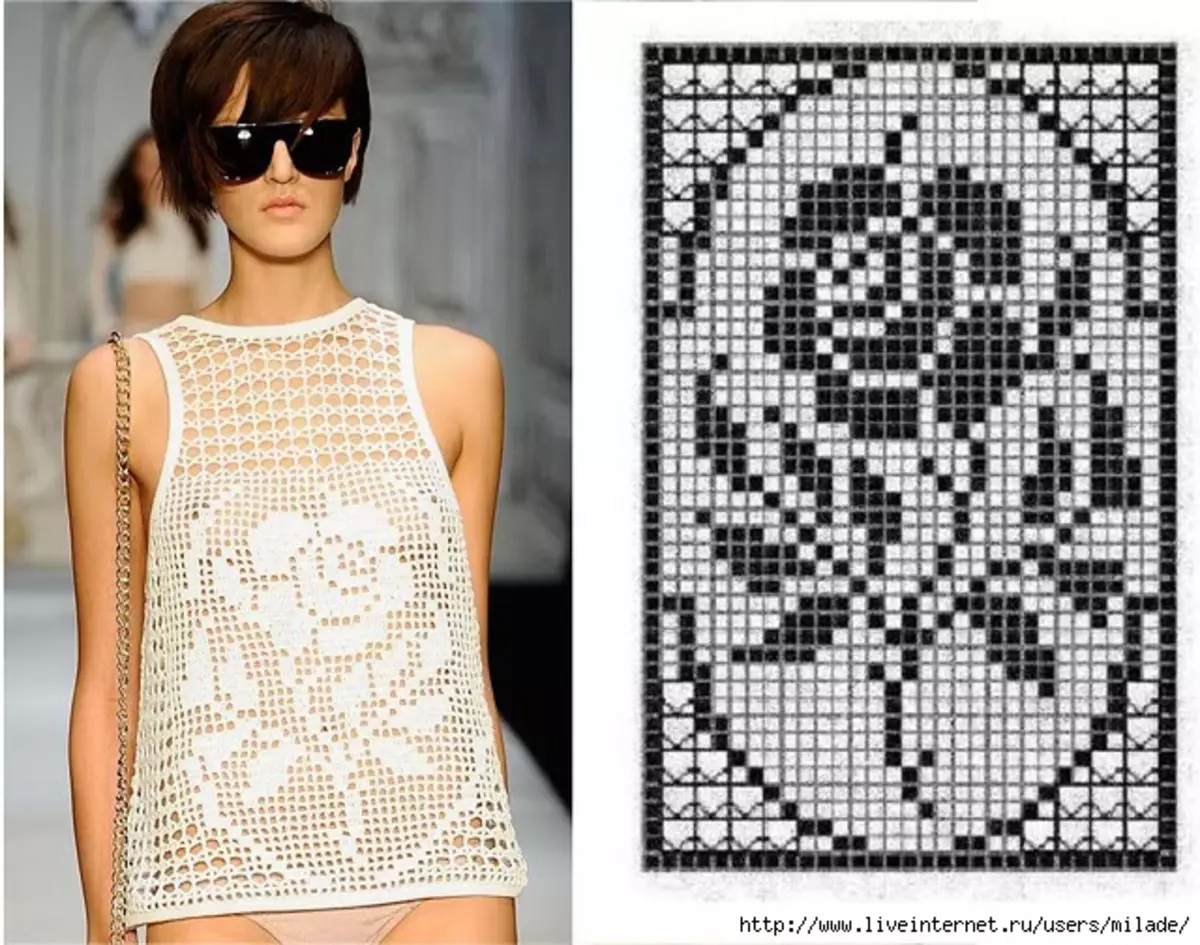
In this technique, you can associate different flat drawings, simply by filling in the skipping points to the columns with 1 nakad. Such schemes are almost always simplified and created in the form of a grid, in which white square is a knitting with a skipping, and color-knitting without skipping with the desired number of columns with Nakud. A detailed description in this case is replaced by the scheme, it greatly simplifies the work.
This method you can create wonderful drawings, as in the images below, and many others.
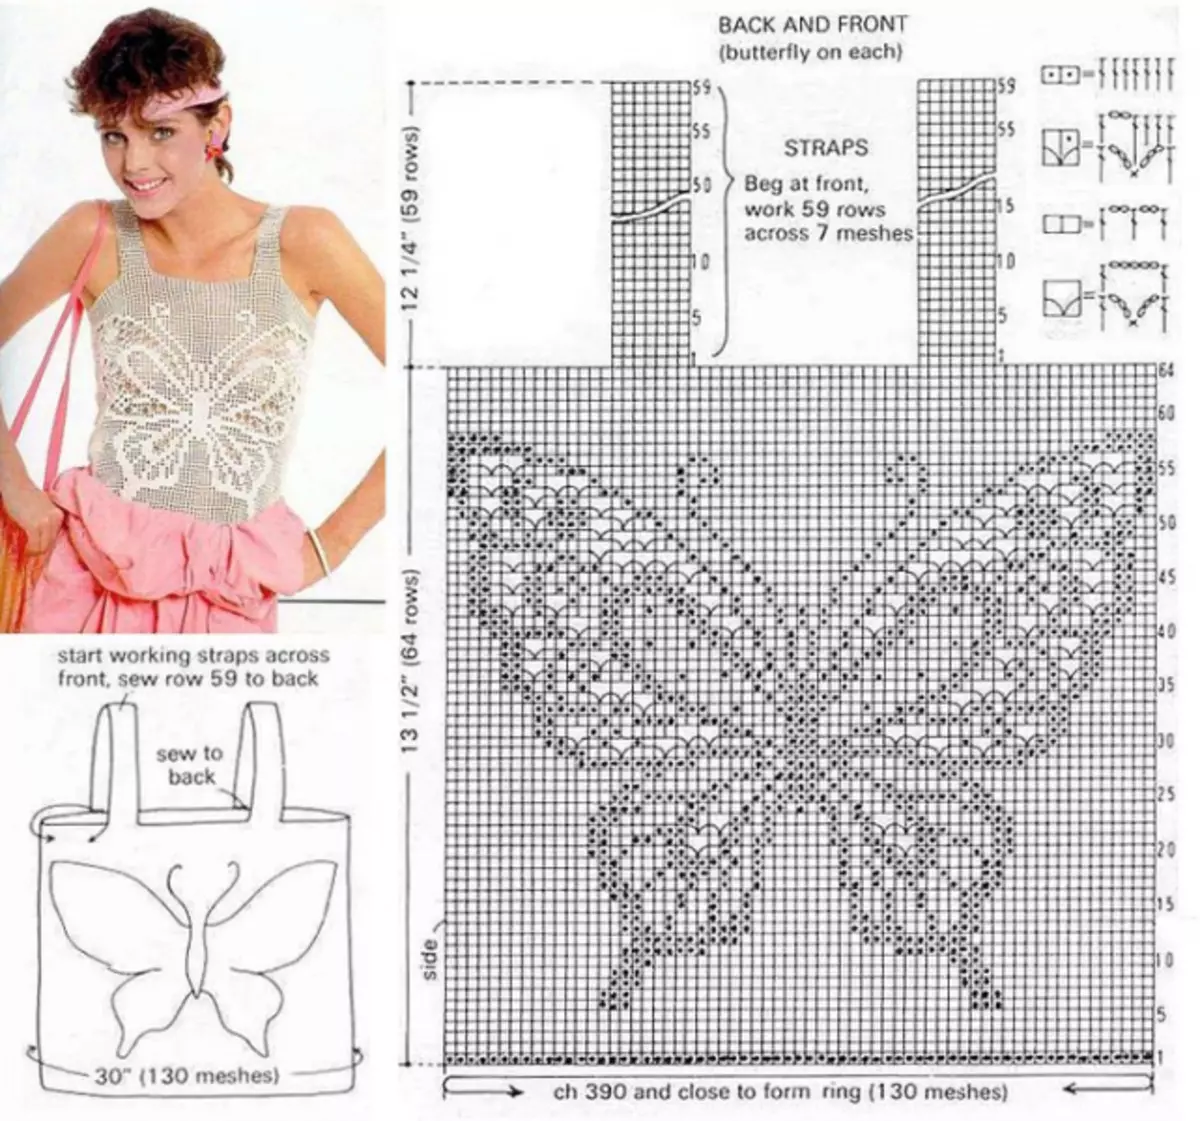
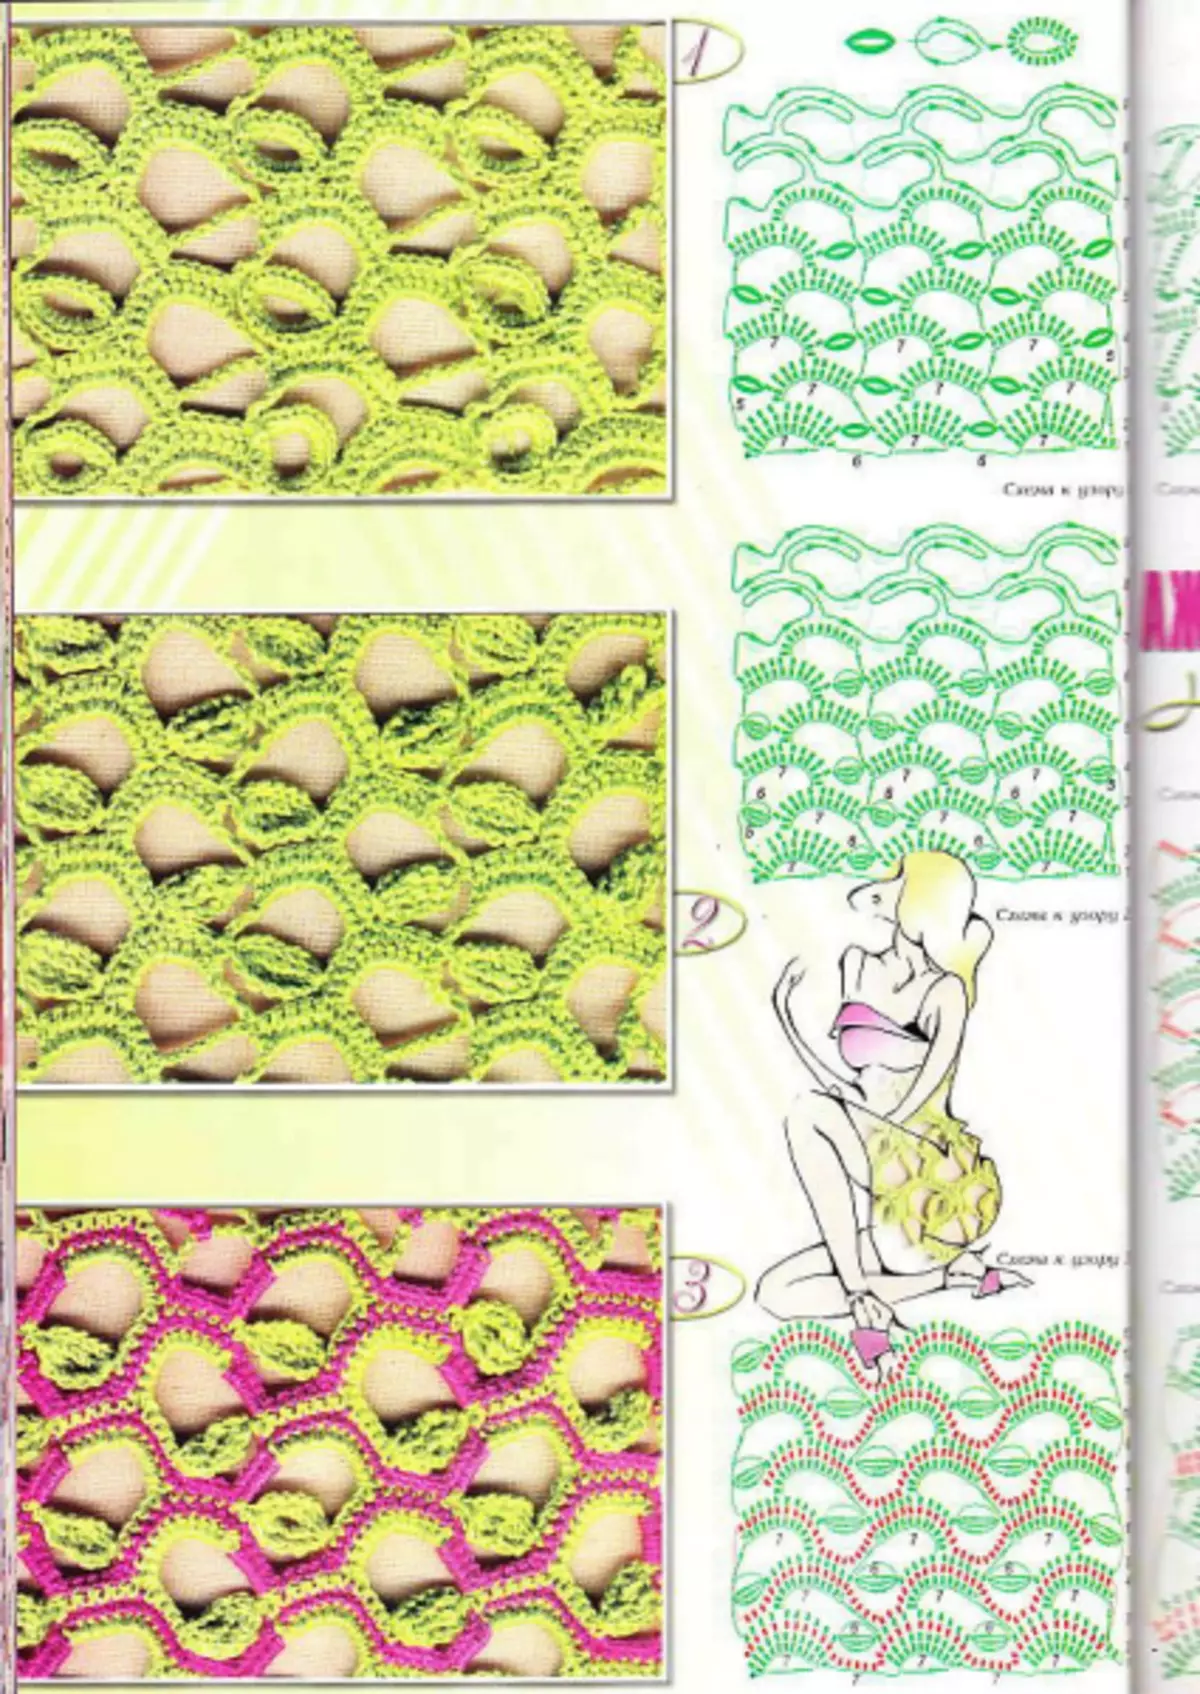
Decorative way
With the help of a combination of air looping and columns, it is possible to create extraordinary and unique patterns. In this way, it is possible to create meshes in the form of honey cells, triangles, colors, circles and many others. Several examples in the images below.
Video on the topic
In conclusion, several videos with detailed master classes to create beautiful grid patterns with a hook.
Article on the topic: how to sew clutch - the best master classes