
Crochet crochet knitting is an exciting knitting section. This technique is based on knitting columns with nakid and conventional air loops, which, alternating among themselves, form a mesh with a certain order. The grid is either filled or empty, and thus the picture can be formed. Fileyan knitting can be created by decor items, as well as clothing. You can implement not only existing patterns, but also invent your own. Next, all sorts of variations of products will be presented, where you can use the crochet, schemes and descriptions will be helped to master the technique faster.
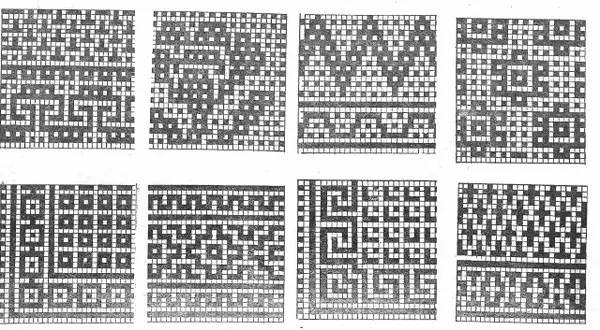
The fillet grid is performed according to the standard algorithm: on the recorded chain of air loops, thanks to the column with an attachment, a drawing begins to appear. The simplest pattern that can be used even for knitting sweatshirts will be a pattern made in the Square location technique over the other. Beginner craftsmen can use such a pattern for their first products for several reasons: it is impossible to allow an error, it will take very little of your time, and it will also work out a good skill training, no one will have time to get bored for such work.
Getting to work
It should be understood how to make the initial first loop, without this, the case will not be moved. You have in your arms and yarn, and hook. Now, if you are right-handed, take the thread, on the contrary, in the left hand, the hook is right. Around the index finger on the left hand, we make a loop, in this loop inwing the hook and we use the thread, which stretches to the submern, then we will call it a working thread. After that, stretching the working thread through the loop itself, remove it from the finger. Tighten the loop as much as it is required on the hook. The first loop is ready!
Article on the topic: Scheme of a lilac bead curb: master class with photos and video
When you mastered the first loop, it's time to move to further actions. Knit a chain of air loops. Their quantity should be safely divided by 4 plus 2 loops plus 2 air loops. The last basic step before creating masterpieces will be familiar with the air loop. When in the hands there is a hook with the first finished loop, then everything looks very simple. It takes the working thread and it has been done through the first loop - that's all! Now we have any schemes.

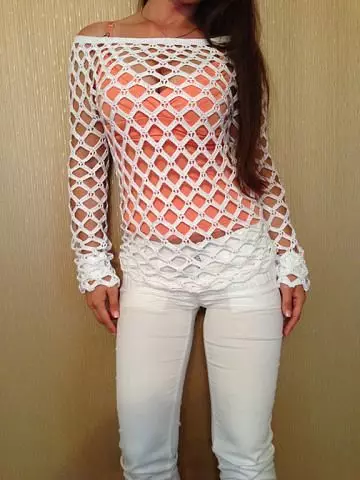
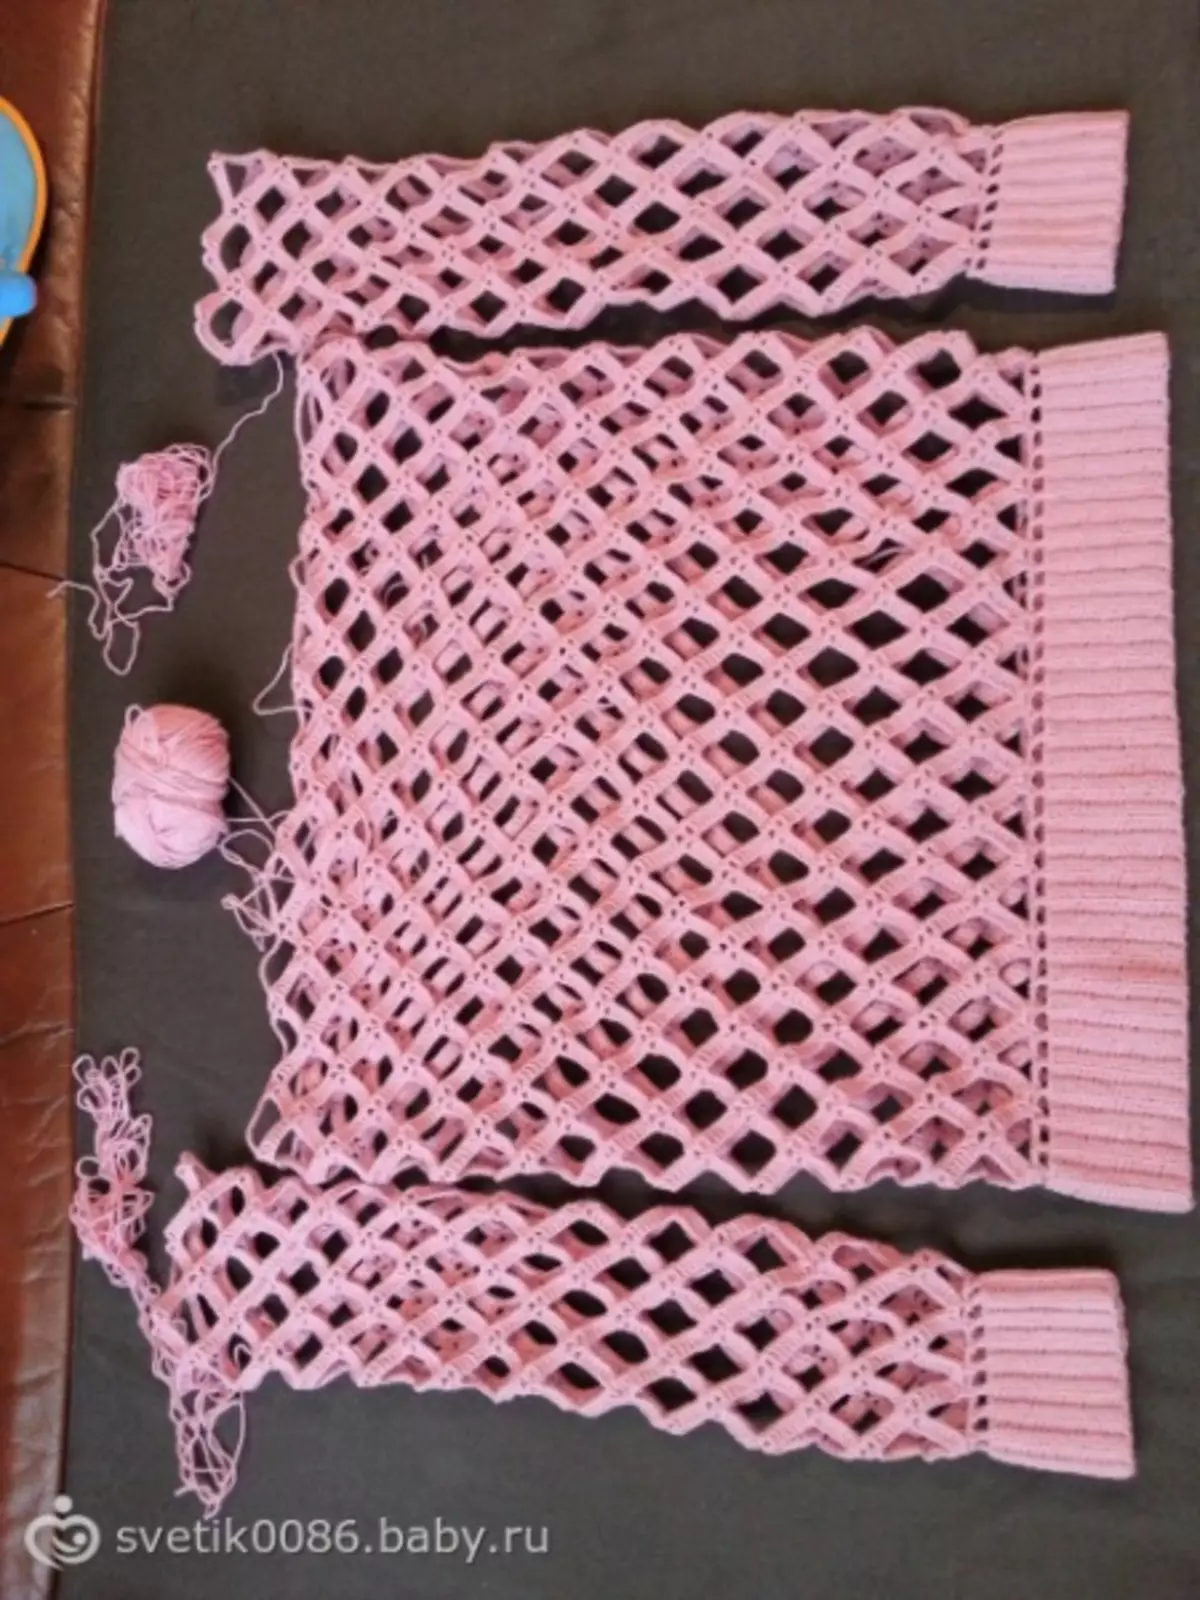
Knit blouse mesh
For blouse we need:
- The yarn is a well-fit composition of cotton and polyacryl, for 44 sizes, 5 engines of 50 grams are enough, that is, 250 grams. There are several additional cross-blocks about the reserve, since the yarn from different supplies can differ in a tonality by adding such a thread into an almost finished product, you can spoil the whole picture;
- Two types of hooks: hook №4 and hook №3;
- scissors.
Now that everything is ready for a knitting process, measure the length of the base for our blouse, it is done, measuring the place where the jacket - waist, hips or stomach will begin, depending on how you have conceived.
Let's try to tie the following sweater:
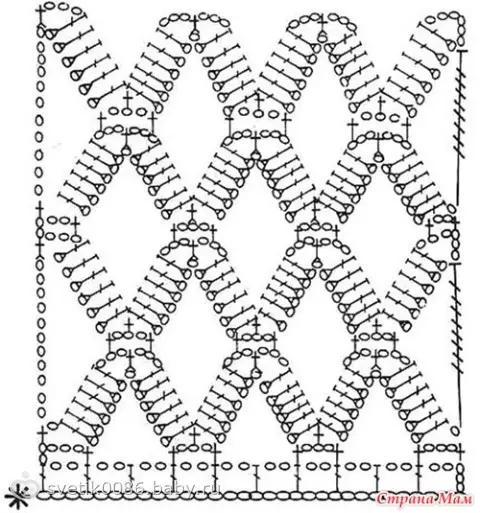
The pattern that we will try to perform:
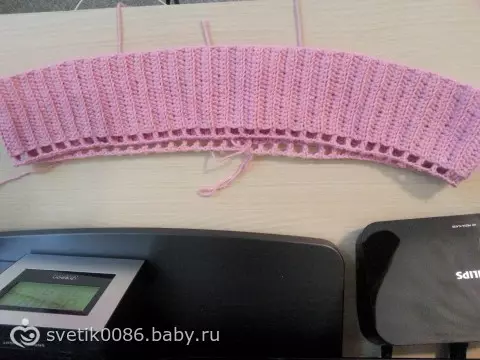
We start with knitting gum. We recruit a chain from air loops, the second loop is knitted by a semi-solitary with an attachment for the back loop, until the very end of the row and knit. After inserting one air loop and turning the work, we perform the same number. After performing several such rows, we get a gum.

We connect the elastic band by tied it with a neat thread, and begin to knit the pattern:
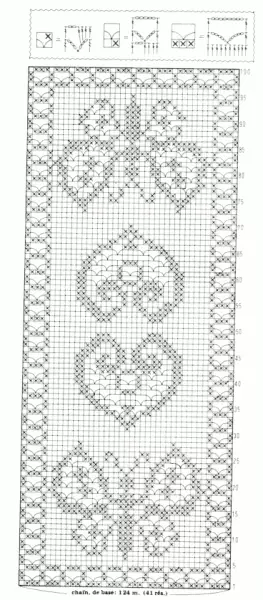
Let's start disassembling the beginning of the scheme, and then we will simply navigate it: the very first row will consist of conventional rhombuses, as can be seen in the picture - four air loops are tied up in 2 columns with an attachment (loop in a loop). After 13 air loops are tied in 4 columns with Nakud columns without a Caida, and then knit three air loops, they in 5 columns with Nakida columns without Nakid. Next, 13 air loops in the seven columns with Nakida bars without an attachment, then 3 air loops so in a circle. Thus, the first row will be completed, which relies on the rhombus. We follow in the same spirit scheme with a pattern. As a result, the first row will be:
Article on the topic: Rose scheme from beads: weaving little bud do it yourself with MK and video

The sleeves of the blouse fit in the same principle, and when the desired length is achieved, joined the total body of the sweaters.
The neck is tied up with a chain of 6 air loops and 6 rows of columns without Caida, as in the photo:
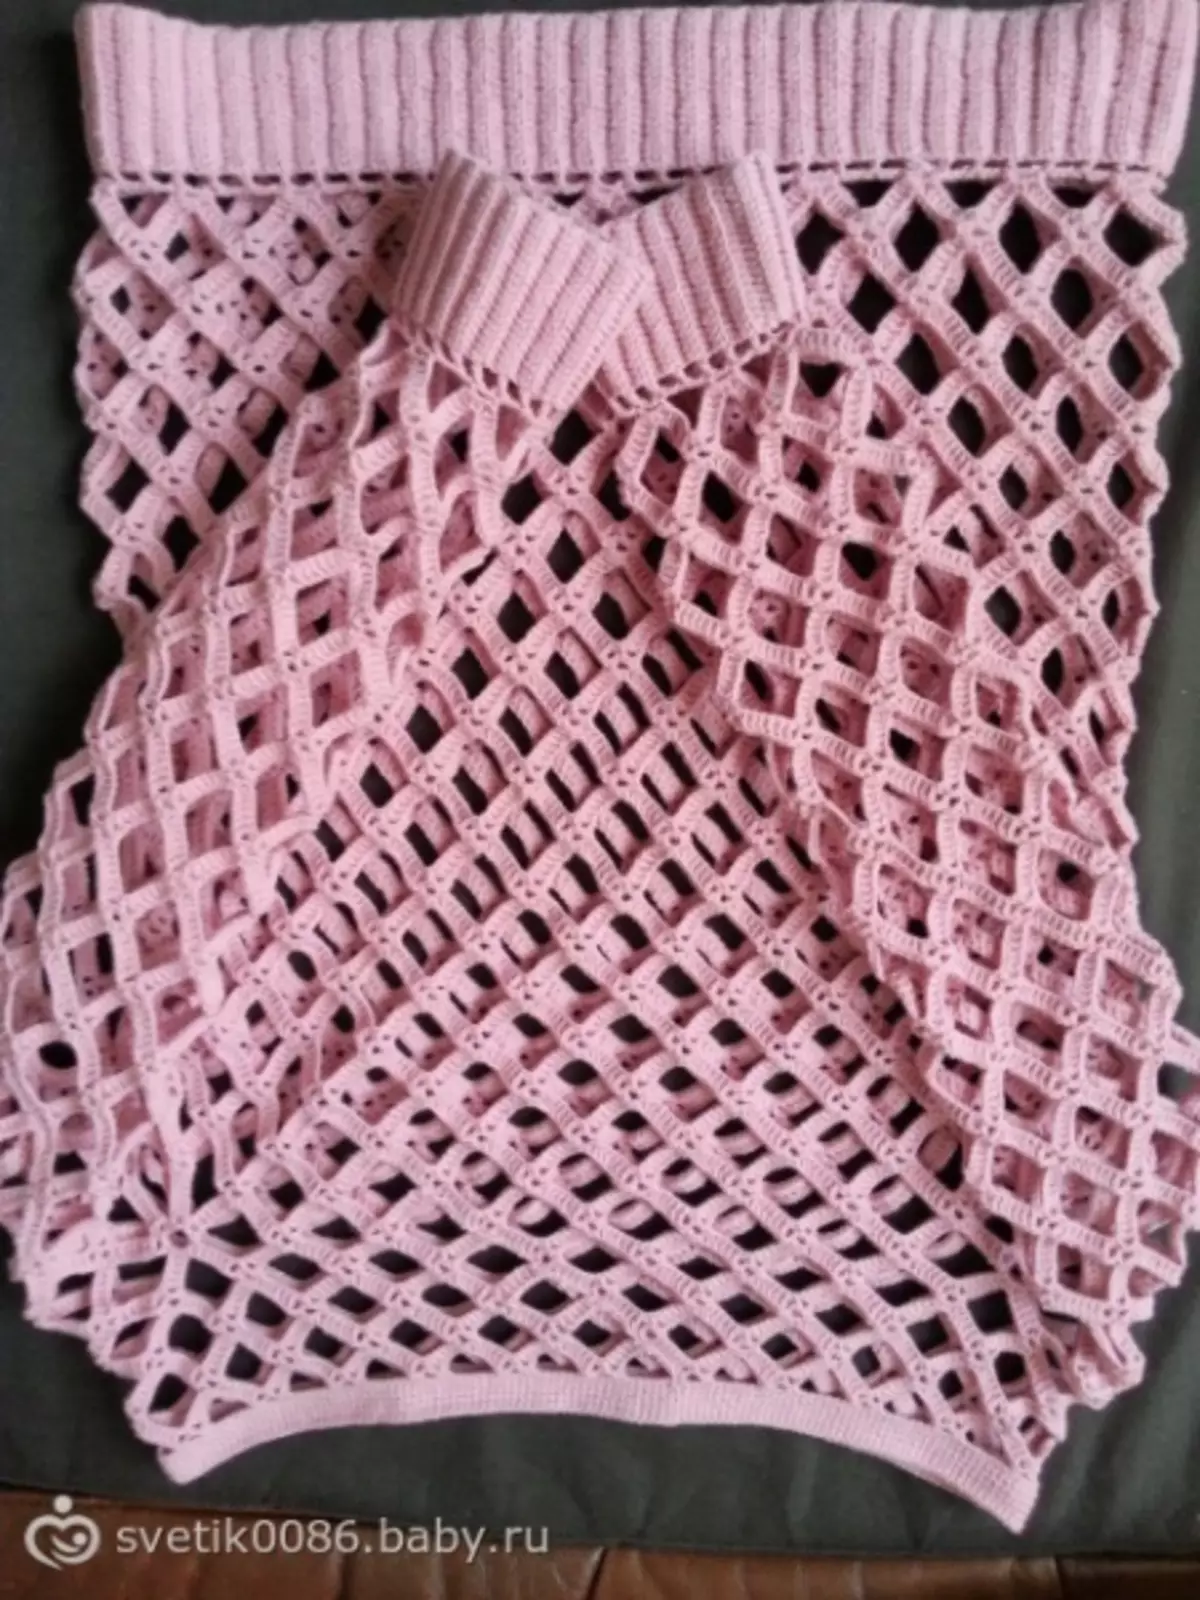
Tunic is ready! It remains only to wear with pleasure.
Butterflies as a state of soul
Every girl, in whatever age she was not, like butterflies. Having mastered the fillet knitting, you can perform the simplest schemes with beautiful butterflies, here are some examples:

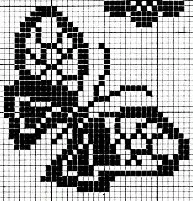
Such small schemes can be used either as a full-fledged completed creation, or as a piece or inserting more extensive operation. You can create interesting combinations. Butterflies will look good on towels, tablecloths, paintings.
The schemes attract them simply: the specified cells are filled, while others remain free, that's all.