
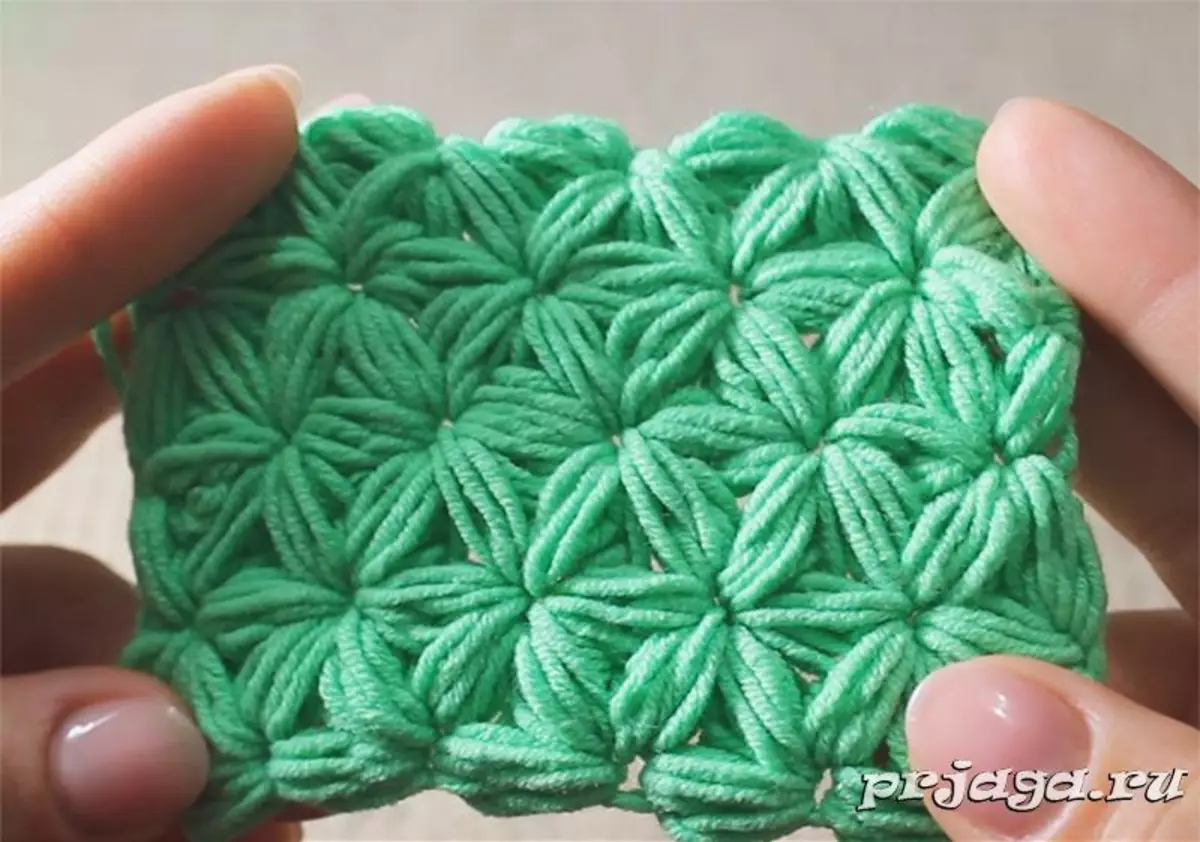
The perception of the hook-related pattern is largely depends on the mood, as well as from the color of the finished product and thickness of the thread. Some can resemble the stars, may seem snowflakes or cause associations with flowers - in any case, the effect and simplicity of this pattern have long made it one of the most popular. To knit a "asterisk" pattern, the crochet of special skills is not required: most of the existing patterns are simply performed. This pattern is universal - it can be used for knitting COFT, dresses, hats, scarves, mittens or plaid.
A warm scarf
For acquaintance with this technique, you can connect a simple scarf, each asterisk on which will be formed from six lush columns.
Under the magnificent columns it is customary to understand the beam from a different number of non-touching columns, which are confused from one common loop and are also connected in a shared loop. This element knits as follows:
- First of all, it is necessary to connect the basics chain, then several lifting air loops - their number will determine the height of the lush column;
- Then the hook make the nakid and introduce it into one of the loops of the base. Which - depends on the pattern, the number of loops missing from the beginning of the product will determine the width of the element;
- Then through the loop of the base, you need to pull out the working thread - to the height equal to the height of the linked threads of the rise;
- The alternation of nakidov and long loops must be continued until the corresponding column width is quoted;
- Such columns are connected in various ways, the easiest and most used - the usual air loop, which is knitting after the thread pulled through the scored column.
In the master class below, each asterisk will consist of six such columns.
Article on the topic: Cap for the girl do it yourself: Scheme with description and video
Pattern scheme:
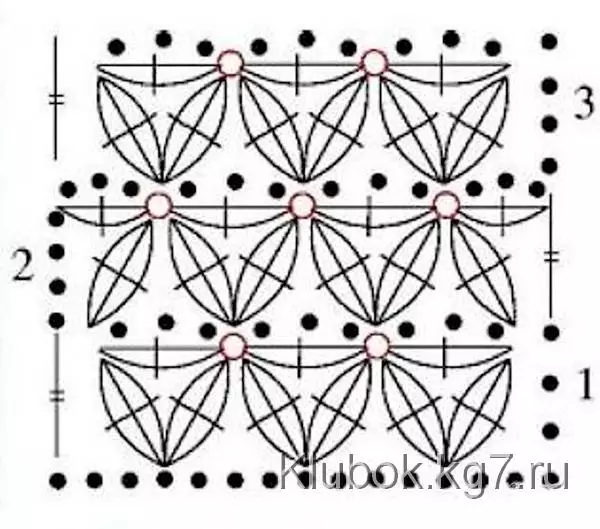
For the base, you should connect a number of air loops. Rapport pattern - two rows. The first row knit four lifting loops. Then through the third loop of the foundation, three lush columns should be connected. At the next stage, you need to tie three more air loops and one magnificent column in a loop, which is connected by the first three. The loop of this column must be left on the hook, tie two more (one to the third, and the second - in the seventh loop of the base), and then combine all the threads that are on the hook. Similarly, knitting continues throughout the row.
In the second, the center of stars shifts: after the same lift, the row should begin with three air loops, followed by four air columns. One of them is inserted into the fourth lifting loop, the second - in the column of the first row with two camids, the third - in the middle of the star.
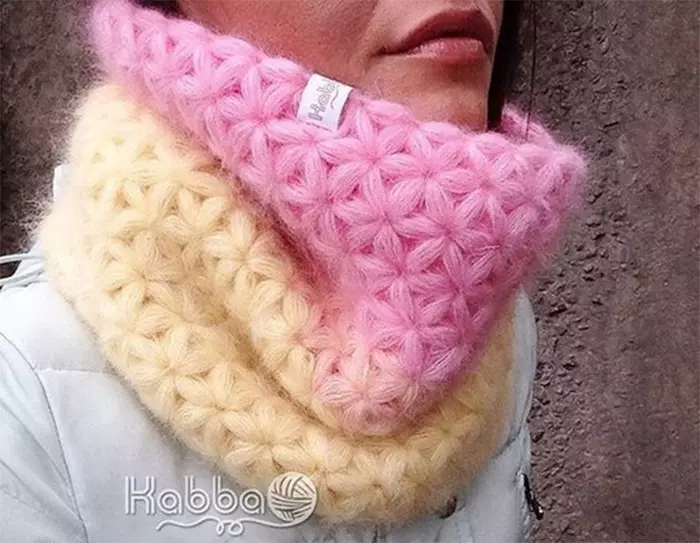
Circular option
It is quite simple and an option of knitting a pattern of an asterisk in a circle that is convenient to use to create a cap or slander. It is also formed at the expense of lush columns, only the order of knitting is different. Start knitting with two air loops. Then, the first of them fit a lush column, which connects the air loop, to tie another air. It is necessary to type the chain from the desired number of such columns, the latter is connected to the air loop on the threads stretched through the column and the very first air loop. Then the lifting column fit in the same loop. In the loop connected it, you need to check one column, but not to bind it upstairs. Another unharmed column fit into the loop, through which the first row was connected to the ring, the third column - in the next left loop of the first row. Thus, on the hook should be scored rolls and long loops, the number of which will correspond to the three columns. Only after that they can be combined with a loop.
Article on the topic: Frog origami from paper for children: Scheme with photos and video by crafts
At this stage, half of the sprocket is formed in the second row, the working thread is in its center. On the hook, you need to again score a loop of three columns that are not connected at the top. One knives in the center of the star, the second - in the loop of the first row, through which three columns are already connected, the third one is in the next left. The columns are again connected to each other. Thus fit the whole range.
The last asterisk in this row should be attached to the upper loop of the column, which formed the rise. Therefore, when it is knitting, you need to dial loops only for two beams, and then combine them with the corresponding loop.
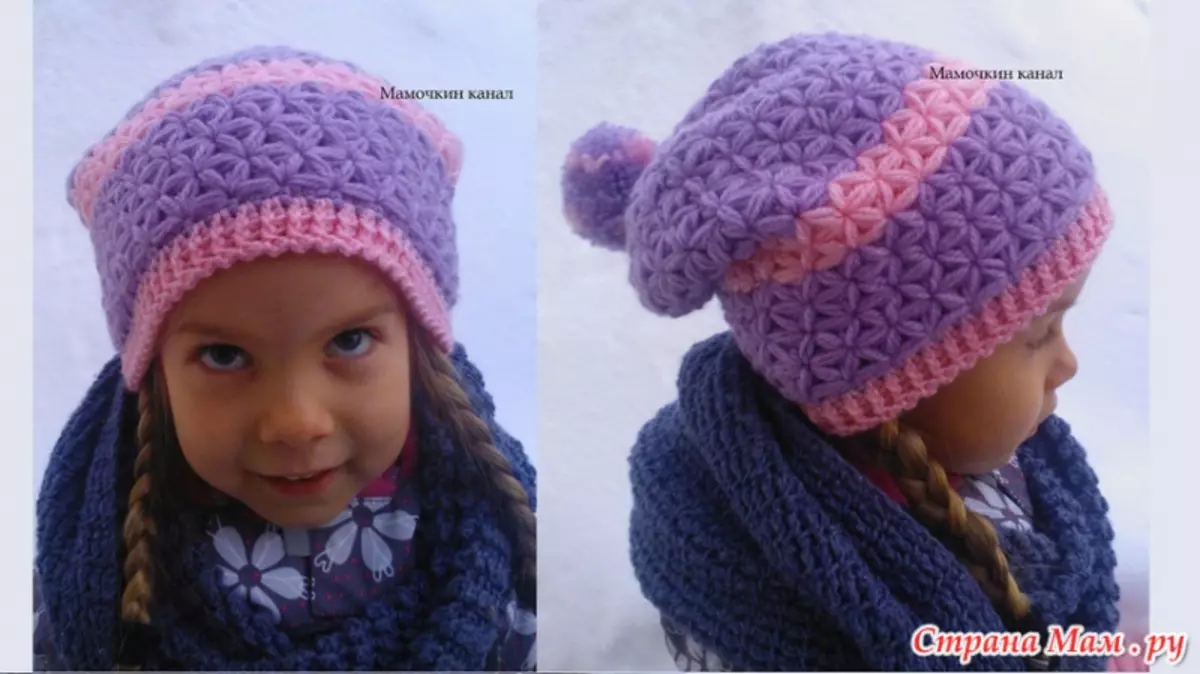
In the event that knitting asterisks are used for the cap or beret, in the upper rows it is necessary to make a believer to save the beauty of the picture. To do this, after the lift column, the loops are recruited for two beams through two corresponding loops (center of the formed asterisk and lower loop), and for the third, a refuting occurs: one thread is pulled out through the corresponding loop (the first left of the bottom), two more - through the next left. Thus, the element of the pattern is slightly shifted to the left. The next asterisk knit, as usual, the burning should be done through one pattern of the picture.
Video on the topic
To knit a pattern, you can be guided by these video lessons.