
A continuous increase in utility tariffs led to the fact that more and more people are installed in their apartments and homes special meters - gas, water, electric, counters controlling the supply of heating. All of them really contribute not only to saving funds to pay for certain natural resources, but also significantly reduce their consumption consumption.
What is the flow of water in the apartment?

For example, we take water supply. In the absence of a meter, the monthly payment of water supply services to the apartment is usually calculated based on the fact that one person spends more than 5.5 cubic meters of water per month. And only by installing the counter, you will realize that the established tariffs are very high. The amount of water consumed by the average man does not exceed 3 cubes of fluid. And if it is also used to use water in economy mode and minimize water consumption, then you can spend a smaller amount, about 2-2.5 cubes.
It is quite obvious that this indicator is almost twice as long as Vodokanal norms. A similar situation with other instruments for taking into account the consumption of natural resources. So it becomes clear the meaning of the installation of meters. But about the process of its installation, let's talk separately and consider how to make it with your own hands.
Install the counter do it yourself
The device of the water meter can be divided into two stages: the assembly of all its parts and elements is the process itself.Article on the topic: Substrate under the warm floor: Water and infrared electric, heat-reflecting lavsan film is better
Assembling meter for water consumption
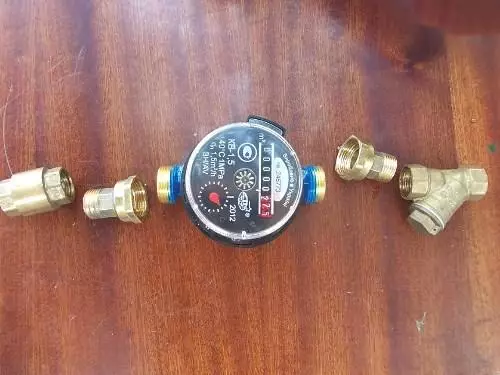
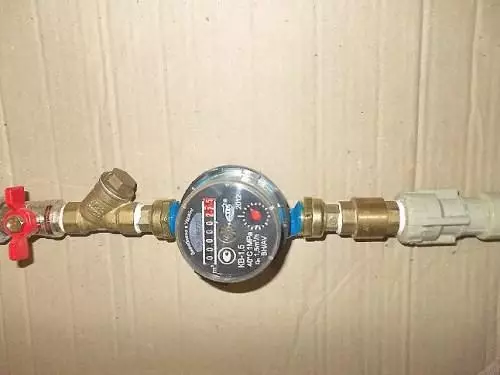
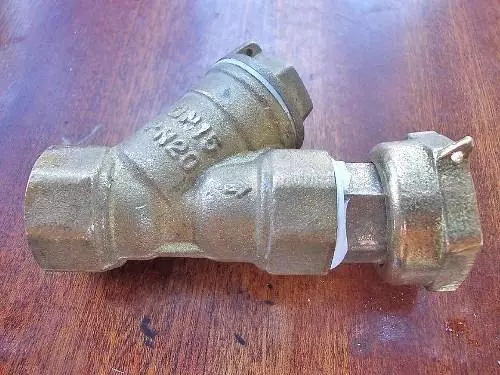
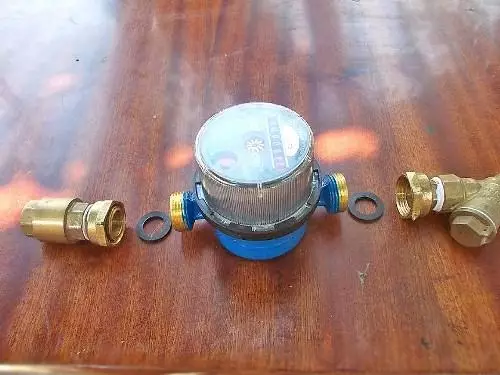
In addition to the meter itself, you will need a filter designed for coarse water purification. With the help of the filter, you can prevent a large garbage from entering the counter, and accordingly ensure its full functioning. You will also need a check valve, the water workers are usually insisted on its installation. All of these sanitary devices are combined into one block, which is responsible directly for accounting of water consumed.
The list of components that the manufacturer supplies includes, as a rule, overhead nuts are American. Such a device allows you to remove the water meter at any time, without damaging the pipes, as well as other parts of the water supply system. These nuts are connected to the check valve and the filter using a pacle and fume ribbon.
At each water meter, the manufacturer provides a special label in the form of arrows, they indicate the direction of water current passing through the device. In accordance with these tags, presenting how water passes through the counter and you need to collect it. Unfortunately, not always the new masters observe the direction when installing the meter.
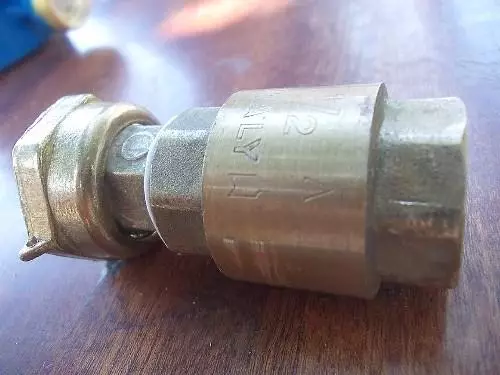
On the side of the shooter, an American is screwed to the filter, and from the tail side to the reverse valve. No windings in the form of a pacular, tape FMU or other species here does not apply. At the same time, the American seal should be exclusively by paired or rubber gaskets of suitable size.
As for the meter itself, it should also be installed according to the direction of water movement. On its case, as well as on the reverse valve and the filter, an arrow is indicated, according to which the correct installation of the accounting device is performed. The arrow mark should be located in the direction from the crane of the cutting, it is installed on the rising water supply.
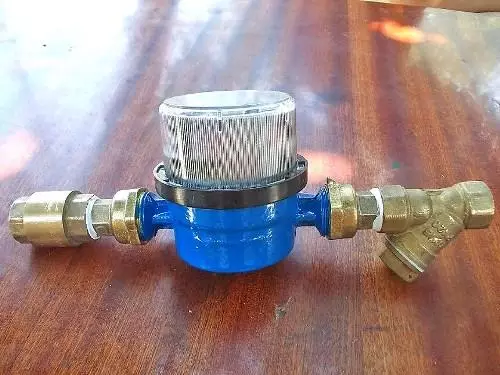
Strictly observing the designated directions, connect the check valve and the filter to the meter using the cape nuts and rubber seals. Once again we pay your attention - the water consumption accounting device will not work correctly if at least one arrow indicates not the direction. In this case, the counter can be wind into another, the opposite direction, or the water will not go to the plumbing equipment at all. And it is quite obvious that the representative of the Vodokanal caused by you because of such an installation will not be partitioned by the counter.
Article on the topic: What to do if the child ate the wallpaper glue
Rules of installation of the water meter do it yourself
How difficult will be the work on the insertion of the meter into the water supply system entirely and completely depends on which pipes it is assembled. Especially time-consuming will be the process of the pitching of the water meter into a plumbing network made of metal pipes. In this case, you will need a special tool, both for cutting pipes, and the machine for cutting the thread. One location of the connection will be a crane that cuts off from the water supply system where there is already a sliced thread, the response thread on the attached pipe will need to be chopped independently.
It is quite different things in the event that the water supply is assembled from a polypropylene or metal-plastic pipe. This is a less labor-intensive process, because such pipes easily cut even with the help of a conventional kitchen knife. Certain difficulties may occur only when working with a polypropylene tube, a special soldering iron may be required here for pipes, as well as the master who knows the technology of soldering polypropylene pipes. The rest of the inserts, as a rule, does not represent special difficulties.
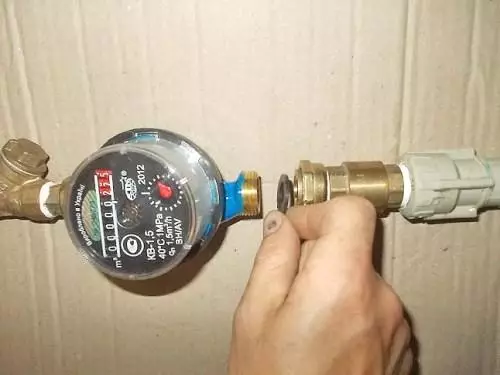
Let us dwell on the process. To begin, the pipe is cut, the collected block of the water meter is completely joined to the cutting crane. All these connections are made using the FMU tape or pack. Capitalizing the water meter to the crane, we measure and mark the location of the response, excess part of the pipe cut off. At the location of the cut, it is necessary to either solder or cut into the thread, you can also set the fitting from the metal-plastic system.
After that, it follows from the assembled water meter unit to disconnect the check valve, with an existing American, and again applying the FMUD tape or the pass to attach it to that thread that just was done by us.
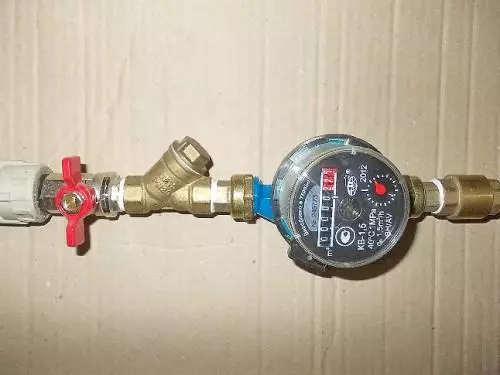
Here, perhaps, our work is nearing completion. It remains only a few trifles - to re-connect the counter with the American, to open the crane cutting off from the riser and carefully check all the available threaded connections. If all items function normally, no connection gives to flow, it means that you have successfully coped with the work and the accounting device is ready for operation. Once again, carefully checking the location of the guide shooters, we call a water voltage specialist for sealing the counter.
Article on the topic: how to insulate a tap pipe in a private house