Each owner of the housing is trying to make accommodation in it more comfortable. To achieve this goal, the room is decorated with high-quality modern wallpaper, stucco, walls, floors and ceilings with various materials. And these materials today are a huge amount.
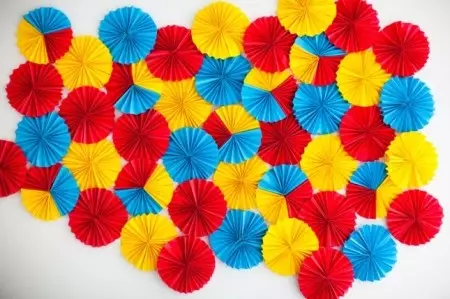
Panel from colored paper can be an excellent background for photos during a party, its manufacture requires minimal spending time, strength and money.
One of the common ways to improve the housing is the design of walls and ceilings, and sometimes floors, various panels with their own hands.
Panels are often used to decorate ceilings and walls in the bathroom. To do this, it is enough to buy a special tile, which, with proper laying, gives any image, and make a ceiling with a stretch material with a colorful pattern. But you can make the original panel with your own hands with your children and grandchildren. Joint work adults and children will always benefit. How to make panel with your own hands? Let's start considering various options since the easiest.
Manufacturing a pair of buttons
Panel with your own hands can be made from ordinary buttons. In almost every family, a box or a box with these things, which served their time or waiting for their turns. It is a pity to throw them away, and this use does not always succeed. Here is one of them and you can try to make a panel with your children, which will find your place on the wall. To work you need to cook:
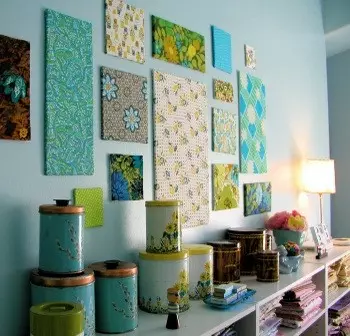
A panel of fabric is very simple in the manufacture, for this you need different tissues.
- Multicolored buttons of different sizes and shapes;
- Beads, beads, rhinestones and other trifles of this kind;
- the basis of dense cardboard, felt, velvet paper sheet;
- markup pencil;
- glue or adhesive gun;
- jelly tweezers;
- several toothpicks;
- Frame for placing a finished panel.
Manufacturing begins with a sequence. For a children's room, it can be an image of chicken, bunny, tree, butterflies, fairy-tale character. It depends on the colors of buttons. For the crown and tree trunk, you will need a lot of green and brown buttons. For chicken, the most applied yellow color.
The contours of the favorite plot are applied on paper, cut out and fixed on the basis. Inside the contour, buttons, beads, beads, beads are laid out without glue. Children with great pleasure will help adults in this lesson. Having chosen the final version of the composition, the details are started. A drop of glue is applied to each of them, the part is glued into place. At first it is recommended to glue large buttons, then fine beads and beads are fixed along the contour. Glue on small details are applied to the toothpick. Putting them into place conveniently tweezers.
After the glue is completely dry, the finished image is inserted into the frame. The finished panel can decorate the box, you can hang it on the wall, give someone. Such an easy way is performed the simplest, but rather original panel, which can be a real work of art. Similarly, you can create a panel of any sizes and plots, sticking parts based on a wall or any other surface.
Article on the topic: How to sew a loop on the curtains with a needle or crochet?
Coffee beans panel
Original panels are obtained from coffee grains. Of these, you can lay out big sizes in the picture that can decorate the room and fill it with unique coffee aroma. Materials for work:
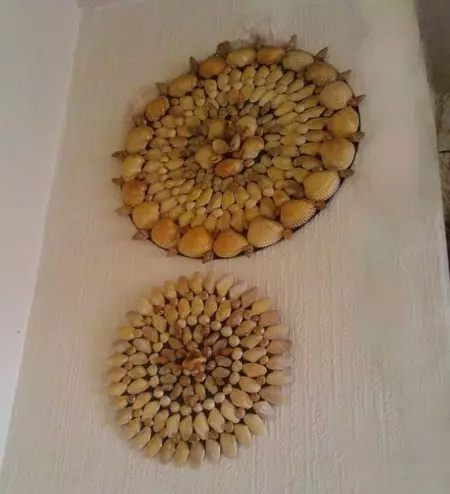
A panel of seashells is suitable for those who love to relax on the sea. If you hang him in the bedroom, it will remind you of a perfect vacation on the shore.
- Coffee grains, some of which can be fastened, part remain green;
- Natural ground coffee;
- plastic empty bottle;
- Scotch;
- scissors;
- Cardboard with a thickness of about 2 mm;
- PVA glue;
- Tassel for glue.
Manufacturing process:
- From an empty plastic bottle, you need to cut off the upper part;
- separate the place where the plug is tightened;
- Cut the resulting item along half. As a result, harvesting, resembling halves of a coffee cup;
- The bottom and the rear of the receiver are cut out of the cardboard;
- All items glued together with each other;
- Wrap the resulting product with a scotch for protecting plastic from deformation;
- Apply a layer of PVA to the surface wrapped with scotch, sprinkle with ground coffee;
- Cut from cardboard Detail resembling saucer;
- get it with ground coffee;
- When the glue is dry, glue the cup by grains of coffee. Work starts from the edges. As a result, a beautiful cup should be obtained;
- In the same way, the saucer is separated;
- It remains the basic parts to glue and decorate with additional decorative elements in the form of spices, ribbons, threads and other materials.
The original small panel with a pleasant aroma is ready.
Panel of colored paper
The original panel that can perform the background function to decorate the room on the day of the family celebration, easy and easy to make from paper of different colors. Its dimensions are not limited. Children, too, are pleased to take part in this work. For the manufacture you will need:
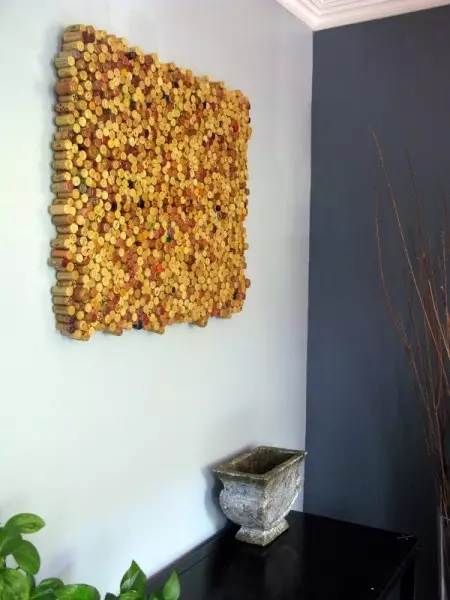
To make a panel from traffic jams, need plugs of different size and shade.
- paper of different colors;
- Stationery clips;
- stapler;
- Scotch.
Sequencing:
- A sheet of paper of any color must be folded by the harmonica and bend in half to get like a semblance of a fan;
- Interior faces can be connected by the stapler;
- make many similar shapes of different color and size;
- from several figures to collect a circle;
- The finished circles are attached to the base that the wall can be. Panel for placing jewelry, photos and other decor elements, ready.
Panel from various fabrics
Fabric panels in apartments and homes are used for a long time. Make it very simple. It is necessary to prepare a fabric suitable and texture, several flat pieces of foam of the right shape and two-sided tape. You will also need sharp scissors. Scotch is placed on the basis of the foam from the rear side. The fabric is stretched to remove the fold and glued to the scotch. It turned out a very light panel, which can be attached to the wall with a putty. On the panel can be attached to photos, artificial and dried flowers, or leave everything in untouched.Article on the topic: Wall decoration MDF panels
Wine Cork Panel
Such a panel looks unusually, it's not very simple to make it, because it is difficult to collect the required amount of traffic jams. In their collection, friends and relatives should help. Well, if the plugs are different size and shade. To work will be required:
- sheet of plywood for the base;
- mastic;
- liquid Nails.
Liquid nails are applied to the base stripes. Corks in randomly glued to plywood. When the entire surface is covered with plugs, they are covered with mastic. You can use varnish instead of mastic. Panel is ready.
Panel with 3D effect
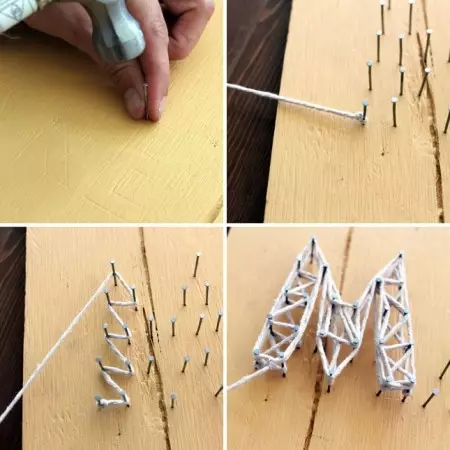
Panel from nails are often used to decorate ceilings and walls in the bathroom.
This product can be performed from 2 identical cards or paintings. Consider the manufacturing process on the example of postcards. In the process of manufacturing panels, children can take part. The interior of the room is decorated with a finished product, you can make a gift to someone by choosing the desired plot of images. Children in the course of work will be fastened by the skills of handling ruler, scissors and glue. For work requires materials:
- 2 images on postcards (they should be completely the same);
- White cardboard for the base;
- Frame in which finished work will be inserted;
- Line and pencil for marking (good to use a portable flight);
- scissors for cutting card;
- PVA glue.
It's time to start work:
- The postcard turns on the table with the back side up and places on the strips. You also need to enroll with another postcard. Strip width is 5 mm.
- Strips need to be numbered, starting from the right edge of the postcard.
- Card scissors are cut on the markup. The strips of each postcard are folded into different handhes.
- On the basis of white cardboard sticks strips in order of numbers. First, the strips are glued with the number 1 and 1, then 2 and 2, 3 and 3 and so to the end. Begin to glue items from the left edge of the base. The upper and lower edge is thoroughly aligned.
- Excess cardboard is cut off.
- Work is inserted into the frame. Panel is ready. It can be put on the shelf, hang on the wall.
In this technique, you can perform other work using a variety of materials.
Cute Watchpad and Hieroglyphs
Of the 13 approximately the same single frames, original wall clocks are obtained. In the 12 frames, various applications are inserted, in the last hour mechanism from ordinary Chinese clocks. Instead of arrows, you can attach plastic tablespoons or forks, capetail straws, other items. 12 frames are placed on the wall in a circle, a frame with a clockwork - to the center of this circle. Watch-panel is ready.Hieroglyphs attract happiness and good luck into the house. So they say the Chinese wise men. You need to take a bamboo stick and cut it into 4 parts. Of these, connect the frame that to pull the tight piece of fabric. Fabric can be replaced with skin, cardboard, other material. Draw a hieroglyph and hang on the wall. The outlines of the hieroglyph can be sewed, stick out of girlfriend.
Wall panels from wallpaper
For the manufacture of such panels, you need some skills with a baguette. Needs the following tools and materials:
- Wall baguette for frame;
- a sharp knife for cutting baguette;
- level to accurately construct a rectangle;
- marker for performing markup;
- line for vertical and horizontal markup lines;
- Stuslo for pumping baguette at an angle of 45 degrees;
- Hacksaw with small teeth.
Completing of the work:
- On the wall place and spread the rectangle of the intended size.
- On the markup, stick the baguette chopped in the form of a frame. You can glue with special glue, which is selected depending on the baguette material. The foam and polyurethane foam baguette can be glued using the finish putty.
- Excess glue is removed with a damp tassel.
- The frame is painted with moisture-resistant paint of any color.
- Wallpaper pasted inside the frame. Initially, you need to form bending, pressing the plastic spatula into an angle formed by the frame and the wall. Then the cloth of the desired size is completely cut and glued to its place.
- Decorate the whole composition of the scab or other lighting device.
Panel from egg shell
An egg shell is suitable for making panels. For example, it is worth considering a fairly simple option:
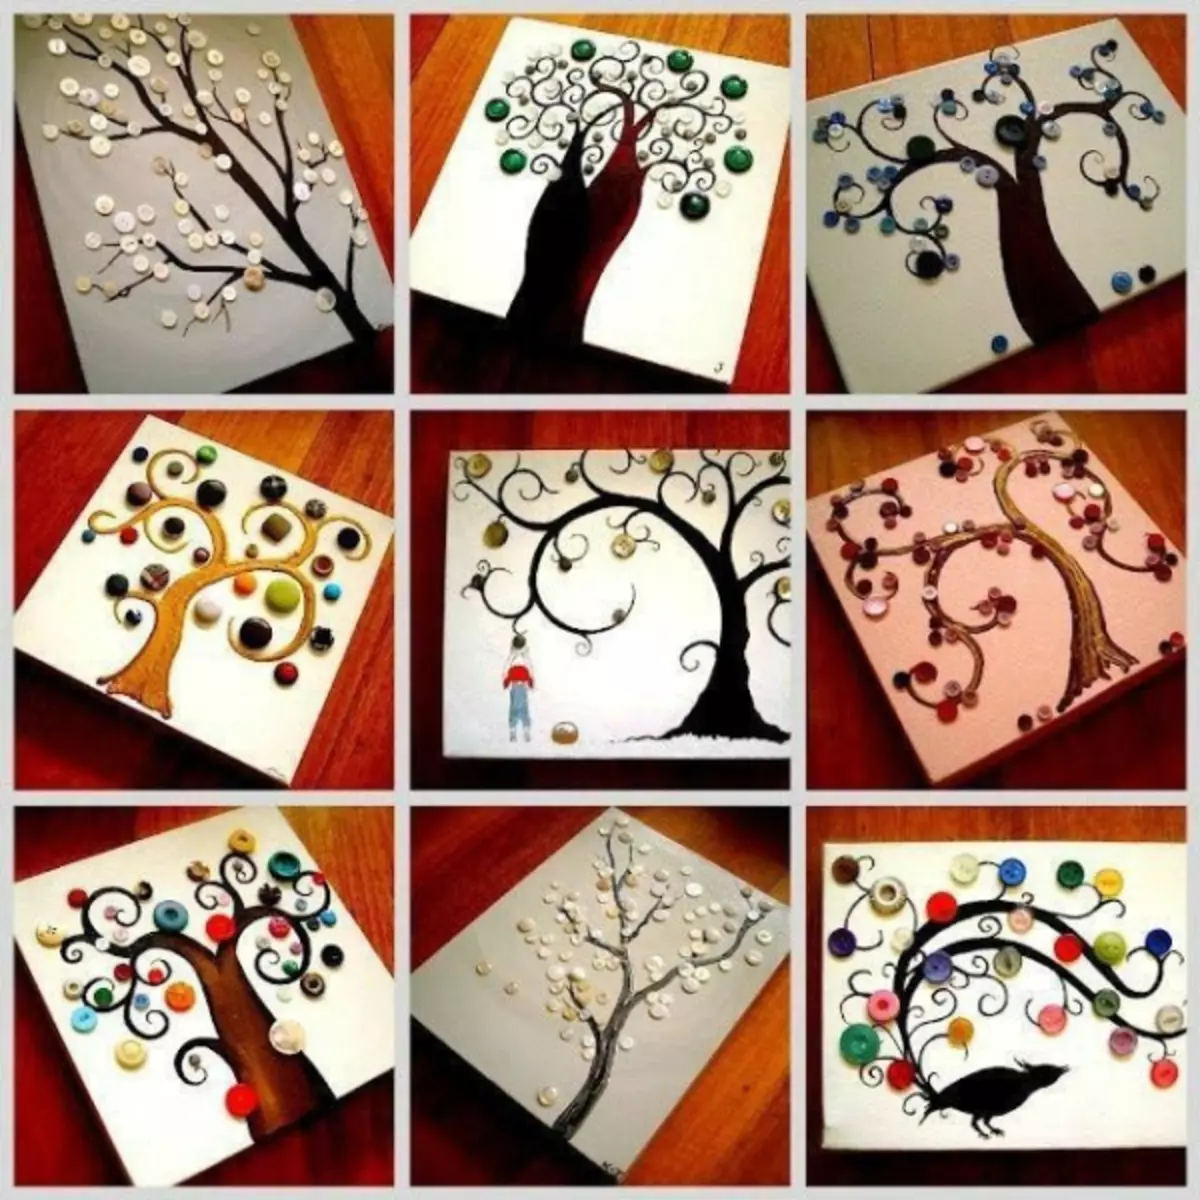
Manufacturing panels from buttons begins with a sequence. For the children's room, it can be an image of butterfly, chicken, tree, fairy-tale character, bunny.
- You need to take the basis in the form of a plastic plate or tray and carefully to open.
- Wipe the surface and cover it with acrylic paint.
- The contours of the picture are transferred to the traction with a simple pencil.
- The reverse side of the carting is stuffed with a layer of soap and applied to the basis of the soapy side.
- The contour of the image will be burned with a pencil, which after removing the carting is imprinted on a plate.
- The loop based on the marker.
- The egg shell is soaked in cold water tanks, frees from the inner film and dried.
- The shell is painted in the desired color with acrylic paints.
- Suitable pieces of shell are glued along the contour of the PVA glue. It is even better to use glue Holzlimm. After salary, the contour proceeds to pasting space inside it.
- The finished panel can be covered with glossy car varnish and dry well. It turns out about the following form.
Any panel on the wall is not always a picture, but can already hide some wall defects and transforms the appearance of the room. For the manufacture of panels, we use a wide variety of materials: beads, buttons, iron chips, mosaic and rhinestones, paper, glass, ceramic tile fragments, fabric, paint and much more. Original panels can be made from sea seashells, which will be reminded of rest on the sea. There are many options. Non-existent can be invented and put on the idea of life alone.
Article on the topic: Water level with their own hands. How to use hydrorem?
