
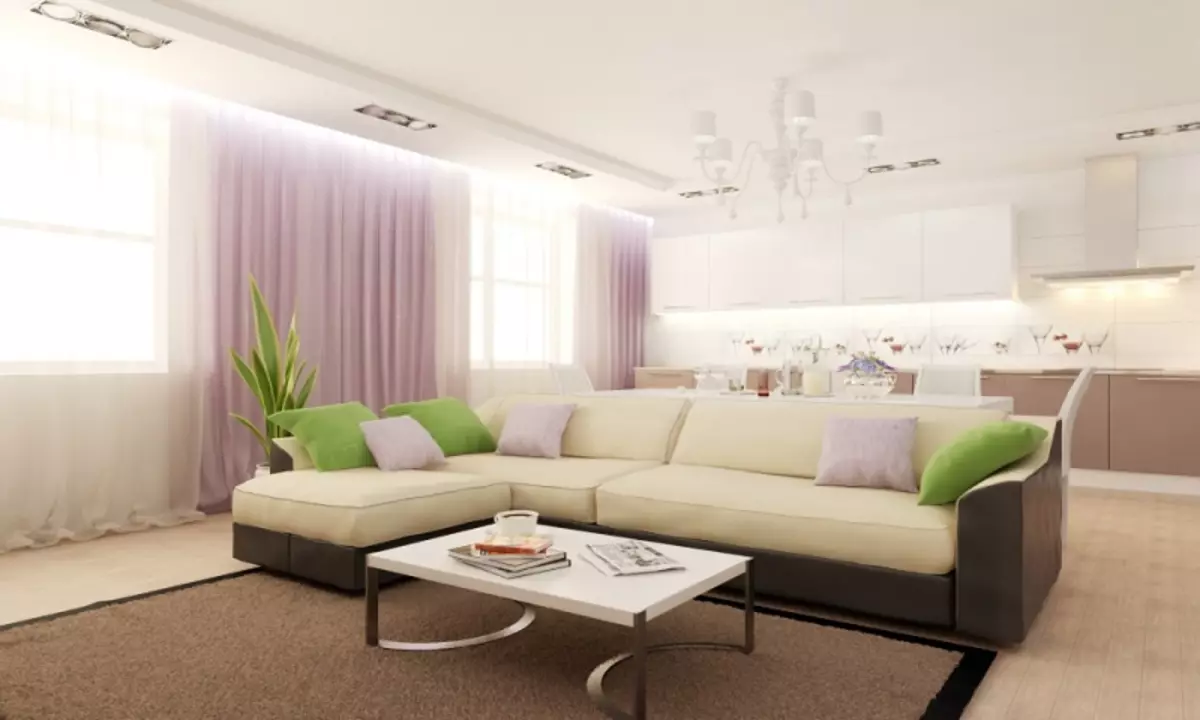
Recently, popular kitchen combined with living room. The transfer of cuisine in the living room is especially relevant for residents of small apartments, where the release of the room (albeit is small) is the expansion of the living area. Such a transfer is often due to the insufficiency of the area of the kitchen itself, which causes many difficulties from the owners.
It is forbidden to combine the kitchen with a room above the residential premises.
In general, the transfer of the kitchen in the living room, as in any other room, it is a completely legal process. However, it requires coordination in the relevant instances responsible for redevelopment of apartments. In case of obtaining permission, the owner of the apartment can be transferred to the kitchen both on their own and with the involvement of specialists. The redevelopment process itself includes a number of complex procedures for the arrangement of new communications, but quite solvable.
Advantages of kitchen transfer in the living room
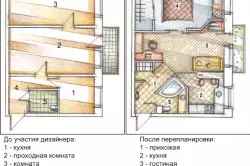
Kitchen alignment scheme with living room.
The main advantage of the cutting of the kitchen is the expansion of its free space, including the working area. In such unlimited walls, several people can participate in the cooking process at the same time. An important condition is the release of the room, which was intended for the kitchen. In this room, there may not be a bedroom in this room, but there are no restrictions on using it under the office or a workshop. In addition, the hostess during cooking for a long time is isolated from the family, and the kitchen and living room helps combine kitchen work with live communication with relatives or guests. It is especially important if you have small children.
The disadvantages (or difficulties) of the transfer of the kitchen include the duration of coordination of the resolution of the apartment, the complexity and considerable cost of transferring communications, the transition from the gas to the electric stove, the need for constant monitoring of the cleanliness of the kitchen area and the operation of the ventilation to prevent the dirt spread Unpleasant odors and soot on the living room (especially on upholstered furniture).
Reference requirements
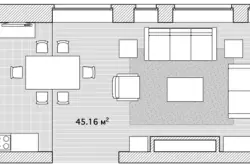
Kitchen-living room plan
You can transfer the kitchen in the living room only after receiving the resolution document to redecessing the apartment. Such a document is based on existing regulatory requirements, which include a number of prohibitions and restrictions. Restrictive measures are caused by the fact that the kitchen refers to objects with elevated water and gas hazard, as well as to sources of unpleasant odors.
The regulatory act is prohibited by the transfer of the kitchen into the room located above the residential premises, without adopting additional measures. Such a ban is justified by the risk of flooding the neighbors from the bottom. To obtain permission, it is necessary to manufacture a waterproofing layer in accordance with the established standards. It is quite difficult to produce it. Restrictions do not apply to residents of the first floor, as well as on apartments located above non-residential premises (shops, offices, etc.).
Article on the topic: Why does water from the boiler the smell of hydrogen sulfide?
Based on gas security, it is almost impossible to obtain permission to redecessing the gas-distribution system. This means that the transfer of the gas stove from the kitchen in the living room is not allowed. The illegal transfer of the slab is fraught with large fines and is dangerous for life.
The established norms are limited to combining premises with a significant difference between the average internal temperature. This limitation indicates that it is difficult to obtain permission to accommodate a new working kitchen area (where the stove is placed) along the wall bordering the street or a laptile balcony.
Finally, certain requirements are put forward to the mandatory exhaust ventilation. At the same time, the kitchen ventilation system cannot be combined with the exhaust system of the bathroom to eliminate the likelihood of the redistribution of unpleasant odors.
Features of the kitchen transfer process
The transfer of the kitchen in the living room is carried out only if there is a resolution document on redevelopment of the apartment.
At the stage of obtaining a permit for redevelopment of the apartment, a scheme for placing the kitchen area with the placement of the communication system is approved. Before starting work, it is necessary to work in detail the plan for the installation of kitchen furniture, sinks, electrical appliances with refinement of the number and placement of electrical sockets and switches. The question of zoning the kitchen zone and its interior are being worked out. It is advisable to produce cuisine simultaneously with the overhaul of the living room, as it is impossible to produce work without dismantling outdoor coating.
Directly work on the transfer of the kitchen in the living room is carried out in several stages. Initially, all types of communications are summed up: electrical wiring, water supply, sewage, ventilation system. Then the floor covering is restored, the walls are repaired and the ceiling. After that, the installation of the sink (washing) is made, the installation of electric stoves, kitchen furniture and electrical appliances. In the final stage, the zoning of the kitchen, interior design, the installation of the lighting system, is completed, the decoration and installation of accessories are carried out.
Installation of the electrical network
Electrical work and wiring scheme in the kitchen.
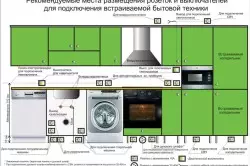
The first stage of kitchen transfer begins with the installation of an electrical network. Due to the fact that the consumption of electricity in the kitchen area is higher than was provided for the living room, it is necessary to bring a new electrical circuit. The main electrical load will be on the electric stove, so a separate wire with copper conductors with a cross section of at least 2.5 mm² is directed to the location of its connection. In places of planned connection of kitchen electrical appliances, outlets are mounted. Wire is supplied to the place of connection of ceiling or wall lights, and the corresponding switch is installed.
The wire laying is made in punched channels (strokers). It is advisable to further protect the wires with plastic corrugation (or casing). Connecting the kitchen electrical power grid to phase in the camshaft should be made via a protective shutdown device.
Tools required for electrical installation:
- Perforator;
- bit;
- a hammer;
- pliers;
- nippers;
- screwdriver;
- tester;
- knife.
Installation of a water supply network
The correct laying scheme of the sewage.
Article on the topic: Bamboo rolled curtains in the interior: Advantages and Disadvantages
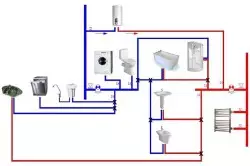
The next operation of the installation of the communications system is the installation of water pipes. Laying pipes for cold and hot water begins with a riser that provided water supply kitchen, but due to the change in the arrangement of the shell, the length of the pipes increases. Water pipes can be used as water pipes, but metal-plastic pipes have shown more reliably.
To the place of the planned installation of the sink, the plumbing pipes are advisable under the flooring. The vertical section of the floor water supply to the mixer can be laid in the channel, pierce in the wall, or on the wall surface. In the latter case, the pipes can be closed with decorative plastic casing. In places of passage of pipes, the corresponding hole makes itself through the wall using a perforator. The connection of pipes is made using couplings or welding (for metal pipes).
For installation of the plumbing system requires the following tools:
- Perforator;
- bit;
- a hammer;
- Bulgarian;
- file;
- Gas and adjustable key.
Installation of sewage
Method of wiring of the water supply system in the apartment.
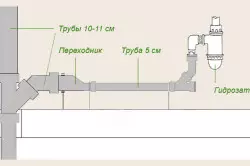
The degree of complexity of the installation of the sewer plum depends on the distance between the sink and sewering rummer. Drain is carried out by a water sample, and therefore the sewer pipe must be located obliquely (20-30 mm lowering per meter of length). With a short distance to the riser, such a tilt can be placed under flooring, but with an increase in the distance of the floor thickness, it is not enough to cover the pipe. In this case, the masking of the sewer pipe is performed using decorative casing or box along the wall, as well as by installing furniture elements.
If the masking elements do not fit into the kitchen interior, the sewer tube will have to be located horizontally under the floor surface. With this installation it is necessary to ensure forced drain using a low power pump. Such a pump must have independent power supply and turn on as the need to remove water from the sink. Installed pump under the sink.
A plastic pipe is recommended as a sewer plum. A plastic siphon is fixed under her sink.
Installation of the ventilation system

Ventilation system.
The first stage of the cutting of the kitchen, which includes the installation of technical communications, is completed by mounting the ventilation system. To ensure good cleaning of the kitchen area, forced ventilation requires, and its output can be carried out only in the removal performed in the kitchen, or directly to the street. The output of the ventilation channel through the taps of the bathroom and the bathroom is not allowed. When the ventilation is output to the street, the ventilation system should not interfere with the neighbors, which requires additional external taps.
To connect to the diversion of the previous kitchen, as a rule, it is necessary to mount a sufficiently long ventilation box. In the presence of a suspended or stretch ceiling, broaching such a box does not cause complexity and is easy to disguise ceiling plates. If there are no suspended ceiling systems, you can disguise the box by laying it along the wall in the ceiling and cladding plastic plates.
Article on the topic: Cement-sand tie density: Specific weight

Tools necessary for work: hammer, perforator, drill, pliers, screwdriver.
Forced ventilation is ensured using an exhaust fan. Air suction above the working area of the kitchen can be provided through a hole (or several) in the wall or using a ple-type cap.
Ventilation Mounting Tool:
- Perforator;
- drill;
- knife;
- pliers;
- screwdriver;
- a hammer.
Repair of kitchen zone
The second stage of kitchen transfer to the living room is to repair the floor, walls and ceiling. Initially, the floor finish coating is restored, with which tube communications are closed. Then the plaster and putty of the walls and the ceiling, masking hidden electrical wiring, close the slots in the places of passage of the pipes and the ventilation box through the wall. When using the mounted ceiling, it is installed with the simultaneous installation of point lamps.Installation of furniture and equipment
The last stage of kitchen transfer begins with the installation of the sink and the mixer with their connection to the tap pipes for cold and hot water and sewer plum. Then the electric stove is installed in the ventilation discharge zone. Furniture and kitchen appliances are located in accordance with the selected optional option and the interior style. The last stage is completed by mounting lighting devices. Depending on the selected style, it may be chandeliers, ceiling or wall lamps of different types. The main requirement to them is: the coverage of the working area should be bright. When transferring the kitchen, it is recommended to maximize the access of natural light through the window.
Principles of zoning kitchen
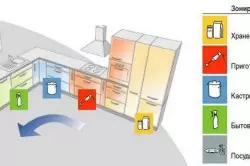
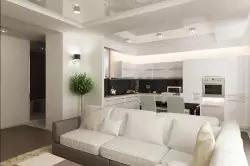
Proper zoning of the kitchen.
The kitchen, transferred to the living room, should perform its main function, while harmoniously fit with the interior of the living room and not disturb the rest of the rest. Psychologically, such a kitchen is better perceived if it is visually separated from the living room, i.e. its zoning was carried out.
One of the simple zoning methods is the use of light movable shirms, which, if necessary, close the kitchen from prying eyes.
A spectacular method of zoning can be the installation of a bar rack, which creates a visual boundary between the living room and the kitchen, while performing a useful function.
Instead of a rack, you can set the table.
Visual separation of zones can be achieved by installing the floor of different levels. As a rule, in the kitchen area, the floor is somewhat rises relative to the surface of the floor of the living room. In this case, the kitchen is located on the podium. Similarly, zoning is carried out on the ceiling. For example, only the kitchen zone is installed overhead ceiling. Lovers of nature can be recommended to distinguish between openwork partitions with curly colors or an aquarium elongated form.
The living room, equipped with a kitchen, often becomes a cherished dream of the hostess. Combining the kitchen and living room is widely used in many countries. If the owner of a small kitchen is not afraid of some of the difficulties, he can embody his dream.