
It is quite difficult to find the owner of housing, not aspiring to create a proper comfort in the house. And this is not only the style of the interior, but also the surrounding microclimate, that is, maintaining temperature and humidity within certain limits. However, weather conditions outside the window do not always allow to enjoy the comfort of indoors, and the tenants pursue the strong heat, then the unbearable cold. To avoid such problems, specialists from various industries are developing all new climatic equipment, among which air conditioners and heaters are considered the most popular.
The heating system is extremely important, and it is especially relevant for bathrooms. It is worth noting that the warm floor for the bath has long been not a luxury for many for many times, but a necessity. But often the tenants do not think about its installation, counting the installation of a rather troublesome business. However, if you clearly follow the instructions of specialists and comply with the rules of laying, then the whole process will seem fairly simple and easily fulfilled on its own.
Today, water and electric heaters for floors received the spread. Here we will discuss the functioning of the water outdoor system, in which, due to the circulation of the fluid on the pipes, the room is heated (temperature up +45 degrees). And before considering how to correctly mounted a warm floor, it is worth noting its main advantages.
Advantages of warm floors
The main positive feature of the floor water heating systems can be considered that they allow the heated air to allocate the heated air. This is explained by the fact that the heat source is placed in the lowest part of the room and rises to the ceiling more evenly, due to which the surrounding space is gradually heated. Also, the benefits can be attributed:
- temperature control using regulators;
- There is no need to establish additional heating radiators;
- long service life (up to 50 years);
- Equal level of heating of the entire floor surface.

Laying pipes under the water floor do it yourself
Of course, warm water floor installation technology requires not only advantages, but also some drawbacks of such systems. So, planning the installation, you need to know that:
- When installing water heating, it will be necessary to raise the main floor of approximately 10 cm;
- In the room it is recommended to install furniture only from natural materials, since plastic products or made of chipboard and MDF can, when heated, highlight harmful substances;
- In the old exploited homes, it is necessary to obtain permission from special services for connecting a system to centralized heating;
- In private houses there is a need to ensure a constant positive temperature in the room so as not to move the water in the system;
- For the finish coating, not all materials are suitable (on products there must be a special marking);
- The relatively high cost of installation, as well as increased payment for water consumption.
Article on the topic: Krepim Plasterboard on the wall and ceiling with glue
Given all the listed advantages and disadvantages, it can be said that it is cost-effective to install a warm floor with a water system in rooms with a small space, the bathrooms are considered a good option. It is also worth noting that almost all popular outdoor materials are suitable for mounting such heating systems. In addition, such products as a ceramic tile are also an excellent conductor for heat, which means that the heating of the room will be implemented as efficiently as possible. It is important to understand how to properly lay water heat.
Installations of the system
First of all, you should define a specific material for pipes. Specialists advise with independent installation of the system to use metal-plastic products with a diameter of 20 mm. Of course, it can be polypropylene tubes, but they will need a soldering iron when they are docked, and this is not a completely comfortable welding method. It is also worth buying all the materials necessary for the repair. In particular, a smooth tile is recommended for finishing coverage. However, in the bathrooms, such a tile can be dangerous, as it has a rather low anti-slip coefficient.

All stages of laying water floor in the bathroom
So, the technology of laying water underwear involves the following steps:
- Installing a collector cabinet;
- Installation of heating system;
- Pouring screed;
- Laying the finishing floor covering.
Each process requires a responsible approach, as well as certain skills, so it is necessary to consider them in more detail.
Installation of collector cabinet
The collector wardrobe is a metal design designed to accommodate the pipeline and water floor connection apparatus. In some cases, it is quite possible to do without it, but for greater aestheticism, as well as for a comfortable operation of the system, it is still recommended to install it. Installation does not take much time, and the design itself is quite simple: the fastening system, body and doors.
Article on the topic: Connecting the refrigerator to the mains
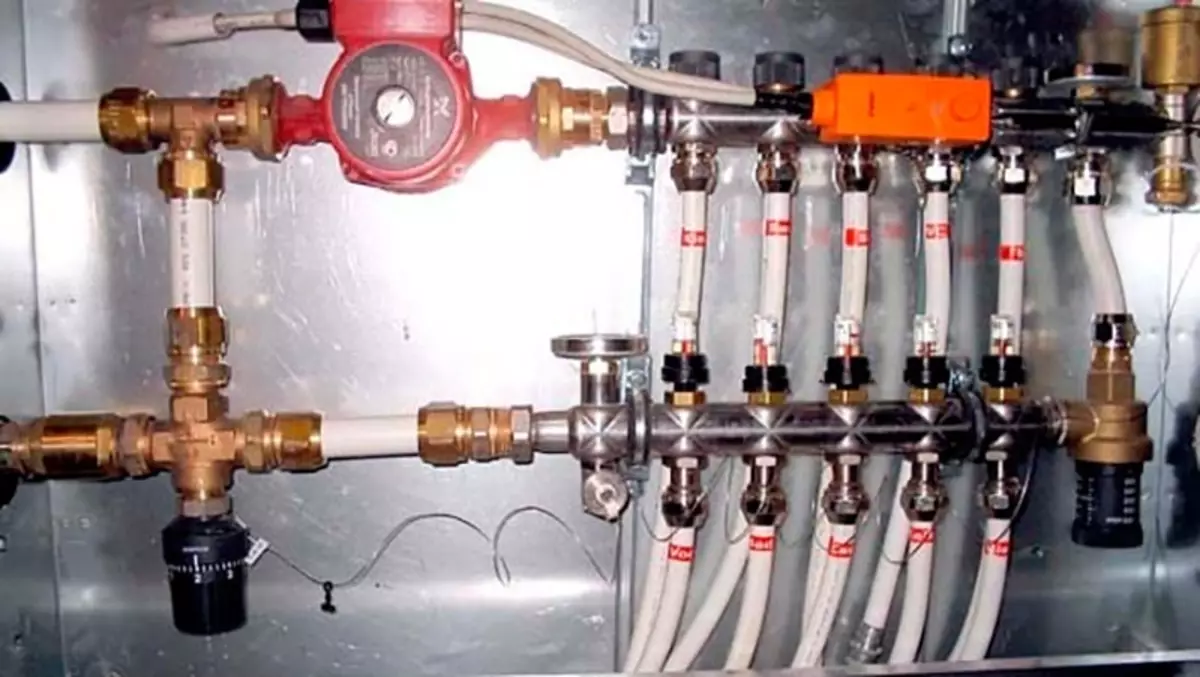
Connecting pipes to the central system
First of all, it is necessary to prepare a niche in the wall almost close to the floor, given the option of supplying pipes. It is installed in it and is carefully fixed on anchor bolts through special holes. Next are the pipes themselves:
- supply tube (from hot water supply);
- Return tube (withdrawing spent water).
It is important on each pipe to install the valve to turn off the water supply. It will also require the installation of the circulation pump. The next step is to connect to the reservoir attachments, as well as connecting it to the warm floor using fittings (pipe junction parts). When the system is fixed, you can proceed to the seal of the cabinet itself, and then go to the next step of work.
Installation of a warm floor
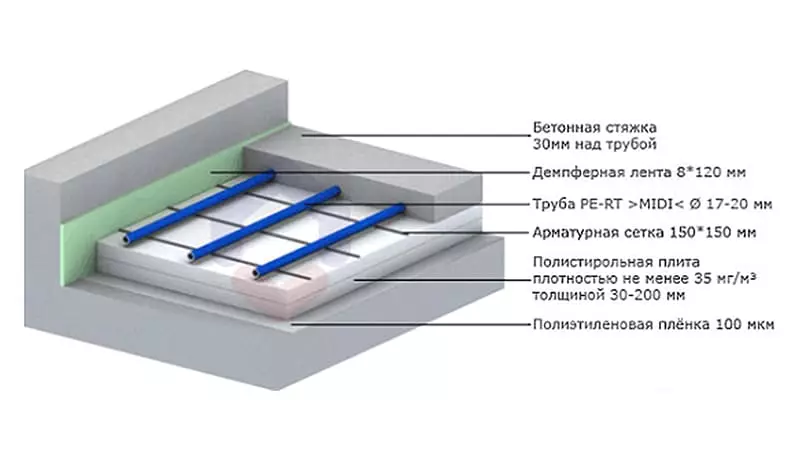
First of all, the proper laying of water warm floor under the tile suggests with their own hands that the base will be aligned and cleaned of contamination. At the same time, if the floor has minimal differences in height, then they can not be eliminated if the differences are more serious, then the surface is needed. Next, it is necessary to lay a layer of waterproofing. The material is stacked with the overlap cloths at least 10 cm, and the joints should be fixed with scotch.
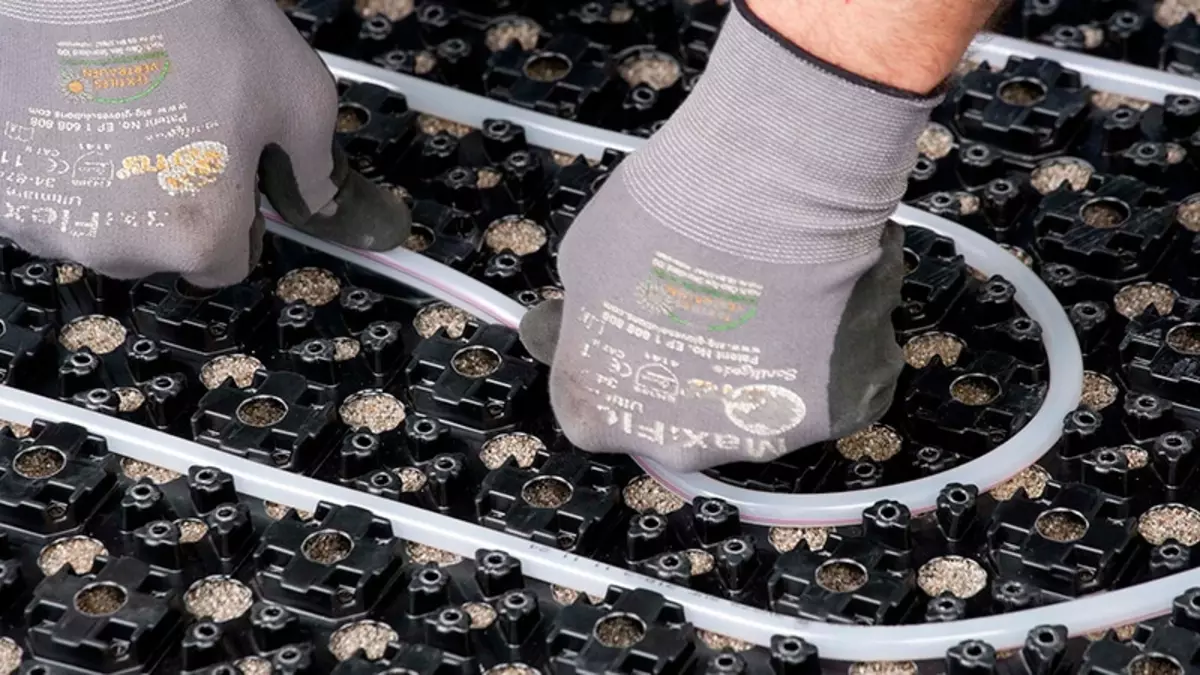
Water floors mounting
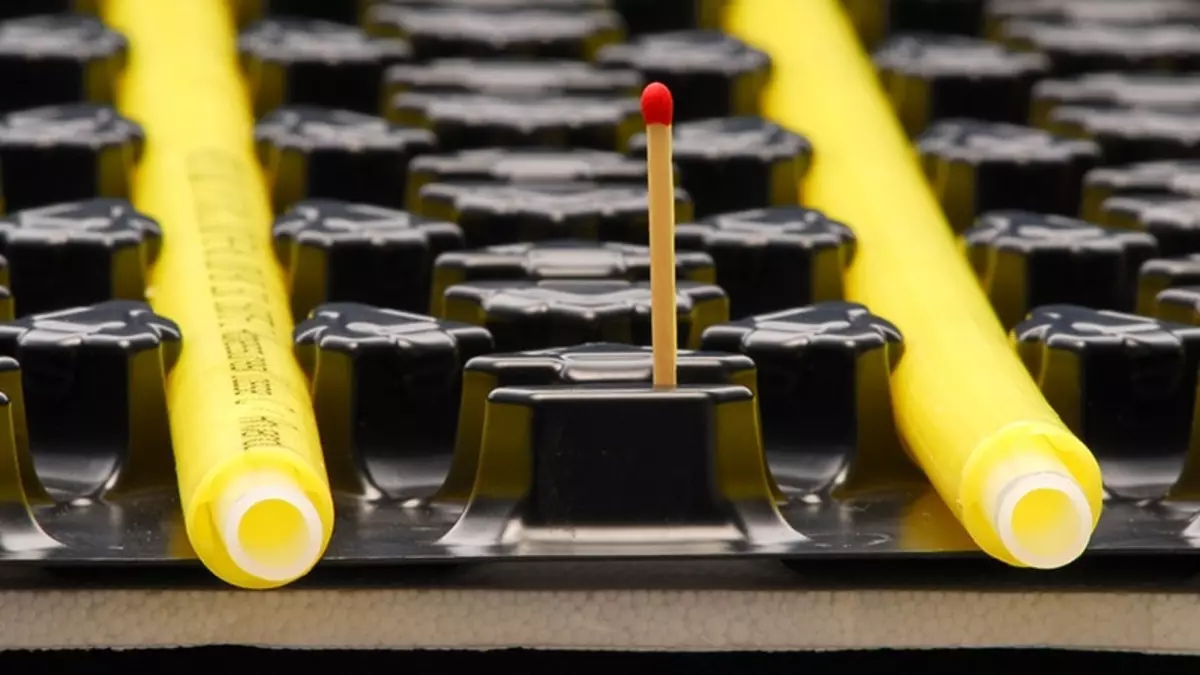
Since in most cases the floor screed is required, then the perimeter of the room is required to stick to the damper tape compensating for the expansion of the solution when frozen. To reduce heat loss, it is important to lay a layer of thermal insulation. With this task, such materials as foam concrete, technical cushion or polystyrene are perfectly coping with. At the thus prepared base is made of pipes.
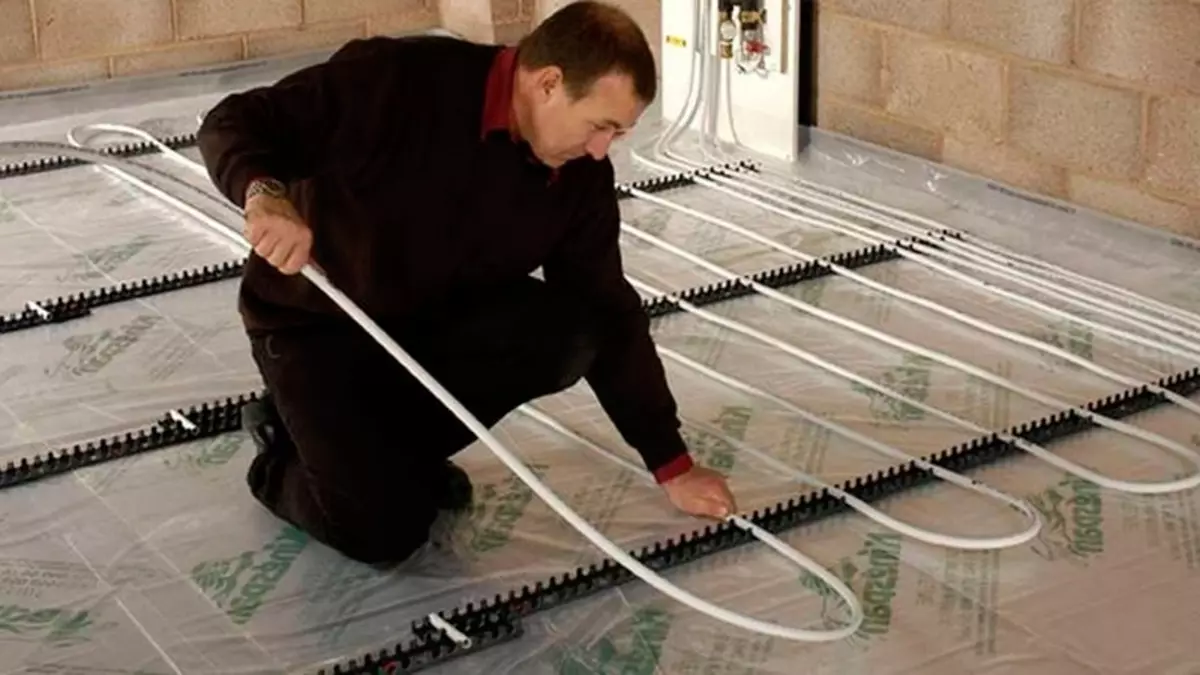
Pipes for which water will circulate, are attached to the floor with special slats with locks. The first step will be the fastening of the start of the pipe to the feed collector, and then hinges lay it on the floor via the diagram selected in advance. The last step will be the attachment of the free end to the return collector. IMPORTANT, after completing the installation, check the leakage system. For this pipe is filled with water at high pressure (approximately 2 times higher than the worker). If there are no problems, it is possible to proceed to the next step.
Article on the topic: What showers curtains are more practical: we make a choice
Fastening water floor pipes
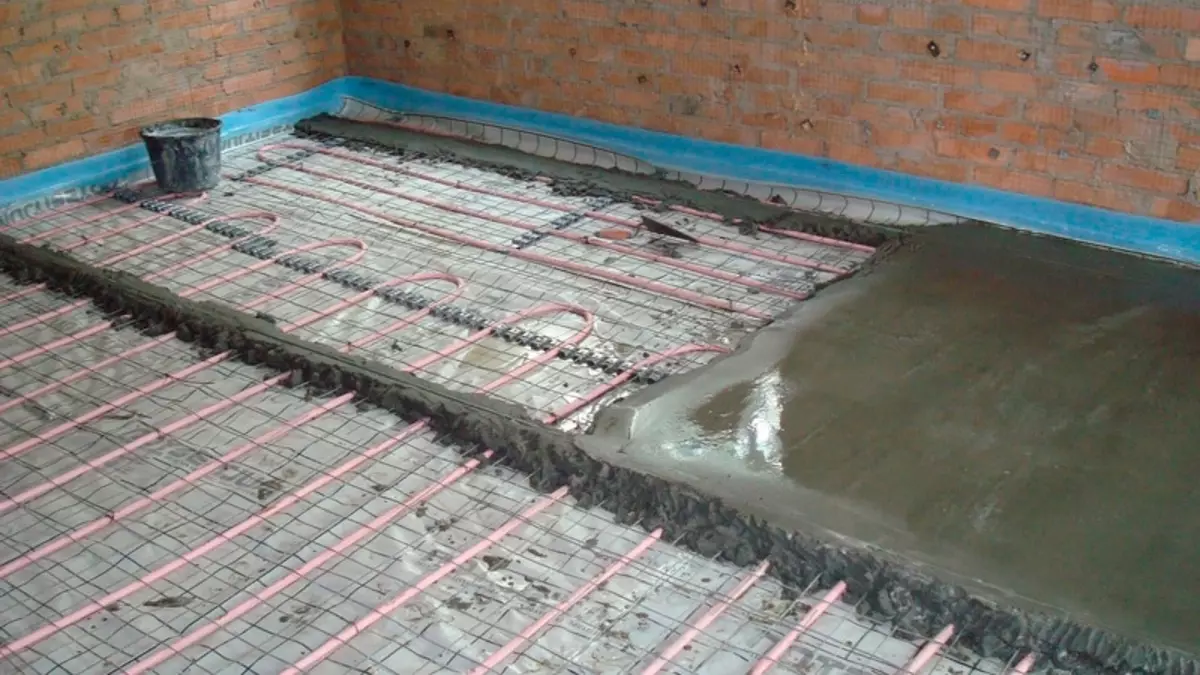
Floor screed
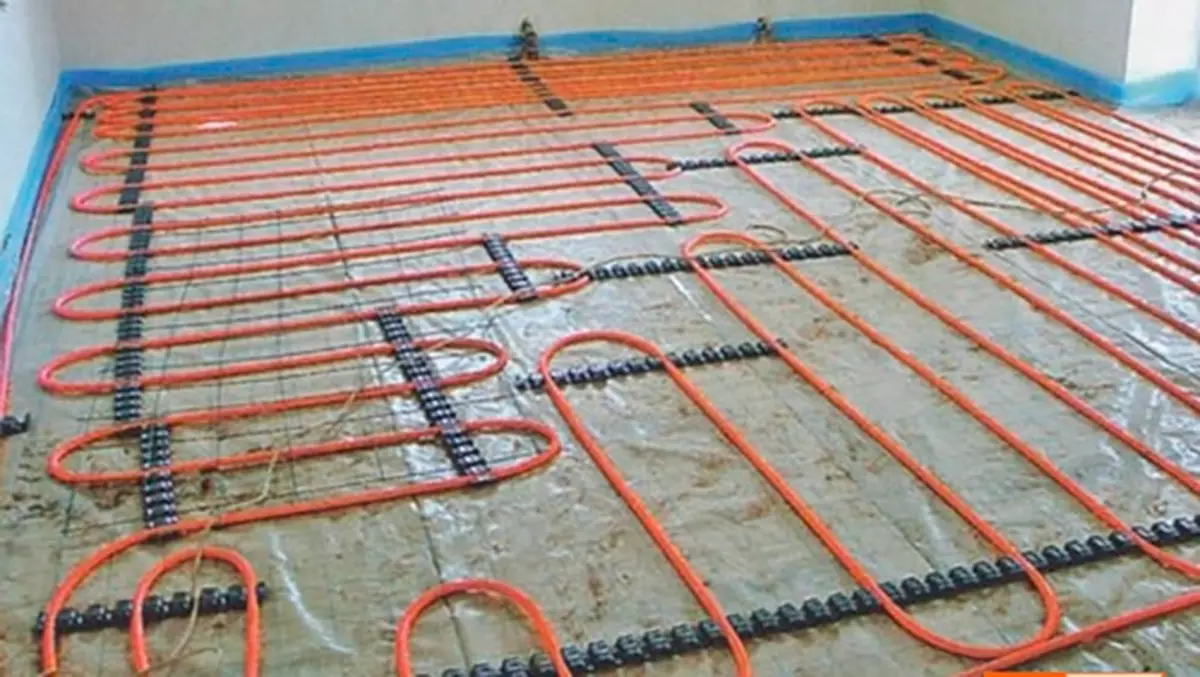
The screed solution is selected depending on the budget capabilities, as well as urgency. So, for example, the cement-sand mix is considered the cheapest option, but for complete drying will have to be waiting for approximately a month. Self-leveling mixtures in this regard are more practical, as they are frozen for 7-10 days, but more expensive. Before starting the fill of the floor, it is recommended to lay the reinforcement grid on special lining. That is, the distance from the pipes to the grid should be from 5 mm. From above poured a solution with a layer of at least 5 cm. Before moving further work, it is necessary to dry the screed.
Screed over water floor
Laying of Cafel
It is worth noting that the ways of laying the tile on the heap system does not differ from its usual installation. The sequence of actions will be as follows:
- Application on the base of the adhesive composition, which is designed for warm floors (glue is applied in small sections);
- toothed spatula composition is applied on the wrong side of the tile;
- Starting from the far wall applied the tile to the floor and pressed it, tapping the rubber image;
- In the seam between the tiles plastic crosses are inserted, it is necessary to get smooth gaps;
- Every few tiles are checked in terms of level, it is important that they are in a single plane, if there are deviations, you can fix the tiles, but it is necessary to do this for 10 minutes, because the glue is grabbed;
- Putting all the tiles should be given to it to frozen during a couple of days, then you can begin to grout seams.
It is important to keep in mind that when laying the tile, the system should be disabled. It is possible to operate the system only after grouting seams.

Technological process of laying water floor
Thus, water warm floors - installation technology is completed. When fulfilling all the recommendations, the procedure can be performed independently. However, if there is uncertainty in its own forces, it is advisable to instruct the master.
Laying pipes under the water floor do it yourself

Water floors mounting

Screed over water floor
Fastening water floor
All stages of laying water floor in the bathroom

Connecting pipes to the central system

Technological process of laying water floor

Fastening water floor pipes