
Almost every owner of the land plot, sooner or later, thinks about the construction of a bath. After all, the bath is not just a washing room, but also an important element of the country's holiday. The construction of the "turnkey" bath can be ordered from professionals for a round sum, or try to build a bath with your own hands.
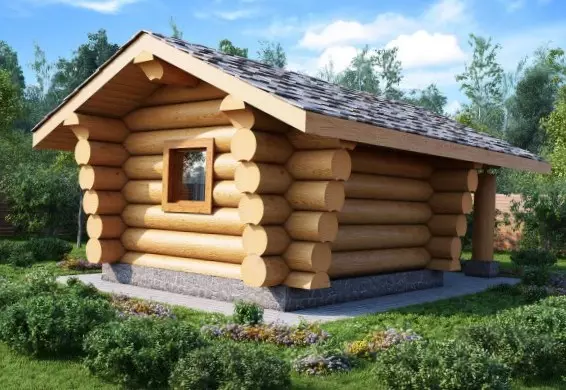
After reading this article, you can choose a project, learn the sequence of the construction process, get acquainted with the boilers models and find the best option for your cottage.
Project
Because to proceed with construction, it is necessary to develop a banani project. To do this, it is not necessary to contact the architect, a simple project you can develop and ourselves, especially since there are many computer design programs.
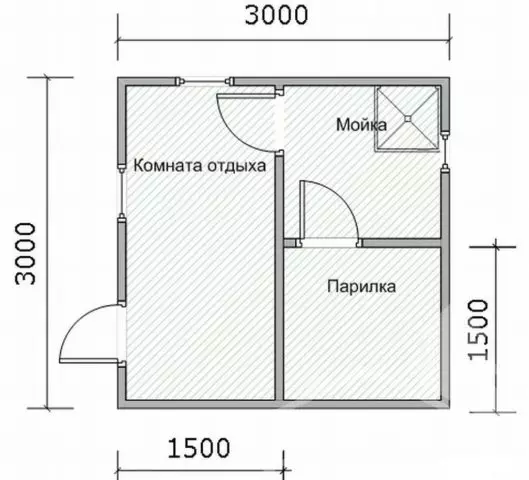
Think what size bath will be optimal for your family. What premises will be inside the bath. From which materials to make the foundation, walls and roof, do not forget also, about the trim. An important point in the design is the placement of the boiler and the method of its firebox.
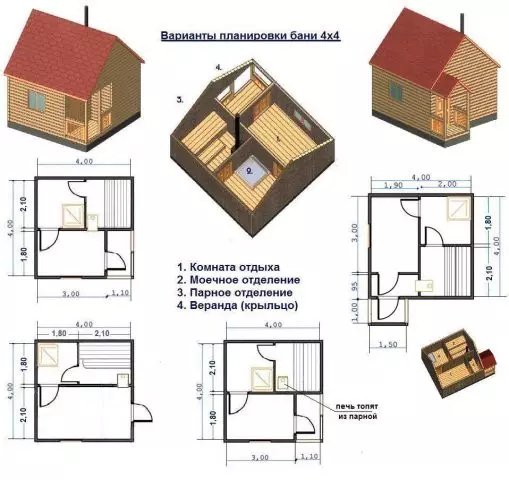
Below you can familiarize yourself with the popular Ban projects:
- Bath project size - 4x4 meters.
- Bath project - 4x6 meters.
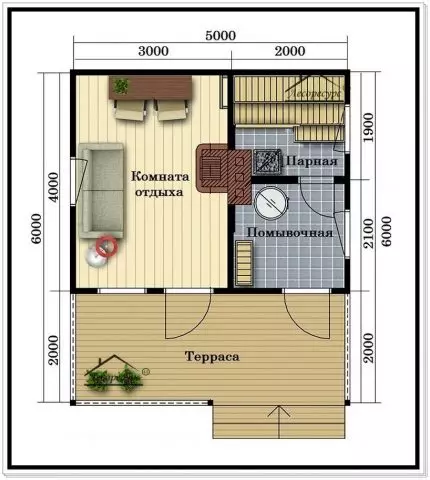
- Bath project - 5x6 meters.
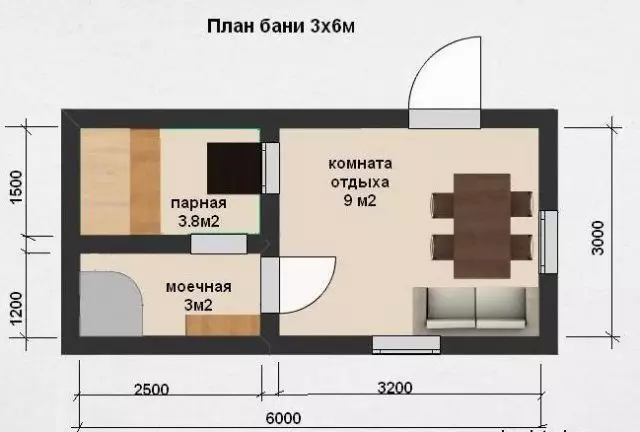
- Bath project - 6x3 meters.
- Bath project - 3x3 meters.
After you have determined with the sizes and materials for the bath, you must create an estimate of expenses.
Foundation
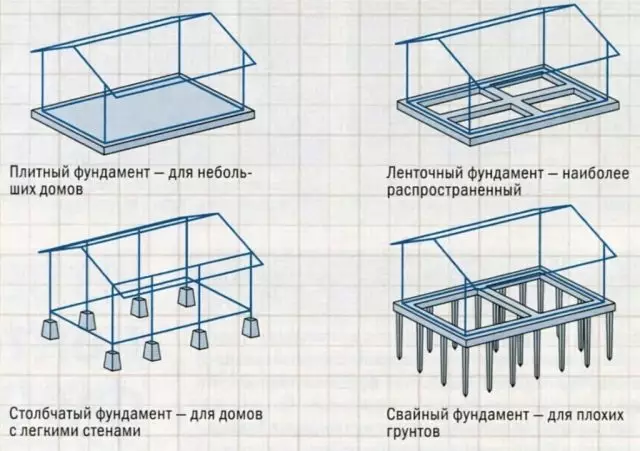
For the construction of the bath, use several types of foundations. Depending on the weight of the walls and the characteristics of the soil, the foundations of the following types are manufactured:
- Foundation from plates.
- Foundation columnar for light walls.
- Pile foundation.
- Concrete belt foundation.
As practice has shown, the most reliable foundation is almost for all types of soil, is a concrete belt foundation, reinforced by reinforcement.
For the manufacture of a ribbon reinforced foundation for a bath you will need:
- Cement.
- Sand.
- Gravel.
- Armature.
- Formwork.
- Ruberoid.
- Wire.
- Shovels.
- Concrete mixer.
- Harness.
- Stakes.
- Tools (pliers, hammer, roulette and others).
In the place selected for the construction, make the marking of the trench for the future foundation. For marking use the harness, stretched between the pegs. Trench width is based on the weight of the material for the walls. For a single-storey bath of wood or brick, it is enough to make a trench width of 30-40 centimeters. By setting markup, make the following:
- Focusing on the markup, haul a trench with a depth of 50-80 centimeters.
- Failure the bottom of the trench and fill it with water to shrink soil.
- Ship the bottom of the tale tale for waterproofing.
- Put the trench by gravel by third of its depths.
- Install the formwork at the edges of the trench.
- Make a fountain-enhancing framework, from reinforcement rods connected with a wire.
- Install the reinforcement frame in the formwork.
- With the help of concrete mixers, make a cement solution in proportion: one piece of cement per part of the sand and two parts of gravel.
- Fill cement to formwork, trying to prevent air emptiness.
- After drying the concrete, remove the formwork.
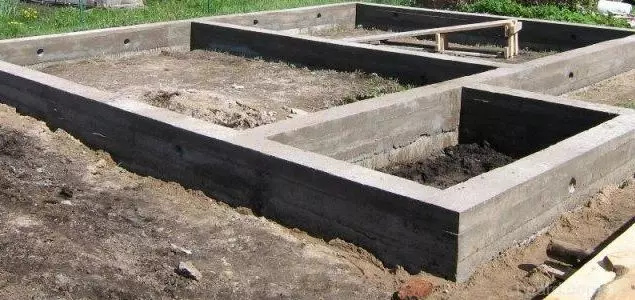
The foundation for the bath is ready!
Walls
The following materials are used to build walls:
- Wooden timber.
- Brica.
- Boards.
- Brick.
- Blocks from various building mixes (slag block, aerated concrete, arbolit and so on).
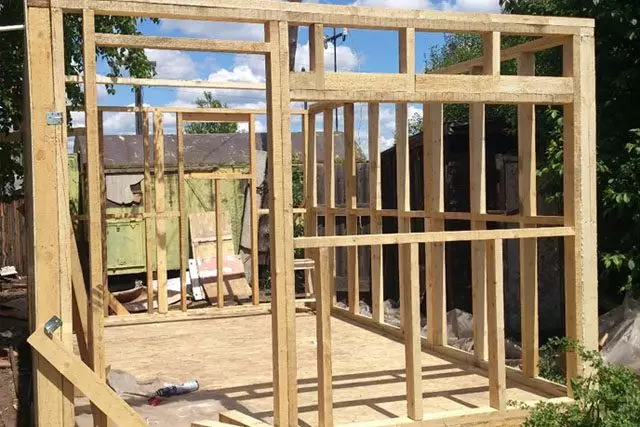
Since the construction of a bruis or brick bath is already quite widely described on the Internet, let's consider the construction of a frame bath from a bar 15x15 and 5x10 centimeters and a cross-section of 2x15 centimeters:
- Make the bottom strapping, for this, take the bars with a cross section of 15x15 cm. And install them on the foundation, connecting with special metal plates and corners. There is another way to connect bars, by drinking on their ends of spikes, grooves and subsequent fastening with screws or nails. Doing the strapping, do not forget to put waterproofing under the bars.
- Install the vertical racks from the 5x10 vertices. The distance between the racks is usually made 50-60 centimeters. First, determine the position of the window and doorways and install the framing racks.
- In the process of work, fix the temporary struts already installed racks so that they do not bother.
- Make upper strapping, securing it at the ends of vertical racks.
- Making the final fastening of the upper strapping, take care of the position of vertical racks, checking their levels levels.
- Be sure to strengthen all the angular connections with diagonal racks, it will help to avoid carcass throwing.
- Make a ceiling cut.
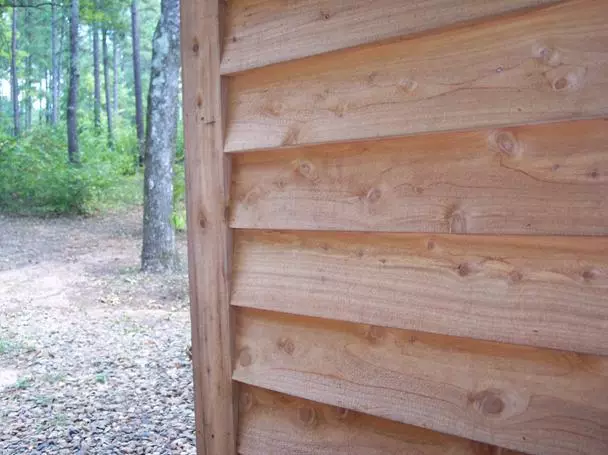
- After the framework of the frame, make the outside of the walls of the wall with a cross section of 2x15 centimeters. If you do not want the appearance of the gaps between the boards, then make the skin - "flashes", laying the bottom edge of the boards on a nithe board. In appearance, this method resembles the walls of the walls by siding.
- Saving a bath from the outside, go to the installation of the insulation. Foam or mineral wool sheets are installed along the vertical frame racks.
- On top of the insulation, it is necessary to install a layer of vapor barrier which is attached to vertical racks with thin regions.
- After installing vaporizolation, make the internal trim bath with clapboard or slats.
- Heat the ceiling by setting on the inner covering sheets of vapor insulation, then the insulation. Cut the ceiling from the outside, plywood sheets.
Note that the manufacture and insulation of the ceiling can also be performed after mounting the roof.
Roof
The roof for the bathhouses is three species:
- Single.
- Double.
- Complex - consisting of four and more rods.
Usually for the baths use the first two options. Let's look at a variant of a bartal roof covered with metal troops:
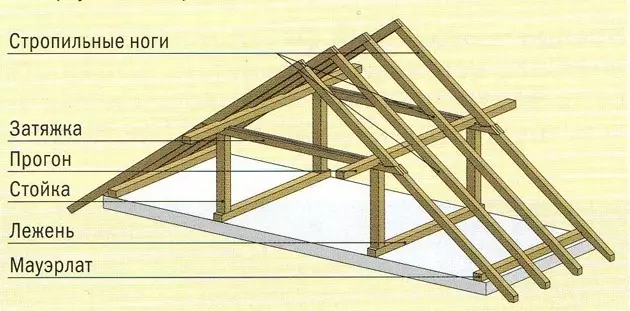
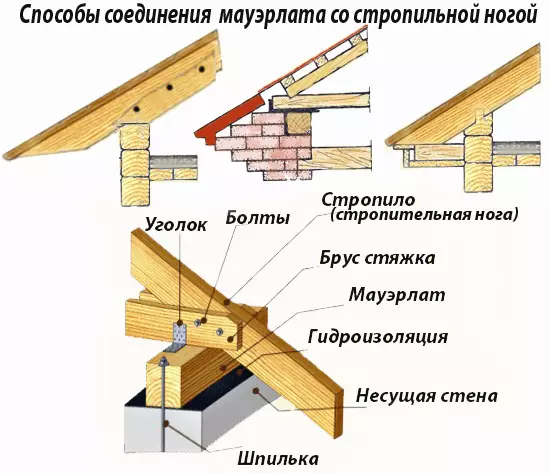
The manufacture of the roof begins with the installation - Mauerlat. In cases of frame walls, the role of the Mauerlat performs the upper stroke.
- Install the vertical stands on the layer.
- Connect the racks using runs and tightens.
- Install the rafter legs by attaching them to Mauerlat, run and connecting the upper ends. The distance between the rafters should be 50-60 centimeters.
- Install metal tile sheets.
- Cut the frontoths with wooden slats or leaf iron.
For more visual acquaintance with the roof mount, drawing is shown:
All sizes of roof elements are listed:

Please note that the less you take the root slope, the more snow loads will have to have snow. Also, a small tilt of the roof can lead to poor water plum and leaks.
Floors
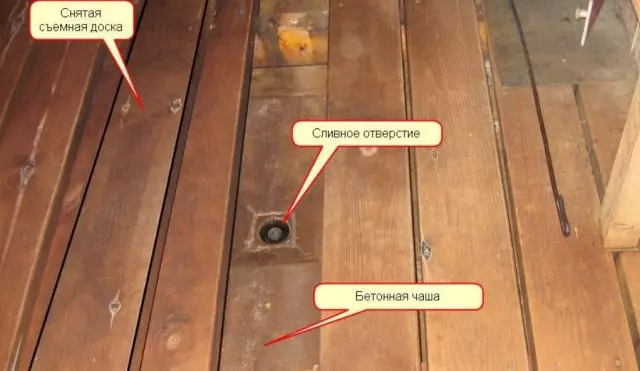
Floor design depends on the type of room. In the room of rest, ordinary wooden floors are manufactured. In the waxing and steam rooms, the floors make out of two levels:
- The first level is made of concrete, it has a bias towards the drain hole.
- The second level is the purple floor of the boards with gaps for draining water.
If you want to make floor stonework or tile, then they simply fit to the first level under a slope to the drain hole.
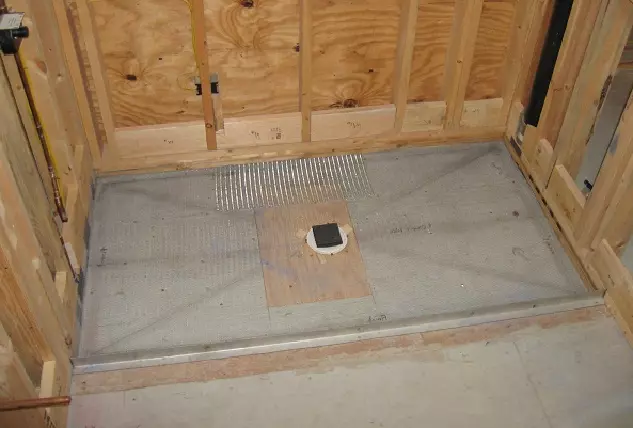
In order to make concrete floor and draining in the bath you need:
- In the center of the steam and wetting, install plastic pipes with a diameter of 5-10 centimeters with a field at the end. Pipes should pass into the street through the foundation and connect to the sewage system.
- Put the layer of waterproofing material.
- Throughout the area of the rooms, pour a gravel layer 10-15 centimeters thick.
- Make a cement solution and fill the floor with a bore slope mounted on a plug-up pipe.
- Reinstall the grille to the drainage of garbage in the sewer.
In the second stage, wooden floors are made:
- Install wooden lags in all rooms. Distance between lags Make 30-40 centimeters. As a lag, you can use the bars with a cross section of 3x5 cm. Or 4x6 cm.
- On the lags, approach the board with a cross section 2x15 cm. Or 5x20 cm.
- In the rooms, where water drain is assumed, leave the gaps between the boards at 0.5-1 cm.
Do not forget, before installing wooden floors, handle all the parts impregnated for wood. Maching floors, note that they must be higher, or at the level of the top edge of the foundation.
Boiler
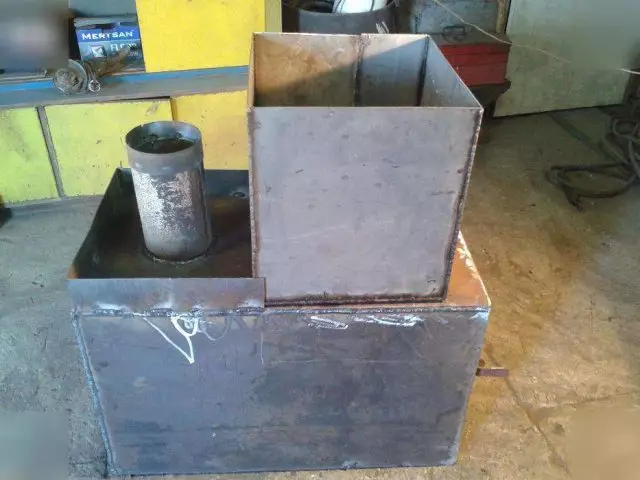
The boiler boiler model will largely depend on your financial capabilities and fuel that you will use for heating. If you know how to use welding, then a simple boiler can be made from thick sheet iron. If you prefer more advanced colas on gas or electricity, they can be purchased in specialized firms.
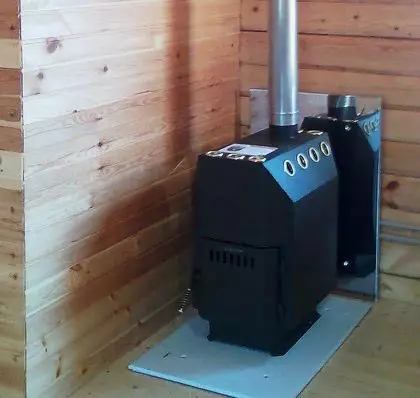
The boiler in the steam room is installed in such a way that loading the combustion chamber with fuel, was carried out or from the street, or from the rest room (pre-banker). The boiler itself, for the purpose of fire safety, is located in 10-15 centimeters from the nearest walls. Walls on the height of the boiler are closed with iron sheets. A successful solution will make the boiler brick, there you most reduce the time of cooling and secure the walls from fire.
Having arrange the chimney for the boiler, pay special attention to the place where the pipe comes into contact with the ceiling. Hole for chimney, it should be isolated with refractory material. Also, pay attention to the place where the chimney pipe goes through the roof. Usually, this place is subject to leakage, so it should be carefully smeared. Below are options for boilers for a bath:
- Homemade metal sheet boilers.
- A gas boiler.
- Electric boiler.
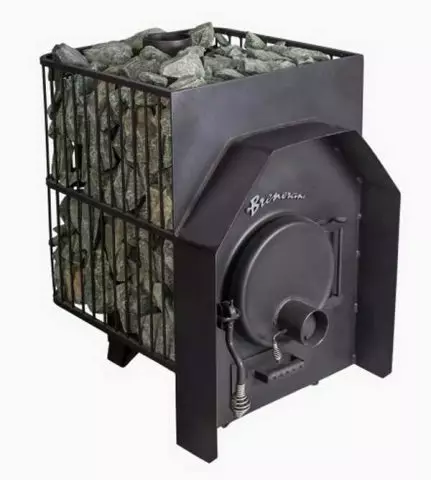
- Boiler on hard fuel.

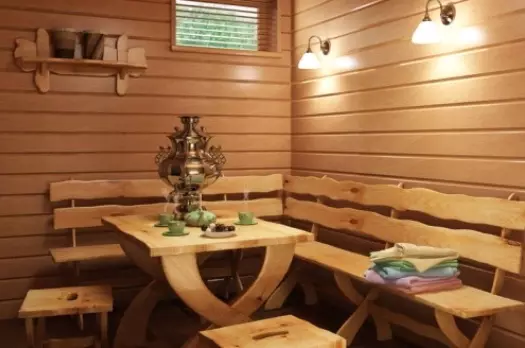
Bath arrangement
After the sauna is built, it is necessary to equip it:
- Move to the bath all available on the site - electricity, sewage, plumbing.
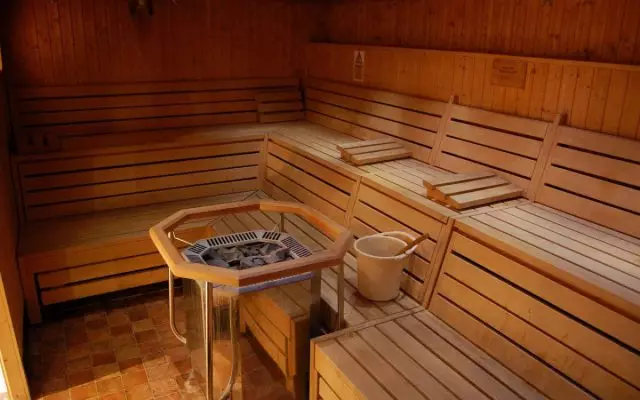
- Place inside the sink, shower cabin, light sources, leisure furniture.
- Finish the walls with curly slats and make stepped shelves.
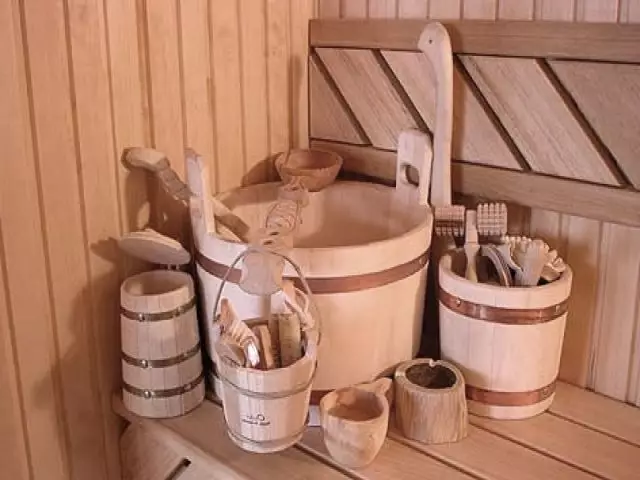
- Buy wooden tubs, hayk, buckets and brooms.
After the arrangement, you can safely invite guests, shake in your personal bath!
Miniban assembly instructions for giving without foundation, you can also look in the video:
Options for beautiful and unusual baths
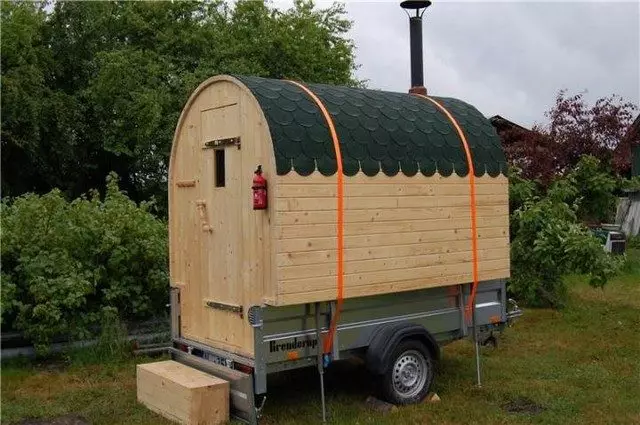
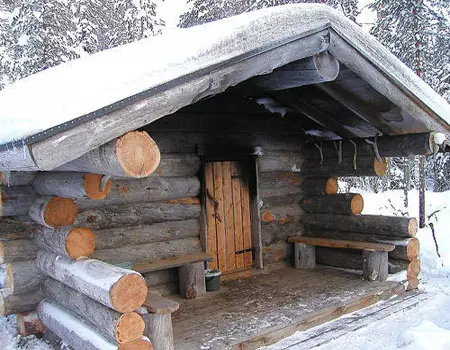
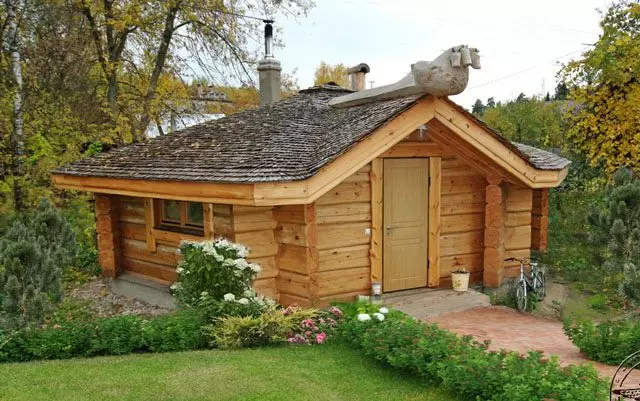
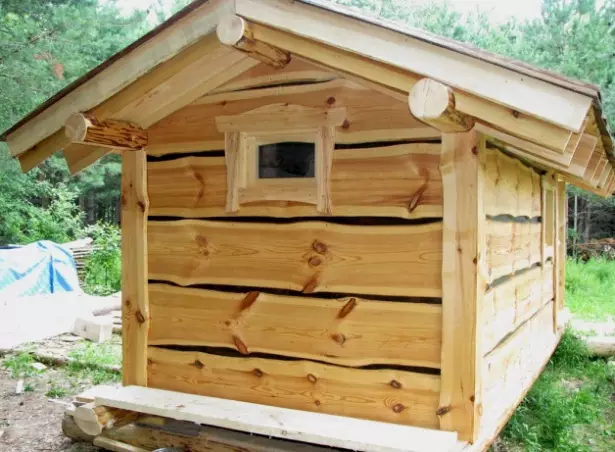
In addition to traditional materials and designs for the bath, there are many alternative solutions. Below we will give photos of the most unusual bath:
- Mobile bath from "Lining", built on a car trailer.
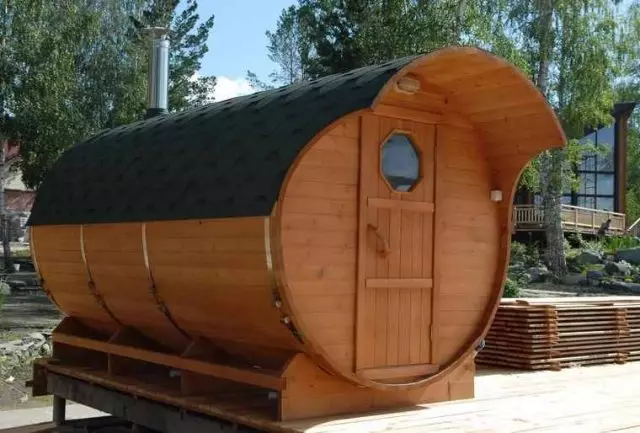
- Bath in a huge wine barrel.
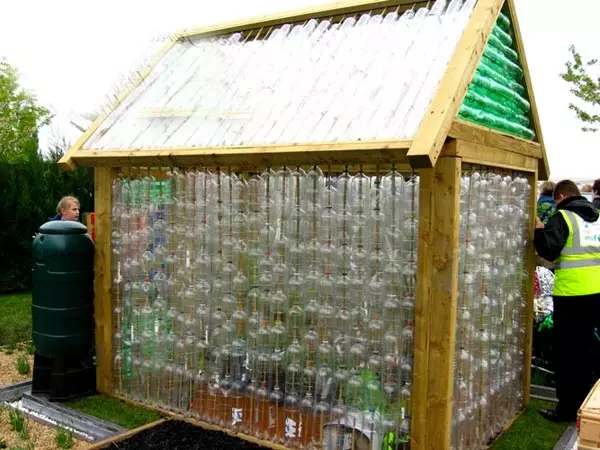
- Bath of plastic bottles.
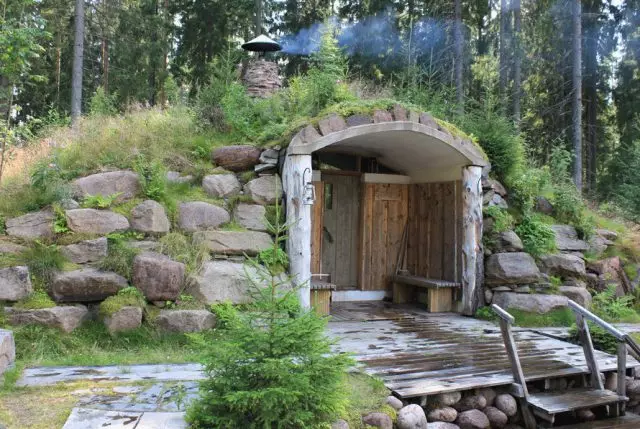
- Bath dug, built straight in the ground.
- Bath arranged in an iron container.
- Forest bath from raw logs.
- Beautiful sauna sauna.
- Bath of non-edged board.

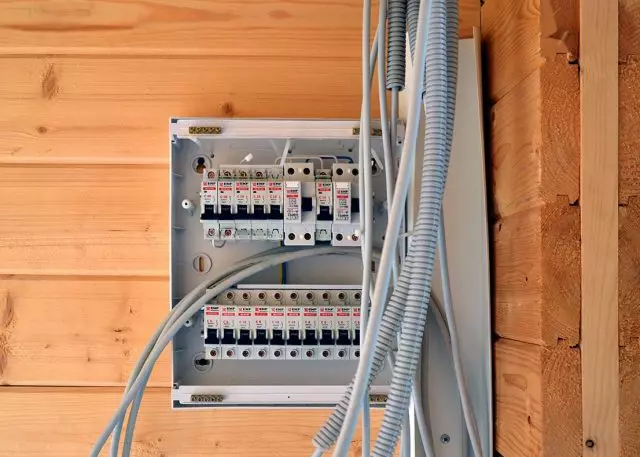
At the end of the article I would like to remind you that the heating of the bath is associated with fire and high temperatures. Therefore, building a brick bath, brica, slagoblock or boards, pay great attention to fire safety. This warning also concerns the electrical wiring device, since indoors inside the bath have increased air humidity and the risk of closing the power grid due to condensate is very large.

We hope that reading our article will push you on an independent building of the bath!
Article on the topic: Wall profile for drywall: Selection and installation of frameworks