
Making the overhaul of the apartment, office or at home, you will definitely face the need for plastering. This process is very time consuming and requiring professional skills. Therefore, it will be better to trust this work to specialists. But if in order to save the repair budget, you decide to finish the walls on your own, then before kneading the solution, read the above-mentioned guidance on the plaster with your own hands.
Ways alignment methods
Stuccoings of walls runs in several ways.
- In the plane, using the rule (without lighthouses). This option is suitable if the walls are generally quite smooth, without drops and strong deviations.
- Alignment of walls by lighthouses. The second way is suitable if the walls have significant deviations and irregularities.
Requirements for plaster
The basic requirements for the quality of plaster works are set forth in SNiP III-21-73. It is especially important to know them if you decide to do the work not on your own, but to hire workers. The quality of work is divided into 3 parts: for simple, improved and high-quality plaster.- With simple plaster, the deviations are allowed vertically no more than 3 mm per 1 m, but not more than 15 mm for the entire height of the room. Thus, the maximum deviation of the wall at the ceilings is 2.5 m - 7.5 mm. Smooth irregularities are allowed, every 4 kV. m. - no more than 3 pieces. Their height or depth should not exceed 5 mm. Horizontally, the maximum deviation is 3 mm per 1 m.
- Sniped for improved plaster requires more strict adherence to tolerances. Vertically - no more than 2 mm per 1 m, but not more than 10 mm for the entire height of the room. Permissible for smooth irregularities - no more than 2 pcs. for 4 square meters. m., a depth of less than 3 mm. For each meter horizontally, the deviation is not more than 2 mm.
- The most stringent decoup requirements are indicated for high-quality plaster. Vertical deviations should be less than 1 mm per 1 m, but not more than 5 mm on the height of the room. The presence of 2 irregularities per 4 sq. Maximum allowed. m., a depth of less than 2 mm. By 1 m horizontally, the deviation is not more than 1 mm.
Alignment of walls by lighthouses
This method can remove significant irregularities of the wall. Light profiles will serve as a restricter to work perfectly smoothly with permissions in 1 mm / sq. M.
Cost of work
The price of plastering is from 600 rubles. per square. m. Let's calculate how much you can save if you do not hire workers.First of all, it is necessary to buy a perforator and a bubble level with a length of 2 m. All other consumables will be listed below. 6000 rubles will be enough for all these belonging, so you will save already after aligning one wall with an area of 15 square meters. m.
If you want to level the walls with an area of 90 square meters. m., the savings will be at least 30,000 rubles! You will have all the tool forever, and if it is already there, then they do not use sin. If we are plastering the walls themselves, we will definitely be sure of their quality.
Choose a mixture for plaster
Now popular solutions for plaster are mixtures on plaster and cement basis. We will talk about the alignment of the walls of the plaster mixture for the following reasons.
- You can apply thick layers to 5 cm, without cracking.
- Unlike cement, gypsum mixtures are not subject to shrinkage.
- Gypsum has high plasticity.
- Due to the high adhesion to the base and small weight, the ceilings can be aligned.
- Gypsum has the best heat and sound insulation, and also allows the "breathe" walls.
- The ability to plaster smooth concrete bases without reinforcing grid.
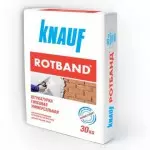
From the gypsum mixes, the products of the German company Knauf - Rotband are most popular. Also there are plaster mixes based plastervel, a wave layer, Forman No. 10 and others.
Light profiles
Metallic beacons
Metal beams are narrow profiles of galvanized iron with perforated holes that will perform the role of restricters during plaster. Conducting "Rule" on them, we remove the surplus of the solution. Standard beacon length - 300 cm, depth - 3, 6 and 10 mm. Fixing metal beacons on the wall is made with screws and perforator.Article on the topic: How to install a bathroom siphon: Installation Instructions
Gypsum beacons
Smooth wall can be made without metal beacons. Instead, artificial lighthouses are exhibited from gypsum. This allows you to save time (you do not need to pull the lighthouses, then attach the shocks from them) and reduce the consumption of plaster.
The manufacture of gypsum beacons occurs as follows:
- On the wall where the plaster will be made, the dowel-screws are installed;
- With the help of an ordinary or laser level, screws exhibit on the desired height;
- On the screws of screws apply a metal profile or a smooth wooden bar;
- holding the profile by hand, plaster mortar is placed under it;
- Removing surplus gypsum, the profile is removed.
The resulting gypsum strip will be a beacon, such strips are made throughout the wall.
In more detail how to make lighthouses from plaster, shown in the video:
Plastic beacons
In addition to metal and plaster, there are still plastic beacons. They are largely similar to their metal fellow, but not made of galvanized steel, but from high-strength plastic. Fasten plastic beacons to the wall as well as metallic with screws. The disadvantage of this type of lighthouses is their fragility, with strong blows by the rule.Required tools and consumables
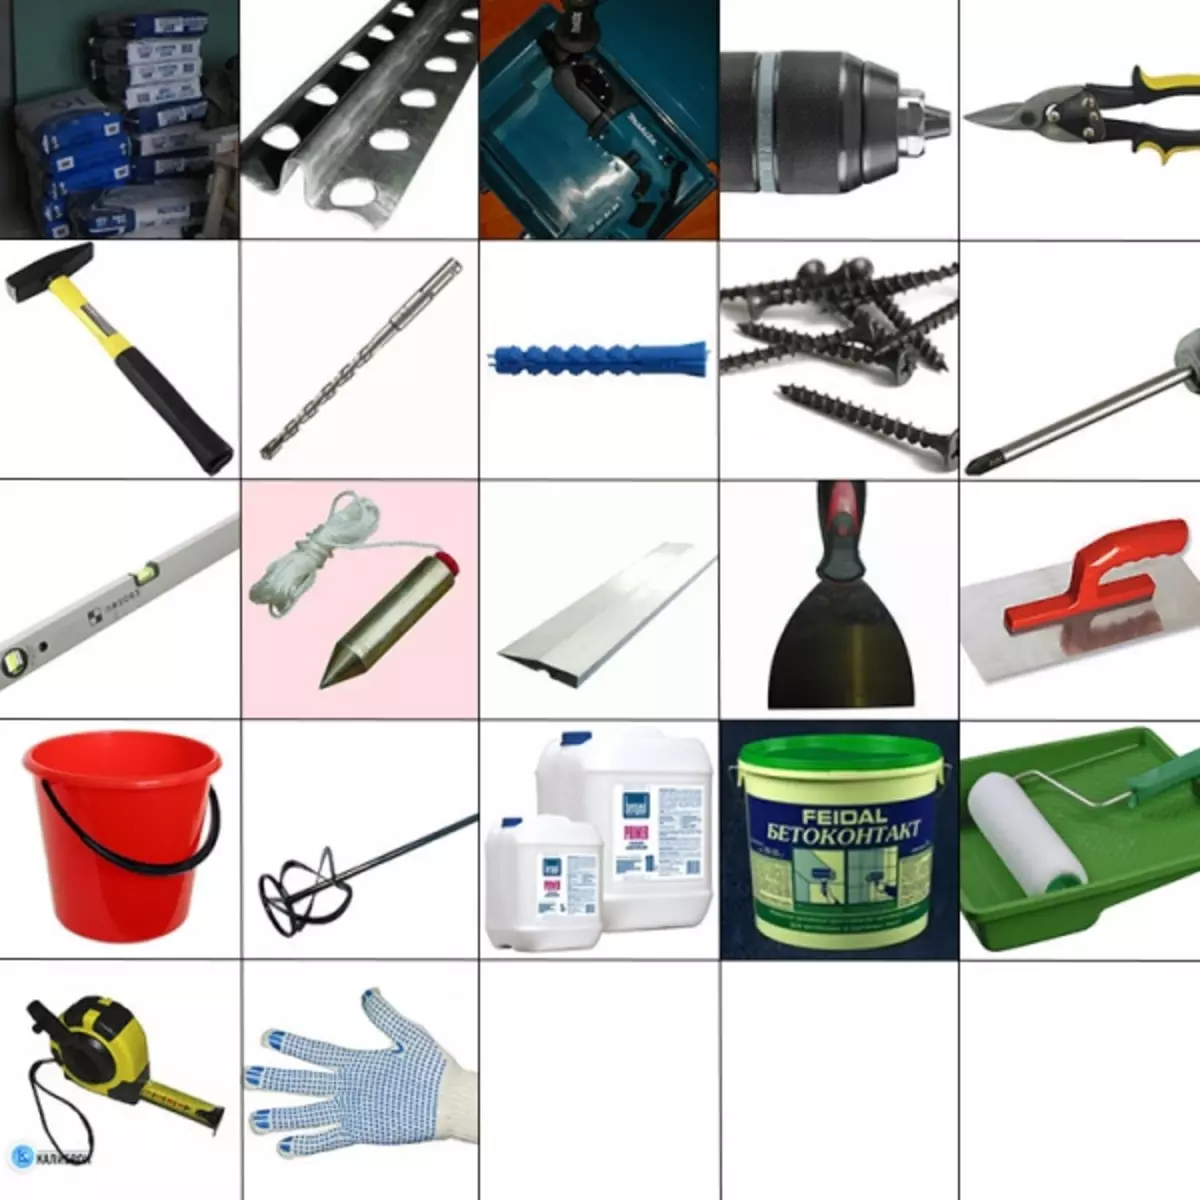
- plaster mix;
- Lights 3-6-10 mm;
- Perforator and adapter with a nozzle for the manufacture of the solution;
- dowels required sizes;
- Screws on a tree with a rare step;
- crosshead screwdriver;
- Bubble level - 2 meters;
- Scissors for metal or Bulgarian for cutting lighthouses;
- a hammer;
- plumb;
- Aluminum rule - 2 meters and a 2.5-meter rule for the installation of lighthouses;
- Wide spatula - 15 cm;
- Steel stroking;
- bucket;
- acrylic primer;
- primer for processing concrete and smooth walls;
- Wide brush or roller with bath for applying primer;
- roulette;
- Hand protection gloves.
The list is impressive, but some of this you probably already have. The main costs are a perforator, level and stroking, the rest is not very expensive. Also, it should not be saved on such an instrument as "rule" - this is a long aluminum rail with a sharp edge, with its help produce an alignment of the solution when the floor tie or plaster. Rule is convenient to check the surface evenness.
Plaster process
When all the materials and tools are purchased, you can start aligning the walls. Especially important is the preparation stage, since the correct installation of lighthouses is the most difficult job. You can do this in different ways, we describe one of them available ways. If there is a laser level, this stage becomes easier.Marking of walls, primer and lighting installation
- First of all, carefully examine the surface of the walls. Apply the level to them and look at how much the deviation vertically. Then find all the bumps and depressions using the long rule, applying it at different angles. Found irregularities Mark the marker.
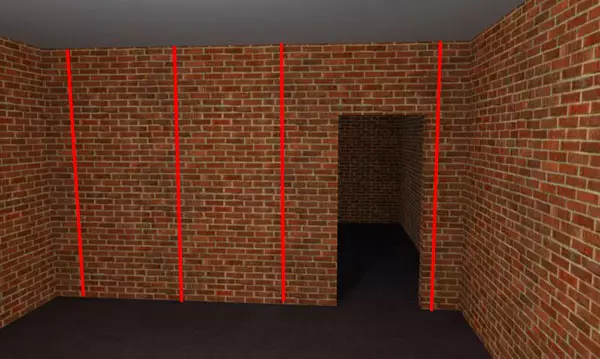
- Next, make marking for lighthouses. Suppose you have a wall of 4.5 meters long with a 2.75 meter ceiling height, and there is a 90x205 -205 door in it. An example is shown in the photo.
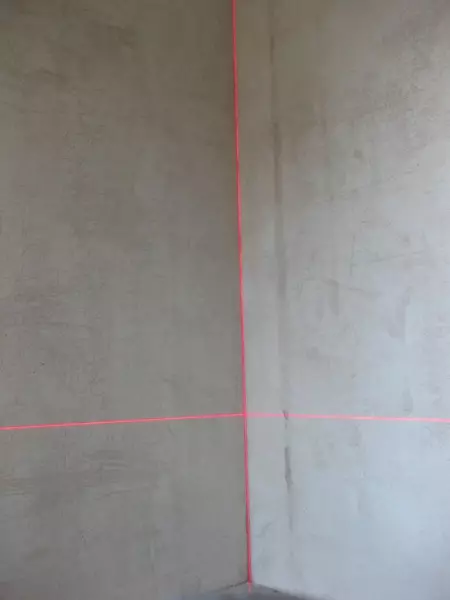
- First of all, install extreme lighthouses on both sides. To do this, it is necessary to retreat from the corners about 30 cm and to read the vertical line.
- To work with a two-meter rule, the distance between the beacons should be about 130-160 cm. It will be more convenient to read the right line first, since we have a door there. Return 1.6 meters and lift another line.
- The next line remains 2.3 meters, so we divide this distance in half, in the end you remains to do another line after 115 cm. It should be marked as in the photo.
- Now come back to extreme lines.
- Return on the placed floor lines of 15 cm (275 cm ceiling - 245 cm beacons, divide by 2 = 15 cm.) And drill holes at these points. Drink a dowel in them with self-drawing so that they hold firmly. Tension between two corners of the cord room in a horizontal position.
- Return up from dowels 245 cm and do the same. As a result, you should have 2 parallel lines. In places where the threads will cross the markup lines, make a marker marker. By stamps, drill at these openings and drive the dowels without self-tapping screws.
- As a result, you turned out 2 rows of holes that are strictly over the line. Corner screws can unscrew, but the dowels will still be useful.
- Preparation of walls under the plaster includes a mandatory surface of the surface before applying the solution. This is done to increase the clutch of materials, removal of dust and reduce moisture absorption. Especially abundantly grinding such absorbing surfaces like brick and aerated concrete.
- For smooth surfaces, use "concrete contact", and for highly absorbing and porous - ground penetration soil.
- When the walls are dried, you can continue work on the markup. Tighten the 4 extreme and 2 upper screws. Suppose if the wall is littered at the top by 1.5 cm, then the distance between the cap and the wall will be about 2.5 cm (1.5 irregularities + 0.6 lighthouse + stock 0.3-0.5).
- When you twisted the screws, put a sharp face to the Hats rule and see how much you need to correct the leg of the lower screw. It should be a strictly vertical line.
- The same is done with the second pair of angular screws. This is the most difficult stage in the plaster of the walls, so come close to it. You can also use a plumb from the top screw, or a laser level.
- Now be sure to make sure that the lighthouses will not be written after installation. To do this, pull the diagonal cord along the hats of the screws. To put a piece of lighthouse under it and check that he fits freely under the cord. Then pull the second diagonal. If all is well, align the remaining self-tapping screws on the corner.
- Between the upper hats, pull the cord along the hats. The beacon profile must pass on it freely. In the same way, adjust the central screws, their caps should slightly touch the cord.
- Repeat the same for the bottom row. You must have 8 screws in the same plane.
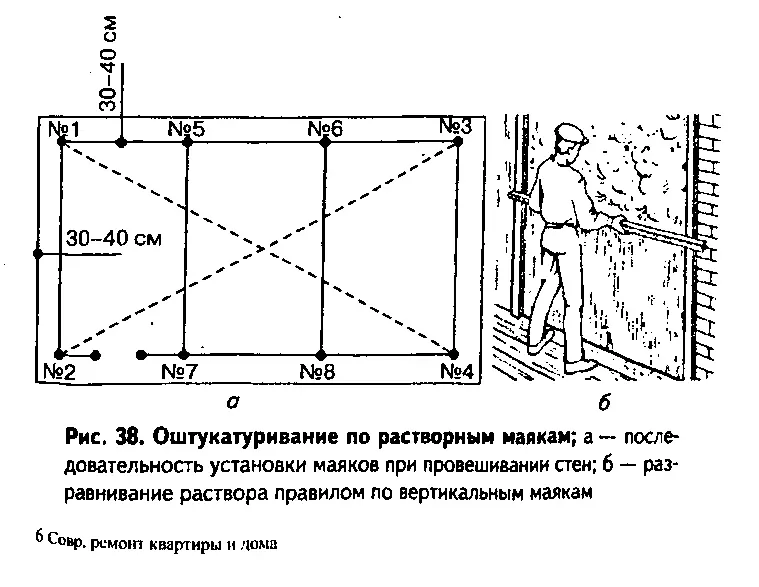
Sequence of the installation of Mayakov

Mount Mayakov

- Cut the beacons a little less than the distance between the dowels. In our case, it will be optimally 2.4 meters.
- Prepare a few plastering mixture for fastening beacons. To do this, pour some water in a bucket and pour the mixture. Thoroughly mix with a spatula or perforator with a nozzle.
- The consistency of the solution must be a little more liquid than cottage cheese. Finished plaster should not fall from the spatula.
- Apply the plaster along the line so that it drank over the hats of the screws. Press the lighthouse into the mixture using the rule, but not deeper than the caps of the hats. It is most convenient to do together - one person from above, another bottom.
- Make sure in the evenness of the installed lighthouse with the help of a long rule and level, if necessary, adjust its position. Then you can pull out the screws from the wall.
- Do not forget to clean the rule from the mixture before drying, and proceed to the next lighthouse.
Since this is a rather difficult thing for beginner plasters, we recommend to see the process of installing beacons on the video:
Applying plaster
When the beacons are securely secured, you can start the plaster of the walls.
- Pour about 1/3 water buckets and add a solution, stirring it with a mixer.
- The thicker you plan to apply the layer, the thick should be a solution, but it should not drain from the spatula. In any case, be sure to learn the instructions on the package with the mixture.
- If the walls strongly absorb moisture, it is necessary to abundantly moisten them in front of the plaster. Welcome only to the site that is going to finish, the most convenient to do this with a spray gun. If you do not do this, the plaster will quickly give all the moisture, not having time to grab, and cracks.
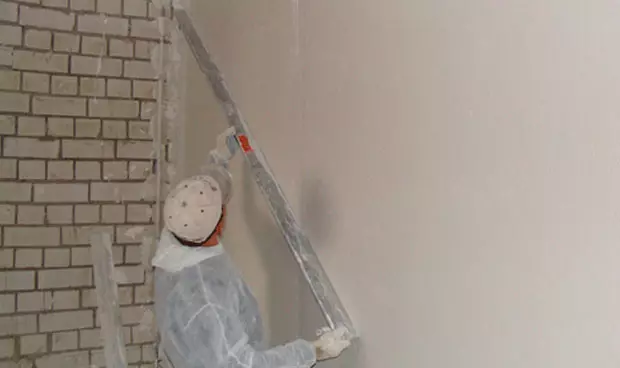
- Applying plaster on the wall by professionals is made by cape by a spatula on the wall. You can try to apply it to Malka, and immediately align it on the wall, if you are so convenient.
- Producing wall alignment from bottom to top. The layer of plaster should be dense, without skipping, and go beyond the lighthouses.
- Then take the rule and sharp face, perpendicular to the beacons, start led by them. If you keep the rule at an angle, then you will remove too much. The level alignment begins with the bottom border of beacons. Zigzag movements are slowly up, and remove the surplus, throwing them up the spatula.
- Formed bubbles and irregularities on the plaster, it is necessary to redo, in these places the solution does not reach the wall.
- Remove the solution with a spatula in this place and threw it again. Then again go through the rule for this place.
- After that, once again spend the rule over the entire height, without zigzag movements and pressure, to finally smooth the surface. Thrust throw again on the wall above. Perform this item 3-4 times until the surplus remains on the rule. It is very important later to walk the rule from top to bottom - you remove another part of the excess solution.
- Next, get a new portion of plaster and repeat the actions until you reach the top face of the lighthouses.
- By inviting the top of the end of the beacon, go to the next cell. When all the bands are attached, there will be a place from the floor and the ceiling. It will need to be embedded after drying the solution on the wall.
- Fill out the remaining empties along the edges of the solution and align without lighthouses using a flat plane of the new plaster. Rule hold vertically or tilt.
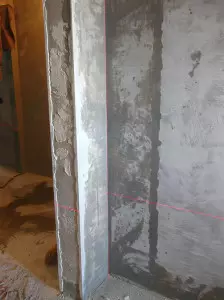
- This is what the technology of alignment of walls in lighthouses looks. Now you need to check the result of the work - for this apply the rule at different angles.
- If there are bugs more than 1 mm - a sharp edge of the little town square excess. If there are cracks - to zadach them with a liquid solution and compare the rule.
- Now it is important to remove metal beacons from the wall, otherwise they are rusted. To do this, picker them with a screwdriver, and pick up from plaster.
- The resulting shoes make a solution and scatter. To make the mixture firmly penetrated the gap, apply it to its X-shaped movements.
In the plaster of slopes from doorways and windows, apply a solution with the overtrown, as shown in the photo.
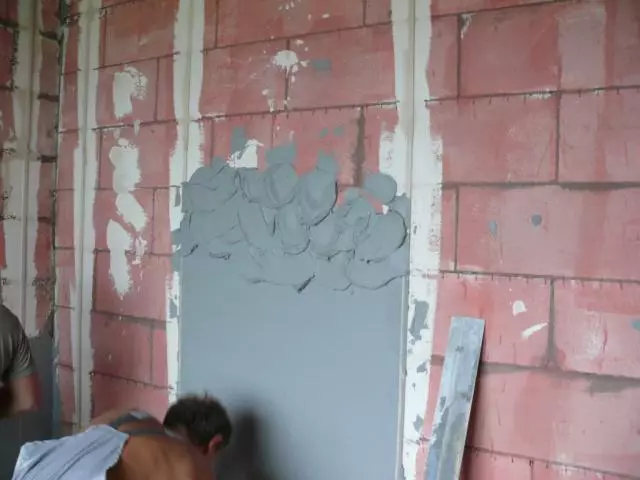
If the walls have large differences more than 5 cm, it is necessary to produce plaster in two layers. The first layer is applied without alignment, and while it has not yet frozen, the spatula on it makes large irregularities (serifs). After a couple of days, you can apply a second layer, pre-reloading the walls.
However, with large irregularities, it will more quickly be equalizing walls with a drywall.
To better understand the process of alignment of the walls, look at the following video lessons on the plaster:
Putting plaster
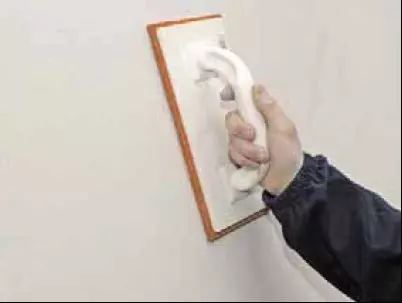
- The last stage is putting plaster. To make it easier to do, it is better to start the grout before drying the solution. For this you need to breed the plaster with small portions in a more liquid consistency. Before grouting, moisture a small area of the wall of about 1 square meter.
- Apply the solution into a small and smear it with a thin layer. Then challenge this square of the Malka at an angle of 45 degrees, with a strong pressure.
- Continue to smooth the square until the solution will stop at Malka, while removing its surplus. The surface should turn out to be smooth and smooth.
- Repeat these actions, but each new square smoothes the pectorist in the previous one. Try to work without interruptions, distracted only to the mortar.
Note! If you align the walls in the bathroom under the tile laying, the minimum layer of plaster must be 10 mm. In addition, it will not be necessary to produce a grout, since for the largest clutch, the tiles with the wall will need to create artificial irregularities.
The result of the work is shown in the photo:
Plaster facades
The plaster of the outer walls (facades) on the lighthouses according to the technology is almost the same as indoors. The main thing here is to observe the temperature regime. The temperature on the street should be above zero.
For facades, a mixture based on cement and sand is usually used. For greater durability, the facade can be attached to the metal grid and plastering on it. It is especially important to use the grid if the walls of the house are made of silicate bricks.
We looked at it in detail how to plaster the walls with the help of lighthouses. Now you can easily make these works and do it yourself. Do not be discouraged if you can't succeed this case from the first time, everything passes with experience, and you will definitely learn how to make the walls perfectly smooth. We also recommend you to familiarize yourself with our article about applying decorative plaster.
Article on the topic: Everything about curtains from Capron: from sewing to washing