
Plasterboard today is used quite widely: it is used for the plating walls and ceilings of the room, and to create new partitions. For inexperienced masters, the most difficult stage of work is the installation of wiring under plasterboard, but if it is properly prepared, even this operation is nothing complicated.
Wiring in plasterboard trim
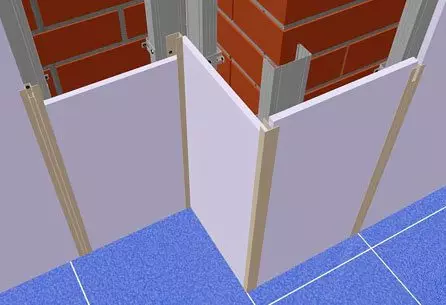
Design of plasterboard sheaturing
The electrical wiring under the plasterboard is mounted in parallel with the walls of the wall, which means, even before all the work, we should understand how we will lay the wiring, and what mandatory elements (sockets, switches, junction boxes) must be installed.
Consequently, the installation of wiring under plasterboard needs to be started simultaneously with the beginning of the installation of the plasterboard itself.
It should be remembered that the trimming of the walls by plasterboard can be carried out in two ways: with the help of special glue or using a metal profile frame for drywall. Accordingly, the wiring in the drywall will also be laid in different ways.
Installation of plasterboard on glue is used quite rarely. Most often for this, mixtures of type "Perfliches" or "Fugenfuller" are used. Such technology is used in situations when the irregularities of the walls do not exceed 4 mm.
Wall sheat GLC on frame
As for the more common installation of plasterboard mounting on the frame, it is as follows:
- Initially, the brackets of galvanized steel frames are installed on the wall.
- Metal profiles for drywall are mounted on the brackets, between which the heat and sound insulation material is stacked.
- Plasterboard sheets are turned on top of the frame, which are then sweeping and coloring interior paint.
This design of the plasterboard is more laborious, and the price of the frame for the frame is very high. But we get the opportunity to level even significant irregularities of the walls.
Article on the topic: Wall mural of sports subject: Football and others
Naturally, in each situation, the plasterboard wiring will be laid in a separate technology. Below we will tell you in detail how you can pave the wiring with your own hands in the same case.
Installation of wiring under drywall
Laying wiring in the shoes
If we plan to glit a plasterboard directly onto the walls, then for the hidden installation of wiring in the walls, you will need to do special grooves - shoes.
Installation of wiring at the same time we produce:
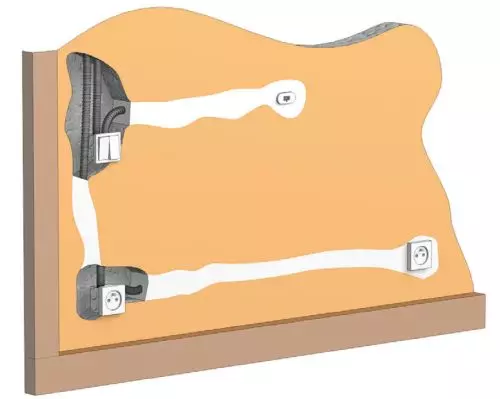
Wire gasket circuit
- First on the walls we apply marking under the laying of wires . Separately, we note the installation locations of sockets and switches. In order for the wiring to be laid exactly, use the level to apply markup.
Note!
Turns of wiring must be fairly smooth. Information about the minimum rotation radius contains either the instruction to the cable or the specification on the manufacturer's website.
- When the markup is applied, proceed to the harden . In places where we plan to install sockets and switches, using a perforator with a depth of at least 35 mm.
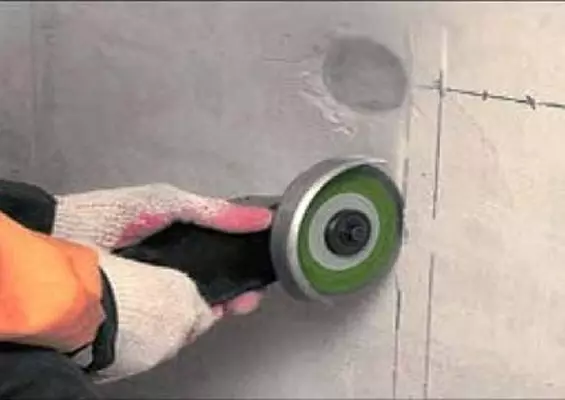
Slicing Strobe
- Grooves for laying wires cut through the strokescence or hollow out a perforator . Technology of pulling in a concrete or brick wall is shown on video on our website.
- Then the wires are placed in plastic corrugations that put in the grooves done.
Note!
In places of installation of switches and sockets, the wires must be laid freely, i.e. without plastic housings.
- Lailed in the grooves of the wire by putting off putty, after which - we stick plasterboard on the wall.
We will only have to do holes and install sockets with switches, but we will tell about it in a separate section.
Grinding Wires in Stroke
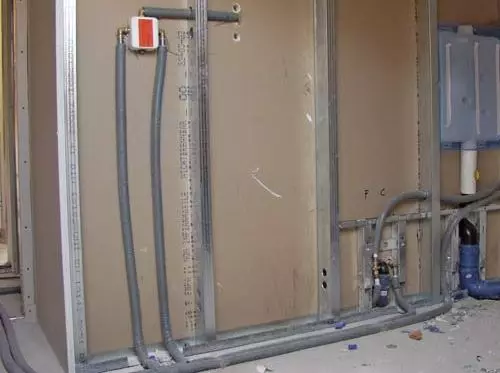
Wiring styling inside frame
Wiring in plasterboard partitions or under the trim fixed on the frame, is mounted much easier:
Article on the topic: How to transfer a heated towel rail
Wiring laying scheme
- At first, as in the previous case, we put on the wall markup for the laying of cables.
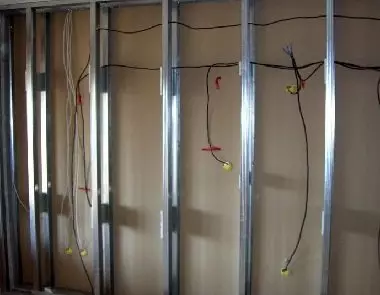
- Then we collect the frame from the metal galvanized profile on the wall.
Tip!
If the installation of electrical wiring for plasterboard is carried out in the septum without a concrete base, then one side of the partition is cut down by plasterboard before laying cables.
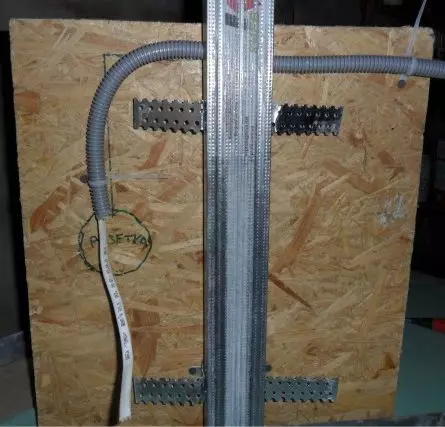
- Focusing on the drawn scheme, drill in the framework profiles of the hole, through which we will stretch our cable.
The diameter of the opening should be sufficient so that through it you can skip the corrugation with wires.
Note!
Some profile models are available with already finished holes, and in other holes you have to do it yourself.
Wall with outstretched wires
- We pave the corrugation inside the frame, following the fastening screws do not damage the protective casing.
- The wiring in plasterboard partitions must be securely fixed, so the wires we are secure to the frame of plastic clamps or segments of insulated wire.
After the wiring in the drywall is fixed, you can sabs. We will only have to install sockets and switches.
Articles on the topic:
- Outlets in plasterboard
Installing outlets and switches
The final stage of the wire laying under the plasterboard trim is setting out sockets and switches.
This operation is performed after the complete walls of the walls.
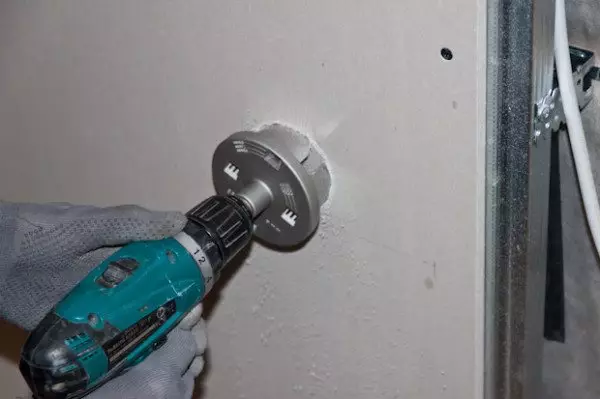
Open hole drilling
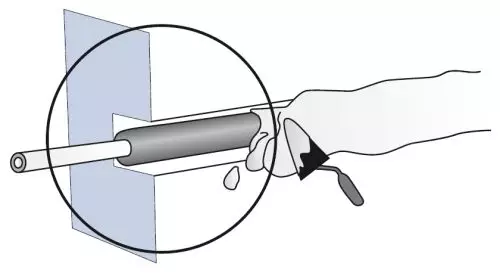
- Initially, using a special cutter in the drywall cutting a hole for the installation of a plastic backbone. As a rule, for mounting the sockets are used with a diameter of 65 mm.
- After the hole is done, in the bottom of the subtlecler, cut the specially provided jacks to stretch the wiring.
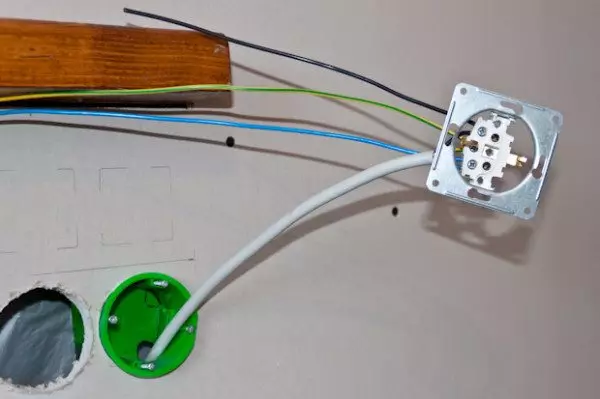
- Pull the wires from under drywall and stretch them through the holes in the bottom of the opposition.
- We place the peavering in the hole and align in the level, after which - we twist the fastening screws. Inside the sheathing Metal "foot" of the subbands are rotated, and the plastic base for a socket or switch is securely fixed in the drywater covering (see photo).
Article on the topic: Windows windows with five aircraft: Is there any sense?
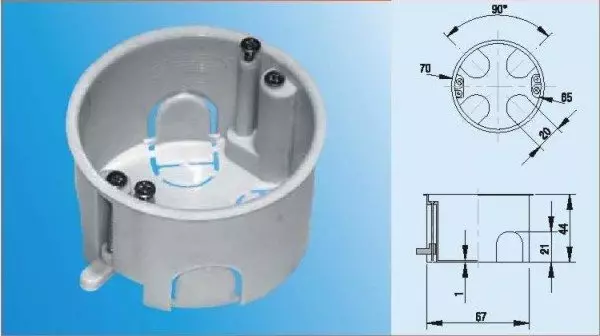
Construction of Podrovetknika
Tip! If the wiring for plasterboard by this time is already connected - reliably insulating the bare ends of the wires to avoid closure during the execution of finishing works.
After the conversion is installed, you can start the drywall trim. We will install sockets and switches only after the finish is completed, because in the process of painting or putty, you can easily drink decorative lining.
Connect socket
Installing a socket or switch is made like this:
- We disassemble the case of the device, removing all the protective and decorative parts from it.
- We connect wires to the terminal part, removed into the peavern, fixing the stripped ends of the wires with screw clamps.
- After checking the reliability of the connection of the wires and the terminal block, we place the terminal part into the opposite and fix with the help of fastening screws.
- On the fixed terminal part we put on decorative and protective overlays, after which - check the performance of the installed part.
It is completed on this work, and the paved wiring can be used in normal mode!
As you can see, the installation of electrical wiring on plasterboard does not represent. The main thing when performing these works is not to hurry, think over each other step, and, of course, comply with the equipment of the electrical safety!