
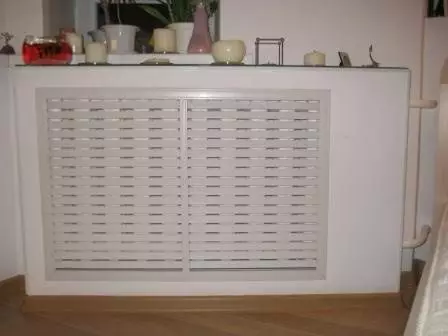
In apartments built by the hands of Soviet workers, as in some modern buildings, cast-iron heating radiators are installed. These elements are not always suitable for the overall interior of the room - in this situation you need to think about how to close the battery with plasterboard and does not reduce the level of heat transfer.
According to the existing residential code and redevelopment rules, it is impossible to hide the heating systems directly into the wall. But it is possible to close them with an additional wall from an alternative material.
How to hang the battery - on plasterboard and removable screen
The trimming of batteries of plasterboard is used more often - this material allows you to quickly and simply simply hide the placing flaw, make the appearance more attractive.
Marking
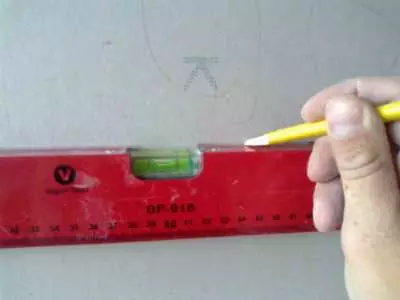
How to fix the battery for plasterboard - stage markup
The markup of the future design is carried out using:
- Measuring tools - roulette, ruler, corner;
- Design tool - simple pencil, marker;
- Accurate tool - Construction or laser level.
Conducting this stage, it is desirable to adhere to the exact dimensions, limited by integer centimeters. Millimeters apply only in the case of a particularly accurate design, for example, under the established interior design.
Before sewing the battery with plasterboard and get rid of its unpleasant species, you need to decide under what embarrassment methods are marked:
- The box is a simpler and fast work method (only the battery area is closed and, literally, 12-20 cm beyond it);
- The wall is a more time-consuming method (a completely wall is closed, which has a radiator; if the heating device is set by the window, the slopes must be performed).
In terms of work, the injection of batteries in the first method is more simple: fewer material is used and a small number of building processes is carried out. In the second case, even fewer building processes are used, but more material is used.
Ku
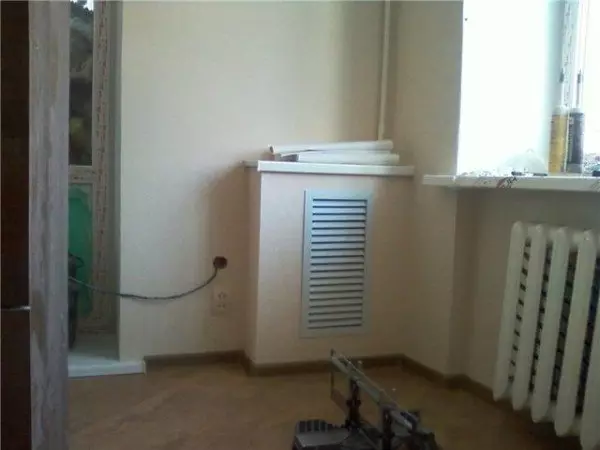
Dog for radiator
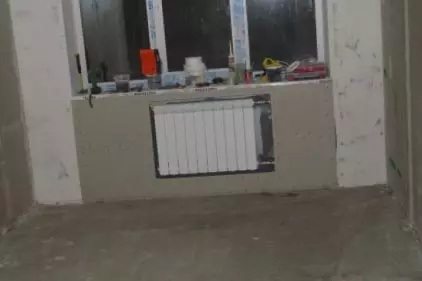
When the device device, the design takes a little space, closing a little more space than the radiator itself. The depth of such a box depends on the width of the heating device (most radiators already than batteries with metal plates).
Note! The edges of the design must be over the edge of the radiator at least 10 cm. - Otherwise it will not be possible to install a removable screen on the front side.
Control instructions:
- Depending on the desired design position, a horizontal band is carried out. If the box is hanging - donate the distance from the floor and using the level of the markup line. If the design will rely on the floor - there will be 3 lines (two along the edges - depth, one front - edge of the design).
- To the lower face you need to install the corner and spend vertical labels - we achieve direct angle. With the help of the level, bring vertical lines to the desired size.
- On vertical lines, the same labels are noted, between which the connecting segment is carried out.
Article on the topic: How to paint the doors from pine: step-by-step instruction
As a result, a square or a rectangle should be turned out (in the case of support to the floor - an additional base markup).
Wall

How to close the battery plasterboard - the method of the wall device
Conducting the placement of the room and thinking how to close the batteries of heating and pipes by plasterboard and make it correctly, the decision about the device alternative wall comes by itself.
The essence of the solution - together with the radiator, the entire surface is closed to which it is attached. This method is wasteful, as you can do in small volumes of the material by setting the point box. But the wall is the only way to hide the heating device from the room with your own hands completely.
For the wall of the wall, the framework is based on the entire height of the room:
- Using the level, several vertical lines are performed based on the frame. Step - 60-100 cm. Mandatory lines under profiles in the corners of the room.
- From each vertical line it is necessary to continue on the floor. To do this, use the corner. The depth of floor lines is equal to the width between the main wall and alternative.
- Similar to the floor, lines are carried out on the ceiling - equal depth and strictly parallel.
- Recent marking lines are carried out on top and bottom of the heating device, at a distance of 7-10 cm.
On the sides of the radiator, there is also a markup - on the perimeter of the device, the profiles are needed to which the removable screen will be installed. But in order to get rid of extra work, it is possible to carry out basic markings (which for the entire height of the room) directly on the sides of the radiator.
Frame device
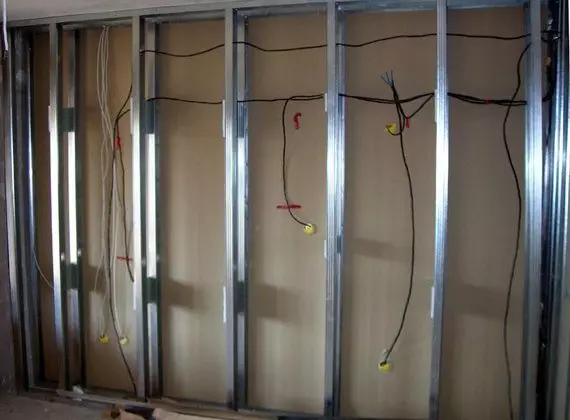
Metal frame under the wall
Before close the heating battery with plasterboard, decides this room interior, you need to arrange a frame. For its construction, metal profiles of a chawller shape are used, a width of 60-70 mm.
In total, in the process of performing work will be needed:
- profiles - as the main frame;
- Screws (40-60 mm) - Construction fastening;
- dowel (40-60 mm) - fastening in the surface;
- metal scissors - for cuts, if necessary, flexing the metal;
- Pliers, screwdriver, drill or perforator - auxiliary tool.
Article on the topic: Combining balcony (loggia) with kitchen, room
The first profiles are fastened, which are adjacent to the wall.
On our site you can see a lot of video on the topic of carcases under plasterboard, but the main instruction is performed as follows:
- Metal profile is assigned to any side or center to the markup line;
- A small mark on the wall is left screwdrived;
- the perforator is deepening under the size of the attachment;
- A dowel is inserted into the performed hole;
- The profile is assigned to the prepared place;
- Mounting is performed screw.
After prehasting the metal to the wall, the backs are made in 15-25 cm. The holes are prepared immediately for the entire profile.
The described process attacks all the necessary parts of the frame. In the case of attaching an angle of two elements, you need to cut the necessary parts with metal scissors.
When parts that are attached to the wall are installed - go to the depths of the frame:
- Cut parts of the profiles of the required size;
- Cut on the place of folding both edges of the element 4-5 cm;
- Bend the middle down, and the sides are cut on the width of the sheller shelter profile;
- Fresh segments to the edges of the main long elements at an angle of 90 degrees towards the room.
Last part - connecting the upper and lower short parts, elements.
Note! With the device, the closing wall battery uses long vertical metal elements, so two short tops and the bottom is not enough - you must at least 4-5 pieces.
The frame in the finished form should represent a strong design, do not fumble. If the frame is staggering, it means that the mount is not performed qualitatively, or there is not enough additional short elements.
Read "How to make a frame for plasterboard - technological steps".
Mounting design
Covering batteries plasterboard
The most difficult stages of solving the issue, how to close the heating battery and do not deprive the heat room, remained behind. If everything is prepared, the installation is an easy procedure.
Plasterboard mount is carried out according to the following method:
- The sheet of material is attached to the metallic base;
- An intensive tool marks the place of the cut - so the material is placed on the necessary pieces;
- The prepared part is attached to the corresponding part of the frame and is attached to the screw.
Article on the topic: how to unwind cable with drum
The step of the screws of the screws when fastening the material in the battery box is 10-15 cm, an example of the location of the fasteners can be viewed in the photo above.
It is better to prepare and mount on one part of the material, if you cook everything at once, you can be mistaken because of the angles speakers in some places.
Note! When screwing into a screw, it is important to feel the measure - if you put the fastener element too deeply, you can damage the front side of the plasterboard.
The removable screen should close the radiator for airing and transmitting heat into the room. Its first part, internal, attached to the metal before working with plasterboard. The main material is then suitable, and the last stage dresses a removable, external, part of the screen.
Finishing work
Seeling junctions
Learning how to close the battery in the room with plasterboard and not spoil the interior, it is important not to apply cardinal new colors. The best option is to place a box or an alternative wall in the common paints of the room. But first you need to prepare the surface under the final finish.
The finishing process takes place on the following principle:
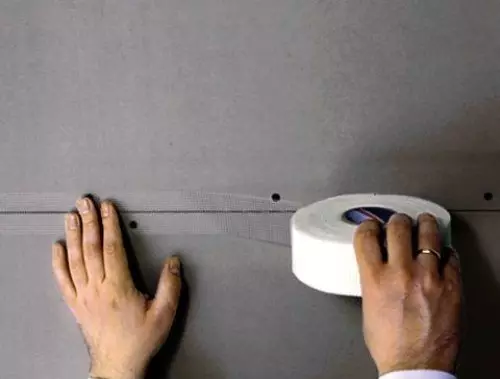
- Seaming seams between parts of drywall (see also an article about putting the seamskarton seams). For this purpose, a small piece of sickle grid is imposed on the seam, then the joint is embarrassed by the putty.
- Sealing the fastener element. It is carried out by a similar method - the serpent and putty.
- Putclowing of the whole design (see also an article than to put plasterboard - the choice of putty and technology of its application). With the help of spatulas, the entire surface of the product is put off, whether the box is either the wall. When the mixture dries, it is aligned, reading the shallow sandpaper.
The final stage is the finish finish of the product - often it is a painting or pasting with wallpaper. It is better to use that material that more corresponds to the general interior of the room if its price is, of course, within the framework of the planned budget.