
As an optimal version of lighting for apartments with suspended ceilings, many experts today are recommended point lamps built into plasterboard. Such lamps are evenly distributed throughout the ceiling area, and provide efficient lighting even in the largest room.
Installation of luminaires of this type is quite simple, but still has several features that should be considered. In the article, we will tell about how to connect and install lamps in plasterboard.
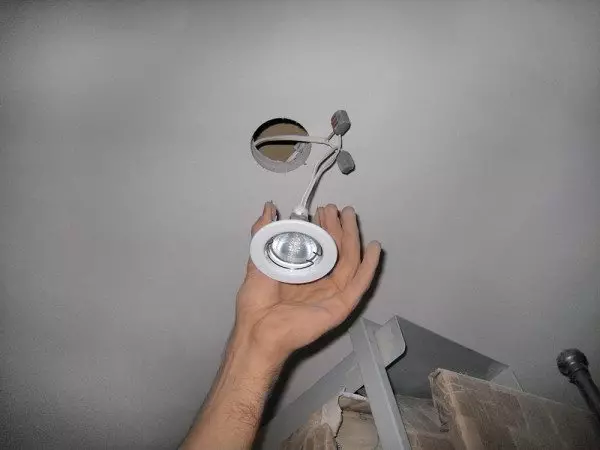
Installation of the lamp in the ceiling
Spotlights
Construction and placement of point lamps
The point lamp is called a small device that is attached to a pendant with a suspended or stretch ceiling. Such a lamp, as a rule, has a compact dimensions, because for the full lighting of the room, it is necessary to install several lamps, distributing them along the ceiling area.
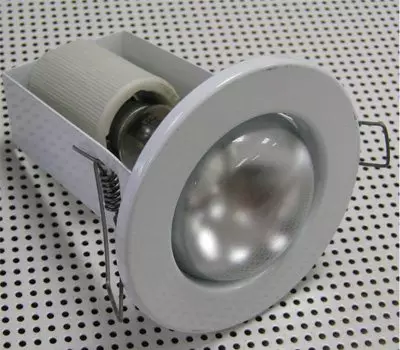
Embedded lamp
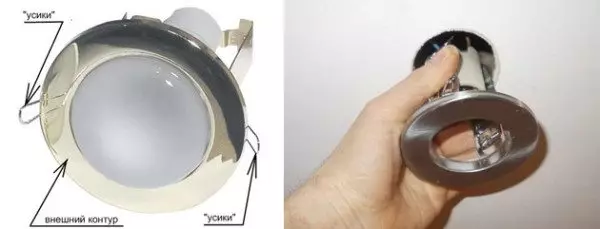
Standard lamps for drywall are made with special fastenings of spring type (you can see the design of the attachment in the photo). The mount is started into the hole in the suspended ceiling, where it straightens, reliably pressing the lamp to the ceiling lining.
From the outer side, the lamp is equipped with a decorative overlay hiding the gap between the lamp and the edge of the hole done in the suspended ceiling. The design of the decorative lining can be the most different, and in some cases, one model of the lamp can be selected several linings depending on the style of the room.
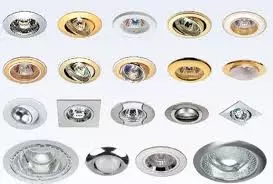
Models of point luminaires
The highlighting sector of most models is about 300, so it is necessary to place such lamps in the ceiling.
The optimal placement parameters are as follows:
- The distance between the rows of point integrated lamps is not more than 1 meter.
- The distance between the lamps in the row is no more than 1.5 m.
- The distance from the lamp to the wall is not more than 0.6 m.
Tip! Optimal is the placement of built-in lamps in a checker order, i.e. With the displacement of the rows - the room will be lit more evenly.
Additionally, point lamps can be installed on furniture items or other interior parts. Well fit into the room design also eaves backlight or point lighting over the desktop in the office.
Is it possible to glue wallpaper on plasterboard? Read the opinion of specialists.
Types of point embedded lamps
At the stage of planning the built-in lighting, the question arises, and what lamps for drywall are better? In fact, the answer depends on many factors, and ultimately choose the model to you still have to be independently.
Article on the topic: How to hang curtains for beveled windows
But in order to facilitate your choice, we will tell about the most common varieties of embedded lamps for suspended plasterboard ceilings.
By design, the lamps are divided into swivel and non-turning:
- Non-reflective embedded lamps have the most simple design. The lamp installed in such a lamp shines in one direction, and you will not be able to redirect the light stream.
- Rotary lamps are characterized by a more complex design. , and as a result, the installation of lamps in plasterboard is obtained by more laborious. But if necessary, you can focus the light from several lamps at one point, which is sometimes very useful.

Swivel lamp
As a source of light in the lamps can be used:
- Incandescent lamps.
- Halogen lamps.
- Fluorescent lamps.
- LED bulbs.
Not only power consumption and the spectrum of the radiated light lamp, but also the parameters of the structure depends on the type of light source. As a rule, models with incandescent lamps have a size of about 12 cm, because it is possible to install them only in the ceiling of the corresponding dimensions.
But the lamps with a LED or compact fluorescent lamp can be hiddenly mounted in a suspended ceiling with a height of about 6 cm, for example, in a small box with hidden illumination around the perimeter of the room. But the price of such lamps will be slightly higher than equipped with incandescent lamps - consider it!
Tip! For more "warm" and less "sharp" lighting, as well as in order for the lighting device to be less heated, the light bulbs with a mirror coating should be selected.
Wall with spot LED backlight looks great.
Of course, it is only the most common classification, since models of lamps of each variety There is a lot. That is why, solving, what lamps are better for drywall, you should carefully examine the entire range - and only then to be determined with the final option.
Read also about what equipment it is necessary for the production of plasterboard and metal profiles.
Installation process of embedded lamps
Preparation and planning
When the lamps are selected - you can move to their installation.
If you want to mount the lighting with your own hands, then the optimal option will be the execution of all works in parallel with the construction of the ceiling itself - so we have the opportunity to plan the placement of all points of lighting and pave the wiring to the melting of the frame plasterboard.
At the planning stage, we need:
- Note in advance on the ceiling overlap the placement of the lamps.
- Place future lamps at a distance of at least 25-30 cm from the elements of the metal frame.
- Plane illumination of different levels of suspended ceiling, withdrawing each level to a separate lighting circuit.
Article on the topic: what jigscription to choose: differences in tools
Also at this stage it is necessary to take into account the presence of other light sources, such as suspended chandeliers, sconce and wall lamps. For example, if a chandelier is installed in the center of the room, then it is enough to make a box from a backlit drywall: the point lights installed on the box will perfectly cope with the lighting of peripheral sections.
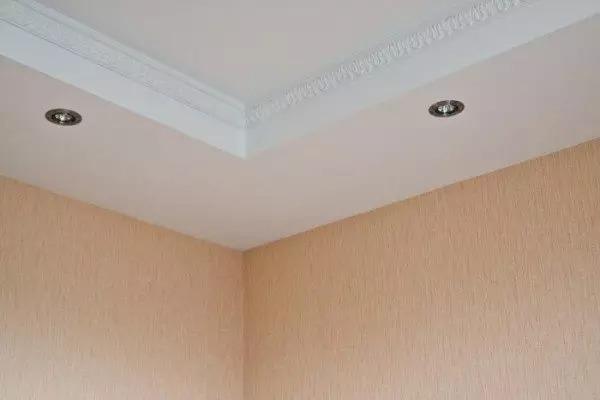
The box with illumination around the perimeter of the room
Wiring laying
At the stage of manufacturing a frame of plasterboard suspended ceiling, it is necessary to pave the wiring to connect the built-in lighting. To make her work easier, first we make a drawing of our future wiring, displaying all the elements of the built-in backlight on it - wires, lamps, switches, transformers, etc.
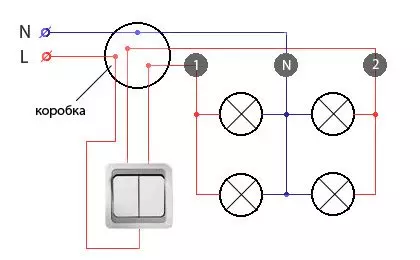
Connection scheme
If you plan a wall with backlit from drywall, a separate wiring is needed on the wall. In this case, opposite each element of the backlight should be placed its wire.
Wire selection has two aspects:
- From the point of view of the reliability of connecting to lamps, it is best to use a soft stranded wire.
- From the point of view of the reliability of the entire system, a soft or hard copper wire, for example, ShVVP or VG-3x1.5.
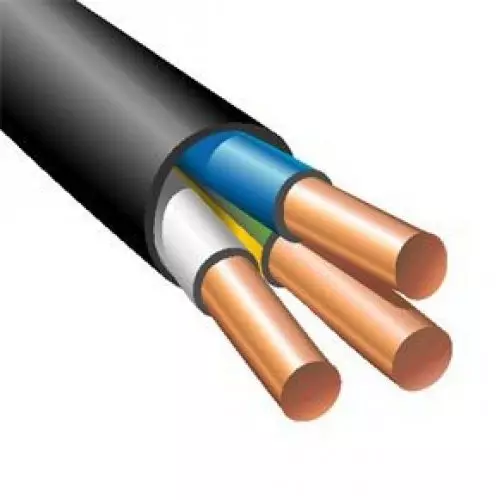
Wire VG-3x1.5
If you will use terminal blocks to connect the luminaires, then the second option is still preferable.
The wiring should be pushed in special corrugated plastic pipes - they will protect the occasion from mechanical damage and moisture from the leaks from above. For additional insurance, it is possible to fix pipes on frame elements using plastic homutics.
Tip! To master the main operations on the installation of wiring and connecting the wires to the lamps, we advise you to carefully examine the video tutorials posted on our website!
Holes in plasterboard
Before installing the point lamp in the drywall, in the drywall, it is necessary to do the hole of the corresponding diameter. As a rule, the instruction on the luminaire package contains information about the desired hole size, but it is better not to be lazy and measure the dimensions on their own.
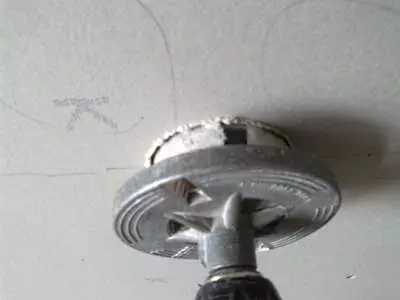
Milling holes in the ceiling
- Most often, the lamps are installed in the holes 60 and 75 mm in diameter. To do these holes, use a drill with the corresponding milling cutter on plasterboard. The drilling process is clearly shown in the video in this section of the site.
- Regardless of whether we make the overall refill of the ceiling or a small box with backlit from drywall, the easiest way to cut holes on the plasterboard plates still on the ceiling. So we are guaranteed to shift the hole where we need.
- If you have to form holes in the already covered with plasterboard ceiling, then a previously composed diagram of the placement of lamps on the ceiling will come to the aid.
- Quite often, the situation is found when the drilled hole is directly opposite the frame element (for example, if a wall of plasterboard with backlit and the milling cutter falls into the transverse profile). To avoid such situations, specialists are recommended before drilling the opening to bring a regular magnet to the plasterboard.
Article on the topic: Standards for installing a gas boiler
After all the holes are drilled and plasterboard plates are fixed on the ceiling or wall, you can start finishing work. Installation of point luminaires in plasterboard is made only after the finish is completed.
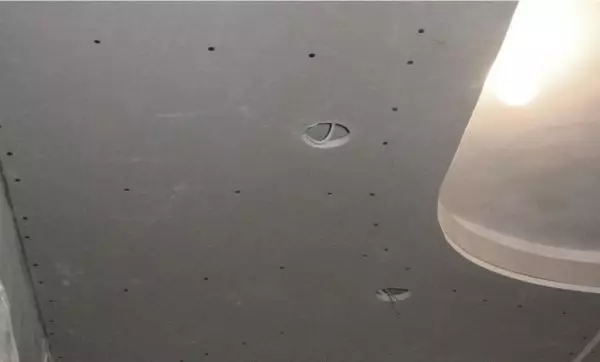
Ceiling with finished holes and extended wires
Installing and connecting the lamp
After the finish is completed, we take previously laid wires in the holes done. We will connect our lamps to these wires.
Tip! Before you start a connection, check the lack of voltage in the network! During the work, strictly follow the safety technique!

Connect to terminal block
- We take a lamp for drywall and fix the wires from the cartridge in the terminal block.
- On the other hand, our terminal blocks connect the wires from the network laid under the ceiling.
- When connected, we observe the lamp on the lamp: PE - "Ground", L - "Phase", N - "zero".
Then we need to install the luminaire case in the hole done. As a rule, there are no difficulties at this stage, but in some cases the configuration of the fastener prevents the free installation of the case. So that you still start fastening into the hole and at the same time do not damage the finish, we use a little cunning:
Installing the lamp in the hole
- We reduce the "mustache" fastening together and connect them using a small piece of wire. It is best to use a fairly hard wire in isolation - so we minimize the risk of circuit.
- The associated mount is unhindered in a hole, after which the plug cuts the wire.
- Under the influence of the spring, the mount straightens, and the luminaire case becomes in place.
When the housing is set - insert the lamp lamp into the cartridge and wear a decorative lining. It remains only to check the performance of the system collected by us.
We hope that the instructions given here explain quite in detail how the installation of lamps in drywall is carried out. When performing all the rules and presence of a certain skill, it is possible to make this work quite quickly, which means that soon there will be a beautiful ceiling with a built-in light in your home!
Read also the material "The framework of the carcass under drywall in different versions."