
In order for the design of plasterboard sheets on the wall or ceiling, it is solid and reliable, you need to know how to fix the profile for drywall correctly. And yet - how to lengthen it, to connect, which attachments to use.
You do not have to break your head over these questions if you carefully examine this article. Instructions for creating carcases from metal profile is simple and understandable, the material itself is easy and convenient in operation, so you will not have problems.
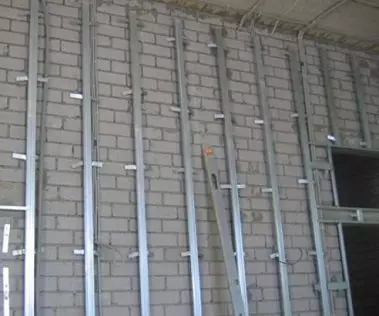
Stock Foto Ready carcass made of metal profiles
Fastening a profile when creating a frame for GLK
The task how to mount the profile under drywall, is solved in different ways, depending on what you create: framework for partition, for cladding walls or ceiling liner.But in any case, profiles have to cut or build up in length, connect at an angle to each other, mount to the base, and sometimes bending. We describe in detail each of these procedures.
Connection profiles
Most often, the connection of two or more profiles is required in a straight line - to build a length, or at right angles to each other - for a ligament of neighboring guides and giving a frame of greater rigidity.
- Extension . If the three-meter length of one profile is not enough, it is connected to the second (or its segment) using a special connector.
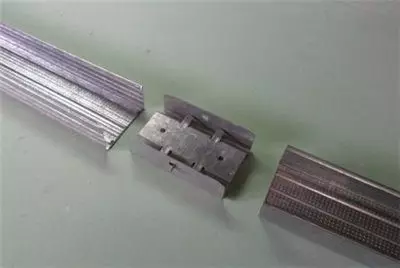
Direct connecting profile
The ends of two connected profiles are inserted into it and fixed with short self-pressing with a press washer (builders are often referred to as "clouds" or "seeds").
For reference. Before coping the profile for drywall with another, it can be shortened in length.
To do this, reserve scissors for metal to the base of its sides, then break the profile, bending a few times and straightening it.
- Conduct connection . It is necessary to create ceiling frames. You will not have difficulties with how to lock the profile for drywall crosslocks, if you use "crabs".
Article on the topic: How to choose doors with increased noise insulation
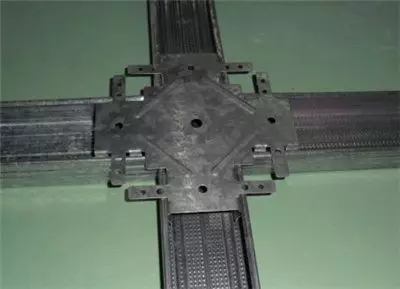
Cross connection profiles
All four profiles are inserted into the "crab" ends, snap into it in it, after which the cunning part must be fused at 90 degrees and are screwed to the side of the profiles with the same "clouds".
Attention. You can do without "crabs". To do this, you need your own hands to cut the transverse profiles on the collar and break away or beaten the sides. Then impose them on a longitudinal profile and fix "clouds".
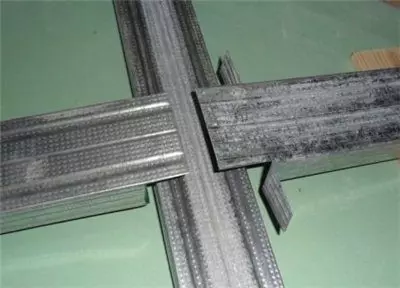
Connection without "crab"
- T-shaped connection . It is carried out either just described in the method, or with the help of the "crab", pre-cutting the excess part of the part.
Attention!
If you need to connect the guide and rack profiles, the latter is simply inserted into the first and fits with one screw.
Bending profiles
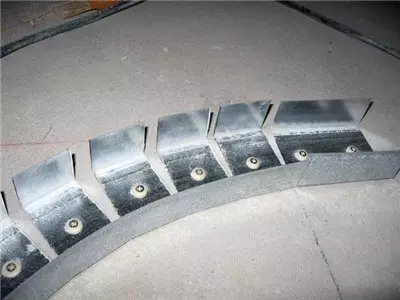
When creating arches, niches and complex ceiling profiles, profiles are sometimes required to bend.
How to do it - look at the video posted on our website.
- If you need to cut both face profile to the back, it will bend on it as you need . The steeper the required bend radius, the smaller the distance between the cuts should be.
Bend on the back
- If you cut one of the side and continue an incision on the back, the profile for drywall is bent on the second side.
Bend on the side
Fastening profiles
The answer to the question is how to properly mount the profile under drywall depends on how much the distance must be sustained between the base and cladding, as well as from the material of this base.More precisely, the fastener profile for plasterboard occurs in two stages. First, the suspensions are attached to the base, and then they are fixed on them, which are displayed at a given level.
Articles on the topic:
- Fasteners for plasterboard
- How to mount plasterboard
- How to mount plasterboard to the wall without profiles
Fastening suspensions
Before fixing the profiles for drywall, the base must be placed and installed on the laying of the suspension.
They are two types: straight and with the needles.
- The direct suspension is a perforated metal strip, in which there are holes for fastening to the base and holes for fastening the profile to the suspension itself.
Article on the topic: How to combine wallpaper correctly: features, correctly and beautifully choose the wallpaper
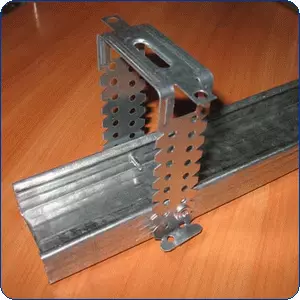
Direct suspension and method of fixing in it profile
- Suspension with the needle is used for the device of plasterboard suspended ceilings. It consists of a figured metal plate, which is attached to the profile, expatriate element and thrust (knitting).
At the end of the knitting needles there is a hook through which the suspension is fastened to the base. Using the split element of the thrust is available on the desired length.
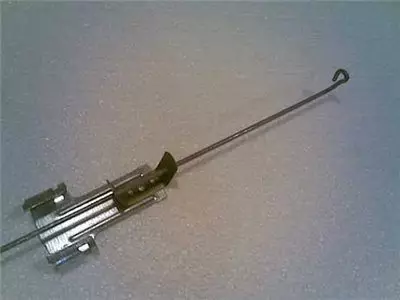
Suspension with craving
The choice of fasteners depends not on the type of suspension, but on the material of the bearing base. If it is a tree, you can use conventional wood screws or nails.
Attention!
On the ceiling, the suspensions are attached only on the self-tapping screw!
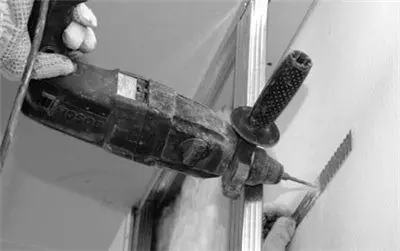
For mounting into a brick or concrete base, a dowel-nail is used, which must be drilled by a diameter of a diameter equal to the diameter of a dowel for drywall.
For hollow brick or aerated concrete, it is better to choose a dowel with transverse notches and spacers.
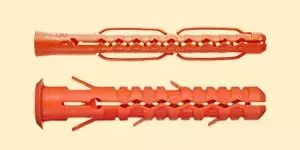
Dowels for hollow bricks
From how the suspensions are fixed, the strength of the entire structure depends.
But here not only the reliability of fastening, but also the correct definition of their position, as it is necessary to fix the profile for drywall at a certain distance from each other.
- The width of the GCL 120 cm sheet, so profiles should be placed parallel to each other at a distance of 40 or 60 cm between the axes. This will allow you to mount two adjacent sheets on one extreme profile.
- The suspensions are fixed strictly on one line, which is placed in advance. The deviation from it will not allow you to set the profile.
If you set a profile to guides, you can do without prior markup
For reference. In the absence of suspensions, they can be made of ps-profile trimming. To do this, they are cut through the sides, bend the letter r and attach to the wall.
The price of such an attachment will be minimal, and reliability is high.
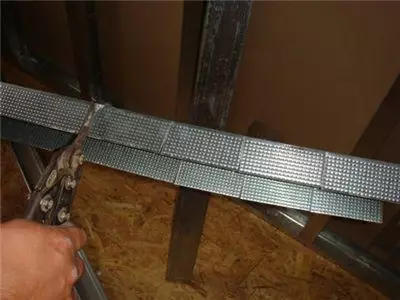
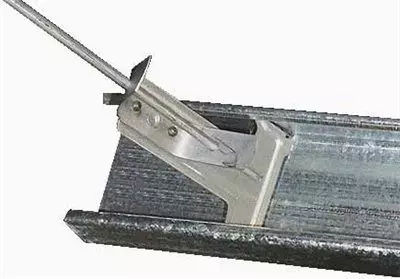
Fastening profile to suspensions
To direct suspensions, the profile is fastened with short self-pressing with a press washer. At one of the pictures placed above, you have already seen that after twisting the paws of the suspension, protruding for the profile, be rejected to the sides.
To the suspensions with a burden, depending on their design, the profile is either fastened with the same self-pressing, or simply snaps on special protrusions.
Article on the topic: We are tie to doors from MDF, laminated chipboard, laminate
Suspension profile
Articles on the topic:
- Crab for profile
Mounting drywall to frame
It is time to tell about how to fix plasterboard on the profile.
The fastening is made by self-pressing metal with a drill or a screwdriver with an adjustable number of revolutions.
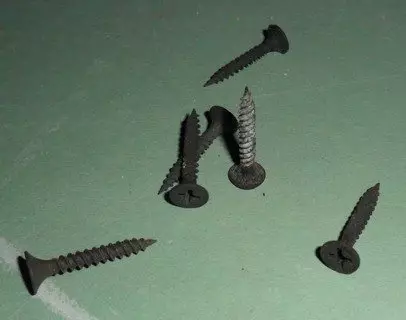
Fasteners of plasterboard to the profile are carried out by such self-draws with a length of 25 mm
Each sheet hlock is attached around the perimeter and to each rack with a step of no more than 30 cm. In this case, the screws of the self-tapping screws must be dried into a drywall for 1-2 mm so that they do not protrude above the surface.
Council. Plasterboard is difficult to fasten to the guide profile, without damaging the edge, especially if it is not very correctly measured in height.
In this case, in the guide you can insert trimming the CD profile and fasten the sheet to them.
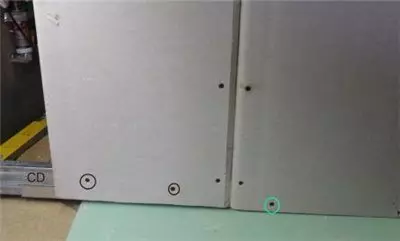
Reds are circled with self-tapping screws, screwed into the rack profile - the fasteners are far from the edge
Before mounting drywall to the profile, it must be cut. It is better to do this in consistently: a single sheet was recorded - extorted, cut out and screw the following.
You probably know how to work with plasterboard: At one point you can go to no more than three sheets. That is, it is necessary to mount them with displacement so that the seams are not crushed, and the T-shaped form.
Cut the plasterboard can be logged, hacking or a conventional stationery knife.
If you need to make a straight cut, paper on one side of the drywall cut the knife along the laid line, after which the sheet is reduced along the cut line. Then cut the paper from the reverse side.
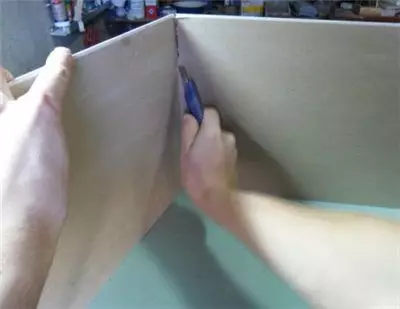
Cutting plasterboard
If you need to make a curly cut, it is better to use the hack or jigsaw.
If the plasterboard needs to be bend, then it must first moisten with water, and then give the desired shape.
Conclusion
We hope that we explained to you in understandable and accessible form how the profile for plasterboard is attached, as well as how and how to fix plasterboard to the profile. This material is unlikely to be useful to professionals, but it will be useful for newcomers, for the first time solved independently to fade the walls or make a suspended ceiling.