
In order to fulfill the repair work correctly, first of all you need to find out the sequence of laying tiles in the bathroom. If in conventional premises, the principle of "top-down" is often used, it is necessary to put in an absolutely opposite way. The order of cladding changes and first of all you need to take care of the removal of smooth gender. This is due to the fact that after applying a layer of solution and laying the tile of the wall and the floor will change their level.
After the floor is completed, you can start finishing the walls. At the same time, the work is performed from the bottom up. In order for the coating to look attractively and did not contain the cutting elements on visible zones, it is recommended to reveal the position of the rows in advance and start assembling work from the second strip.
If you plan to bile a tiled bath or output borders, then the wall decoration can be done in two ways: from the curb up the wall or from the bottom according to the standard method. More preferred is the first option.
The correct sequence of laying tiles in the bathroom: first of all the floor is facing and only then the walls
Selective sequence of tile facing relative to a particular plane is considered. Also, the location of furniture and plumbing is taken into account. In some cases, you can save and leave, for example, walls behind the bathroom without coating.
Laying and marking scheme
Before you start putting the tile on the walls or the floor in the bathroom, you need to decide on the layout project and find out where the elements of the finish will be located. To do this, it is recommended to initially work out design on paper. When drafting the drawings, the scale and accurate sizes of the tile are taken into account. So you can clearly appreciate the situation and make the necessary adjustments.
Article on the topic: Parosolation for floor in a wooden house: laying order
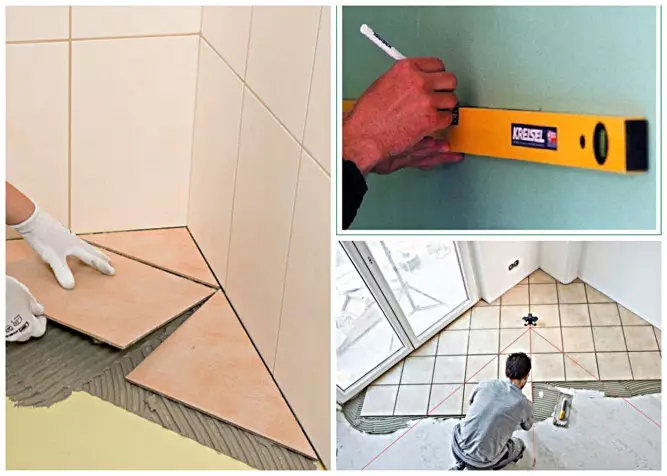
After the project is designed can be started at the workplace. First you need to determine the perimeter of the floor. The lines must be even so that in the future it could be eliminated. For marking, it is best to use a laser level or thread treated with chalk, it is applied to the concrete surface and thus mark the contours of the facing.
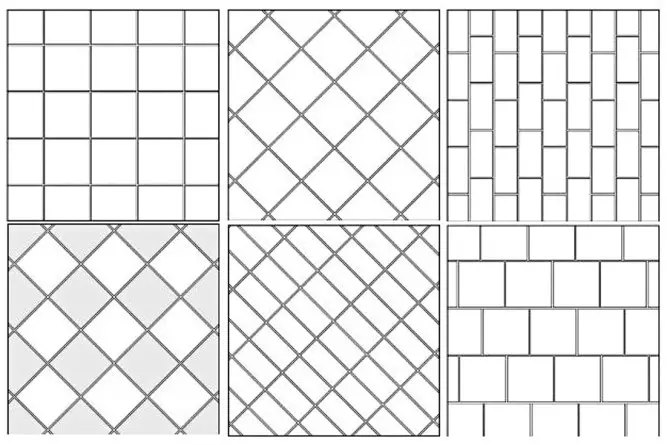
The most common schemes for laying tiles in the bathroom
To mark the walls you need to use the tile itself. Attach it to the wall without a solution, moving from top to bottom and marking the position of each tile. So you can determine the point of starting the masonry. The lower row will be laid last on the cutting elements.
Facing a floor
Since repair work begins to bottom, first of all, it is necessary to bind the bathroom floor tiles. You can start work according to one of the following principles:
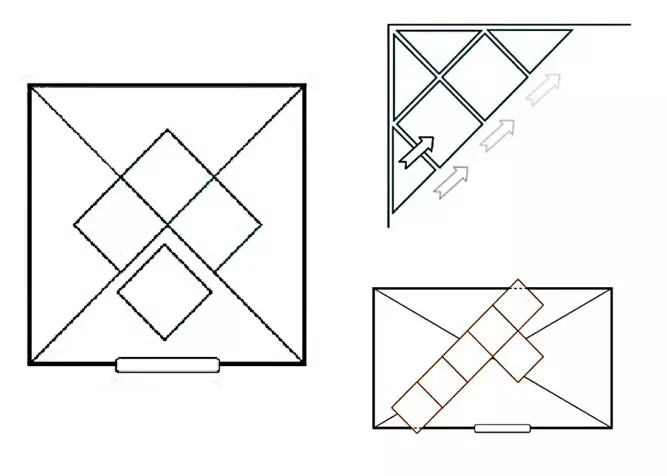
- From a long visible angle . This is a traditional method. In this case, the first element of the facing is stacked from the most viewed point, that is, from the angle, which is located opposite the wall with the door. If this zone is closed by a bath or shower, the feasibility of such a principle is partially lost.
- From the threshold . This is the most common method. In this case, the process of laying the tile begins from the angle, close to the door. The rationality of using this method is determined by the fact that the long-distance part of the bathroom hides the plumbing.
- From the central tag . This method is extremely rare and more suitable for spacious bathrooms with an open central zone. At the same time, furniture and plumbers should be located along the walls so that it is possible to hide the outbreak elements. The center of the bathroom is determined by applying markup. You need to determine the center of each wall and spend the lines for these points. At the intersection site and the central joint of four tiles from which the laying starts.
Article on the topic: Arbor from the pipes with their own hands - simple versions of garden structures
Basic principles of laying tiles on the floor
Wall decoration
Tile laying technology on the walls in the bathroom also has its subtleties. In order to better understand how to put the tile, the methodology and sequence of work should be considered in more detail. The technology of laying ceramic tiles involves the presence of the following steps:
- To begin with, make the approximate position of the side elements, taking into account the semisal space.
- Determine the position of the bottom line of the second row and fix the wooden bar, a metal corner or profile in this place in such a way that it turns out to be a flat line indicating the start of the masonry. Such a bar will allow you to withdraw the exact level when laying and prevents the crawling of the tile.
- Check the adhesive solution and give it a broken 10-15 minutes.
- Apply adhesive on the wall using a toothed spatula. The reverse side of the tile can not be processed.
- Attach the tile to the place intended for it and press slightly.
- After fixing the second element, insert a plastic cross on the junction to adjust the seam thickness.
- Tighten the Tile of Cyanka and check the level compliance.
- Move up rows, in some cases it makes sense to work in parallel with two stripes.
- First, put whole elements, and then cut the missing fragments.
- Every 4 rows let's dry the cafél and lock.
- The latter lays down the lower row, after the top will dry and can be removed the support bar.
This technology is also used when the kitchen apron is arranged, facing facades of buildings, etc.
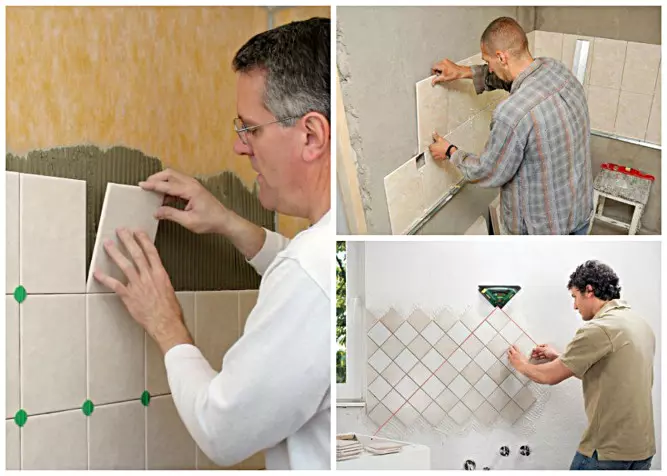
When cladding the walls, the laying of the tile begins with the second bottom row in the direction
Shavi Processing and Defect Defect
After the surfaces dry can be proceeding with seams. It is made after complete laying of tile and clean it from glue. For this use special thicker mixtures. It is recommended to moisten the joints with an antiseptic.
Article on the topic: Tile for the kitchen on apron: expert recommendations
The grout is applied with a rubber spatula or with the help of a construction syringe, in appearance it looks like confectionery, it can be made from a cellophane package. The last method is especially relevant for working with epoxy mixtures, they are more viscous, and therefore carefully fill them into the space between the tiles of the ordinary spatula will be quite difficult.
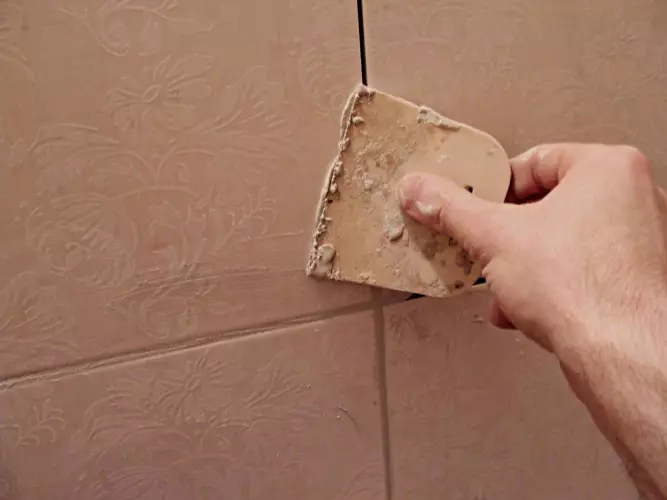
The last stage of laying tiles in the bathroom is grouting seams
The junctions between the plumbing and the tile should be treated with the help of sealant. Additionally, the corners and compatible areas are working in the same way. With the help of mastics, you can disguise small defects and adjust the visually width of the seams.
Hide the joints between the floor and the wall, as well as the tile and plumbing with a plinth or decorative plank. They are fixed in the last place with the help of sealant.
After laying the tiles and grouts, the seams necessarily need to wash the surface of the tile with a soft sponge. So you clear it from the residues of building materials. For brilliance, treat the tile to the glass to the glass.
The process of laying ceramic tiles in the bathroom on average takes 3-4 days. This will be enough to prepare the working area, bind the surface of the surface, let them dry and close the seams between the elements. If you comply with the correct order of laying the tile, you will be able to minimize defects and remove a flat surface.