
Before you set the furnace, decide on the tile type. First, pay attention to such characteristics:
- Refractory. The coating is subjected to a constant contact with high temperature.
- Thermal conductivity. Tile should pass, but at the same time hold the heat.
- Strength. Random strikes affect the integrity of the coating. In addition, the low-stream material cracks at the first heating.
- Decorativeness. Pay attention not only to the color and drawing, but also on the size of the elements.
- Porous structure. Due to this tile, it is firmly held on the surface of the furnace and does not lag at temperature drops.
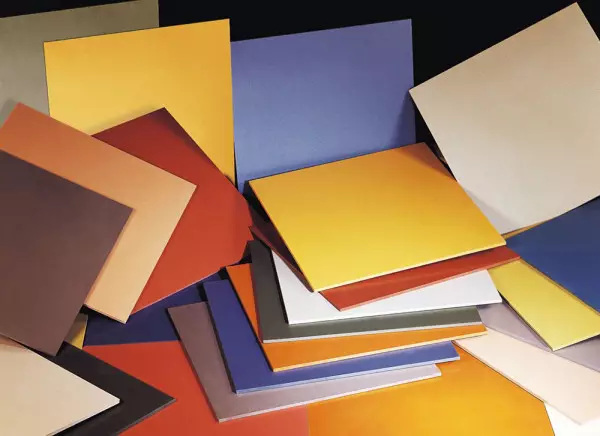
Facing tile should be not only beautiful, but also practical
Selection of glue
Another point - how to glue a ceramic tile to the stove. It is impossible to use conventional cheap compositions, they contain harmful resins and impurities, which, when heated, distinguishes dangerous toxins.
Ideally, a special refractory mixture is used with tiles with tiles. In principle, sand-cement mortar is used, but it is better to purchase specialized products. Such glue will provide a reliable clutch of the tile with the surface, will not crack and does not occur.
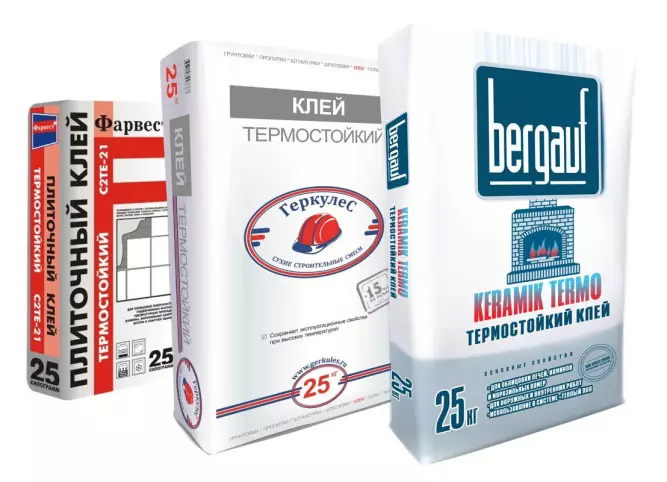
Special heat-resistant mixes
Used tools
To bust the stove with tiles, you will need to prepare a considerable list necessary to work inventory. :- set of straight spatulas;
- kiyanka;
- mounting grid;
- Metal corners;
- Platecores or Bulgarian;
- Crossings and plates for fixing joints;
- level;
- primer;
- Started heat-resistant plaster;
- a hammer;
- brush;
- Construction mixer;
- plumb;
- Scissors for metal;
- nails;
- rule;
- roulette;
- Rubber and small rubber spatula.
The mounting grid is necessary when strengthening the design, it improves the grip of the solution with the surface of the stove and ceramics.
For the edges to be smooth and the angles it was easier to form, use special linings. All materials are mounted with nails.
Preliminary work
Before separating the stove with tiles, it is required to prepare its surface. If before that it was lined with another material, it is dismantled. Then they measure the piece of the mesh and applied to the stove, the edges pressed the corners and nail.
Article on the topic: Shock absorbers and dampers for washing machines
After that, the surface is ground. The starting plaster is divorced and the layer covering all the irregularities and the metal grid is superimposed. Check it with the help of the rule so that the ideal basis is the ideal. In order to adjust the level and plumb. After dried, the surface is re-primed and a glue solution is prepared.
Laying
Before facing the oven with tiled tiles, make sure that it is designed for this kind of work. The material will necessarily be exposed to high temperatures, and therefore it is better to double-check whether it will endure such a test.
Ceramics should be insensitive to high temperatures
How to glue a heat-resistant tile on the oven:
- First of all, it is necessary to prepare a solution and give it to breed for 15-20 minutes.
- Then a small amount of glue is applied to the stove - approximately laying 3-4 fragments.
- The mixture is resurrected by a toothed spatula. If the surface is not too smooth, another layer of solution is added to the tile itself.
- The tile is glued, it is confrontated by the image and lifted.
- A few rows seeking and only then begin to work further.
- After drying, the tiles close the seams with a special heat-resistant grout.
Ceramographic
This material is increasingly used in the facing of the furnaces. It has an excellent heat resistance and is distinguished by unique characteristics. With a porcelain tile, not only the outer surface, but also the inner space of the furnace. In addition, he is not afraid of temperature differences, evaporation, cold and blows.Porcelain stoneware wear-resistant, so over time it practically does not rub.
How to set the furnace with a porcelain tile:
- Adhesive to the surface with a toothed spatula.
- A fragment is established and the queen is rambling.
- This is stacked by several rows and is given to dry.
- Work continues. In the end glued the chopped tile.
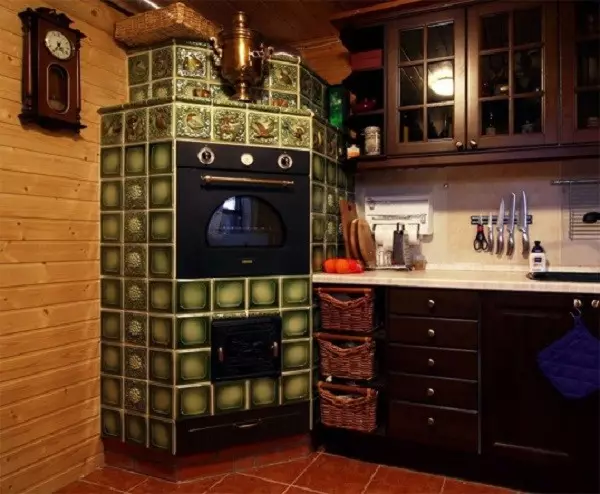
Tiemas
This material is specifically designed for facing furnaces. It is characterized by excellent characteristics and magnificent appearance. But this is not only a stylish decor, but also the way to keep heat as long as possible. It has a box structure with a recess on the reverse side - the so-called tap.
Article on the topic: Make a cellar of reinforced concrete rings

Facing with tiles will provide visual attractiveness and efficient functionality.
How to put the tile on the stove:
- On the surface, the sulfur mesh is fixed and placed in a thin layer.
- Self-tapping screws are screwed in the seams between bricks.
- The glue is applied to the oven and on the opposite direction of Rumpa, by its contour.
- The tie is fixed on the surface, then with the help of wire is screwed to the screw. Thus all the tips are stacked.
- The distance between the elements reaches 1 cm.
- Inside the rumba is covered with refractory shame, it holds heat and increases useful effects with a smaller flow rate of heating materials.
Clinker
Most often, when cladding the stove clinker tiles use elements in the form of bricks. Such material is quite durable, heat-resistant and durable. The result pleases with its decorativeness and a variety of available options.
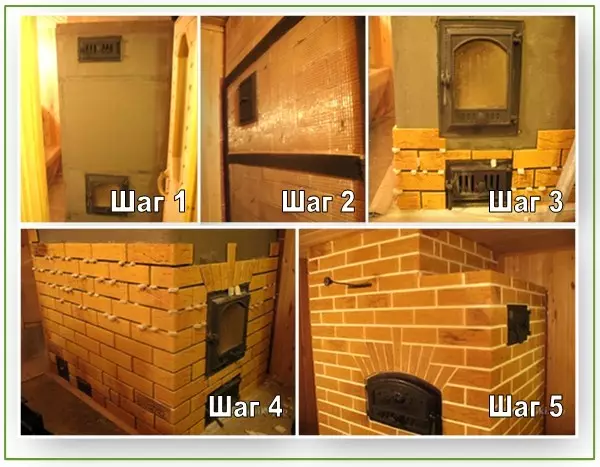
Example of phased cladding with clinker
The laying is made according to the same principle as in the case of a cafeter or porcelain stoneware:
- The adhesive solution is applied using a toothed spatula.
- The tile is superimposed and the seams are tested.
- Corner elements and cutting pieces are mounted.
- Cocks are drained.
Due to the form and a small size of bricks, experiment with the methods of laying. Most often use the "seam in seam" scheme, but the brick dressing method looks more interesting, that is, with a displacement in the floor element.
Note, with such a scheme, you need to write a lot of fragments, but this can be avoided if you purchase special angular elements.
After the final finish of the stove, the heat-resistant tile must pass at least 4-5 days, and it is better a week before using it in direct intended.