
3D postcards do it yourself always attract their uniqueness, unusual and complexity. But their execution seems not easy at first glance. The bulk card is an excellent gift for almost any celebration. Everyone will be immensely happy to receive a gift in which efforts invested and love. Here are presented variations of the manufacture of cards for a wide variety of cases of life.
Variety of ways
- Eight-bit heart.
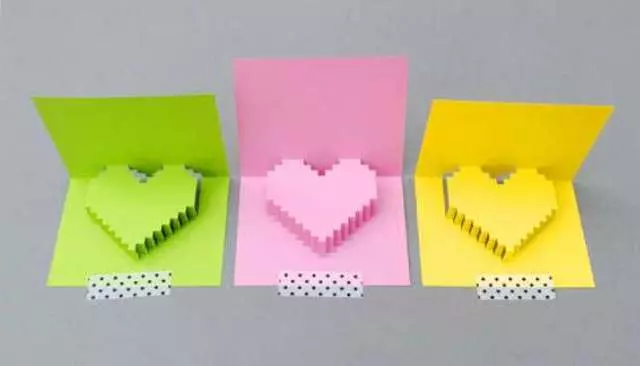
The design of the postcard seems too intricate, but it is only at first glance! Make such a charm will not be a lot of work.
This requires compacted paper of the selected shade, the stationery knife and some patience.
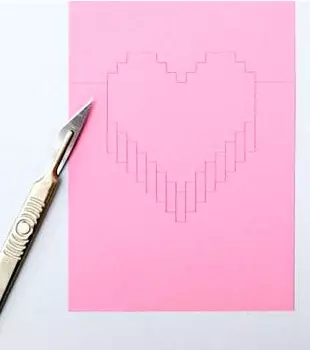
First, redraw or print the model of the future postcard.
Using the stationery knife, make vertical cuts on the template prepared in advance.
Very carefully fold the workpiece, trying not to remember it, it follows the paper on the horizontal lines, drawn yellow paste.
Now carefully swing the palm on the resulting product. Subsequent fragments should properly work out on their own. During the process for comfort, use the tape to attach the paper to the surface.
Decorate your product with a paper, various sparkles, appliqués. Everything is done, write wearing sincere words and the gift will be perfect!
- Burning hearts.
Despite the fact that this postcard is very easy, it looks quite effectively if you stick to the instructions. To make it yourself, you do not need to have some kind of skills. This kind of Valentine is able to make even newcomer!
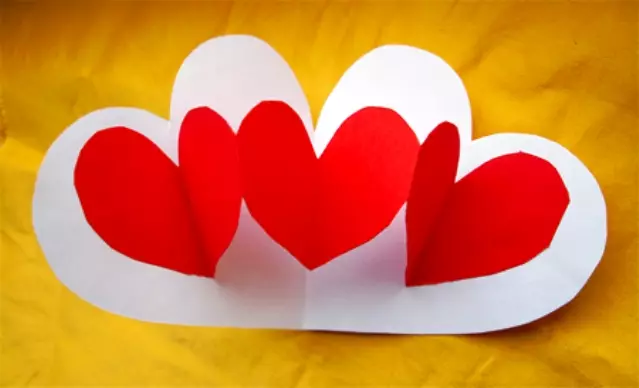
You will need: white medium density paper, normal red paper, adhesive pencil and scissors. You can choose absolutely any colors that you like. The combination of white and red is not at all necessary, let the postcard be creative.
First of all, it is necessary to prepare the model of the future gift. You can draw it yourself, but you can use the schemes:
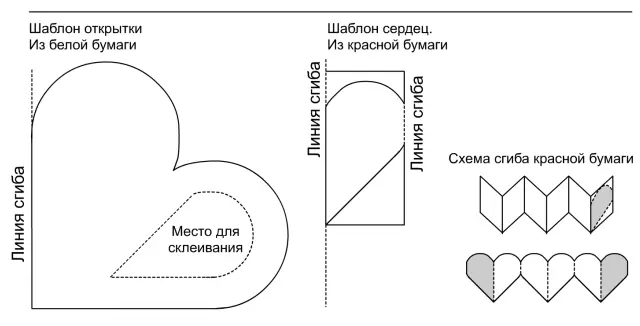
From the thick paper of white color, take out the basis, and the red - bend the harmonica, it will also need to trim it. Hearts glue with harvested base.
Article on the topic: Toy food with your hands Fetra for dolls with video
All the most important thing we have already done. Decorate the product on the subject of the submitted case, write a congratulation and make a loved one!
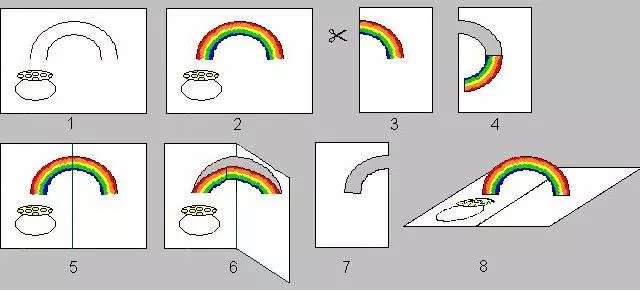
- 3d rainbow.
Even a small child can make this wonderful craft, giving her mom for a birthday or on some other occasion, because the idea is absolutely simple and universal!
Use white dense paper, stationery scissors, markers (as well as paints or color pencils - on your choice).
Fold the paper in half, draw the rainbow, make cuts along the top and bottom of the rainbow, and now break the product and draw a picture! Use the most different decorations: rhinestones, sequins, markers. Now carefully dispersed the result by cutting and turn the paper to make a hole from the cutout, imperceptible. Our postcard is ready!
- Vulcan hearts.
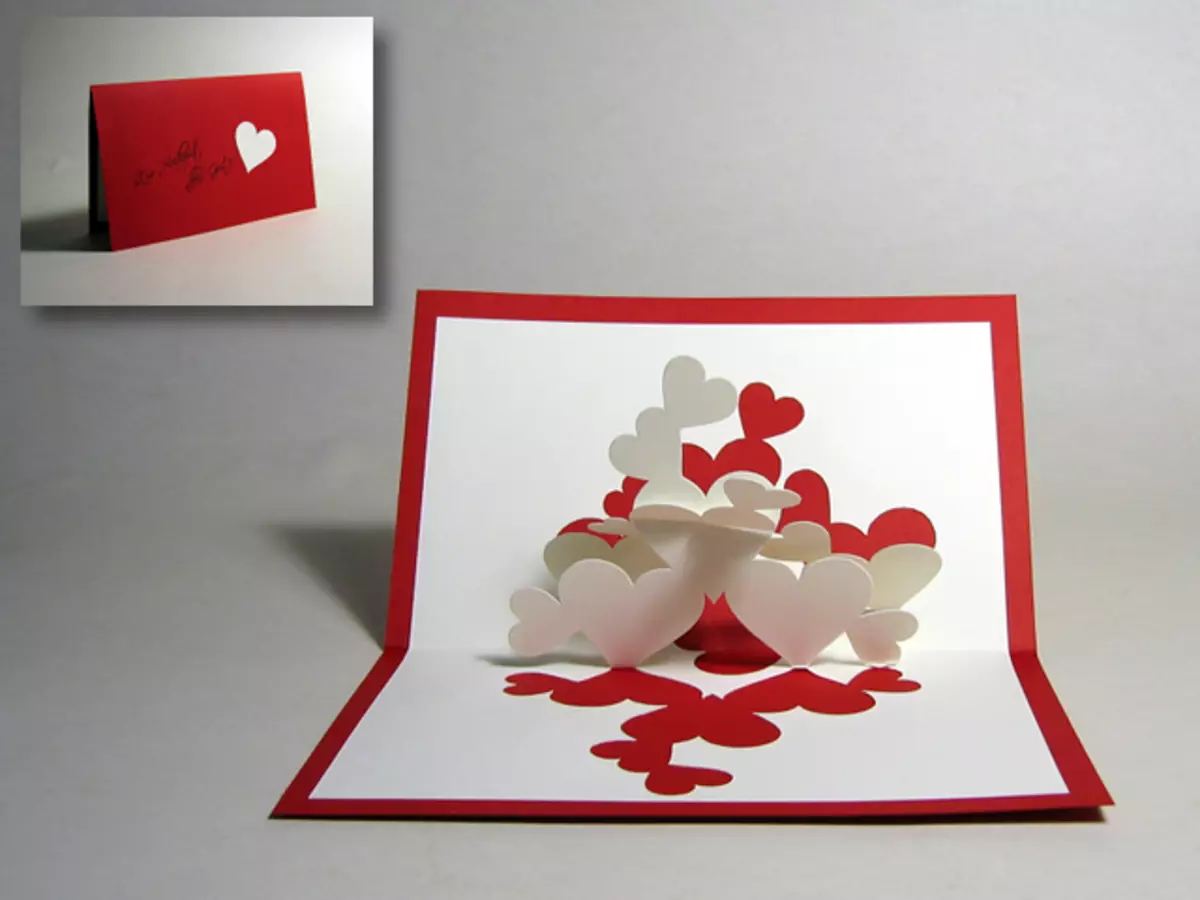
The product includes two parts glued together. You will need high-density paper, ordinary paper, scissors and adhesive pencils. Select the desired color gamut yourself.
Hearts can be drawn with their own hands, but you need to stick to a certain technology, so that the fake came out neat.
Remove the major heart from the core.
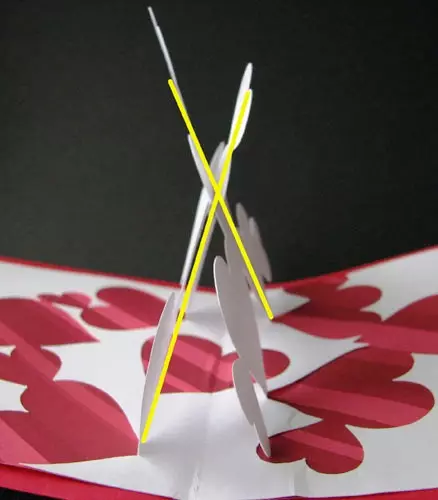
Cut out the rest of the shapes, leaving the unaffected place of their fold. Cancel the hearts, as in the figure, so you can bore them.
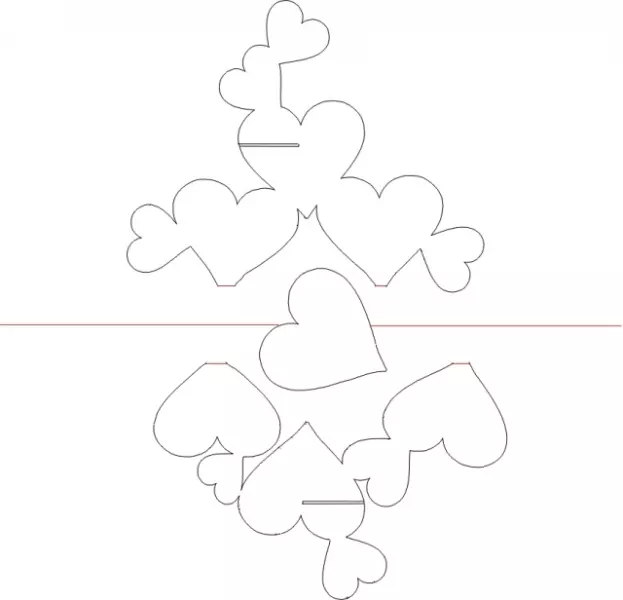
If you caulate paper in the center in the center and attach all the parts sequentially, the postcard closes better.

Attach the halves to the base and align the hearts with the cuts made.
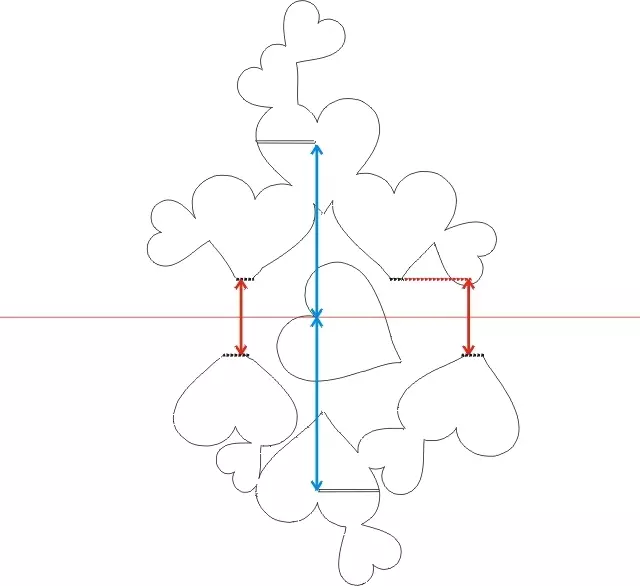
The sizes of hearts are similar on both sides. The blue and red lines indicate the same intervals.
- Card-club.
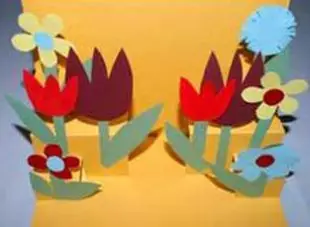
3D postcards from paper colors can be given absolutely to everyone, in this their main charm.
For it you will need: scissors, adhesive pencil, line, paper of various shades and cardboard of different colors.
Use green paper for cutting with steel and petals. For buds, choose some other color you like.
Article on the topic: Hydral sleeves crochet for children's dress with diagrams and video
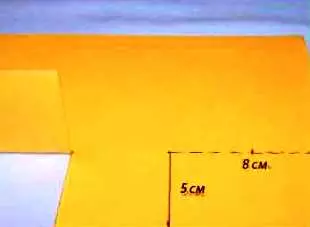
Dlyter paper fold twice. Attend one part to the side, and from the second, measure 8 cm from the leftmost and 5 cm from the bottom. How to do it, shown in the picture. Then you need to make a cut along a solid line, bent on dotted. Duplicate the most on the reverse side, and the resulting steps bent into the inside, they will be painted with flowers and make them more voluminous. Measure 4 cm from the extreme part of the sheet and 2.5 cm from the bottom. Now shift the steps again. Glue the stalks to the steps, and the flowers are to the stalks. Holes made for steps, hide an extra sheet of paper that you initially postponed to the side.
Ready. Write a congratulation or draw something inside.
Video on the topic
Video that will help you in the manufacture of 3D postcards: