
Casket for needlework with your own hands - a unique object, which is necessary for each mistress. Such a product can be made independently and give to the celebration of mom, grandmother or girlfriend. The box stores the cute heart of things, decorations, different devices for creativity and so on.
Getting to work
This master class will tell you several variations of manufacturing a variety of boxes.
- Box with box and fabric.
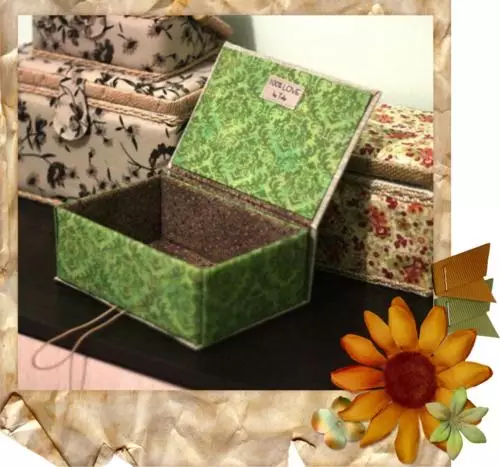
To fulfill this work, we will need: a cardboard box, cotton fabric (you can use any, but for newcomers cotton is most suitable), tape on paper based, stationery knife, scissors, simple pencil, eraser, ruler, clamps, transparent glue (universal) , adhesive pencil, ribbons, different decorations.
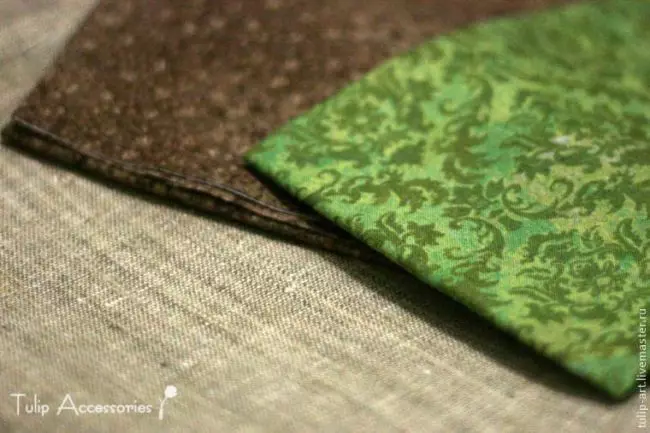
Pick fabric over the color scheme. Distribute which material will be used for interior decoration, which for external, and which is suitable for the cover.
Remove the fabric using a pencil and an elasty to get a smooth outline. Return an extra place on the allowance (2-4 cm). Wrap the box with a cloth, after making cuts by a stationery knife in those places where it is not saturated. In this you will be helped by clamps and paper tape, which is removed from the fabric, without leaving on it traces.
Use the adhesive pencil is needed in an amount dependent on the type of fabric. That is, if you enhance the future casket with cotton or atlas, then you need to apply a thin on cardboard, barely a noticeable layer. And if the tissue is dense and multilayer, then use glue more abundantly. With the material you need to do the same with the inside of the casket. In the corners, on the joints, under the lid - it is better to use universal glue by applying it to the cardboard dotted line.
Do not use the casket on the outside, it will leave the stains and spoil the entire design.
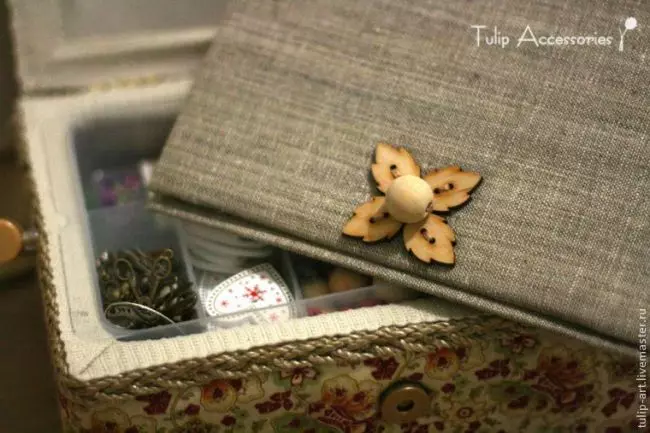
Optionally, on the joints of the fabric from the inner and the outside, it is very good to pass with glue using an openwork ribbon. This will give the box especially cute view. But without a ribbon, the product will also look spectacularly - in the photo of the openwork is not used. Ready casket decorate with a variety of buttons, appliqués, rhinestones, etc.
Article on the topic: How to decorate bumps sparkles
- Tree box.
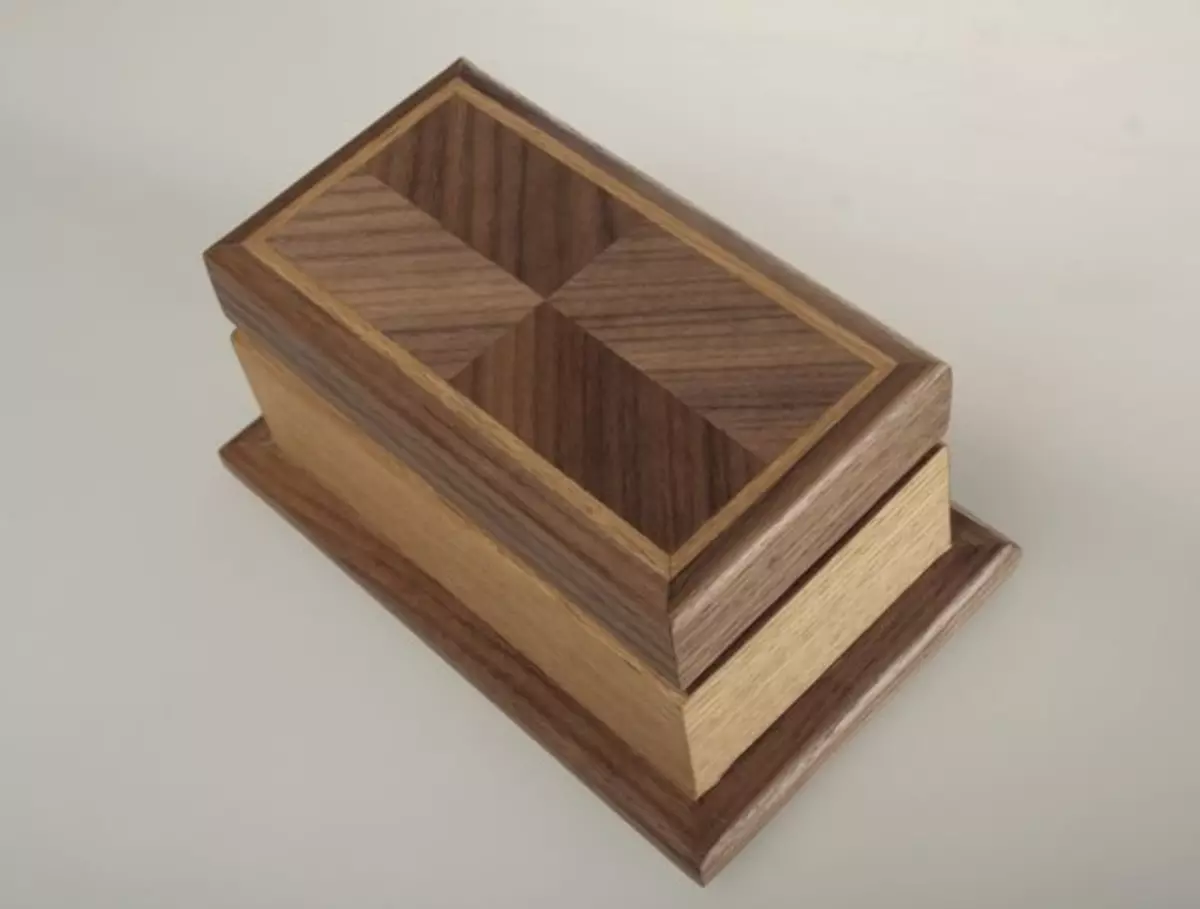
For the manufacture of a wooden box, a scotch is greasy, PVA glue, loop, wooden platband or rack, veneer of a tree (color, texture and other characteristics can choose yourself), plywood.
Dimensions for the future casket choose themselves, depending on what you would like to adapt it.
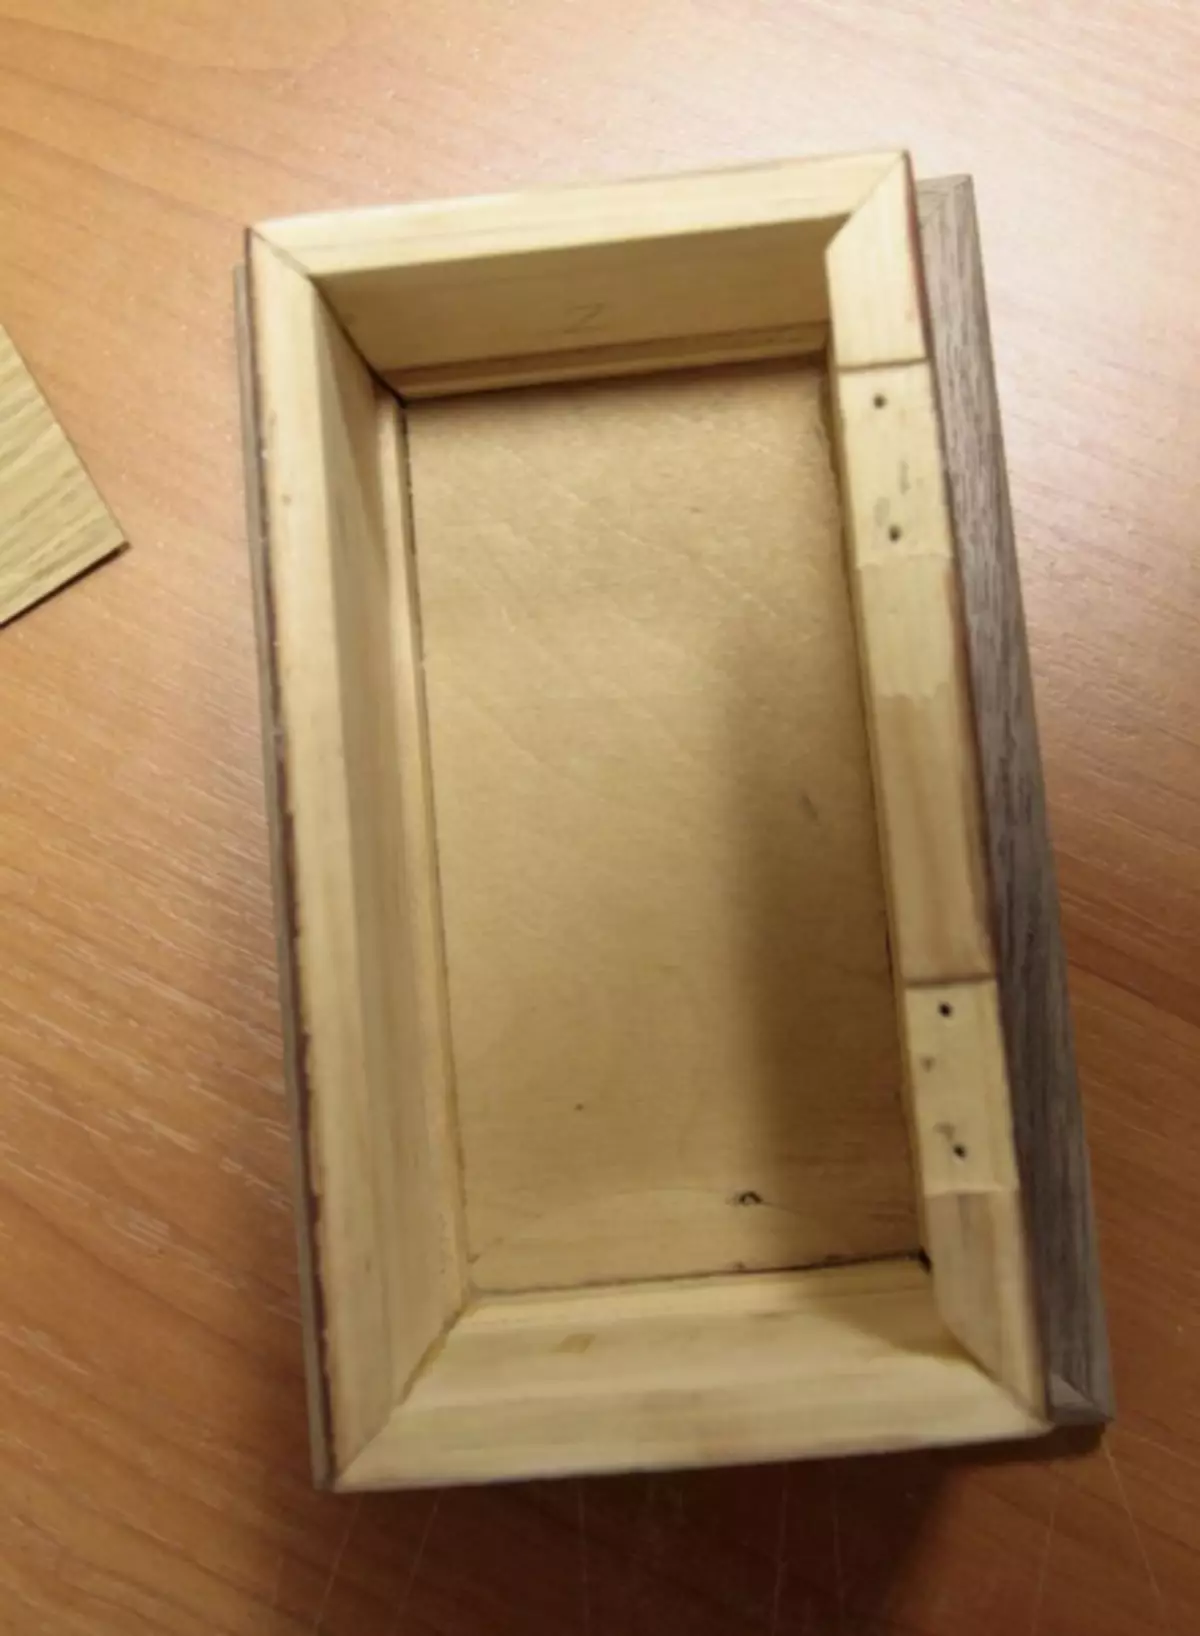
Basis make more covers, it will have a positive effect on the appearance of the future product. The ends of the walls with glue at an angle of 45 degrees using PVA glue. In advance, grind the base and walls, until gluing. Also in advance should take care, make grooves upstairs in one of the walls for the loops and drill holes for the screws.
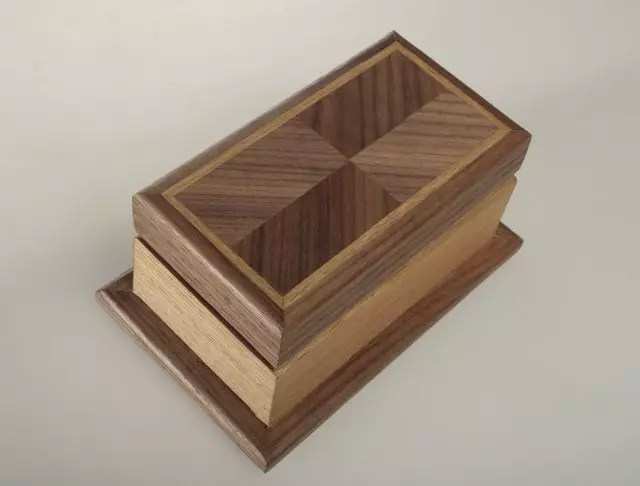
Next, go to the manufacture of the lid for our box. Perimeter - tree, top and bottom - plywood. PVA glue comes to the rescue. Plates cut off the stationery, according to the required dimensions. It will not work at once, so you are taking care and cut out carefully. What pattern to recreate and how to place panels - your choice. We have they converge diagonally in the center.
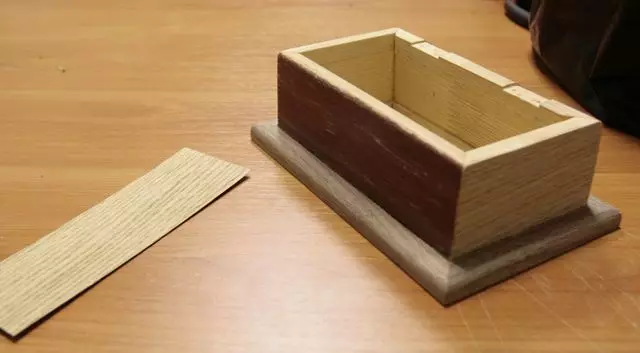
Use the painting tape to connect the items with each other before gluing them on the casket. Now we apply glue and glue all panels immediately. Choose more reliable glue than PVA. Perfectly will go any instant for wood. We remove the scotch and give time to dry completely.
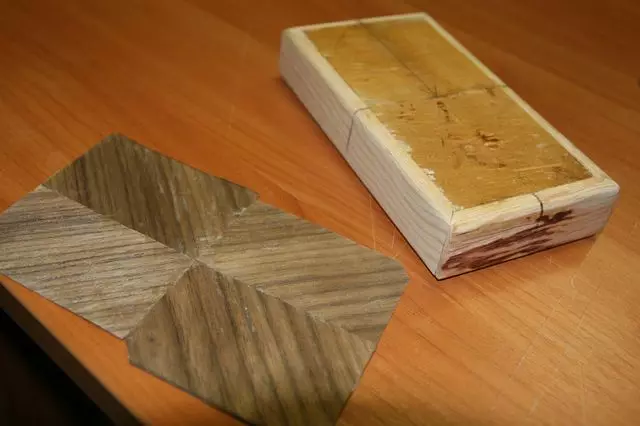
For registration of the lid, cut the strips from the veneer. Generate edges.
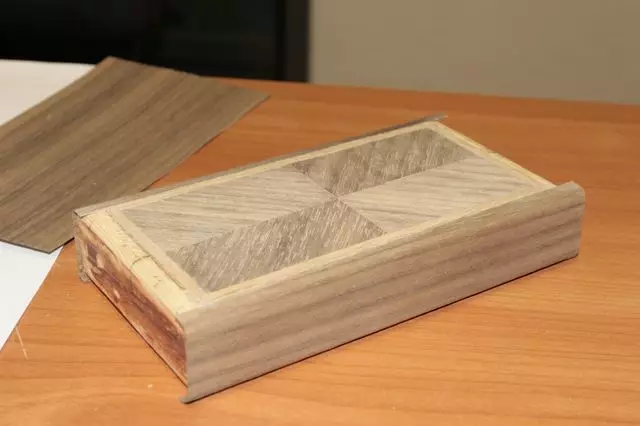
To make the item during flexion could crack, press the edge using the bar. Use that instant glue as for the lid.
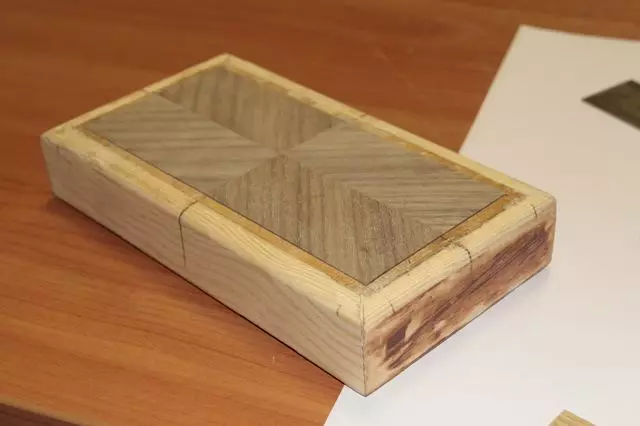
The outside we built. Now pay attention to the fact that on the lid in the places of fastening the loops had to be extended.
Separate the inner part. Choose a dense fabric, preferably suitable for the appearance of the casket. In this case, the red velvet appears. Looks very elegant and professionally. The easiest way: know the size of the walls, cut the blanks and arrange them with a luxurious burgundy velvet. The material will dry, and you glue them into the inner part of the box.
Article on the topic: how to tie a crochet chicken
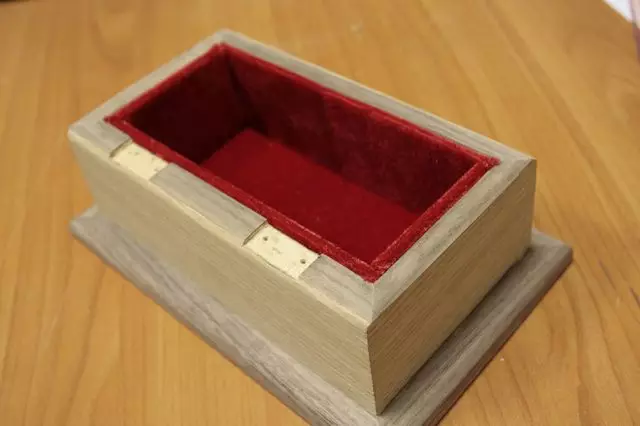
Screw the loops, assemble and walk out the emery paper on the product.
Ready!
Video on the topic
There is a lot of different ways of making caskets: from cardboard, from shoe boxes, from fabric and even from newspaper tubes! How much - you can just find something like yourself. Experiment, recognize new and develop in creativity, the masses such here are wonderful things!