
The gazebo is a great way to relax after a working day on the household plot. And if you know how to handle a grinder and a welding machine, then you will not be difficult to collect and install a beautiful and durable metal gazebo with a polycarbonate roof on your garden plot.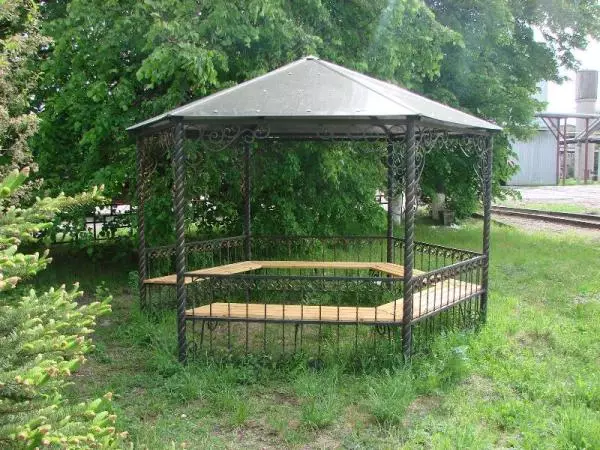
Construction of pipes with decorative wrought elements.
Highlights in construction
A gazebo of metal pipes with their own hands is created on the basis of a metal frame, which is trimmed with polycarbonate sheets or other material.
Therefore, first of all, you should decide on the size of the building and purchase the necessary materials, namely:
- Profile pipes for a gazebo with a square cross section.
Tip!
Consider that this material will be required not only for racks, but also for strapping.
If you want your design to look more aesthetic, then for the strapping of pillars you should use pipes of a smaller cross section.
- 2 polycarbonate sheet.
- Reinforcement bars.
- Paint or primer intended for metal surfaces.
Light arbor designs do not require the foundation laying.
Note!
Be sure to check with the seller, whether the paint has an anti-corrosion effect.
For our case, this indicator is important and must be.
To carry out work, you should also stock appropriate tools:
- Electrock with a set of metal drills.
- Welding machine.
- Bulgarian.
Articles on the topic:
- Gazebo from the profile pipe and polycarbonate
- Arbor from plastic pipes with their own hands
- How to make a gazebo from the profile pipe
Foundation - the basis of the structure
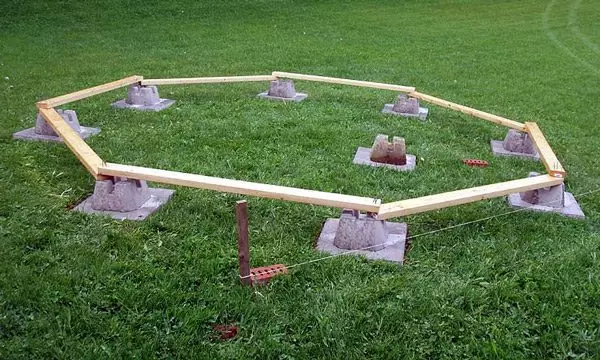
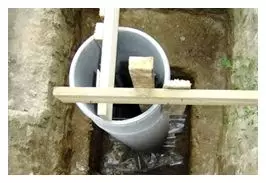
Foundation columnar from special blocks.
If you want the erected design to be stable and reliable, then it is necessary to prepare a solid foundation for the arbor. Most often, the gazebo of the square tube is installed on the base, since it is simple and economical in the construction.
The instruction on the fill of the foundation has several stages:
- We carry out the marking of the territory . Between the supports, it is advisable to observe a distance of one and a half meters. Marking you define the form of a future gazebo of pipes. It can be square, rectangular or in the form of a polyhedron.
Tip!
If you choose a hexagon form, then for the base of the box of the arbor, you will need to use a chamberler.
It will need to put it on the chord of the hexagon of the shelf down, and then to privar.
If the design is square or rectangular, then you can do only with horizontal strapping.
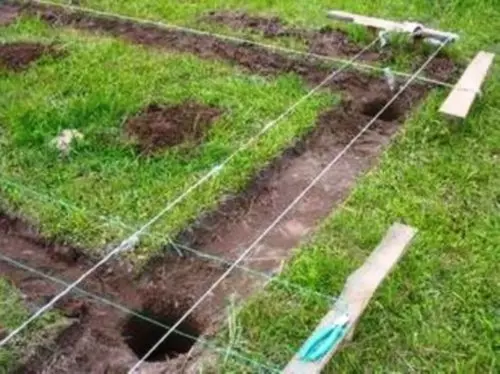
- Accordingly, the markup, dig holes under the pillars for the arbor, a depth of about 1.2 meters.
Article on the topic: Wall and ceiling bamboo panels - Freshness of the forest in your room
Poppies with a bera.
- In each pit, we fall asleep the mixture of sand and gravel in the proportion of 1: 1.
- Now you can start installing columns . Each pillar exhibit in terms of the level is strictly vertically and fixed using wooden backups. The support racks are made from the pipe with a square cross section 80 to 80 mm, the wall thickness of which is at least 2.5 mm.
- Insert into each support for 2-4 reinforcing rods.
With the help of such a device from wooden bars, you can do without installing the formwork.
- Cooking cement mortar from cement, sand and fine rubble in proportion 1: 3: 5.
- Pour it into support and in the wells around the supports.
- After the fill, it is necessary to check each of the supports in the level . After the solution hardens, the pillars will be very difficult to align.
Note!
Since concurred basement supports are and gazeboards, they don't need painter in this design.
It is replaced by the ribs strapping.
Also a good version of the foundation for the arbor is a ribbon. For such buildings, a small-breeding belt base is best suited.
The ribbon base is gaining strength for 3 weeks.
In this case, a trench is digging around the perimeter of the construction, a depth of 30 to 60 cm, on the bottom of which the ten-gravel layer of sand and small gravel mixture is falling asleep. After that, the trench is stacked by the reinforcement frame, which is poured by concrete.
We make carcass
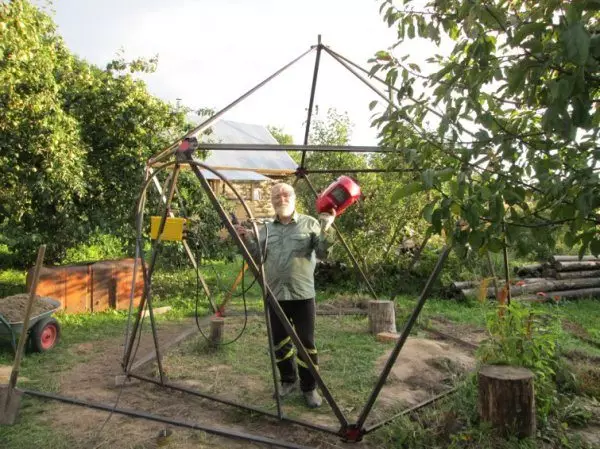
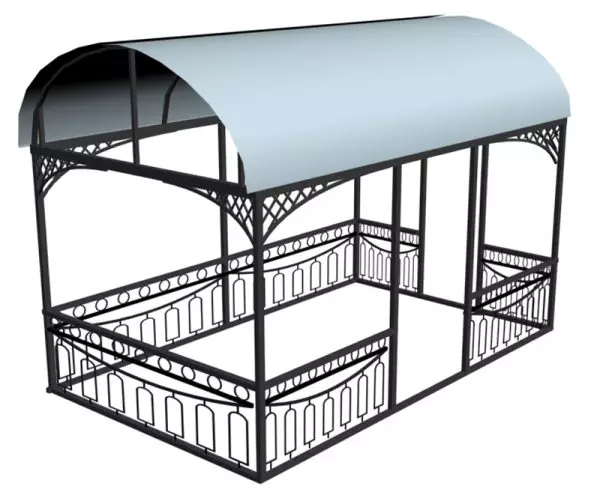
Non-standard metallic frame under the arbor.
When the solution freezes, and the posts will be steadily standing in their places, it is necessary to perform their strapping, welding the cross. On the one hand, this significantly strengthens the design, on the other, the gazebo of the pipes, therefore, it acquires some kind of walls.
The strapping can be performed as pipes of the same section, as well as thinner, which will give the design more aesthetic appearance.
Article on the topic: Repair of small cuisine with their own hands, layout of small cuisine
It can be done as follows:
- All over the perimeter weld to vertical racks upper horizontal struts.
- Now parallel to the top weld the lower spacers.
- For the beauty and strength of the design, we weld the diagonal spacers located between the upper and lower. They are installed crosswise.
- The last step is to open the frame of the paint arbor.
The photo shows the simplest and successful version of the strapping.
In the event that you create a frame of hexagon design, you will need a channel in your work.
The markup is made as follows:
- The resulting circle is divided into 6 equal parts;
- After that, the channel also cuts into the same segments connected to each other by welding.
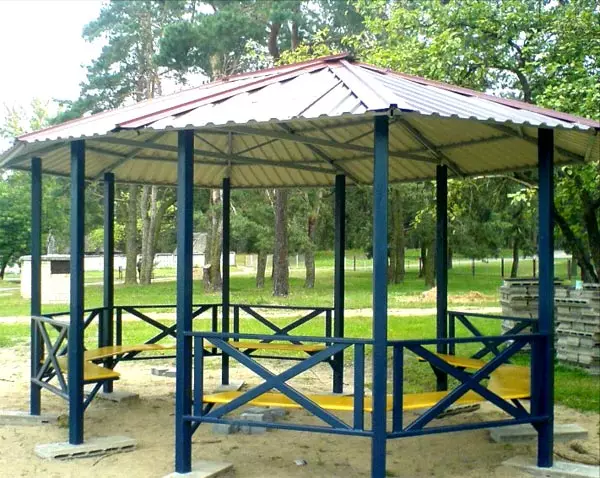
We draw roof and finish
Now consider how to make the roof of the arbor do it yourself from the pipes. The rapid part of the structure should be made of square pipes that are welded to the frame under a slope of 15 degrees.
It is necessary in order to ensure the proper bias of the roof. If your building has a rectangular shape, then the rafters will be in the form of triangles.
The price of the roofing of pipes and polycarbonate is much lower than, for example, from the tile.
Tip!
If the gazebo is quite large, and rafters have a length of more than one and a half meters, then inside such triangles it is necessary to provide spacers, as in the case of a strapping.
Here it is also necessary to provide a crate. It is performed from a thin profile pipe and welded to the rafters every 35 cm. This allows you to protect the sheets of polycarbonate from deformation under the weight of the snow masses. Such a doom should be easy to do not lose design.
Polycarbonate sheets are stacked on top of the crate. If necessary, they need to trim in size.
It is advisable to allow a small backstage so that water does not register during the rain. Polycarbonate sheets are fixed to the crate with the help of a dowel.
Article on the topic: Replacing the loops of balcony plastic doors
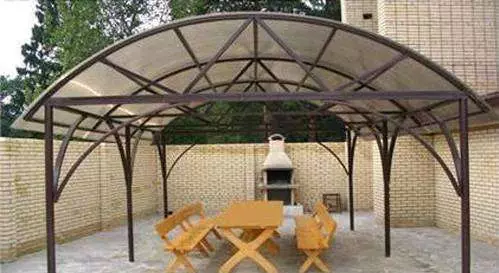
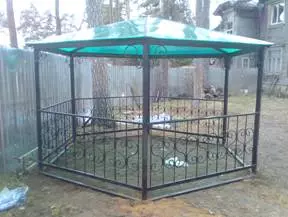
Gazebo with a semicircular roof.
If you decide to assemble a multifaceted frame, then the rafter is in this case concentrated around the axial rack, which should turn out to be slightly higher than the rest. Thus, it turns out to make a small bias of the roof. After that, using self-tapping screws and thermoshaba, you can begin to secure polycarbonate sheets. The sheet is placed on the roof, after which the holes are drilled, and fixation is carried out.
Paul such a design can be laid with tiles or boards. Note that since we are talking about an open gazebo, the boards should be protected from rotting, using antiseptic compositions.
Also for the arbor, you can provide walls. For their arrangement, polymer materials are used. Details are cut in size and attached to pipes with dowels.
Articles on the topic:
- Drawing of the profile pipe
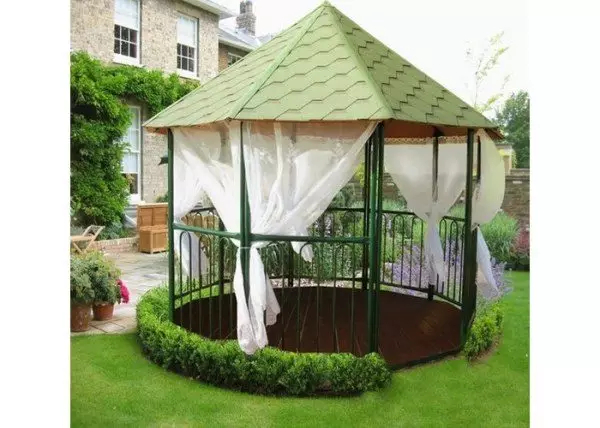
In order not to lose the design of the walls, you can hang light tulle.
When the arbor from asbestos pipes is ready, you can proceed to interior decoration.
- The table can be collected from the same profile pipe.
- The frameworks of the shops can also be made of tubular, while the seats and the countertop are made of wood.
Repeat: if the frame of the gazebo will be open, all the wooden elements should be treated with antiseptic composition.
- A good option is the framework created on the principle of pergola. Most often it consists of several arches, which have transverse guides, thanks to which a single design is obtained. Pergola is a building with a living roof.

At the racks such a pergola, it is desirable to plant the fusing plants, which will create a live green flooring, saving from the heat in a summer heat.
Conclusion
Above, we looked at how to make a gazebo from the pipes. As you can see, it is pretty simple design, the construction of which is even an inexperienced builder.
The main advantage of such garden buildings is ease and durability, and the care of this building will not cause many difficulties. To learn more about the construction of a metal gazebo, see the video in this article.