Bows are made from various materials and there are different forms. Recently, the manufacture of bows scored great popularity with their own hands. The most popular materials are satin and rep. What could be its use? Very different: as a hairpin or gum on the hair, like an element of clothes, for a box, greeting card or for a bouquet of flowers. In this article, we suggest you make a few bows from ribbons with your own hands with step-by-step photos. The target destination of the bows will be absolutely different.
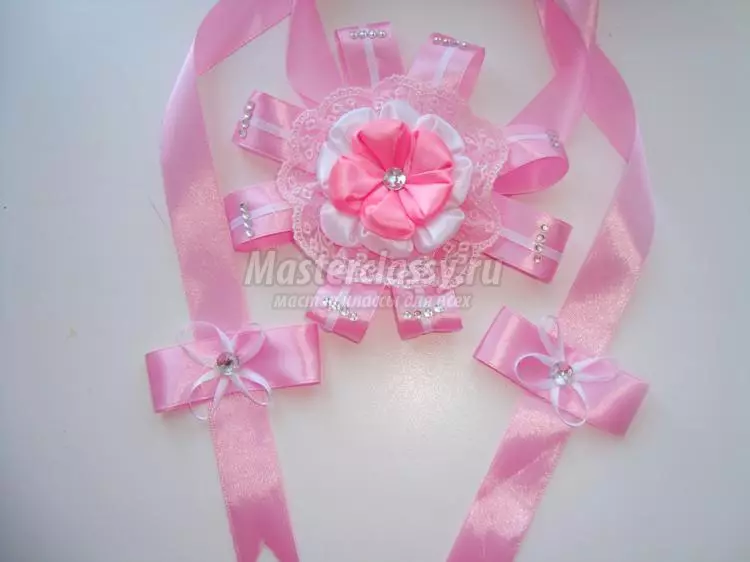
A beautiful, practical and exclusive solution will be the manufacture of a bow for a newborn to an extract from the hospital. This can do as mommy on male and her girlfriend or relative. Any parent will be very happy to such an original gift that will undoubtedly decorate such an important event. Let's start a master class on making a bow for an extract for a girl with kansashi elements.
We start with simple
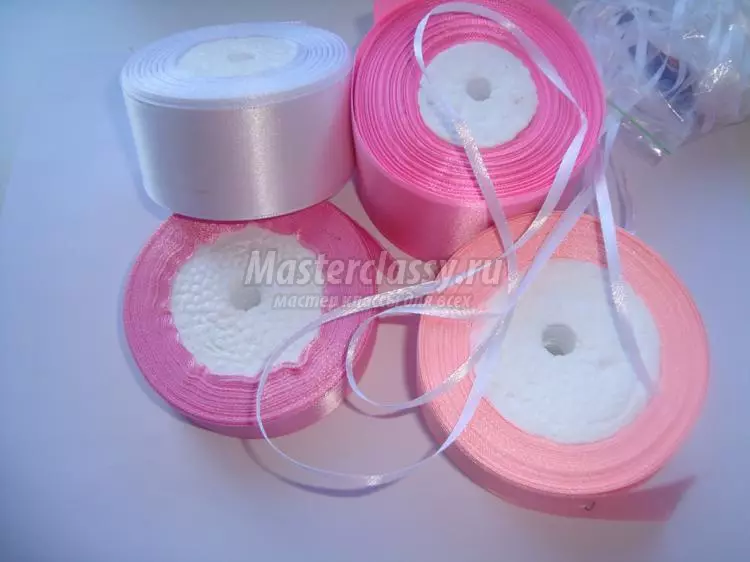
Required materials and tools:
- pink ribbon 2.5 cm wide and 128 cm long;
- White satin tape 0.5 cm wide and 152 cm long;
- White and pink ribbon 5 cm wide. white 40 cm, and pink 225 cm;
- Pink lace;
- glue;
- scissors;
- rhinestones;
- Candle or lighter.
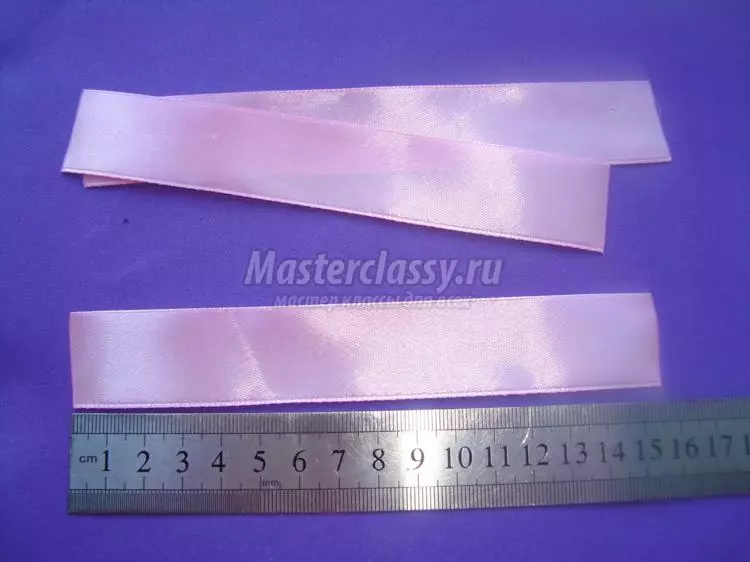
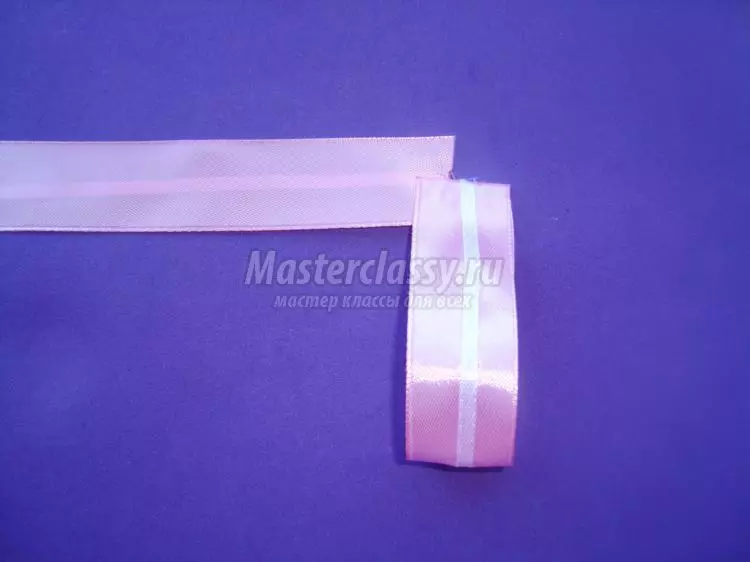
Let's start. Of the pink tape of the 2.5-centimeter width, we make 8 sections of 16 cm.
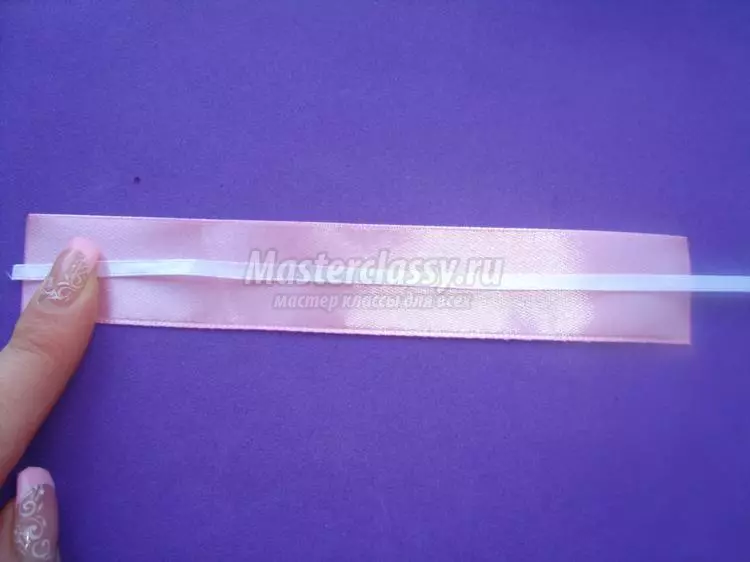
White narrow tape is cut into exactly the same parts and with the help of a drop of glue on the edges we stick into the center of pink ribbons. We do so with all the elements.
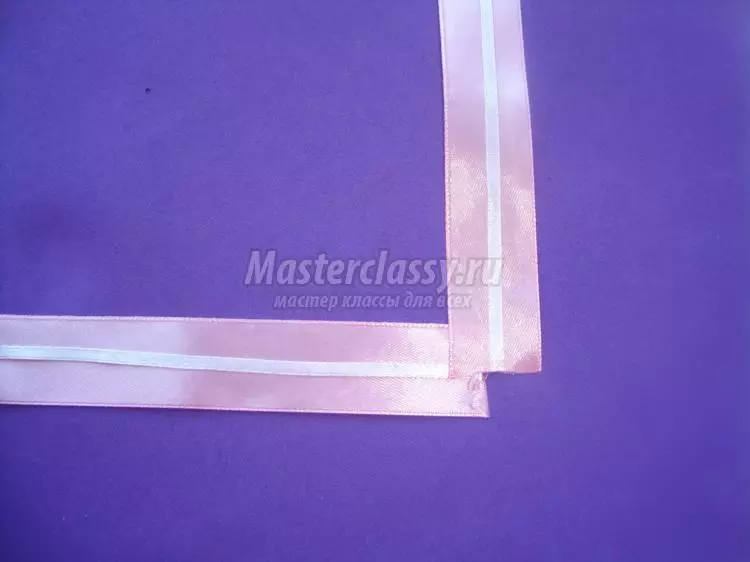
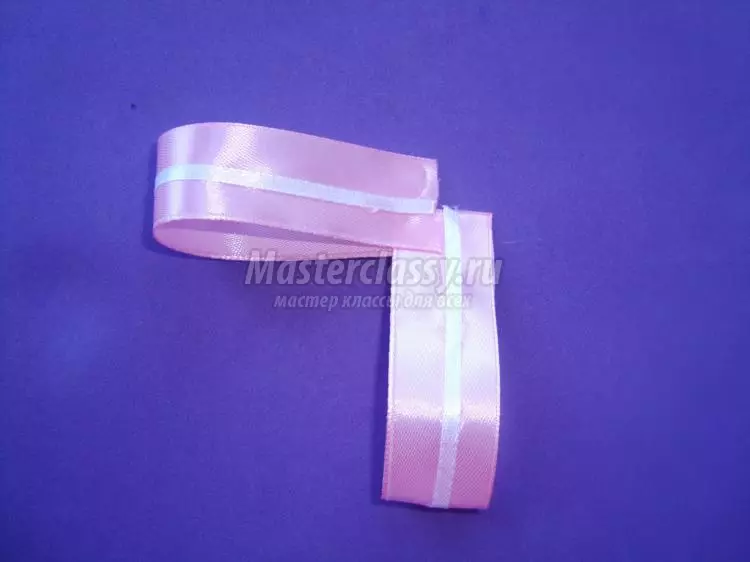
We fold 2 cuts, as shown in the photo, and glue.
Loose ends bend inside and glue. We repeat with the remaining billets.
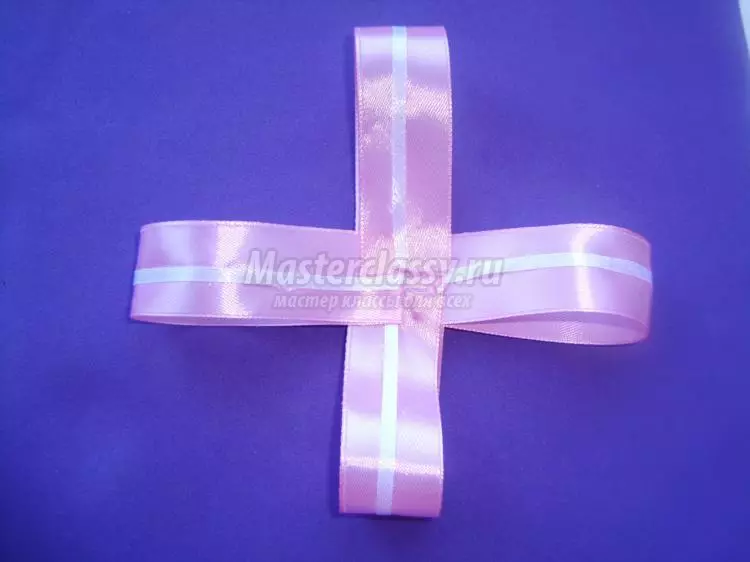
We take two elements and glue so that it turns out a cross. There must be two crosses.
Article on the topic: Ceramic knife sharpening rules
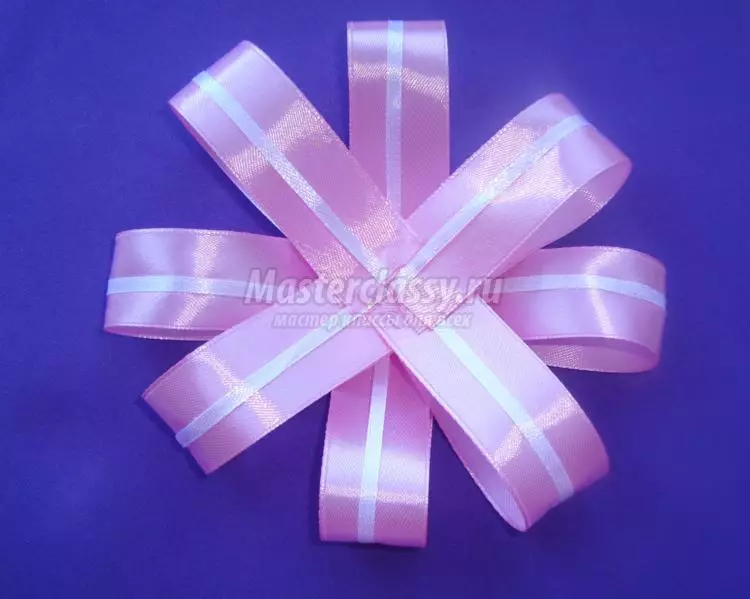
We glue the blanks to each other by folding them in a checker order.
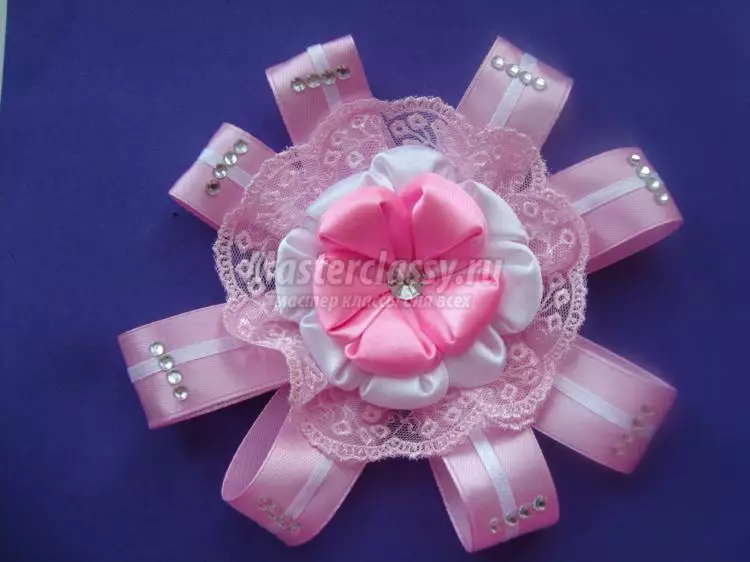
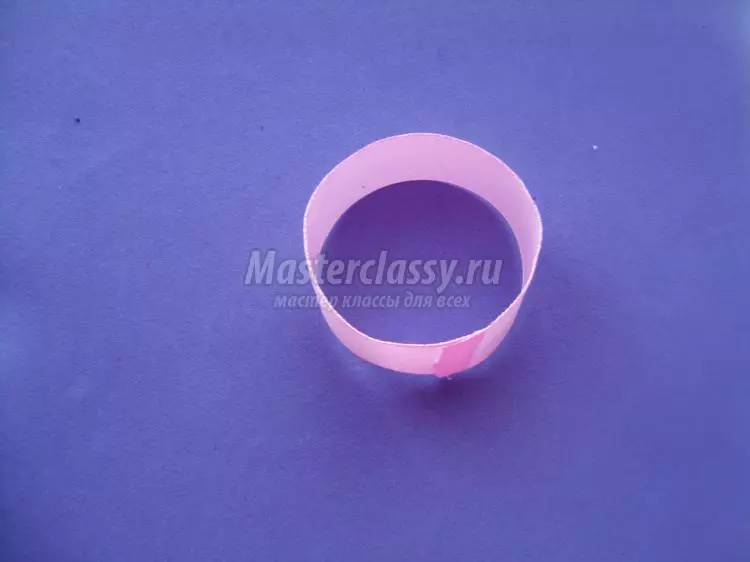
From pink satin, cut a circle with a diameter of 5 cm. On the edge of the lace.
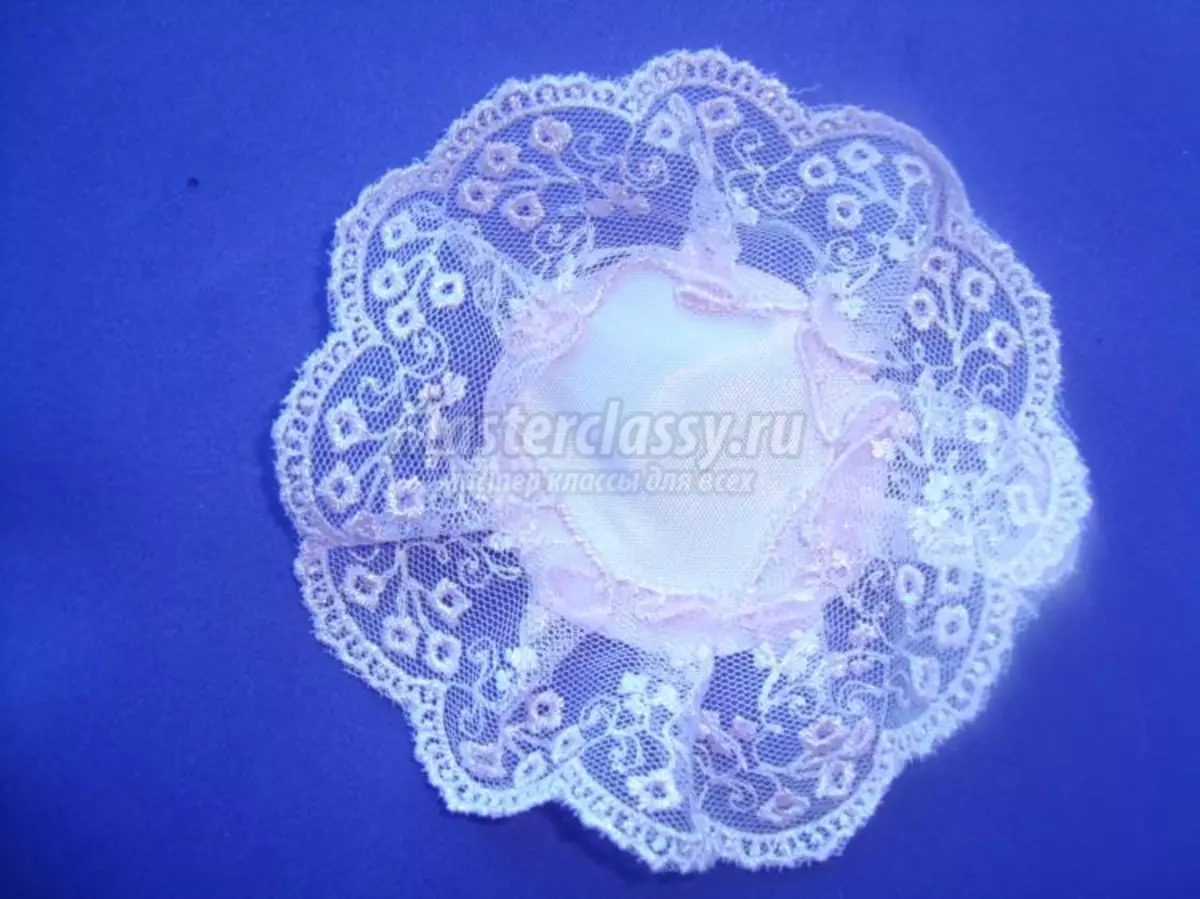
In stock it in the harvesting of the bow.
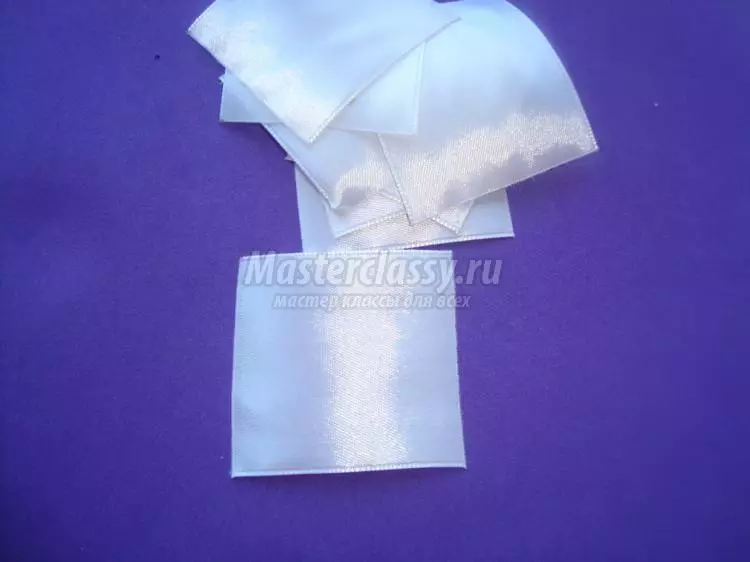
From a wide 5 centimeter tape cut squares: 8 white and 5 pink.
We turn the square in the triangle.
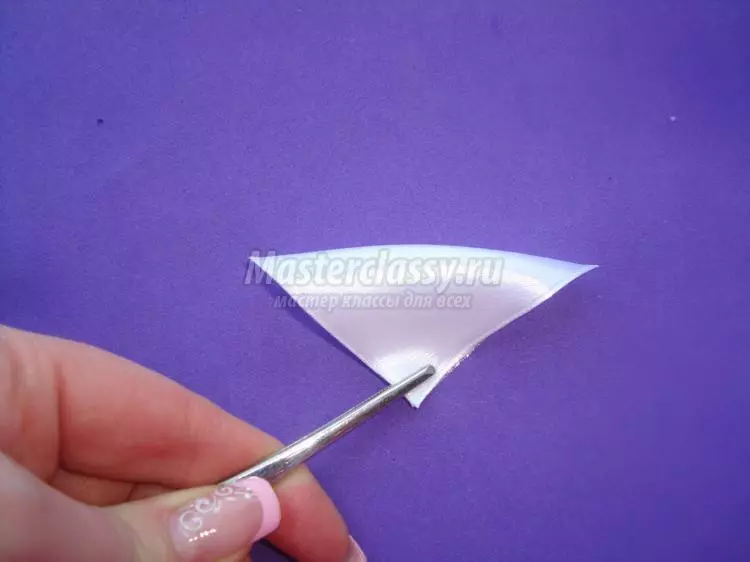
The sharp extreme ends of the triangle are folded down to the central corner.
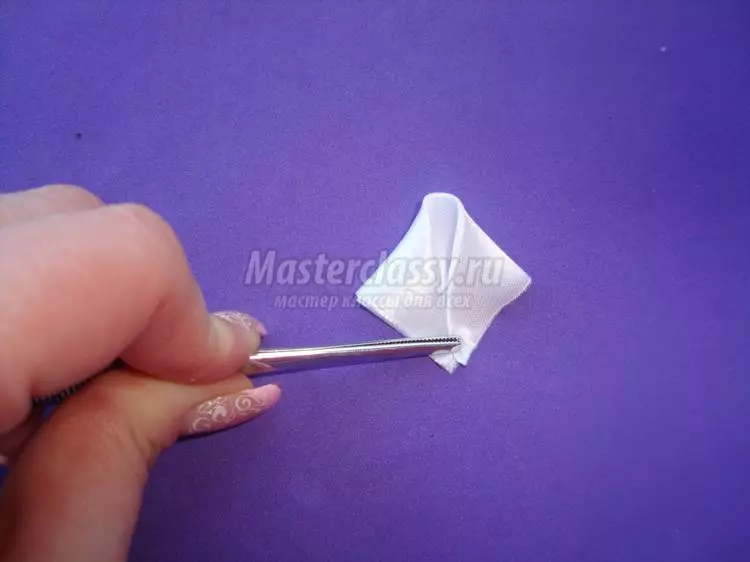
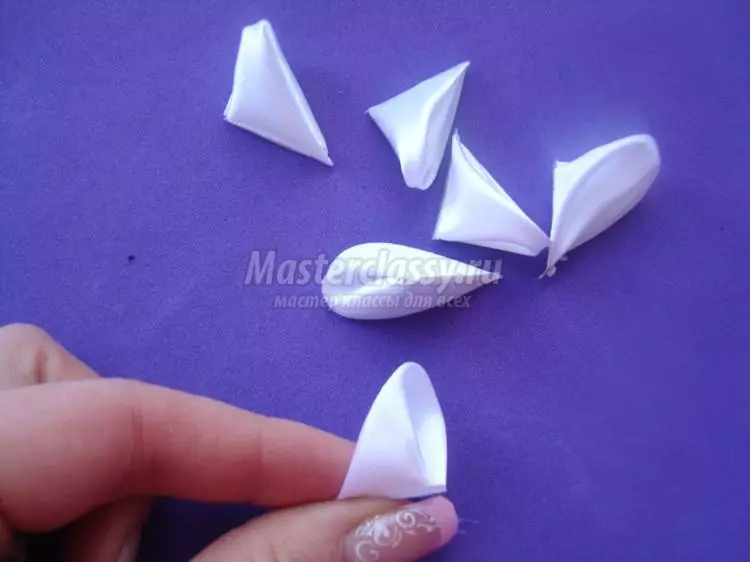
We carry the petal outside and with the help of a candle by fixing the edge. We repeat the procedure for all squares.
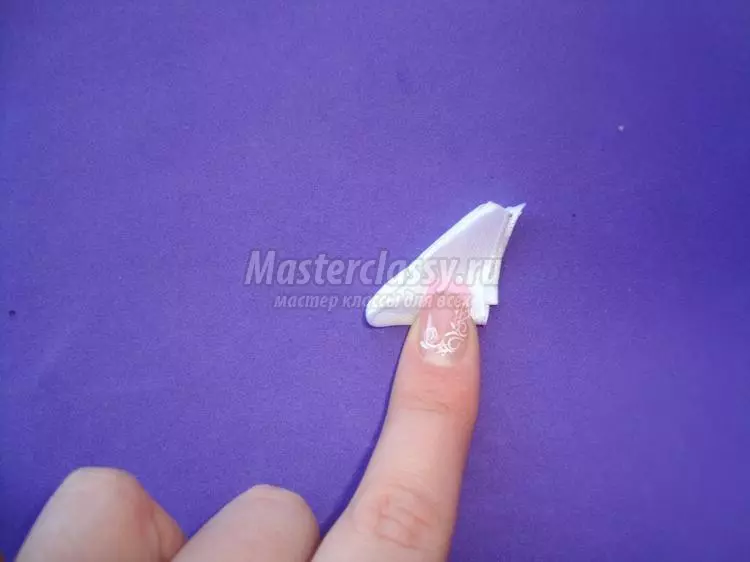
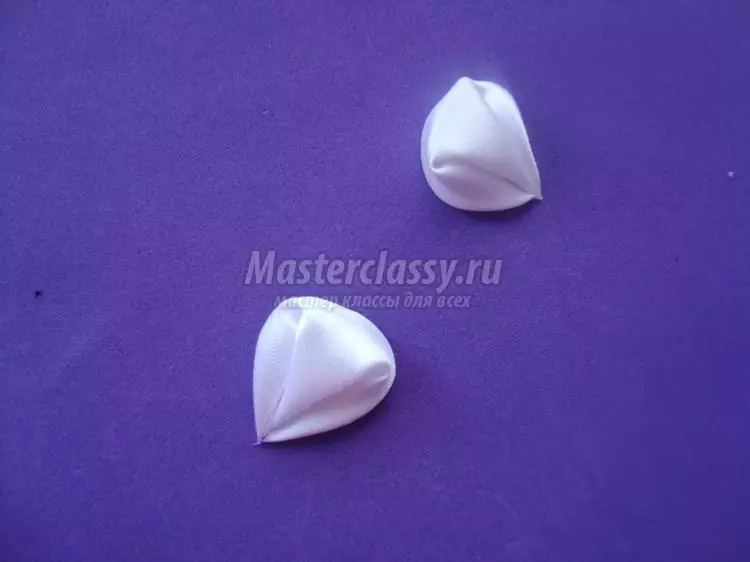
I turn over the petals and glue the gap in the atlas of all petals.
Soak the resulting canzashi.
White blanks will incur in the circle. Petals should be placed symmetrically.

Inside white petals glue pink blanks.
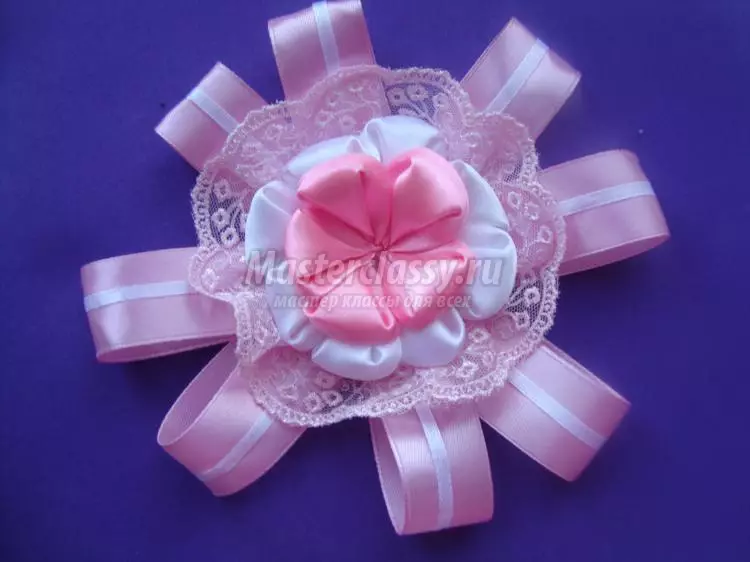
Decorating the flower with a middle. With rhinestone, add chosenness to the bow, decorate the petals of the base of the bow.
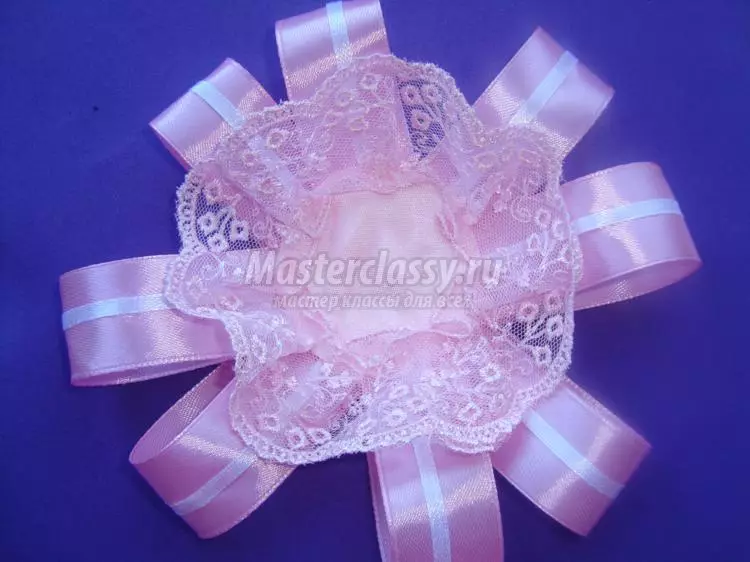
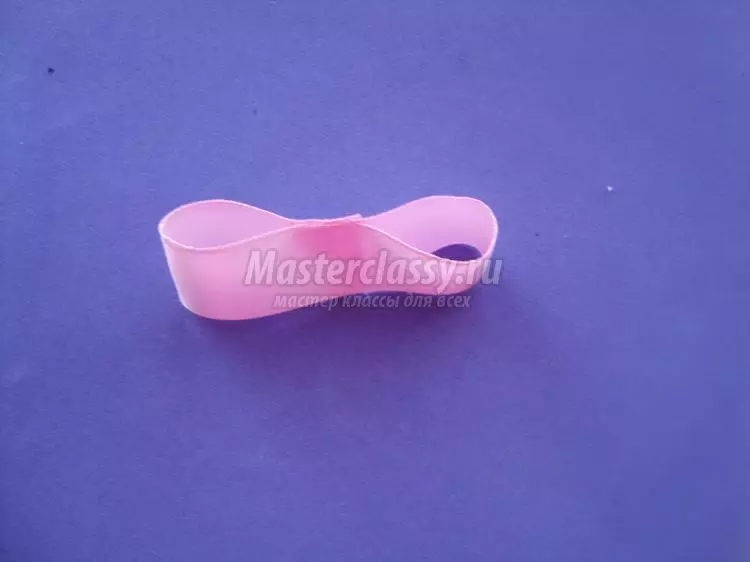
Inverting the bow and glue a small cutting of the tape, it should be free to pass the tape to the width to the width. Rent a tape. It should be about 2 meters.
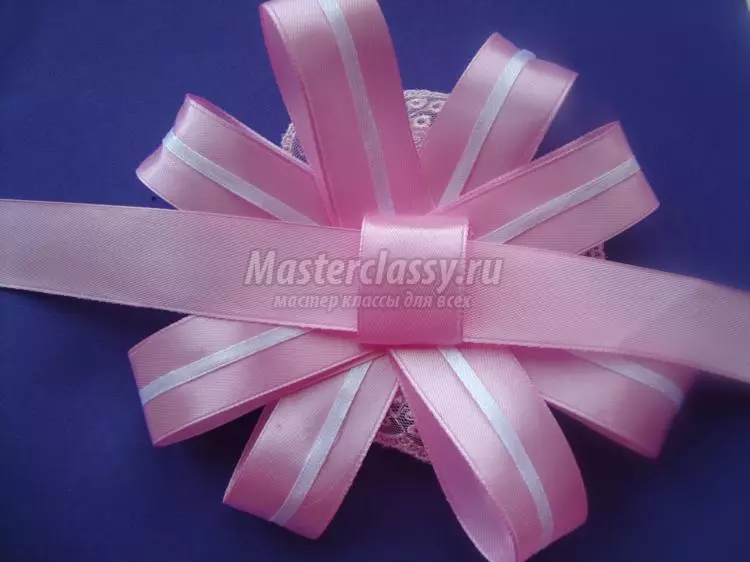
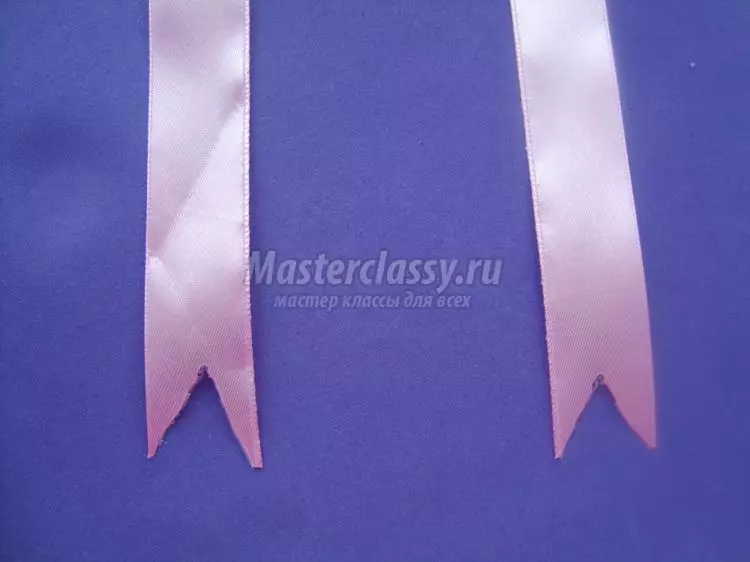
Treat ends with fire, pre-giving them a form.
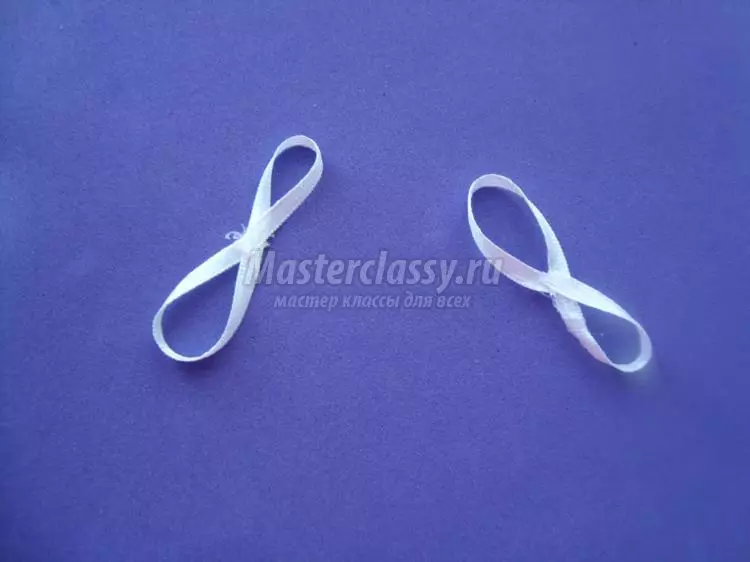
Cut 8 cm pink ribbon and glue ends.
We glue the tape in the center so that it turned out to be eight.
From a thin white ribbon, cut off 4 pieces of 6 cm. We form from each eight, as shown in the photo.
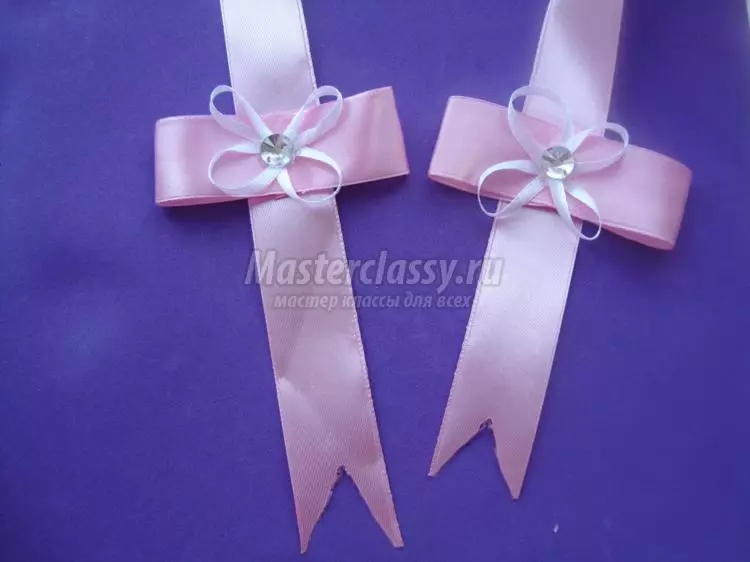
Of the white kettops we form cross, glue them. Now freamed them on the basis of a pink bang. We glue to a long satin pink ribbon. Rest of bows adorn rhinestones. The original bow on the state of the newborn is ready!
Universal option
The next bow of satin ribbons is universal.
Attaching it to the gum, you can safely wear it on your head, you can apply like decoration for flowers or for a gift.
The manufacture will be very simple and fast.
We need:
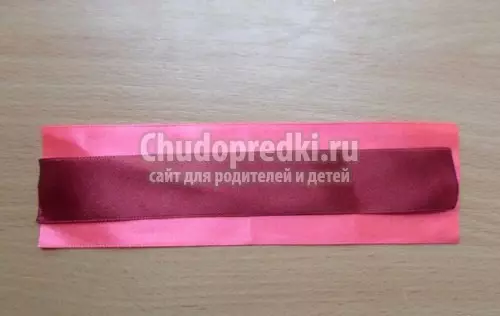
- pink satin ribbon 5 cm wide and 26 cm long;
- Red satin ribbon 2.5 cm wide and 25 cm long;
- thread with a needle or glue "moment";
- Candle or lighter;
- scissors.
Article on the topic: Shrink Plastic Necklace (SHRINK PALSTIC)
Let's start step by step instructions for sewing a universal bow.
From the pink thread, we cut a piece of 1 cm. Thus, we obtain 2 cuts of a different width of 25 cm. On the pink ribbon we put red, having it in the middle. We process the ends lighter, gluing them. Or gently glue glue. The item should be solid, do not fall apart.
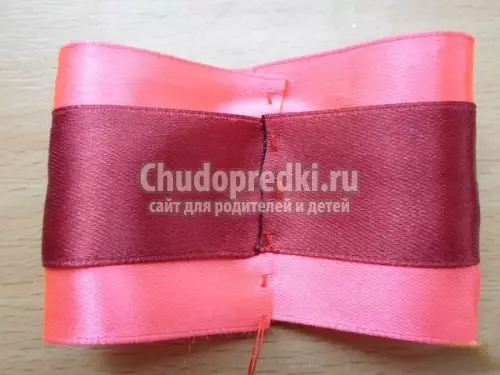
I turn over the workpiece with the invalid side up. The edges evenly bend in the middle. We sew the blank of the bow of the scum "needle forward", as shown in the photo. Tighten, forming a bow.
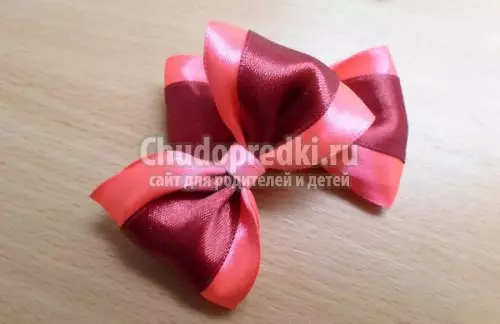
At the tightening place we glue a previously cut 1-centimeter cut of a pink ribbon. Seam must be behind. Bow ready! Very simple and very fast!
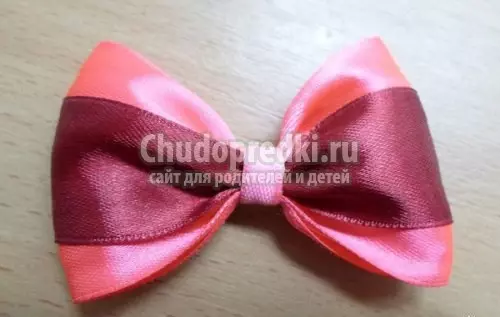
Depending on the purpose, the bow can be tied to a bouquet, glue to double-sided tape for gift wrapping or sewing a gum. If you want to make it elegant, you can decorate it with rhinestones or suspensions with bead elements or canzashi.
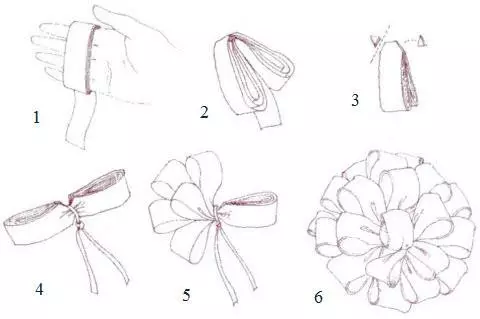
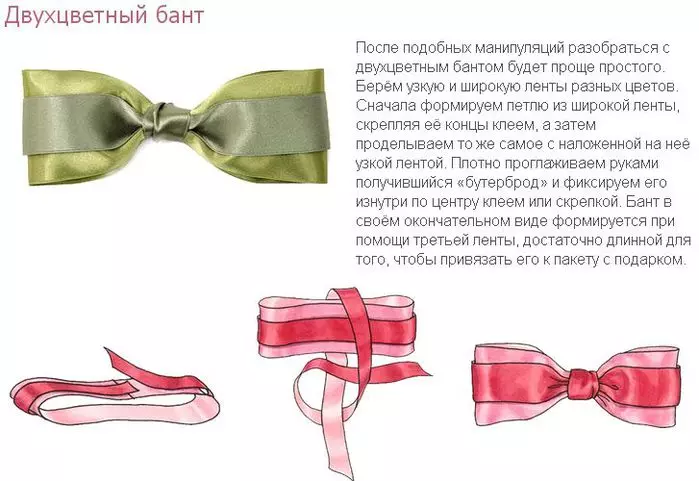
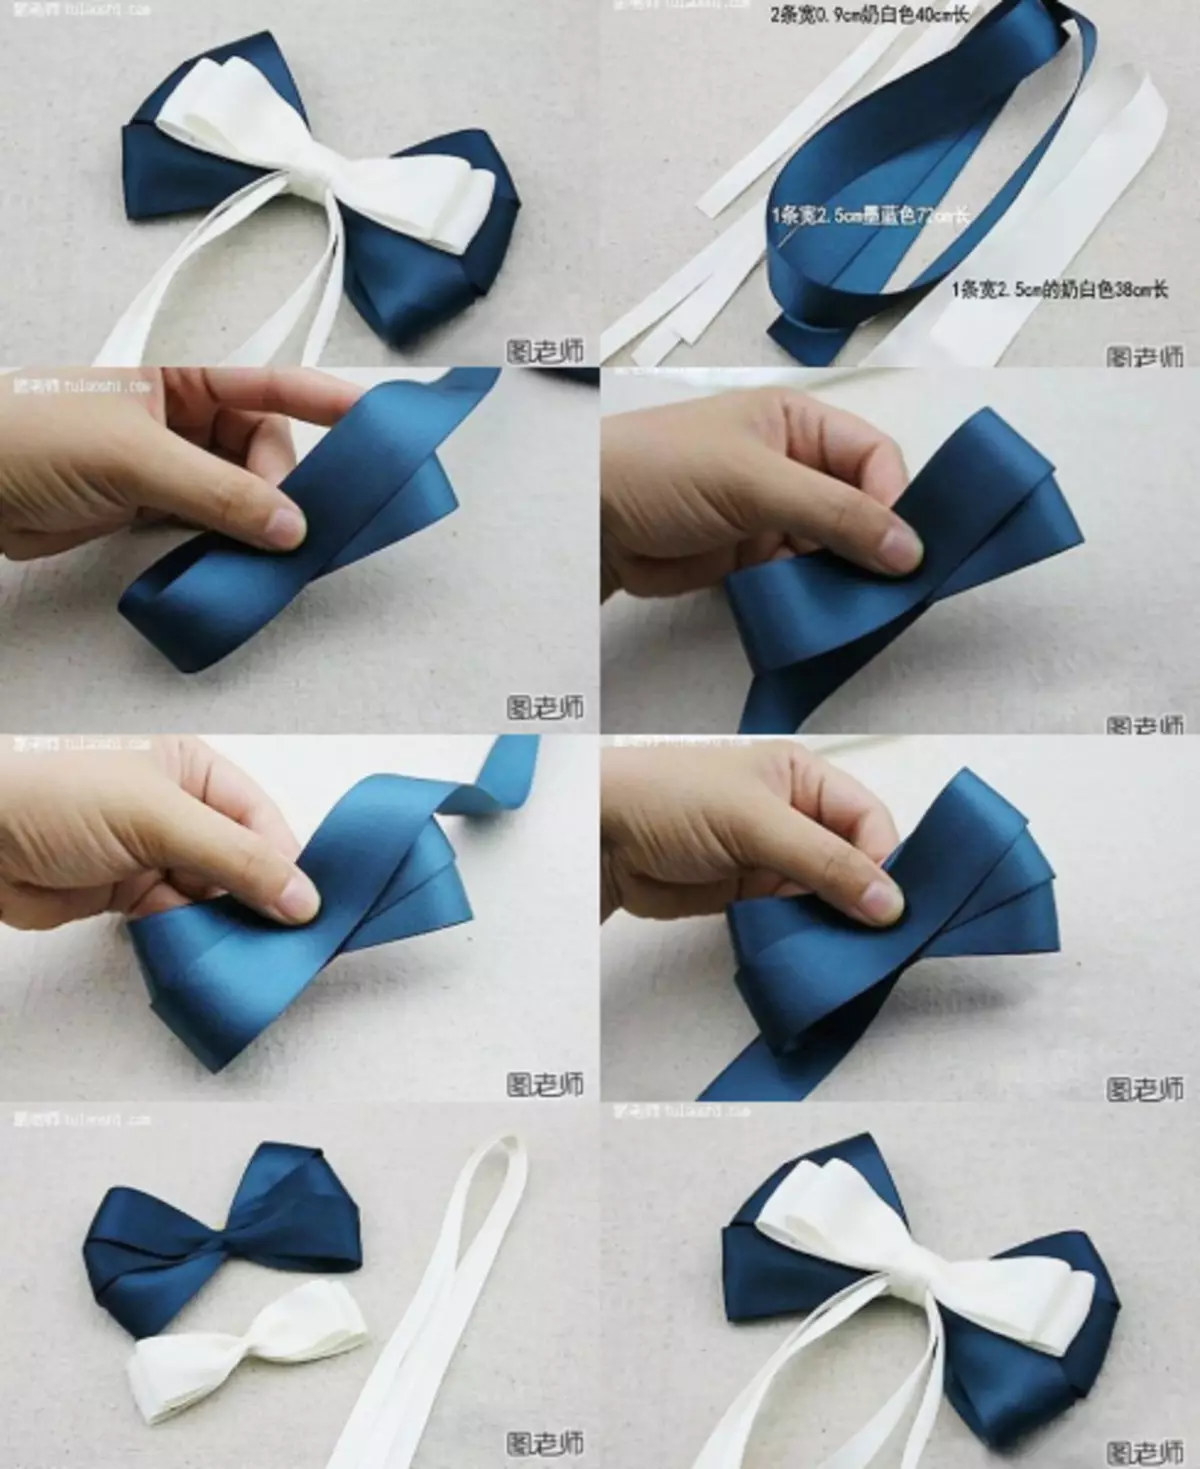
For quick and easy manufacturers, a detailed step-by-step circuit or video can be useful. Below are some examples.